Tokyo, Japan Travel & Photography Guide: Best Photo Spots, Things to Do & Hidden Gems
I was twelve years old the first time I came to Tokyo. My family stayed at a brand new Hilton Hotel that was, by some distance, the most modern building I had ever walked into. Every time the elevator doors opened, a staff member bowed. My brothers and I could not get over it. We spent a significant portion of that trip riding the elevator up and down just to watch it happen again. We also discovered the hot and cold baths in the gym, alternating between them long before ice baths became something people did on purpose. It was around Christmas, and one morning we woke up to find the hotel had placed a Christmas tree in our room overnight. A small gesture. I have never forgotten it.
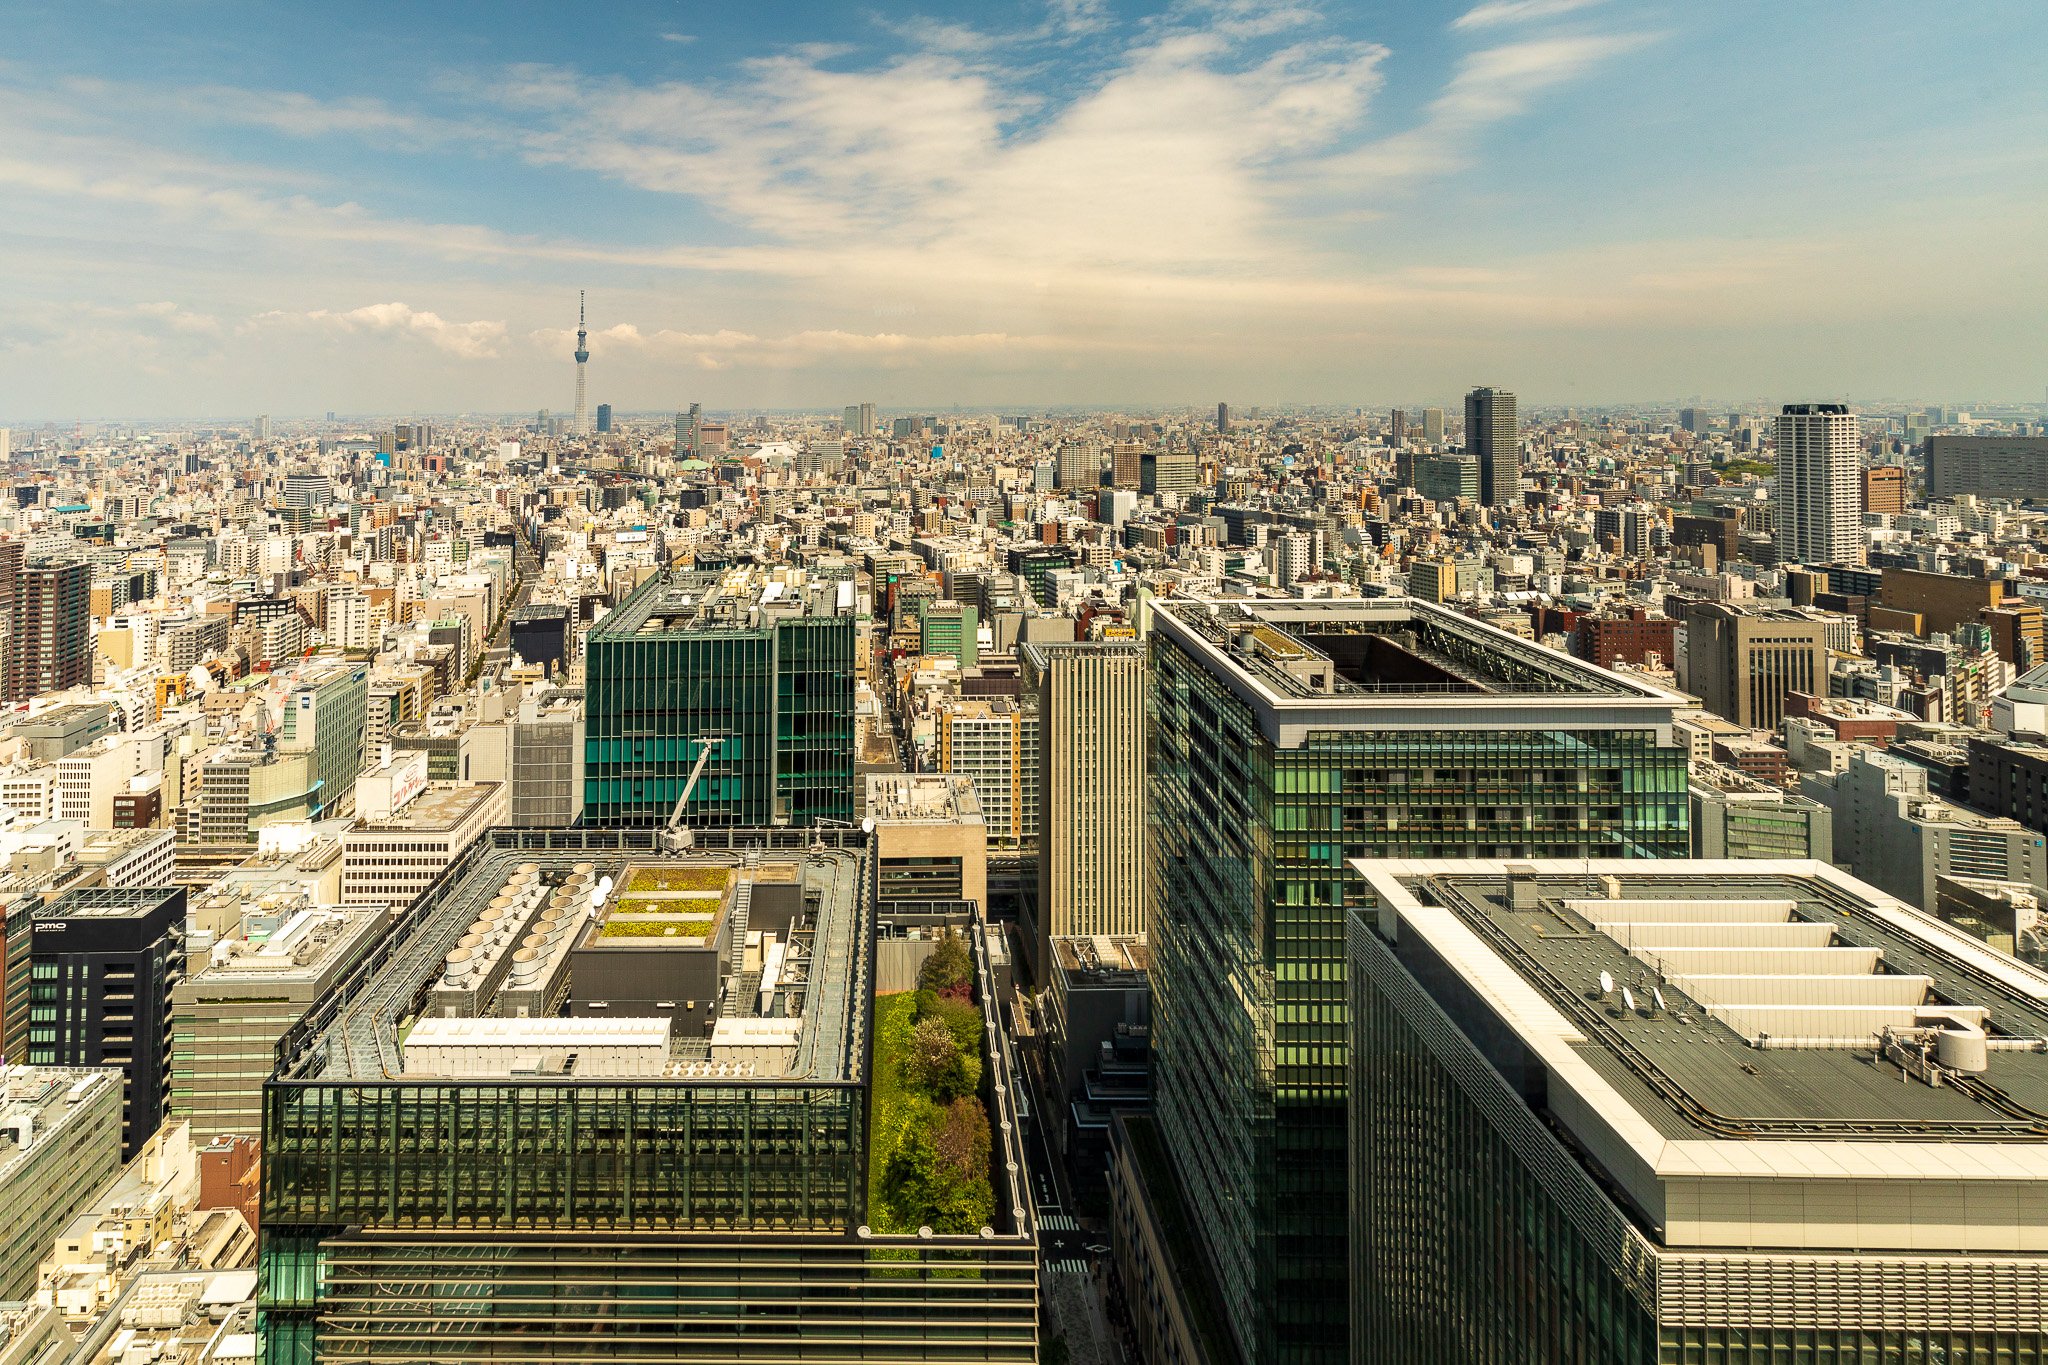
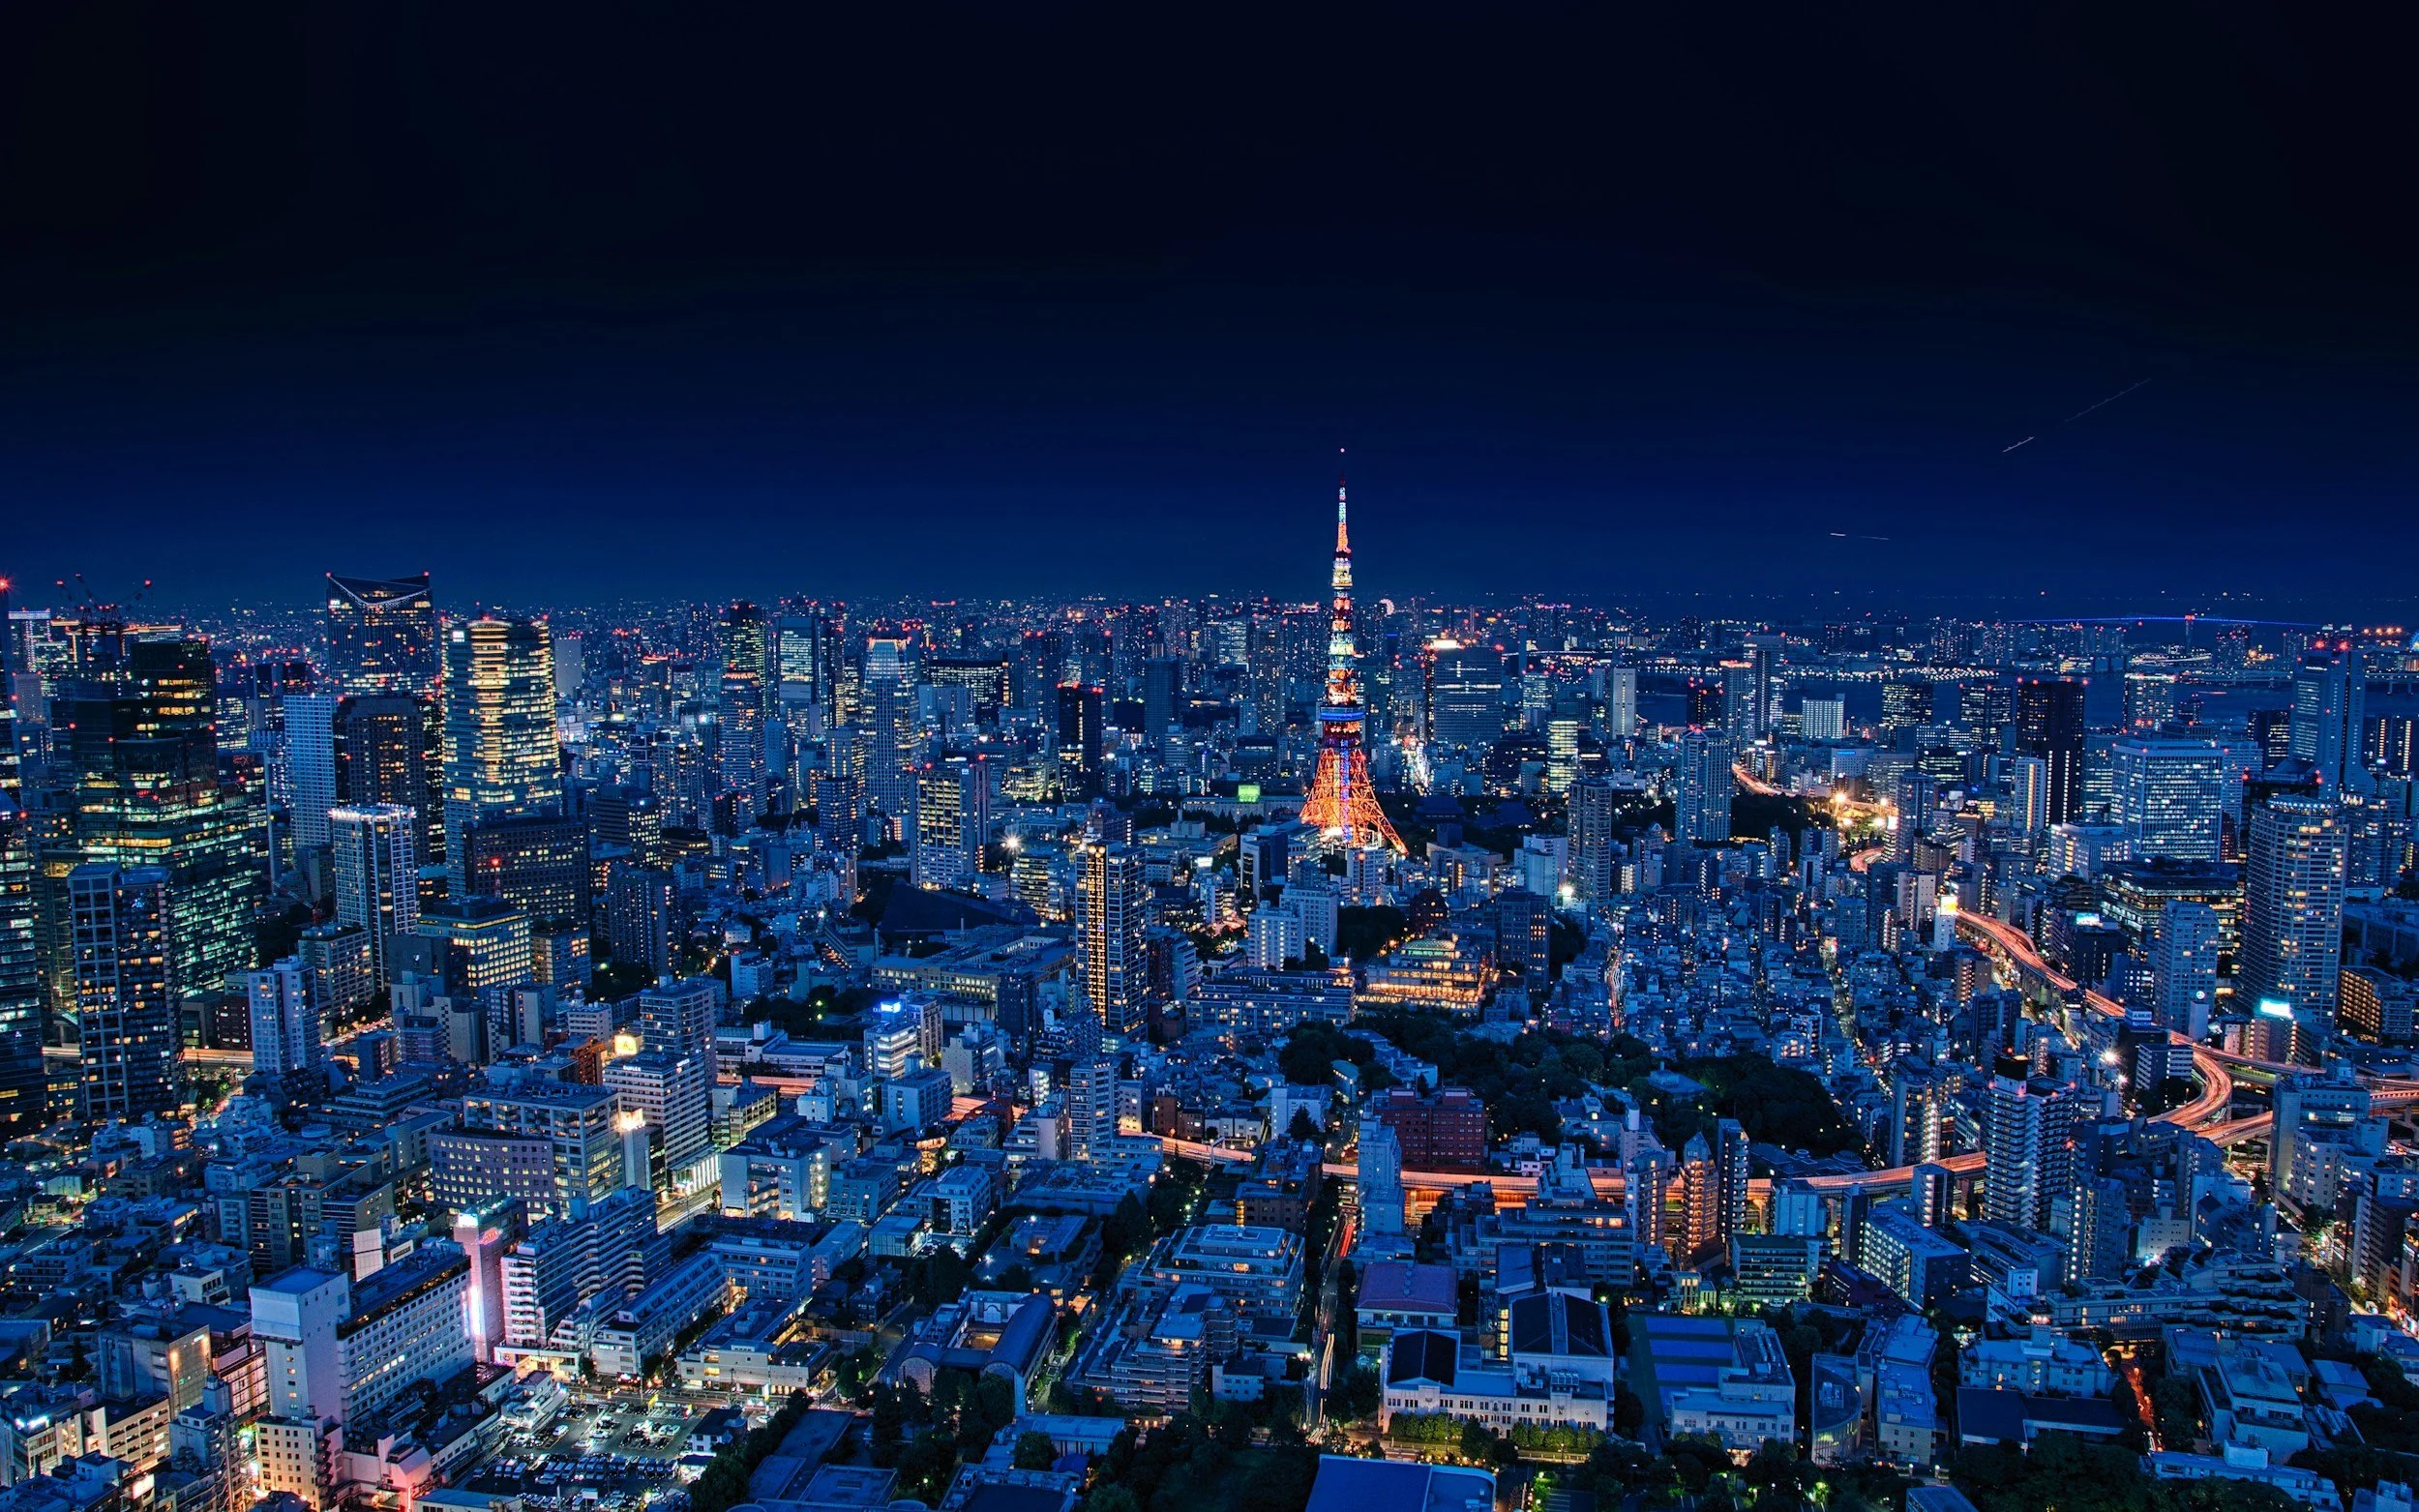
Tokyo does not ease you in. The moment you step out of Shinjuku Station, the city hits you all at once: neon stacked on neon, taxis gliding past convenience stores glowing at 3 am, salarymen in dark suits walking beside teenagers in outfits that look like they came from a different dimension. It is loud and fast and absolutely electric. And then, two subway stops away, you are standing under a cedar-lined avenue leading to a shrine so quiet you can hear birds.
I have been coming back ever since, and it still surprises me. That is the thing about this city: it does not reveal itself in a single visit. Every time I return, I find something I missed, a back street I had not walked down, a neighborhood with a completely different energy, a temple I had passed a dozen times but never entered. For a travel photographer, that depth is rare. Most cities show you everything in the first two days. Tokyo takes as many visits as you give it.
The Shibuya Crossing
Visually, the city covers every genre you might want to shoot. You can spend a morning working the symmetry and incense smoke of Senso-ji at dawn, be in Shinjuku by afternoon for the neon geometry of Kabukicho, and end the night on a roof with the skyline stretched out beneath you. Street photography, architecture, landscapes from elevated viewpoints, intimate food markets, traditional ceremony, pure urban chaos. All of it, in one city.
In this Photography Guide to Tokyo, I share the places and experiences that continue to draw me back. You will find my favorite photography locations, guidance on when and where to shoot, practical travel tips, and gear recommendations, along with cultural insights to help you explore and photograph Tokyo with confidence, respect, and ease.
Time….
Best Time to Visit Tokyo
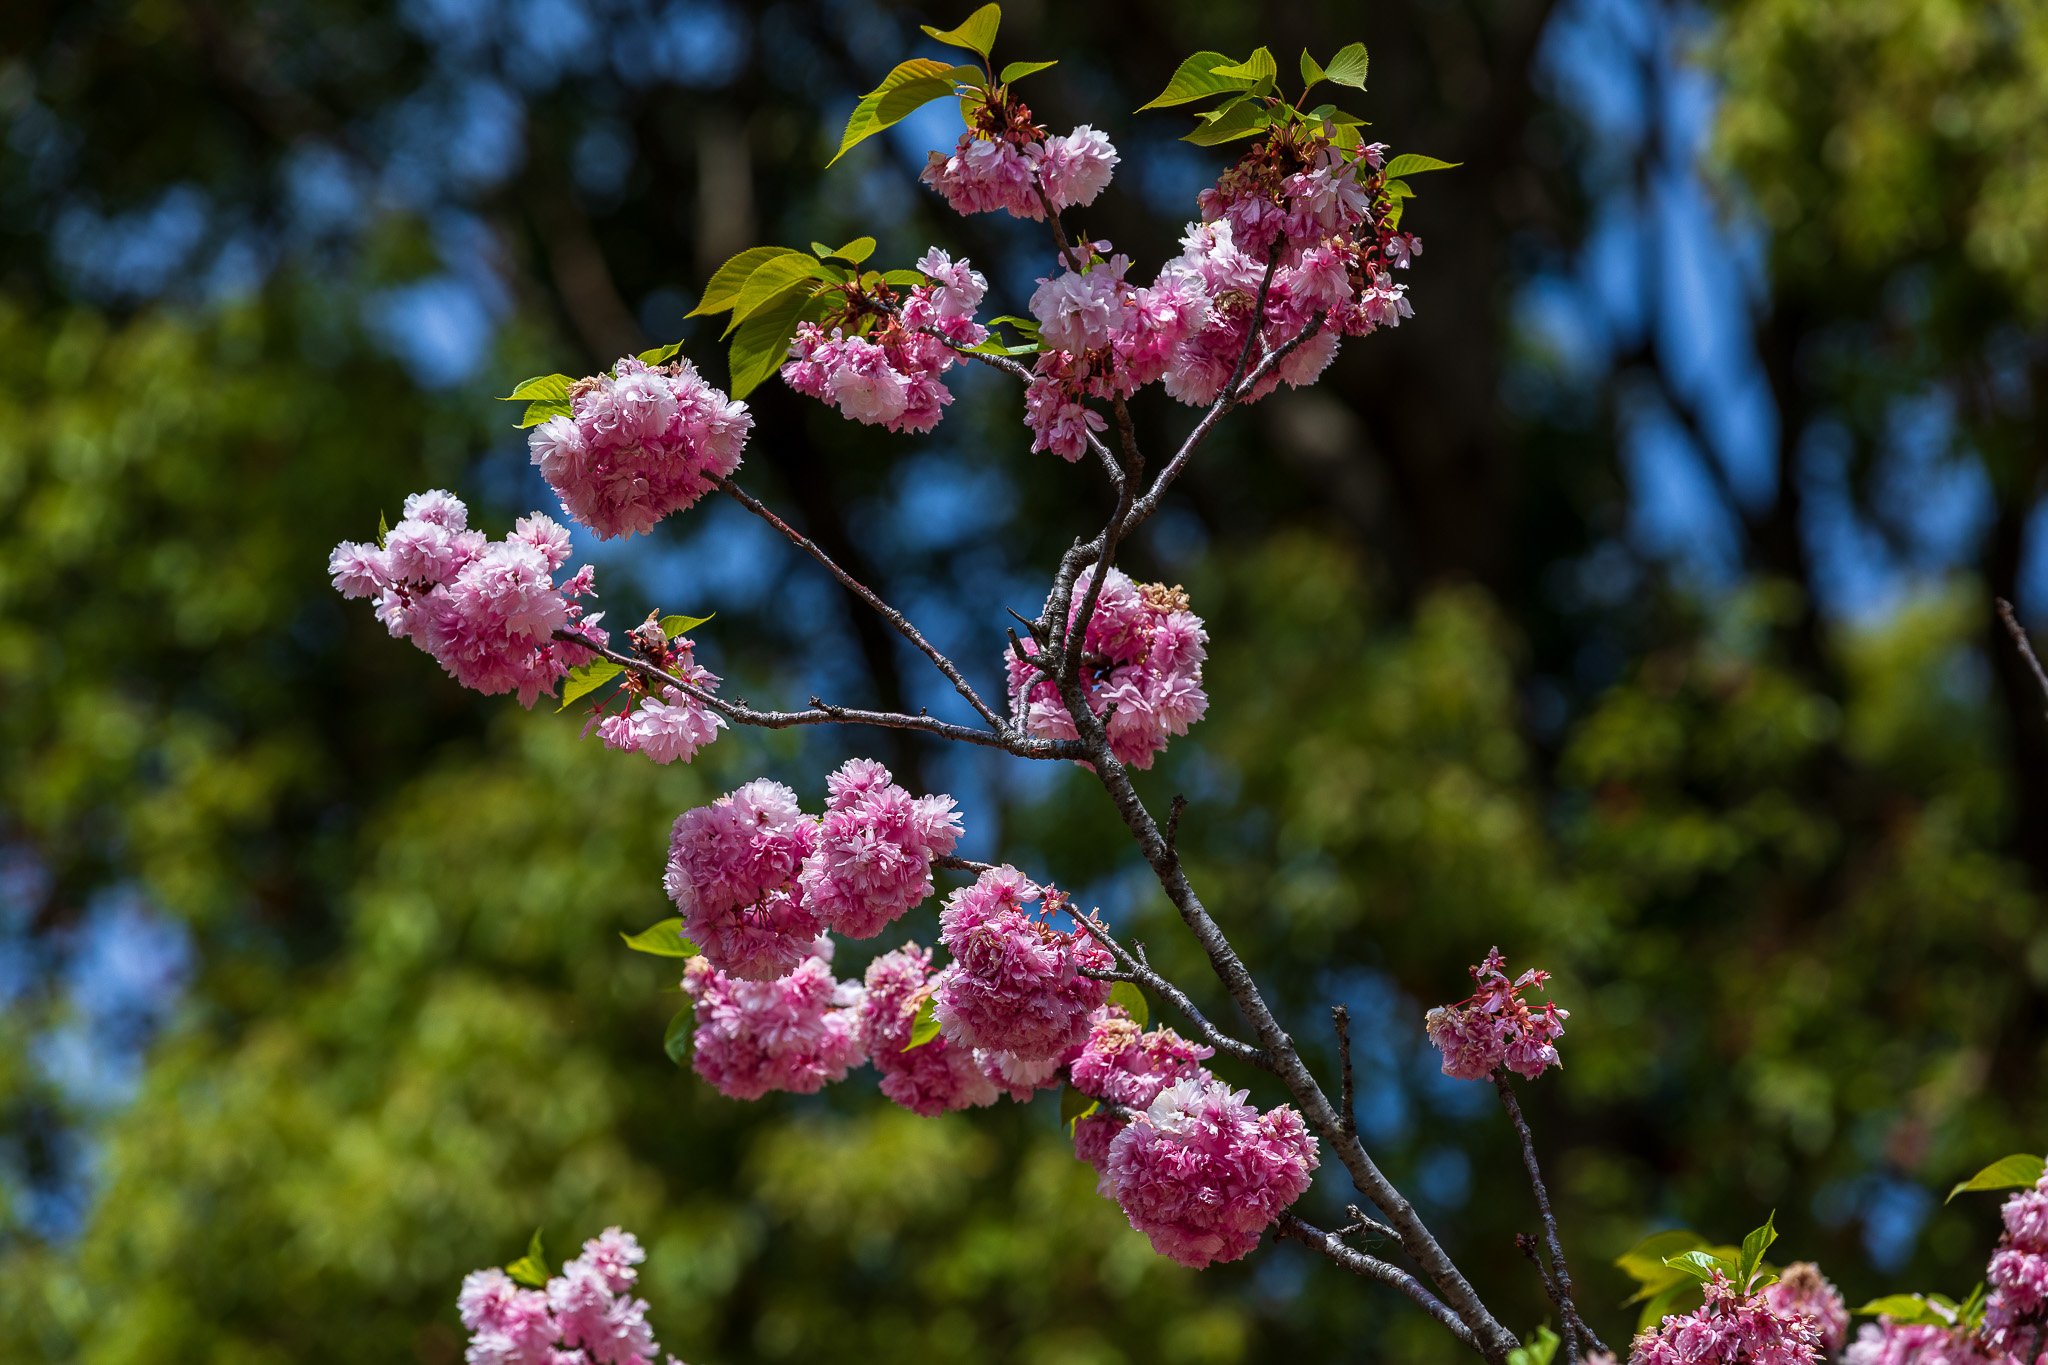
Spring (March to April) is the peak season for a reason. When the cherry blossoms bloom, Tokyo transforms. Parks, temple grounds, and even quiet residential streets fill with soft pink. Light is gentle and warm. The atmosphere feels celebratory. If you have always wanted to photograph Japan during sakura season, this is your window, but plan early mornings or you will be fighting crowds.
Autumn (October to November) is equally compelling and, in my view, slightly underrated. The summer humidity fades, the skies clear, and the city's gardens shift into deep reds and golds. Foliage peaks in November, especially in traditional neighborhoods and parks. The air is comfortable for long walking days, and the light at golden hour in autumn Tokyo is exceptional.
Summer (July to August) is hot and humid. Festivals are visually interesting, but the heat can drain you fast. Street photography has energy, but comfort is limited.
Winter (December to February) is quiet. Crowds are thin, which is excellent for early-morning temple photography. Trees are bare, daylight hours are shorter, but the cold air produces some of the clearest visibility of the year. On a sharp winter morning, you can see Mount Fuji from the upper floors of Tokyo's tallest hotels.
Photographer's Tip: Regardless of season, Tokyo rewards the early riser. Wake up before the city does and you will experience a version of it that most visitors never see. Streets that look impossibly crowded at noon are empty and beautiful at 5:30am.
Where to Stay in Tokyo
Shinjuku is the obvious first choice. It is visually dense, loud, and endlessly photogenic, with strong metro connections in every direction. If you want that classic Tokyo night photography experience, neon stacked deep and streets layered with reflections, you will not find a better base.
Marunouchi and Nihonbashi, around Tokyo Station, give you a quieter, more refined atmosphere with equally fast access to every corner of the city. I have stayed in both, and there is no wrong answer. What matters is a major station within easy walking distance.
Luxury Hotels
Mandarin Oriental Tokyo — This is where I have stayed, and I recommend it without hesitation. The hotel sits on the upper floors of the Nihonbashi Mitsui Tower, a short walk from Ginza and directly connected to the metro. The rooms are spacious and oriented toward views that can include Mount Fuji on a clear day. The bar on the upper floors is one of the finest city-view experiences in Tokyo, particularly at dusk when the skyline begins to light up. The service is consistently described as warm and attentive across recent reviews. One of the great hotels in Asia.
Park Hyatt Tokyo — Made famous worldwide by Sofia Coppola's Lost in Translation, the Park Hyatt completed a full renovation and reopened in late 2025. The result is a hotel that feels newly essential while remaining unmistakably itself. The New York Grill and Bar on the 52nd floor still has the same live jazz, the same views of Shinjuku and Mount Fuji, and the same quiet sophistication that made it iconic. If you have been before, you will recognize it immediately. If you are going for the first time, you are arriving at an exceptional moment.
Aman Tokyo — Aman's first urban hotel remains one of the most architecturally extraordinary hotel experiences in the world. The lobby soars thirty meters. The views look directly over the Imperial Palace Gardens. The 84-suite format means it never feels crowded. If you want serenity, scale, and one of the best swimming pools in Tokyo, this is it.
Bulgari Hotel Tokyo — Opened in 2023 and quickly ranked among the top hotels in Asia, Bulgari Tokyo occupies the upper floors of a tower in the Yaesu district. The design fuses contemporary Italian elegance with Japanese minimalism in a way that feels considered rather than forced. Three dining options anchor the experience, including Sushi Hoseki for omakase and The Bulgari Bar for evening cocktails with panoramic city views. For photographers, the 40th-floor corridor lined with vintage photography and traditional Japanese textile patterns is worth a visit on its own.
Mid-Range / Boutique Hotels
Hotel Gracery Shinjuku — The most characterful mid-range hotel in Tokyo. Located directly in Kabukicho, it is easy to identify from blocks away thanks to the massive Godzilla head rising from its 8th-floor terrace. The terrace hosts a Godzilla head show with sound and light, and the bar serves themed cocktails and desserts. Five minutes on foot to Shinjuku Station East Exit. Ideal for solo travelers and couples traveling light. The rooms are compact, but as a base for street and neon photography in Shinjuku, the location is unbeatable.
Shinjuku Granbell Hotel — Modern, stylish, and located in a quieter pocket of Shinjuku. A good balance of comfort, design, and accessibility without the chaos of the entertainment district on your doorstep.
Tokyu Stay Shinjuku — Practical and well-located, with in-room laundry facilities that make it ideal for longer stays. Clean, functional, and very close to transport connections.
View from Our Room
How Many Days Should You Stay?
Five to seven days is the right range for photographers. Tokyo is not a city you check off in two days.
3 days: Possible, but intense. You will hit the highlights without depth. Good for a brief stopover combined with Kyoto or Osaka.
5 days: Ideal for first-time visitors. You can photograph mornings, afternoons, and nights across different neighborhoods without fatigue. Enough time to revisit a location in better light.
7 days: The photographer's choice. You can wait for the right weather, revisit locations at different times of day, and explore neighborhoods like Yanaka, Daikanyama, and Nakameguro that most visitors skip entirely.
A suggested framework for 5 days:
Day 1: Arrive, Asakusa at golden hour, Senso-ji at night
Day 2: Meiji Shrine at dawn, Harajuku, Shibuya Crossing at blue hour
Day 3: Tsukiji Outer Market morning, Ginza architecture, Shinjuku neon at night
Day 4: Tokyo Skytree, Ueno Park, Metropolitan Government Building observation deck at sunset
Day 5: Daikanyama, Nakameguro, revisit your favorite location in different light
Tokyo rewards repetition. The same street at dawn and again at night will give you completely different photographs.

Getting Around Tokyo
Tokyo's public transportation system is one of the most efficient in the world. The JR Yamanote Line runs in a loop connecting many of the city's most important districts: Shinjuku, Shibuya, Harajuku, Tokyo Station, and Ueno. For photographers, mastering this single line alone puts you within walking distance of most prime locations.
Suica or Pasmo card: Get one at the airport or any major station. Both are reloadable and work across the metro, JR lines, buses, and most convenience stores. Digital Suica is now available on iPhone and Apple Watch for foreign visitors, which makes tap-in, tap-out even faster.
Google Maps integrates seamlessly with Tokyo's transit system and gives you platform-level detail, including which car to board and exactly where to exit. I used it constantly and it worked perfectly. It provides subway times to the second. It's Tokyo, after all.
Taxis and Uber are clean, safe, and professional. Uber operates in the city but typically uses licensed taxis and is often more expensive than public transport. For early-morning shoots when trains have not started running, taxis are the practical choice.
On foot: Much of the best photography in Tokyo happens while walking. Shinjuku, Asakusa, and Ginza reward slow exploration on foot. Do not rush from location to location. The backstreets between places are often more interesting than the destinations themselves.

Where to Eat in Tokyo
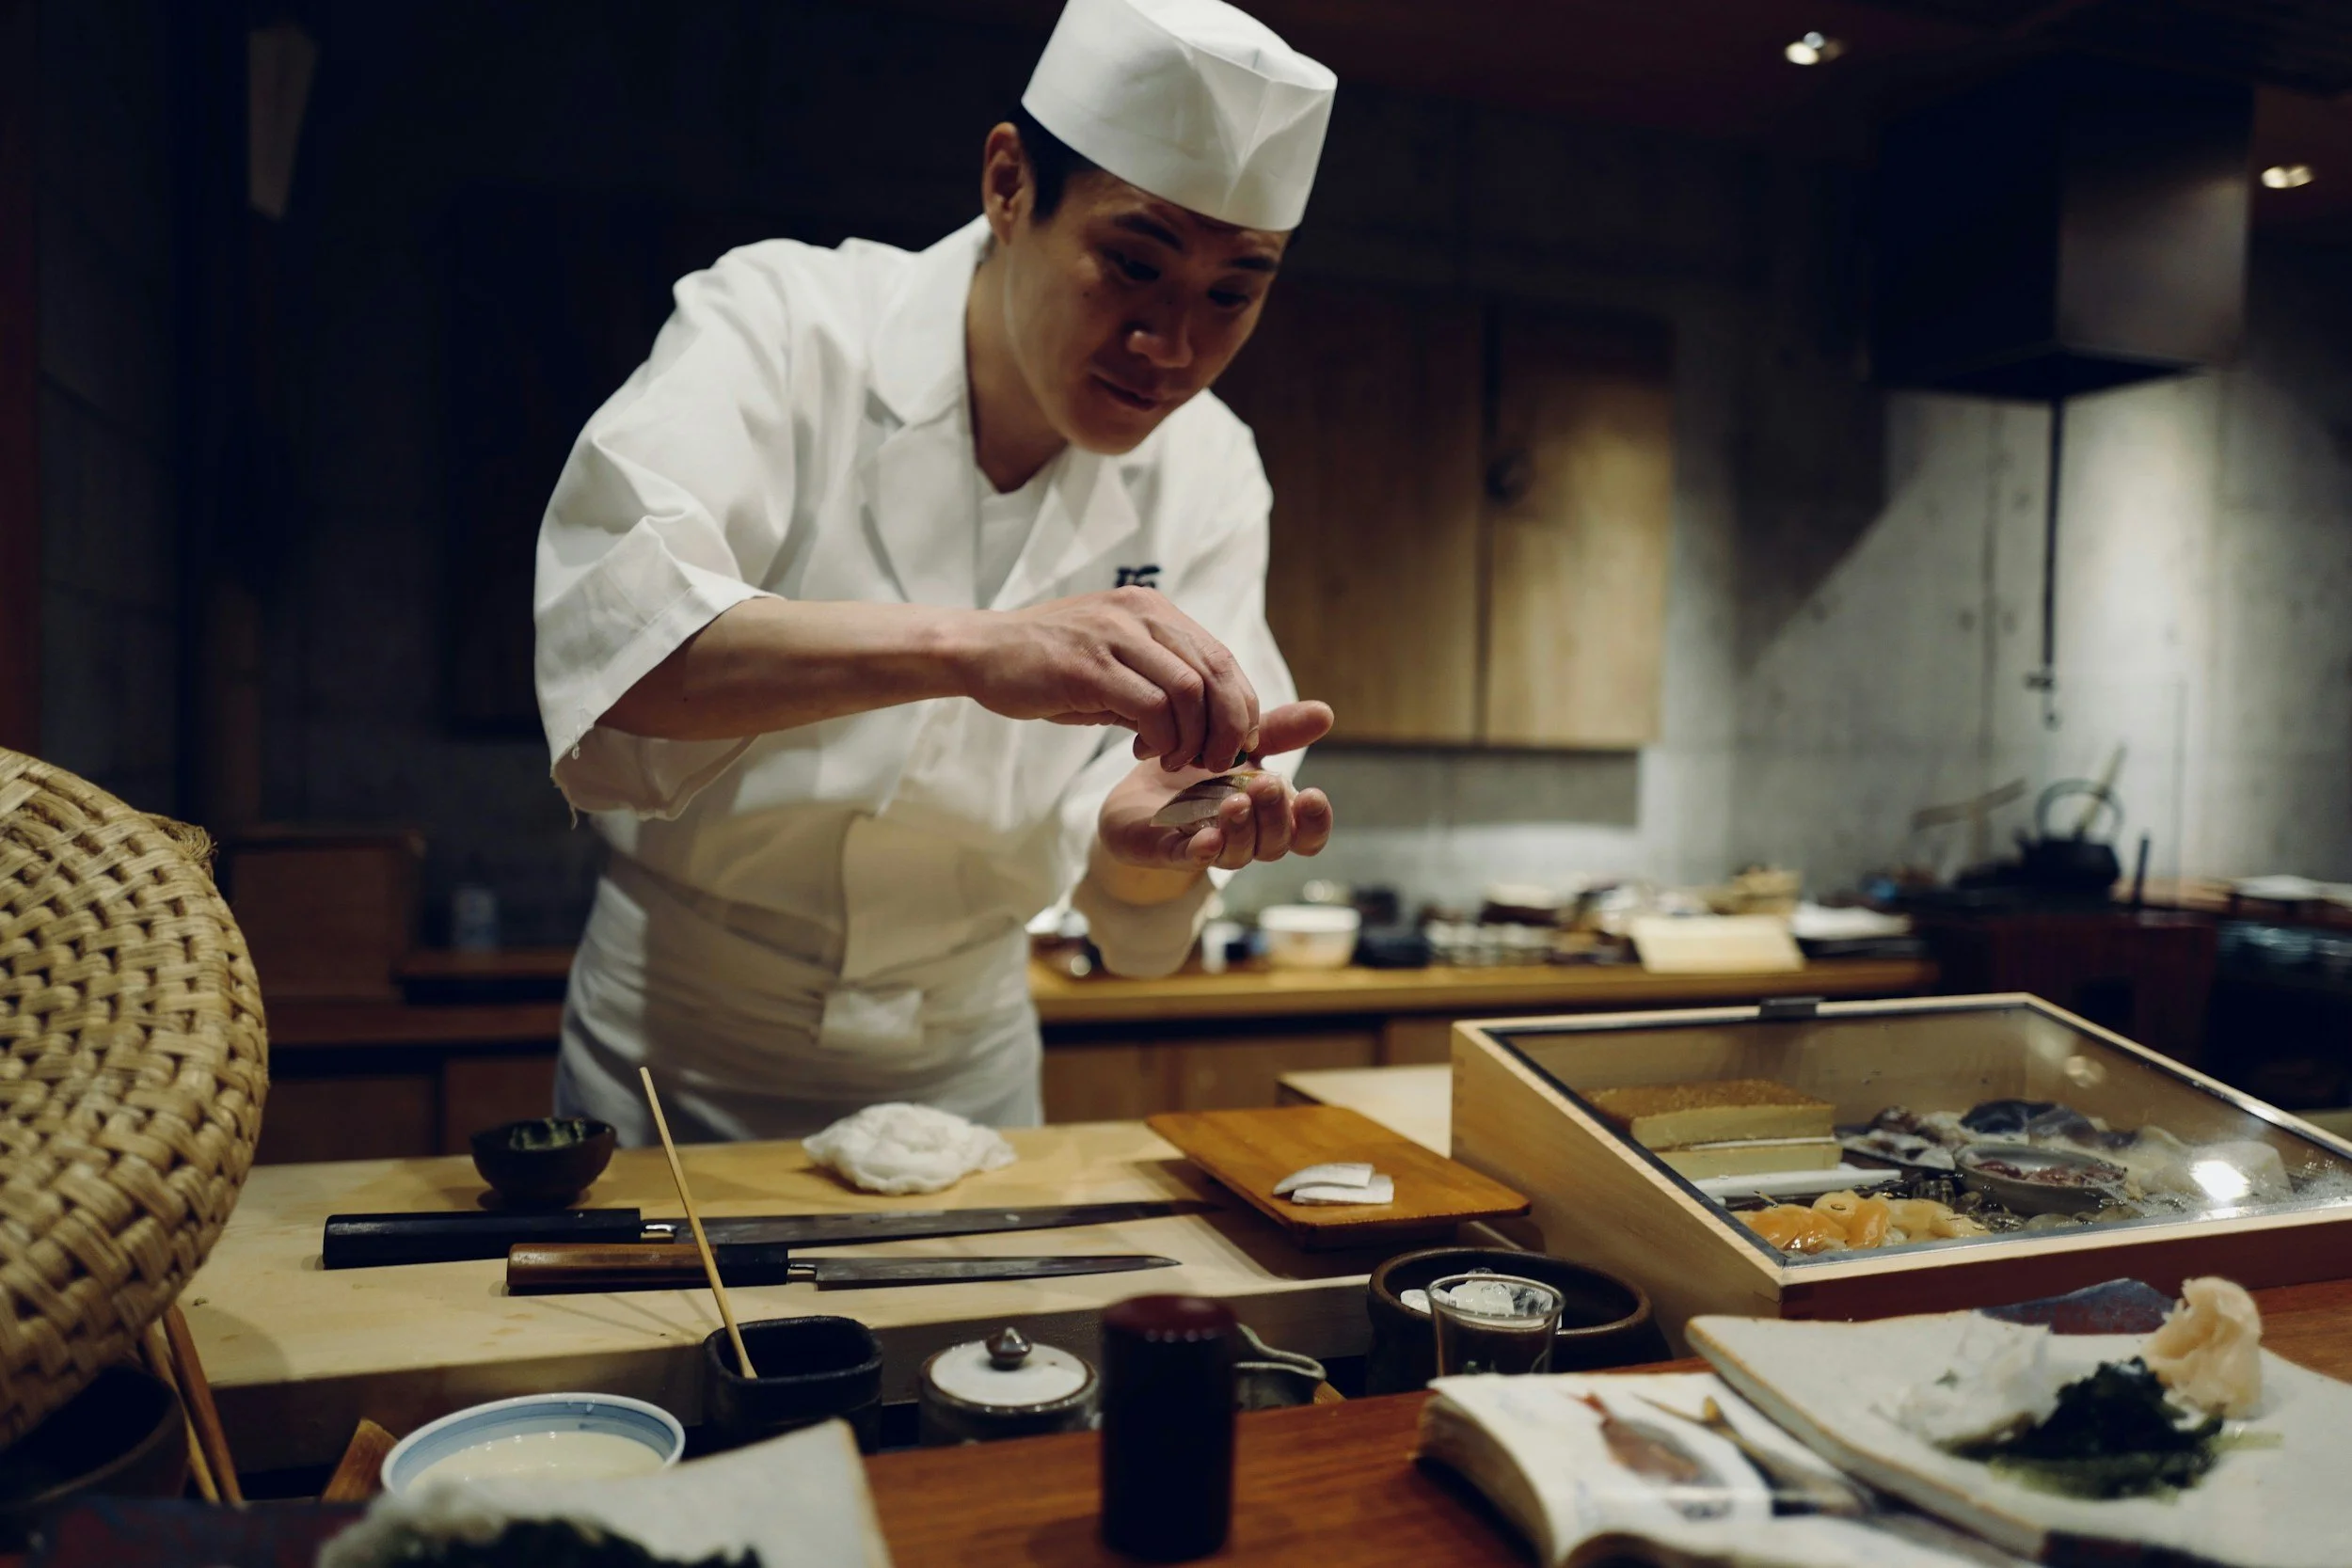
Tokyo has more Michelin-starred restaurants than any city in the world. That is worth sitting with for a moment. More than Paris. More than New York. The food here is serious, and it covers every price point from standing ramen bars to multi-course omakase. You will walk long days with a heavy camera bag. Eat well.
Ichiran Shibuya — A ramen institution. Individual booths let you order by paper form and focus entirely on the bowl in front of you. The broth is rich and perfectly calibrated. It is efficient, surprisingly photogenic in its design, and ideal after a long day of shooting. Entirely unique to Japan.
Afuri — Known for yuzu-infused ramen, lighter and more citrus-forward than traditional tonkotsu. Clean interiors and thoughtful presentation. Multiple locations across the city.
Gonpachi Nishiazabu — Often called the "Kill Bill restaurant," this dramatic multi-level space serves traditional Japanese dishes in a setting that feels cinematic. It is lively and theatrical. Worth one dinner just for the atmosphere and the images.
Omoide Yokocho (Yakitori Alley) — A narrow network of small eateries tucked beneath the train tracks in Shinjuku. Smoke rising from grills, warm lantern light, tight spaces, locals eating shoulder to shoulder. This is both one of Tokyo's best dining experiences and one of its best photography locations. Come hungry with your camera.
Sushi Dai at Toyosu Market — One of the great sushi values in Tokyo. Sushi Dai moved from the old Tsukiji inner market to the 3rd floor of Block 5 at Toyosu Market when the inner market relocated in 2018. Arrive very early. Lines form before dawn. The omakase is worth every minute of the wait. Combine this with a walk through the Tsukiji Outer Market for the full morning experience: Toyosu first, then Tsukiji Outer for street food and market atmosphere.
Tempura Tsunahachi — A Shinjuku institution with decades of history. Tempura cooked to order, ingredient by ingredient, in front of you. A quieter, more refined alternative to the neon-lit chaos outside.
Coffee Shops
Streamer Coffee Company — Known for exceptional lattes and latte art. Multiple locations, clean design, and a reliable midday reset point between shoots.
Onibus Coffee (Nakameguro) — Sits in one of Tokyo's most photogenic neighborhoods, right along the canal. Small, warm, excellent coffee, and an ideal spot to edit photos and watch people walk by.
Fuglen Tokyo — A Norwegian-style coffee house with a carefully curated menu. Quiet, with a cozy European energy that feels like an antidote to the sensory intensity of the city. One of my favorite places to sit and decompress.
Photography Gear for Tokyo
Tokyo demands versatility. You will move from temple silence to urban chaos, from open parks to narrow alleyways, from midnight long exposures to golden-hour morning light, often within the same day.
Camera and Lenses
Camera body: Any modern full-frame mirrorless handles the range of conditions well. The Canon EOS R5 Mark II, Sony A7R V, and Nikon Z8 all deliver the dynamic range you need for the extreme contrast of Tokyo at night. Fast autofocus matters for street work at Shibuya.
Wide angle (16 to 24mm): Essential for Shibuya Crossing at ground level, Senso-ji at dawn, and architectural compositions in Marunouchi and Ginza where scale is the point. Your primary lens for interior temple shots.
Standard zoom (24 to 70mm): Your all-day workhorse. Street photography, market scenes, food, and most daytime work across every neighborhood.
Telephoto (70 to 200mm): For compressing the layers of neon in Shinjuku at night, isolating the Tokyo Skytree against the skyline, and candid street portraits from a respectful distance.
Prime (35mm or 50mm at f/1.8 or f/1.4): Your best lens for night photography in tight spaces. A fast aperture handles Omoide Yokocho and dimly lit temple interiors without the noise penalty.
Accessories
Compact travel tripod: Non-negotiable for Shibuya Crossing long exposures and night cityscape work. Many observation decks prohibit full-size tripods; a compact travel tripod passes without issue and fits in your camera bag.
Extra batteries: Cold winter evenings drain batteries faster than you expect. Shooting days in Tokyo run long.
Rain cover for your bag: Tokyo rain makes the streets dramatically more photogenic. Wet pavement doubles the neon. Be prepared to shoot in it rather than retreat from it.
Samsung T7 SSD: Back up your cards every evening. Shooting multiple neighborhoods per day generates a large volume of files quickly.
Drone: Do not fly a drone in central Tokyo. The city falls under restricted airspace around Haneda Airport, and residential and commercial areas have strict no-fly rules. Flying without specific MLIT authorization for each flight carries severe penalties. Leave the drone at home for this trip.
iPhone Tips
Tokyo is one of the best cities in the world for iPhone photography, and the reasons are specific rather than generic.
Omoide Yokocho at night: Switch to Night Mode and hold steady against a wall or post. The warm lantern light and smoke photograph beautifully. Do not use the flash.
Shibuya Crossing overhead shot: Most visitors shoot from street level. From the second floor of the Shibuya Sky or any of the coffee shops with window seats overlooking the crossing, use your wide lens at street-window height and let the pedestrian flow create natural motion blur with a slightly longer exposure.
Meiji Shrine's forested avenue: Shoot at dawn in Cinematic mode or standard video. The light filtering through the cedar canopy moves in a way that still photographs cannot capture.
Reflections: After rain, turn off Portrait Mode and use the standard wide lens low to the ground. Tokyo puddles are underrated subjects. The neon doubled in wet pavement is some of the best iPhone photography you will make anywhere.
Photograph Shot List
Tokyo is not just photogenic. It is multidimensional. The key is not trying to photograph everything. It is understanding the types of images the city offers and approaching each with intention.
Neon Nights
Tokyo after dark is electric.
Shinjuku and Shibuya glow with layered signage, pavement reflections, and constant movement. This is where you experiment with:
• Slow shutter speeds
• Motion blur
• Reflections
• Tight street compositions
Rain makes everything better. Wet pavement doubles the light.
Arrive just before blue hour and stay into full darkness.
Traditional Temples & Shrines
Tokyo’s historic side is just as compelling.
Visit Senso-ji Temple at sunrise for softer light and fewer people. Focus on:
• Symmetry
• Leading lines
• Torii gates
• Incense smoke
These locations reward patience and quiet composition.
Architecture & Minimalism
Tokyo blends bold modern architecture with Japanese restraint.
Photograph:
• Glass towers in Marunouchi
• Clean lines in Ginza
• Elevated train tracks
• Repetition and patterns
Look for geometry. Tokyo is full of it.
Skyline & Elevated Views
For cityscapes, consider observation decks or high-rise hotels. From above, Tokyo becomes a grid of light and structure. Sunrise and sunset create depth and color contrast, transforming the skyline.
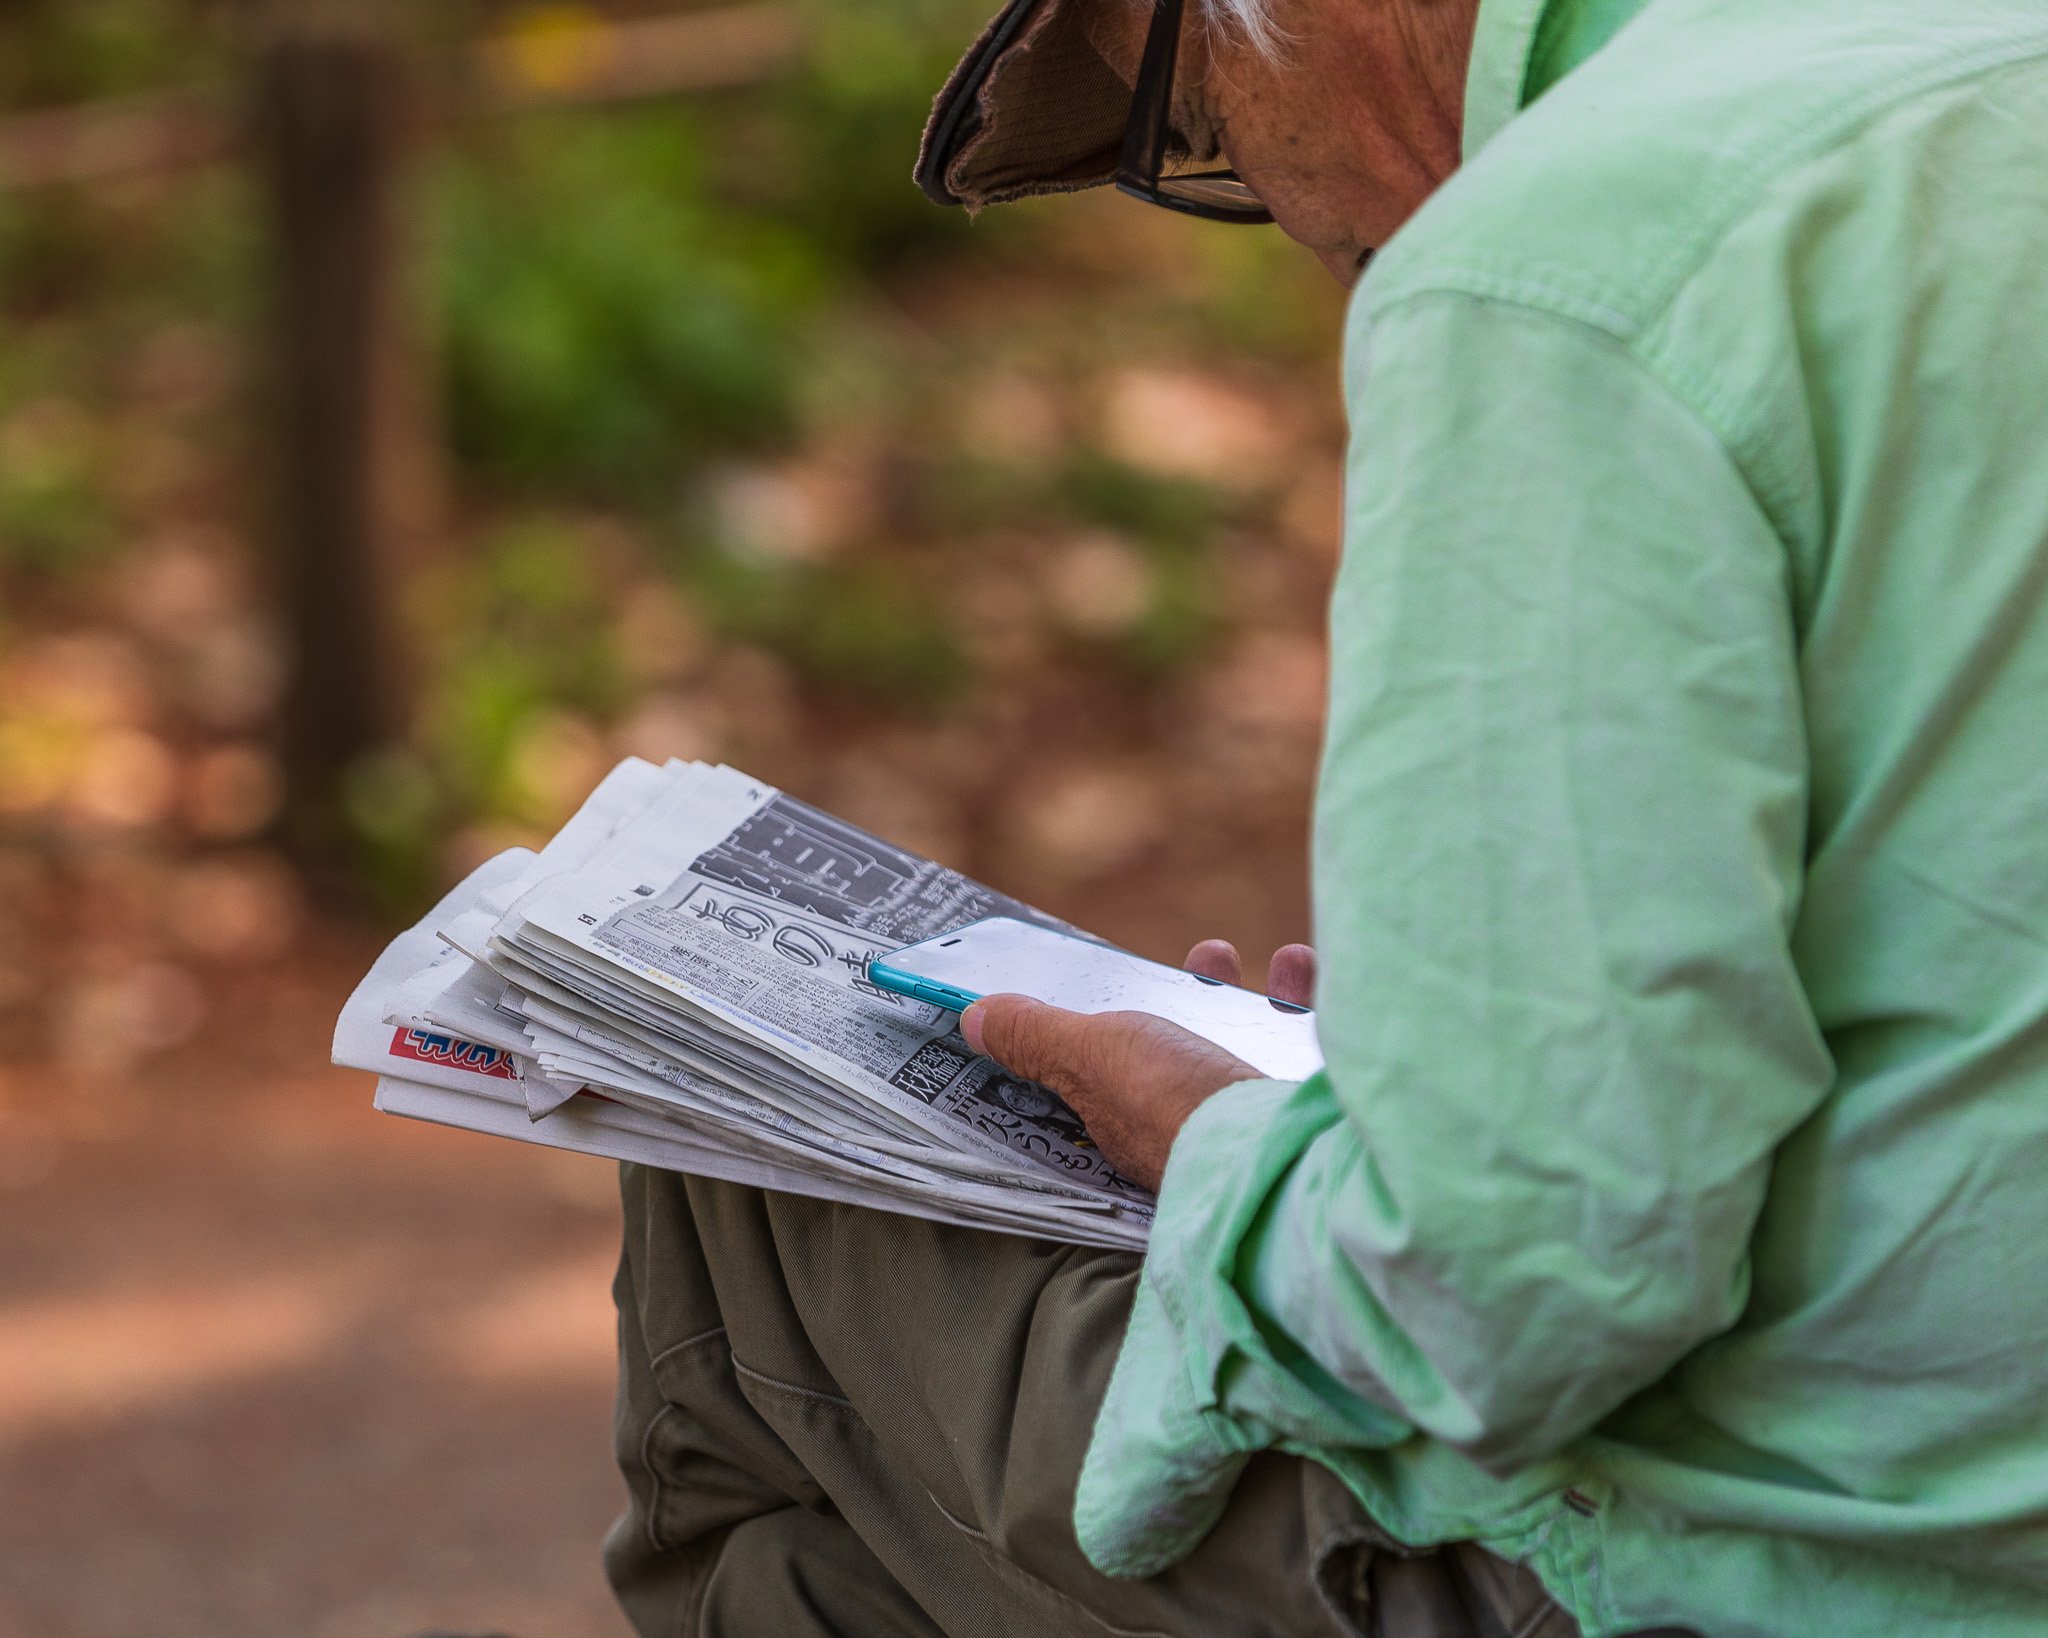
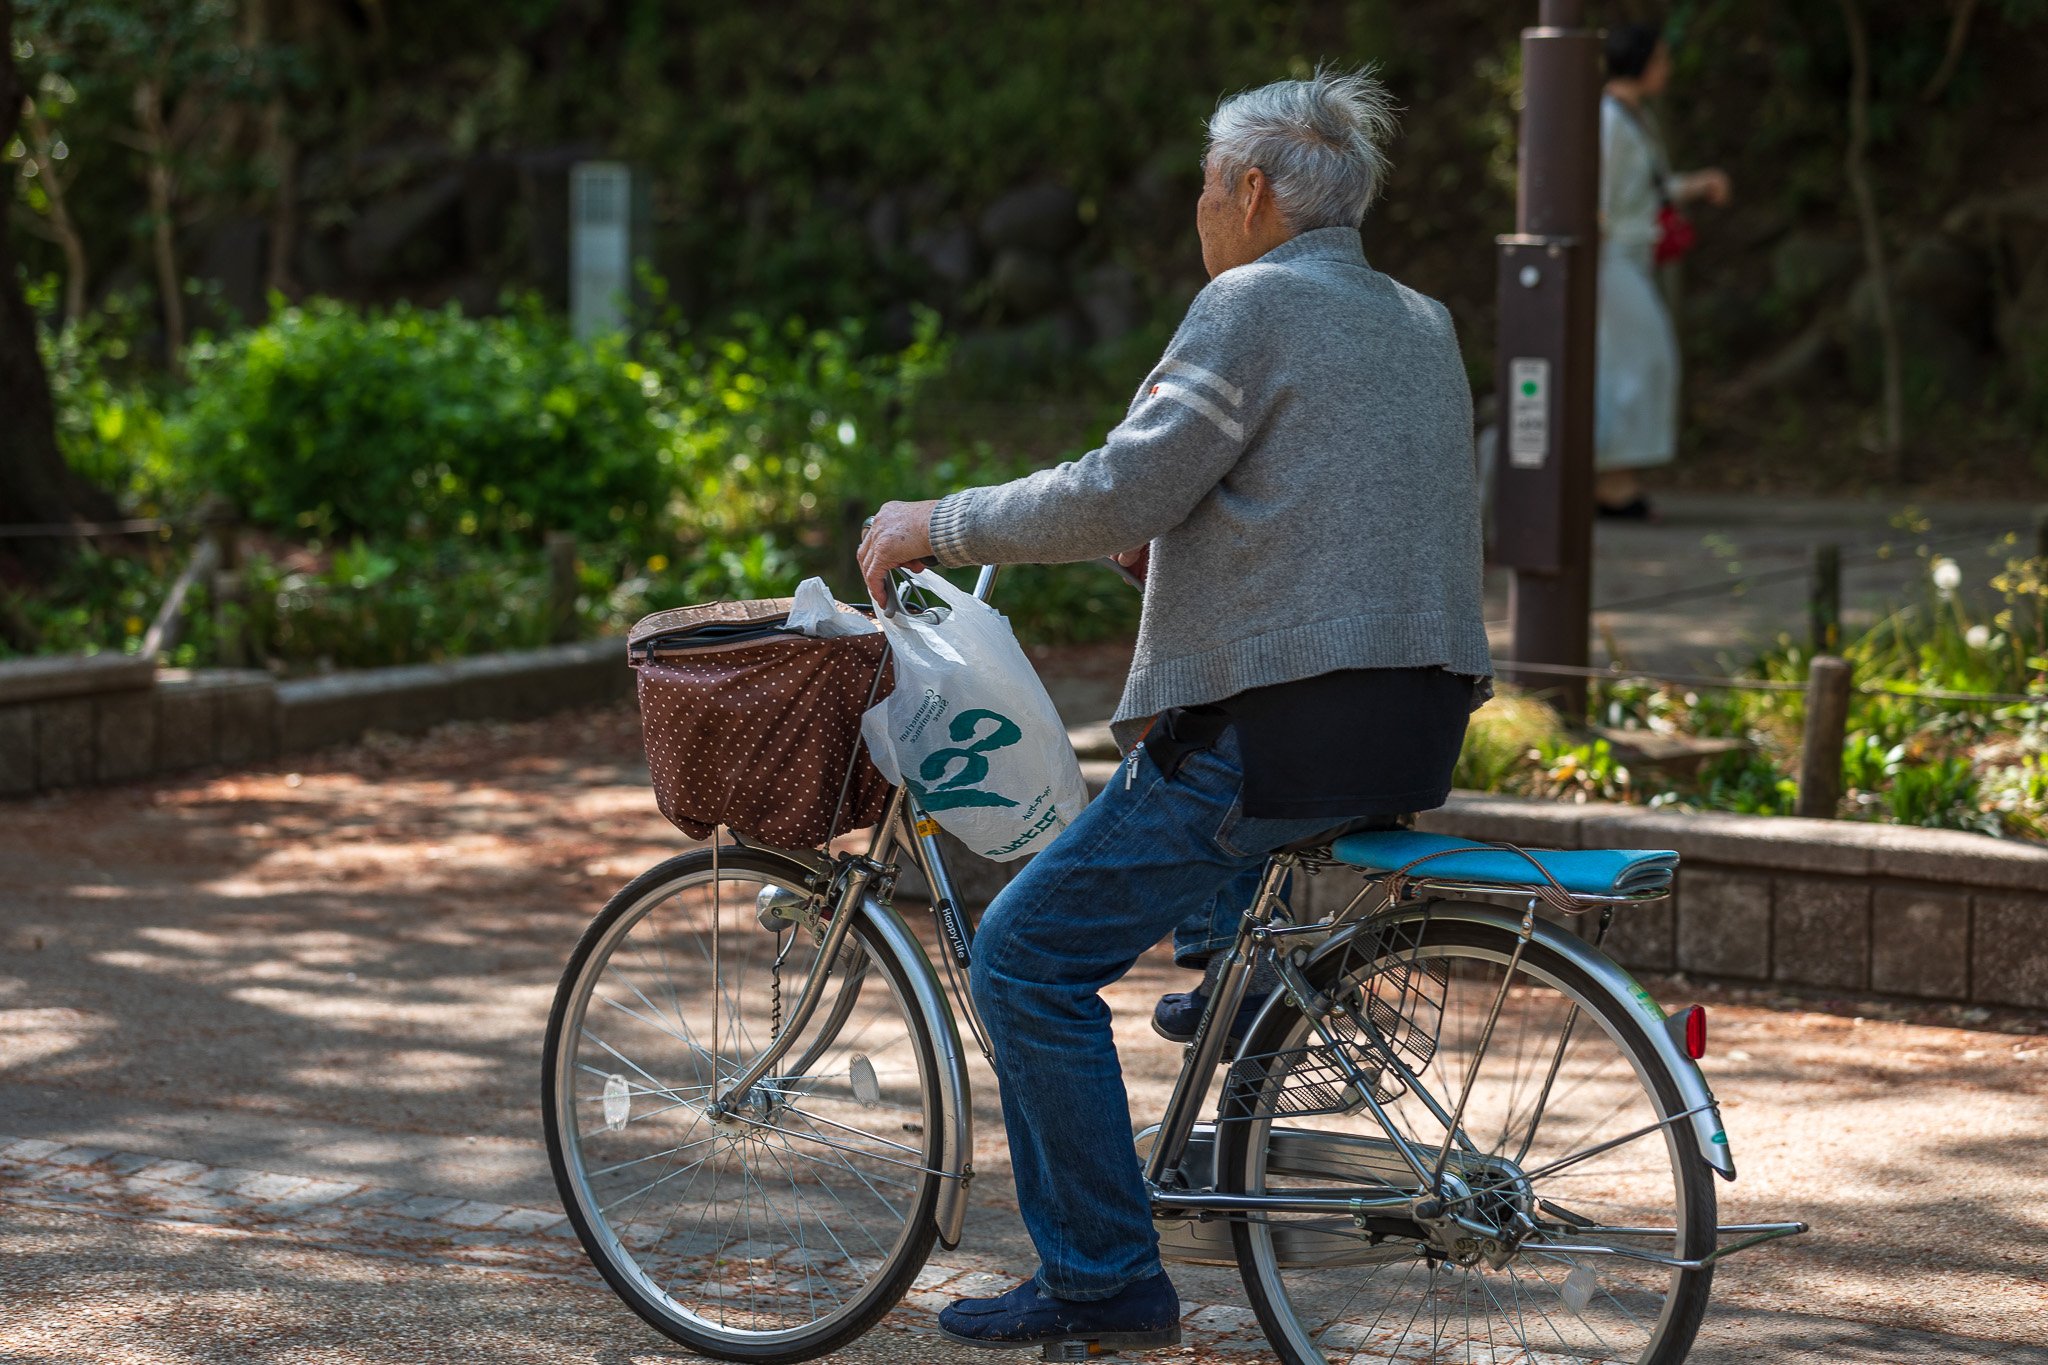
Small Details
Do not ignore the micro moments.
• Vending machines glowing in alleyways
• Lanterns outside restaurants
• Bicycle rows
• Train interiors
Tokyo rewards photographers who slow down.

Best Photography Locations in Tokyo
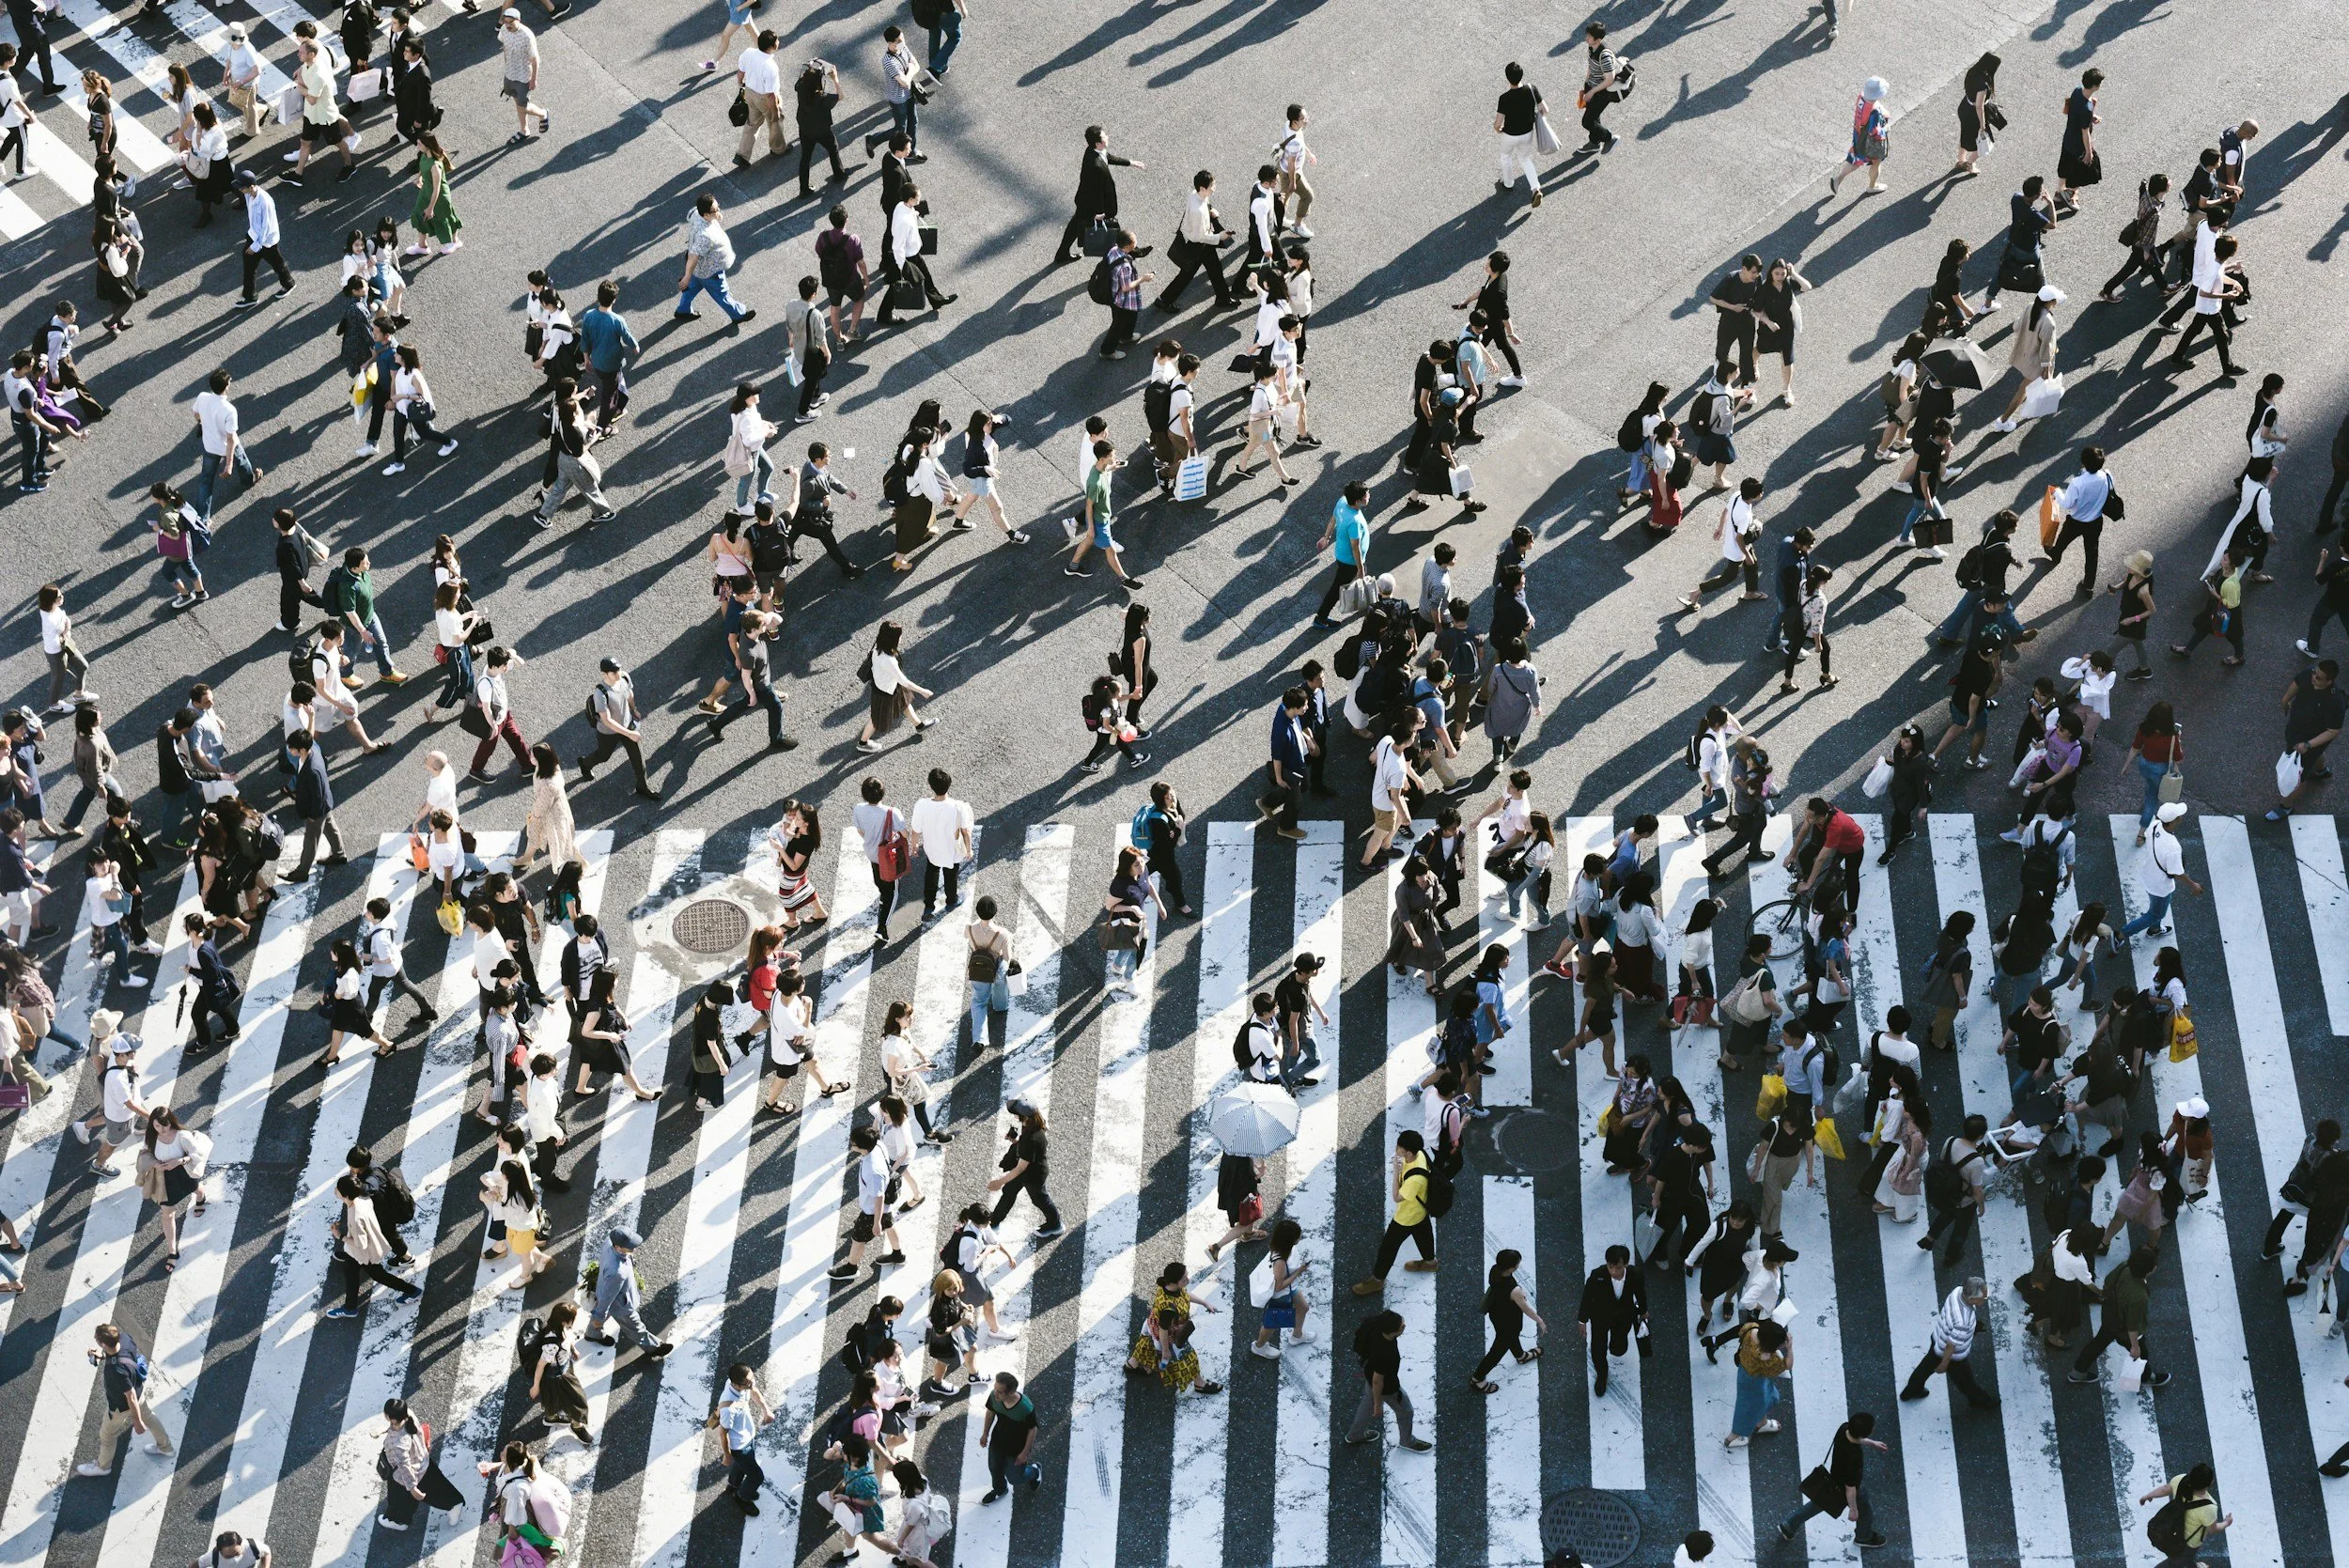
Shibuya Crossing
There is a reason Shibuya Crossing appears on every list. When the lights change, pedestrians flow from every corner simultaneously, and for a few seconds the intersection is a river of humanity moving in every direction at once. It is kinetic and chaotic and unlike anything else in the world.
Photographically, you have two very different options. From street level, the energy is immersive. Use a wide lens at 16 to 24mm, go low, and let people fill the entire frame. At blue hour, the balance of ambient light and neon creates a window of about fifteen minutes where the color depth is extraordinary. From an elevated position, the crossing becomes graphic and abstract. The Mag's Park observation deck above the Shibuya 109 building and the windows of Starbucks on the second floor of the building facing the crossing are both excellent.
📷 Pro Tip: The best light is at blue hour, approximately twenty to forty minutes after sunset. Position yourself either at street level with a 16mm or 24mm lens for immersion, or elevated with a standard zoom for the overhead graphic composition. Arrive thirty minutes before blue hour to secure your spot. The crossing is free to access and runs around the clock. Exit Shibuya Station at the Hachiko Exit and the crossing is directly in front of you.
Best time: Blue hour and night. Access: Free. Exit Shibuya Station, Hachiko Exit.
Shibuya Crossing is best photographed at the golden or blue hour in the evening. The magnificent lights begin to appear during the blue hour.


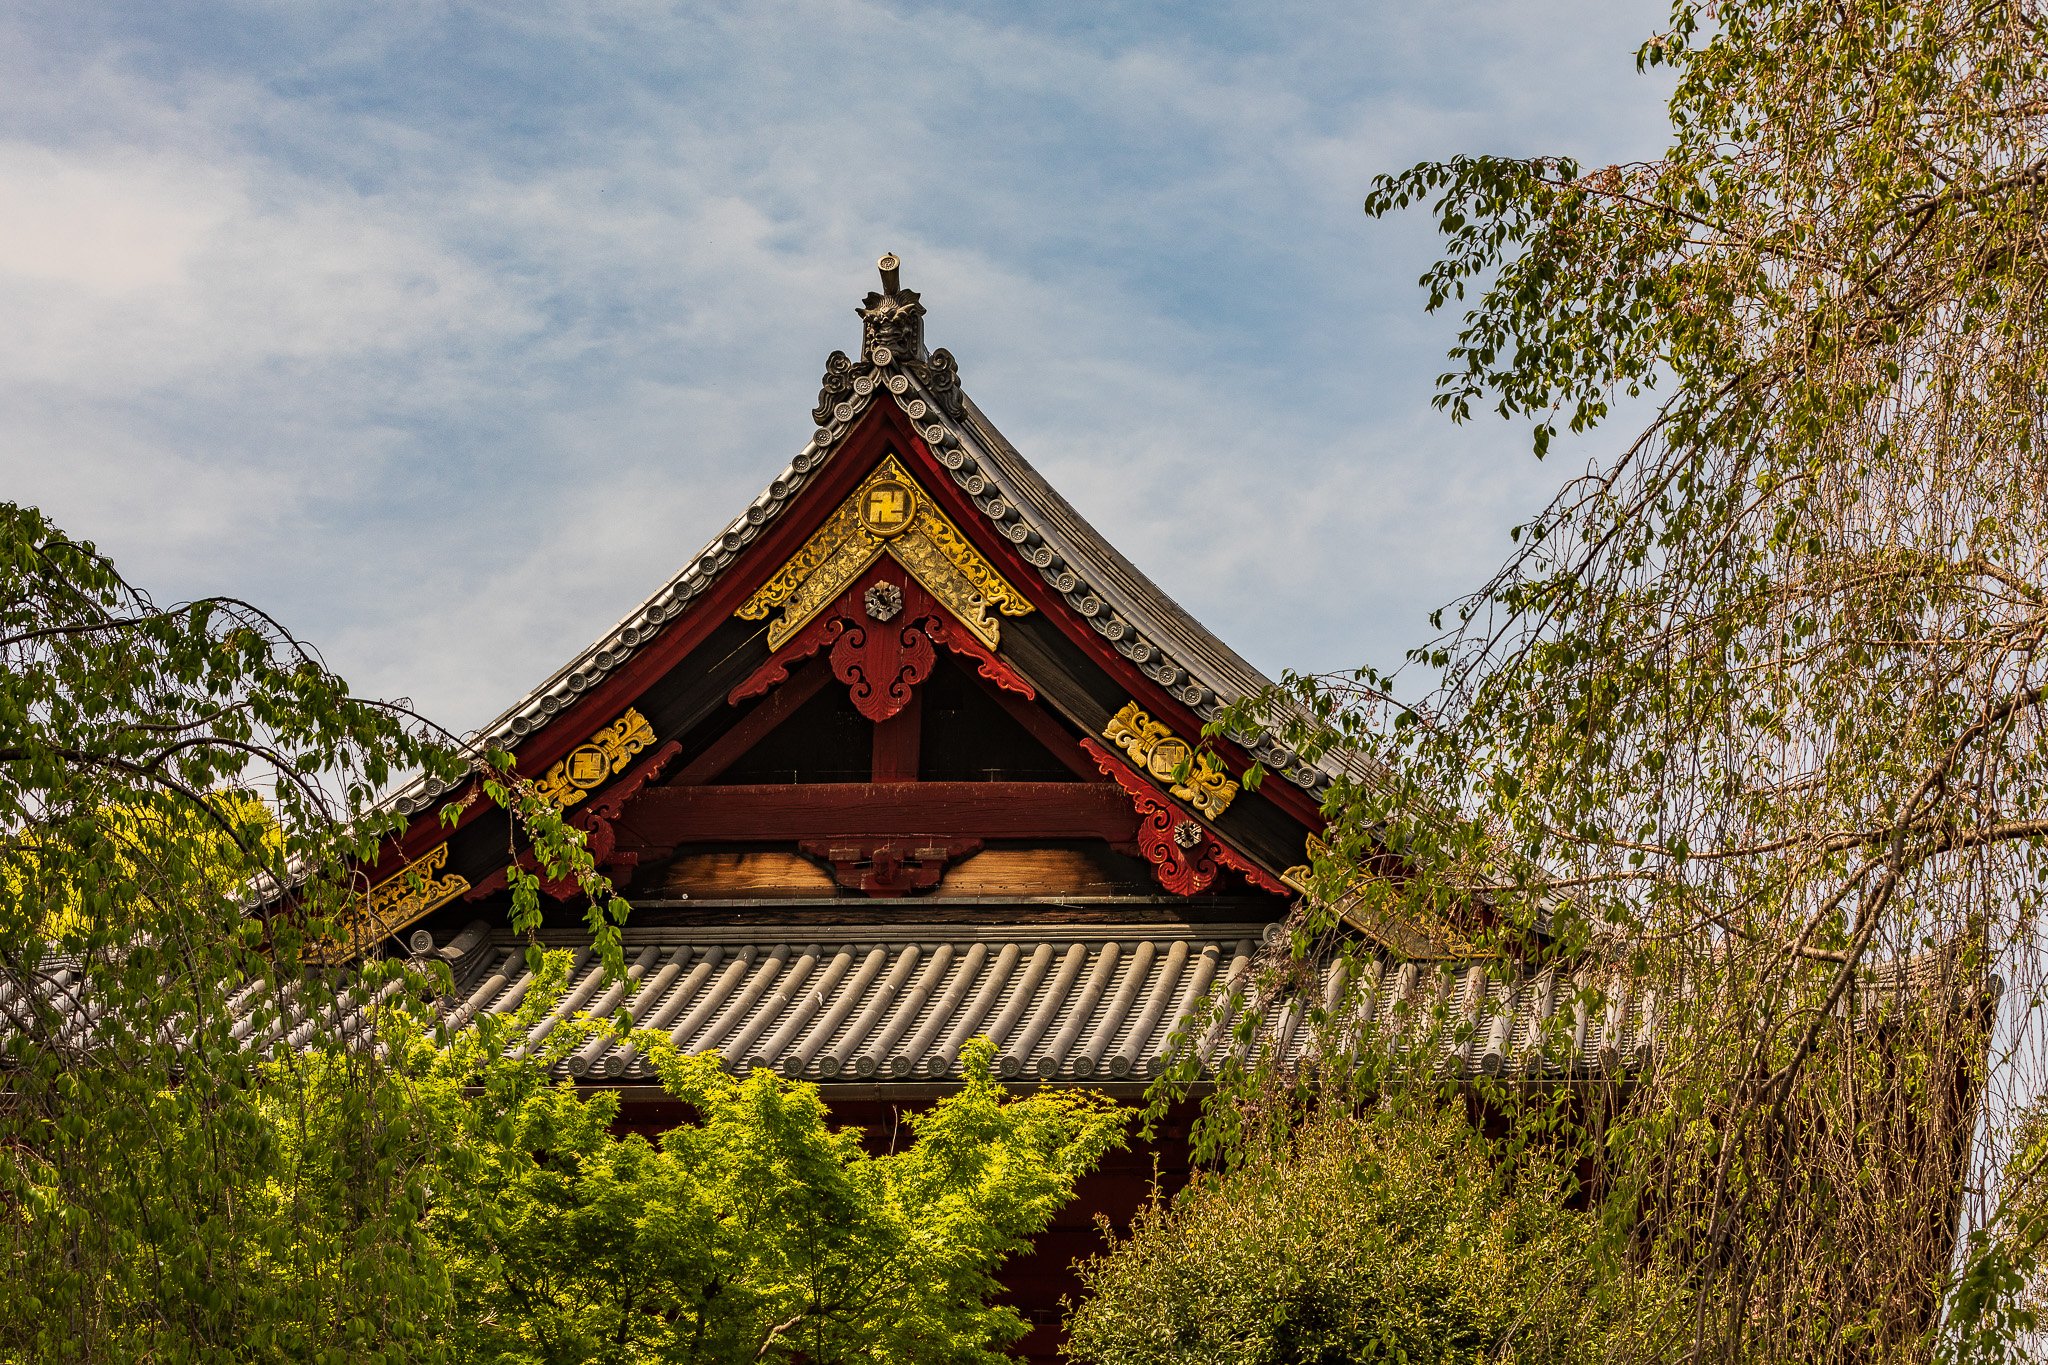
Senso-ji Temple, Asakusa
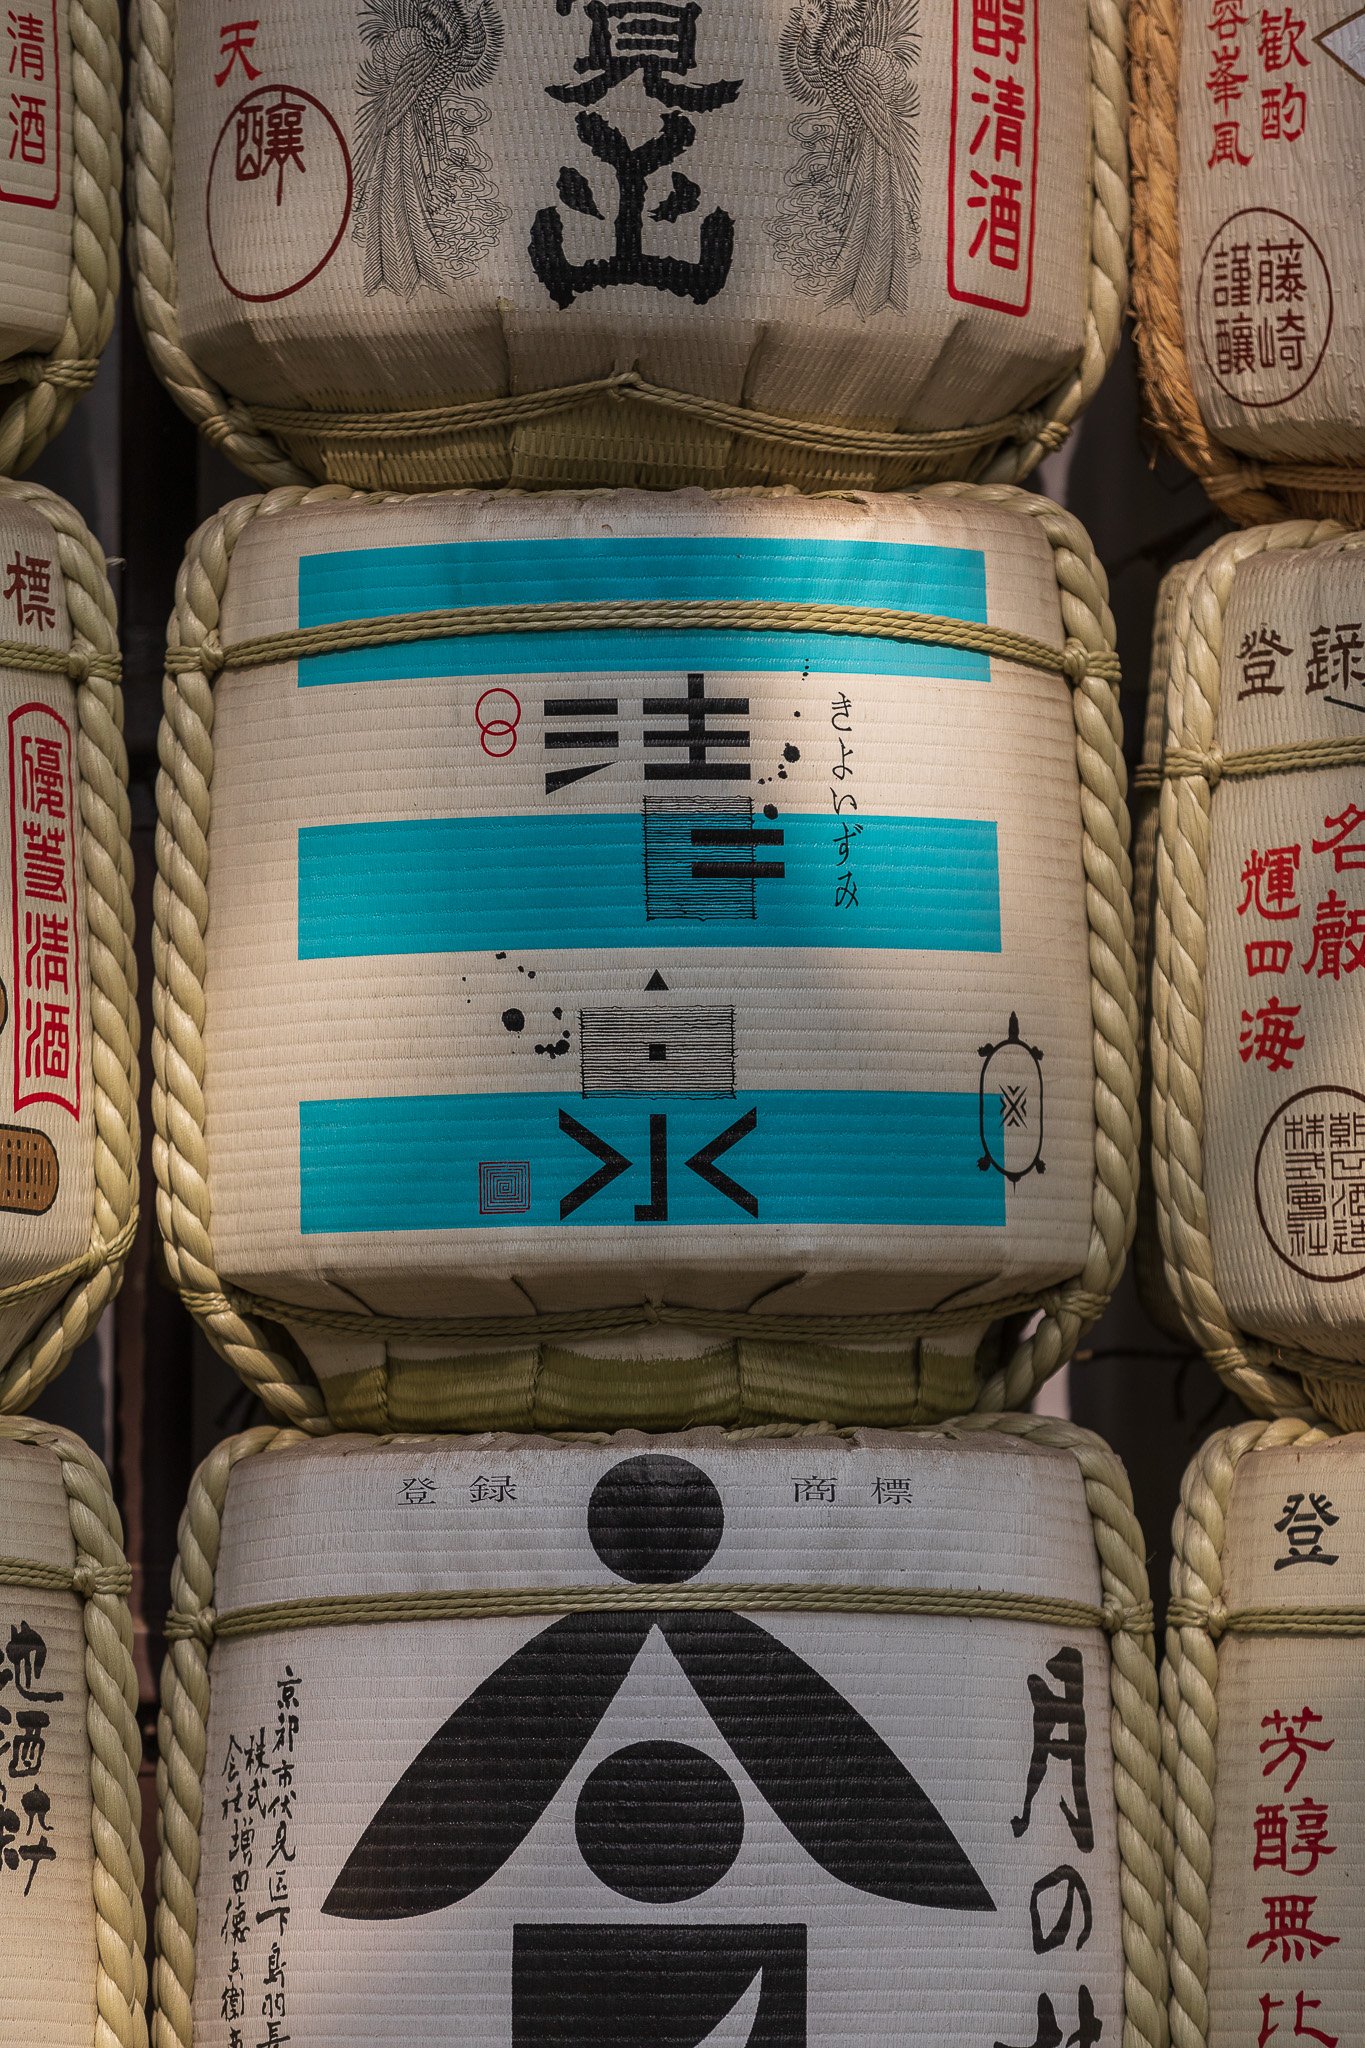
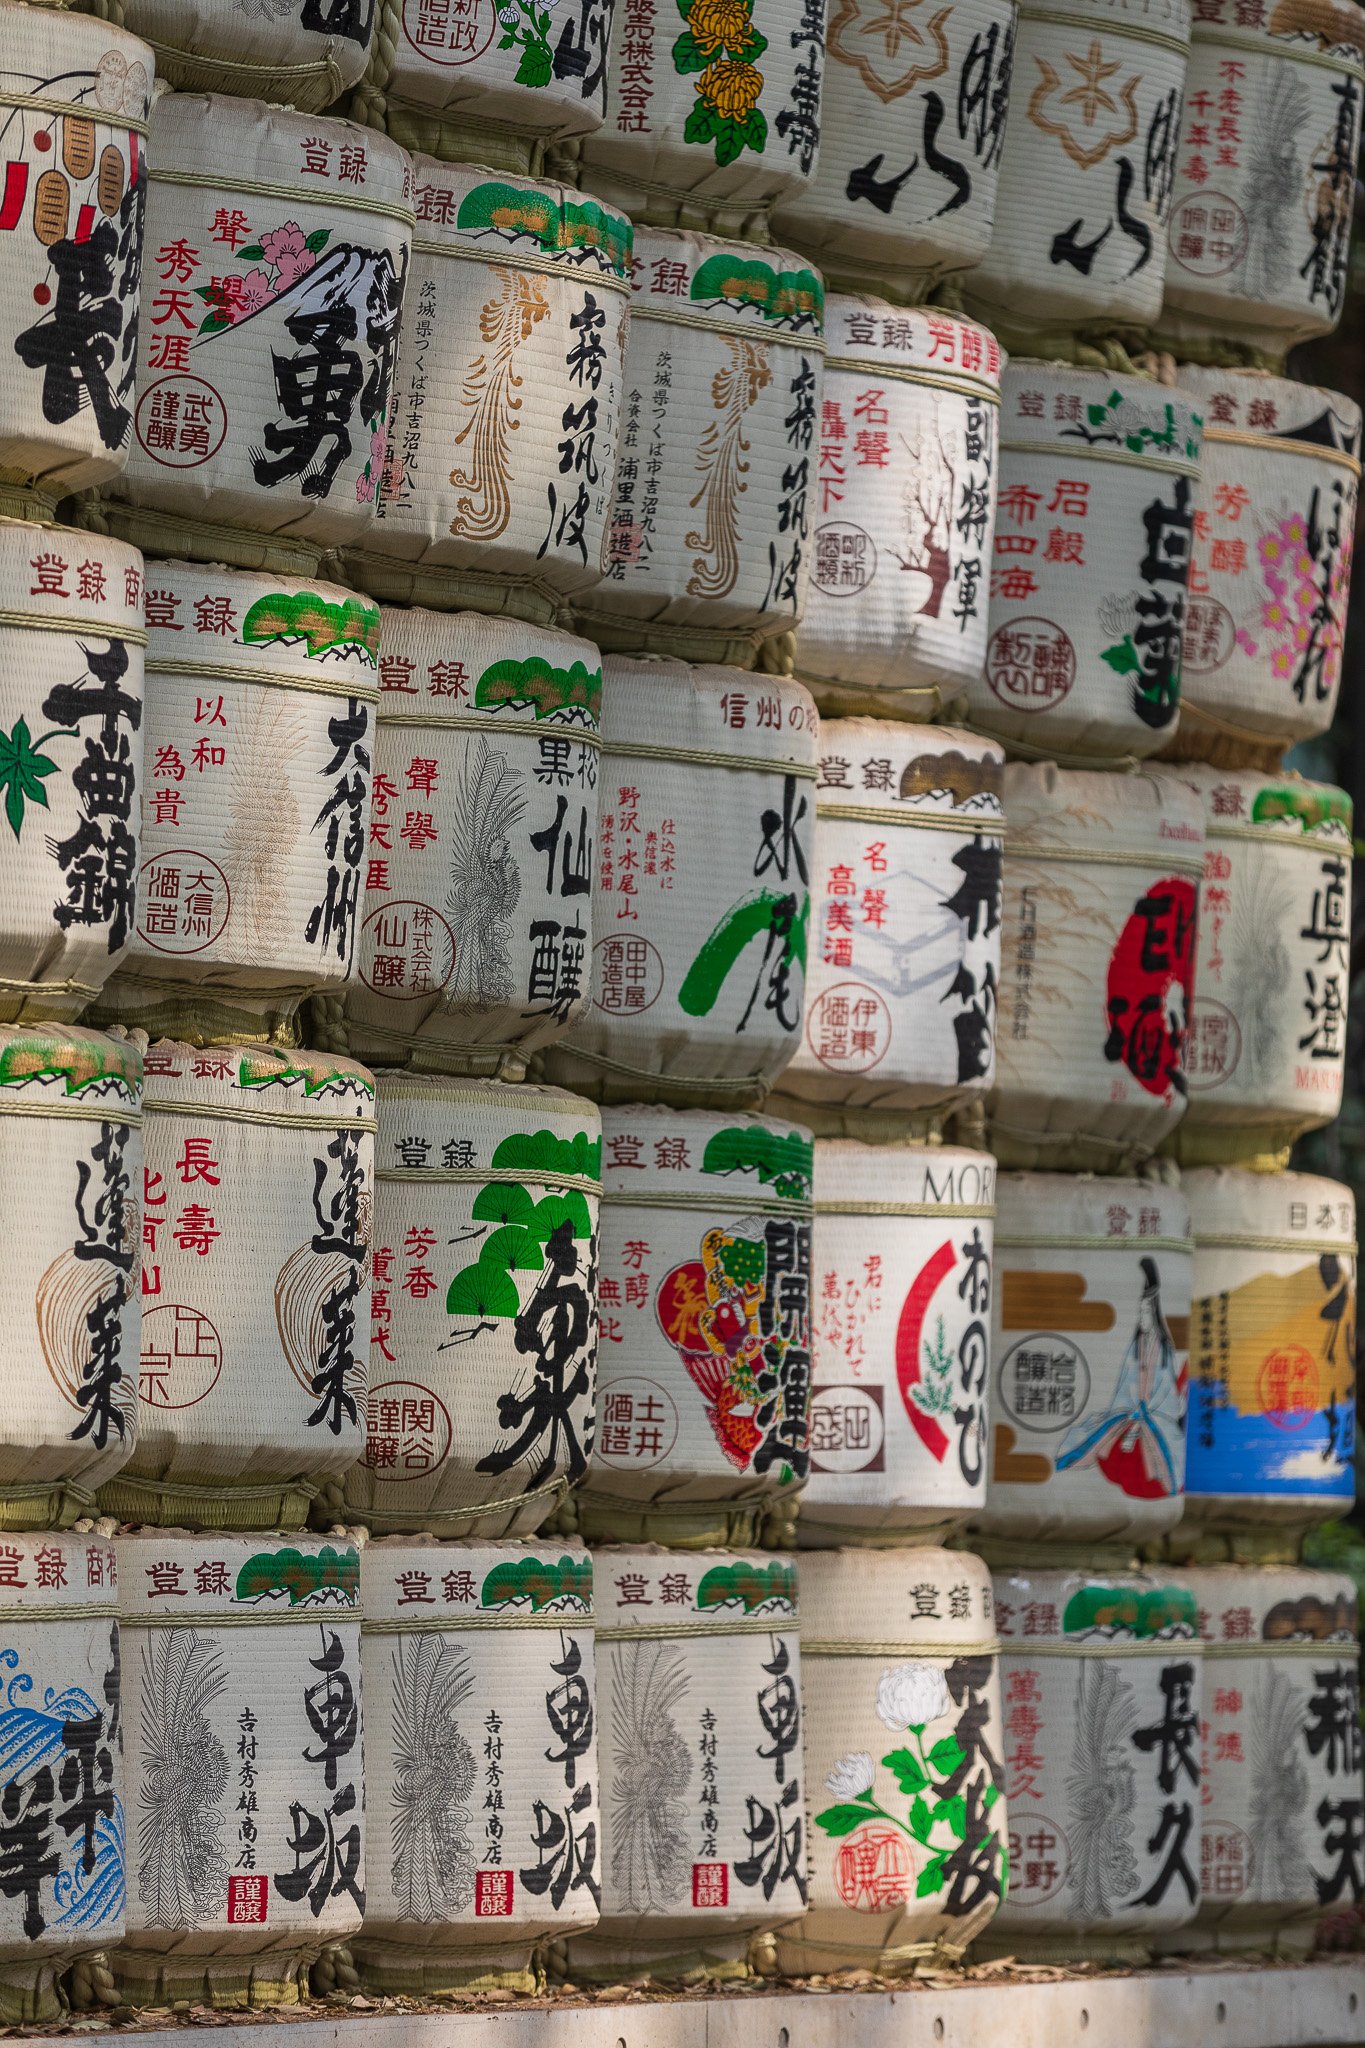
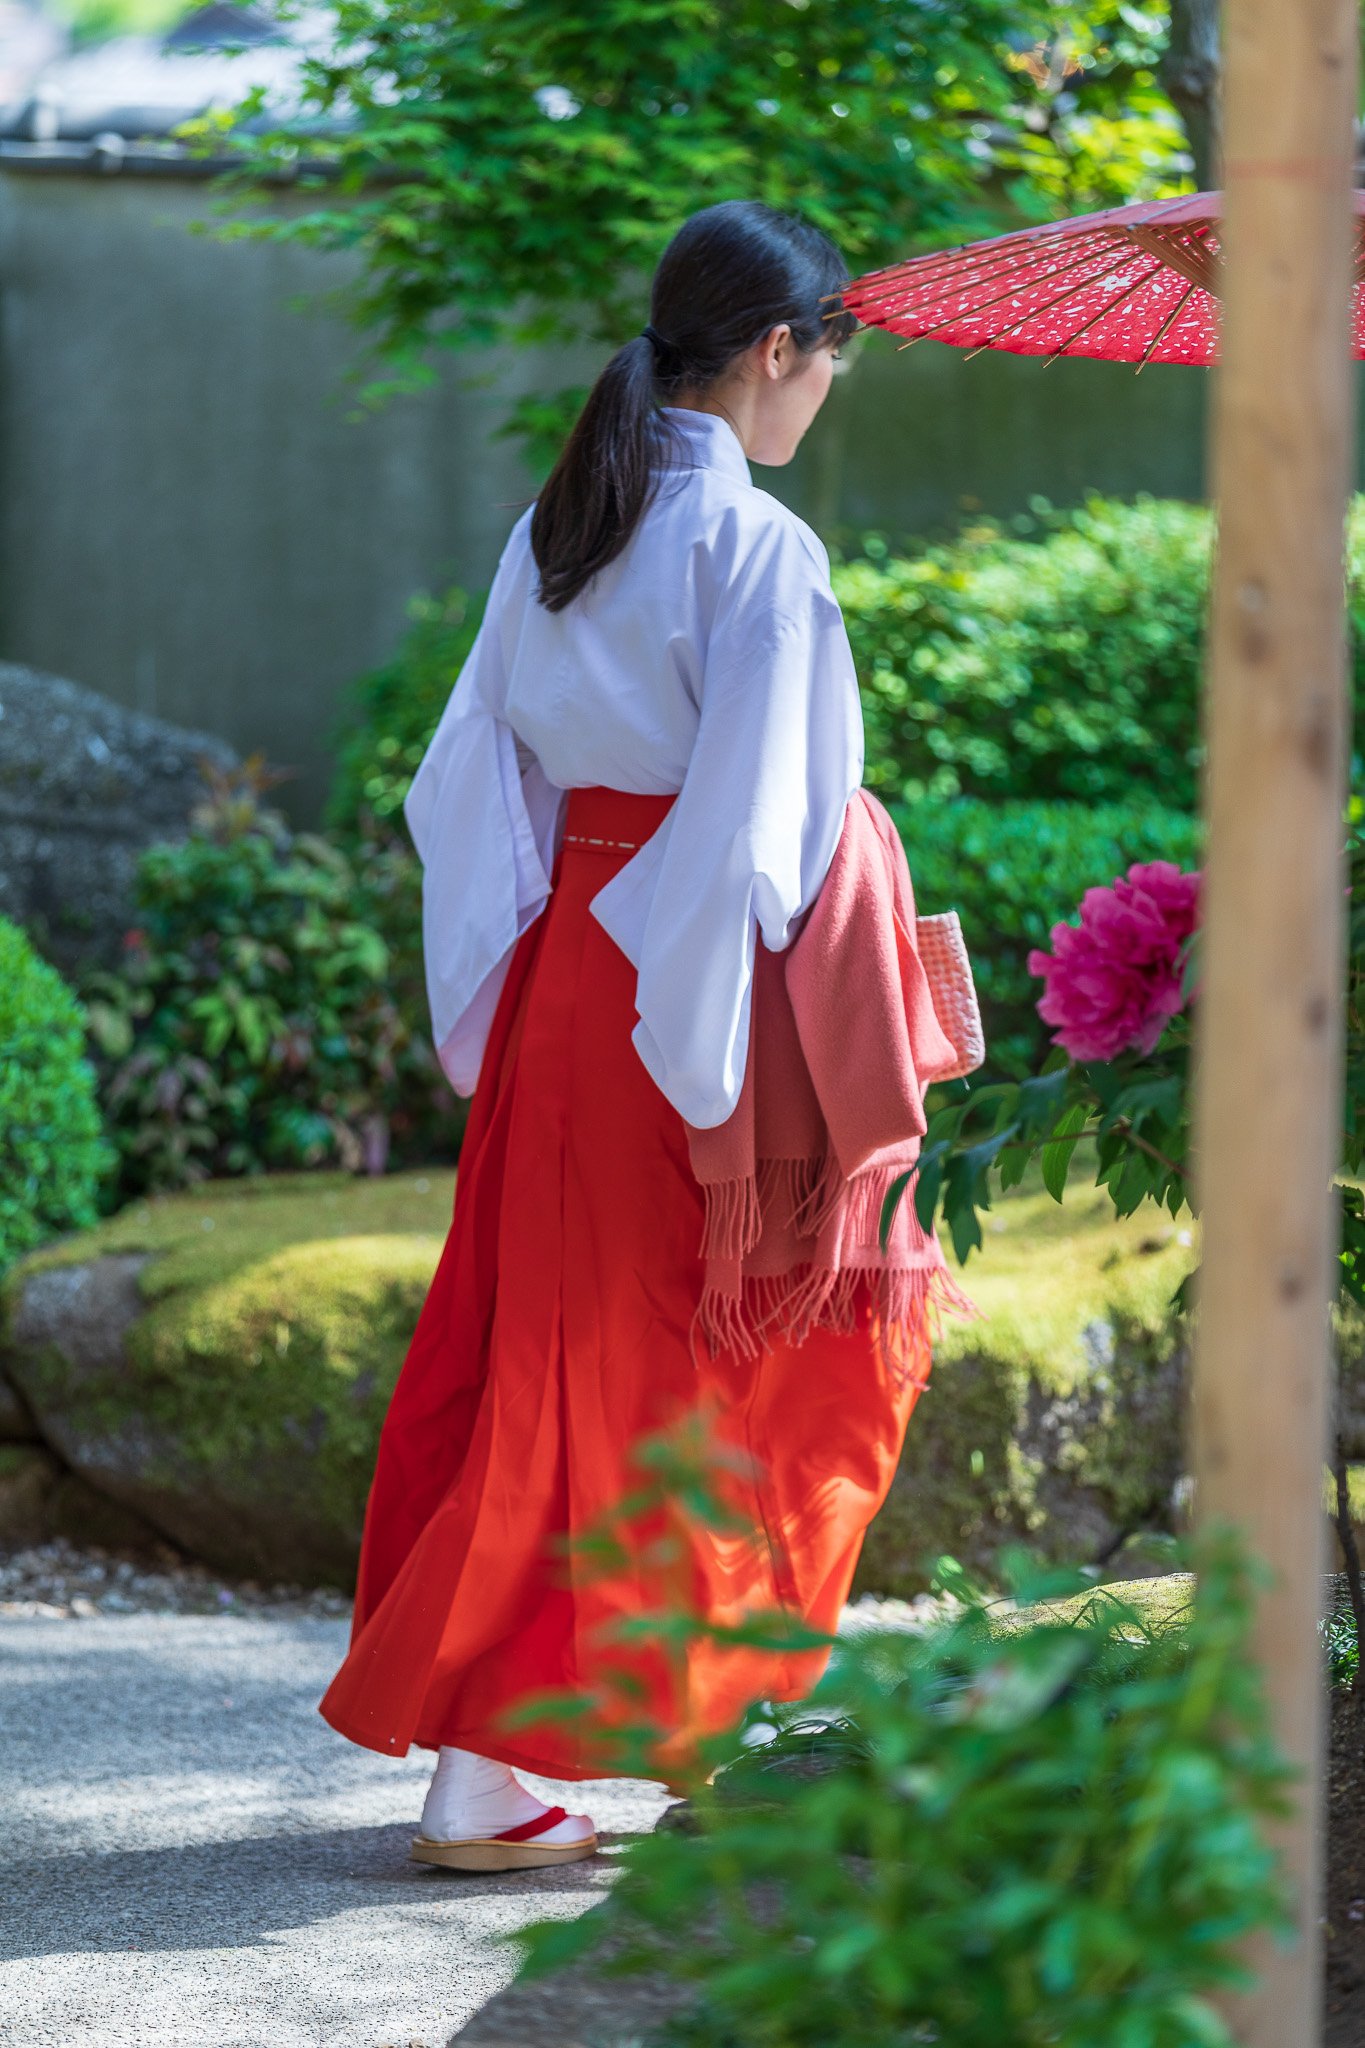
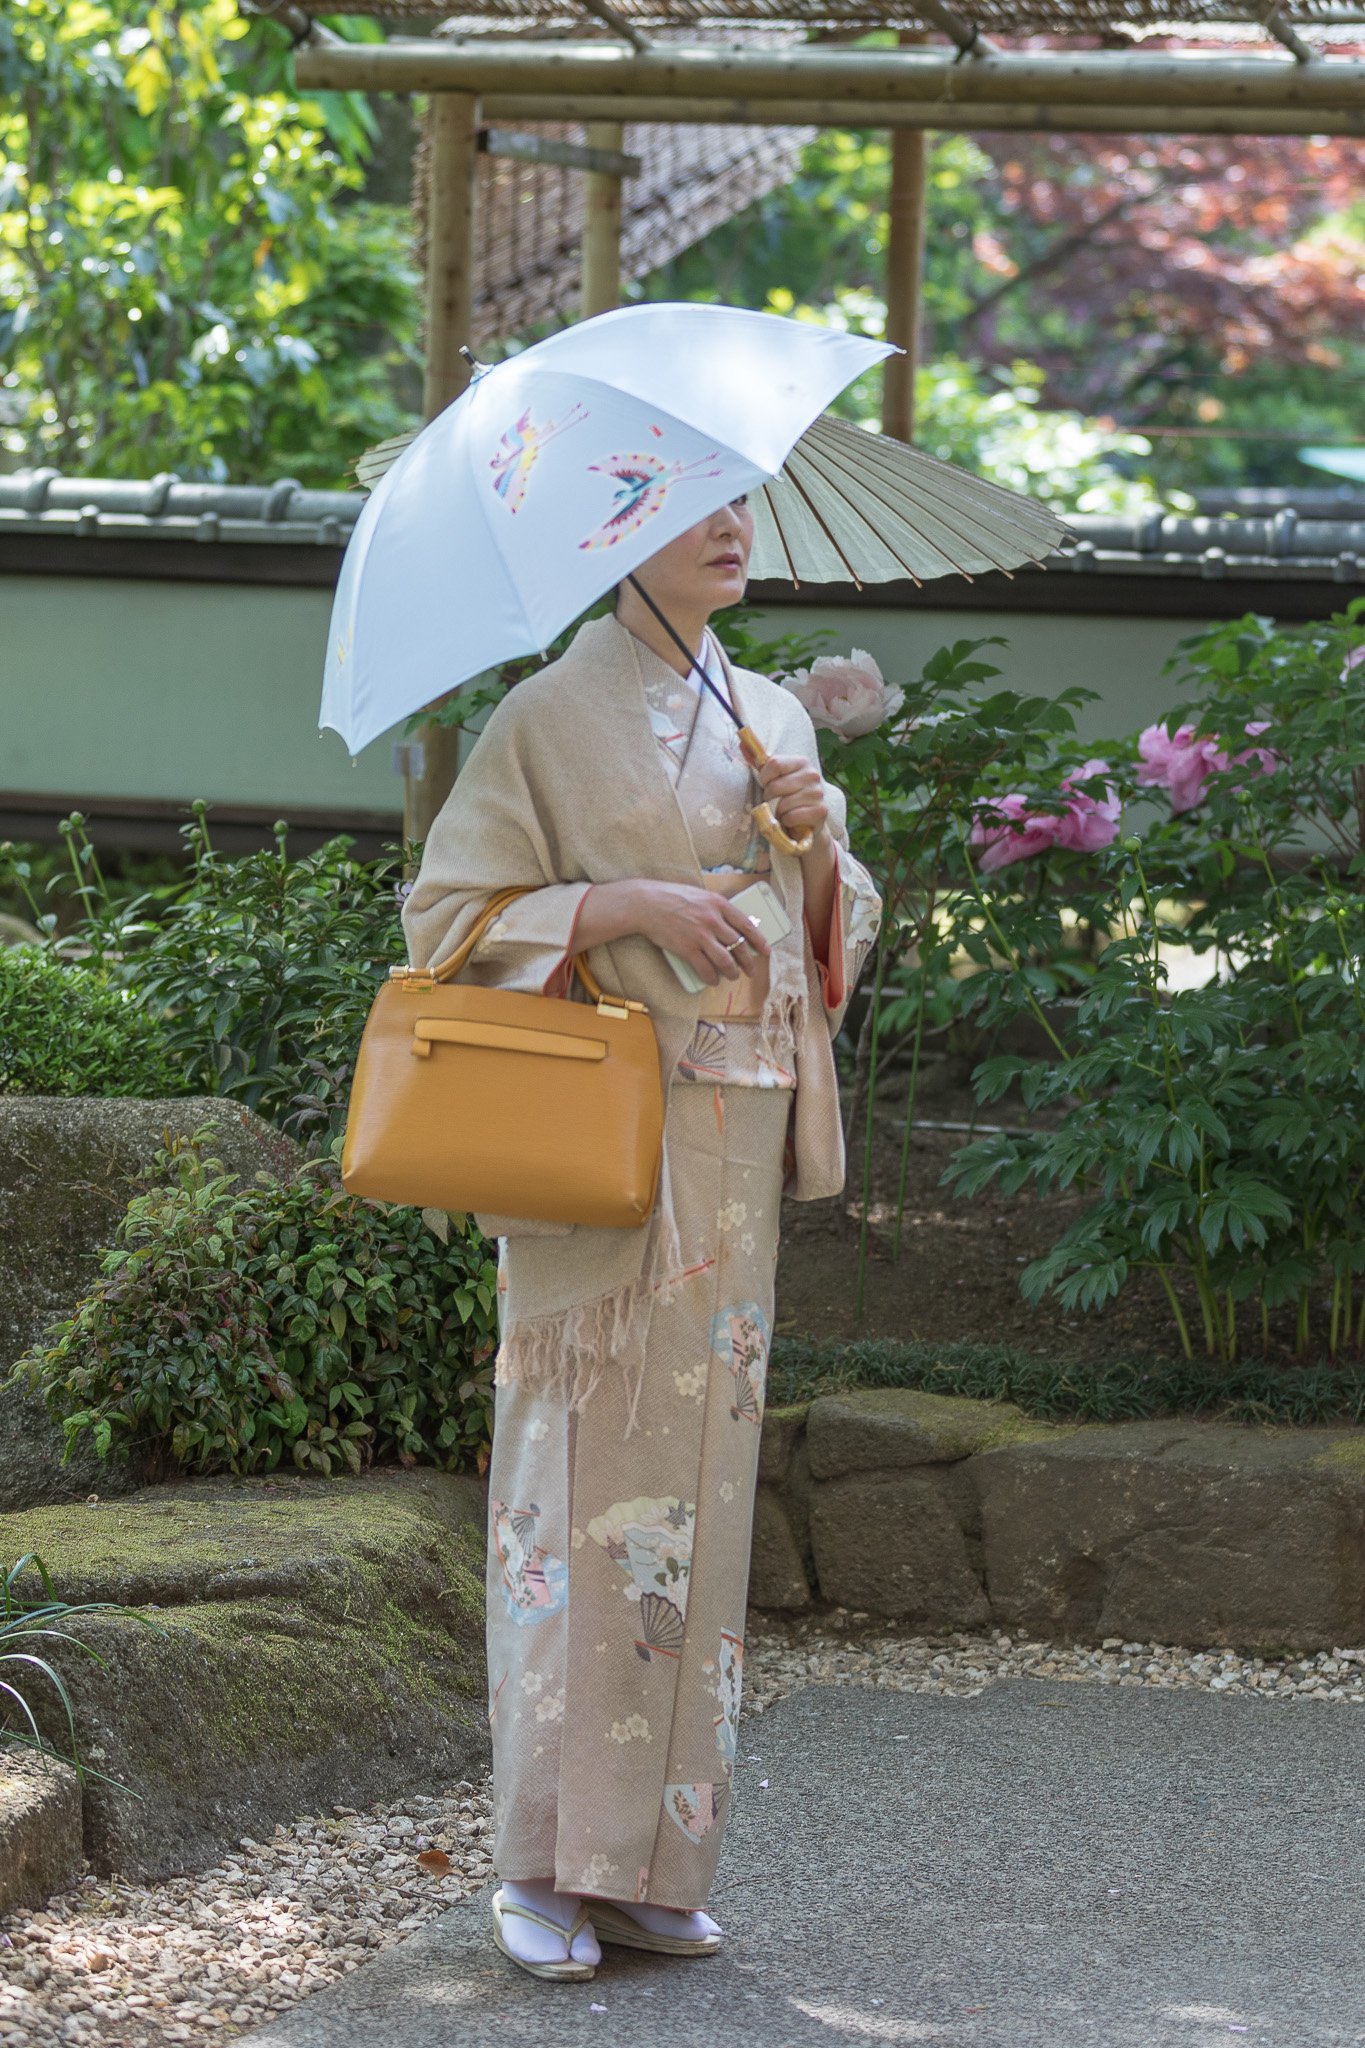
Senso-ji is Tokyo's oldest and most visited temple, and the contrast between the two is what makes it interesting to photograph. Before 8 am, the approach along Nakamise-dori is quiet. The giant red Kaminarimon lantern frames the avenue. Incense smoke drifts through the main hall. Monks move through their routines without interruption. After 9am, the crowds transform the same space into something completely different, and that has its own photographic value.
The five-story pagoda behind the main hall, visible against the sky from several angles, is one of the most iconic architectural compositions in Tokyo. Come back at night, when the temple is illuminated and the tourists are mostly gone. Senso-ji is open 24 hours.
📷 Pro Tip: For the cleanest shots of the Kaminarimon lantern, arrive at dawn and position yourself centered on the gate from about thirty meters back using a 35 to 50mm lens. This compresses the lantern against the pagoda behind it beautifully. For the incense-smoke detail shots at the main courtyard, a 70 to 200mm lets you isolate the smoke and the devotees from a respectful distance. If you visit in the afternoon, you will encounter visitors in rented traditional kimono walking the side streets, which makes for excellent candid portraits with a telephoto.
Best time: Dawn for solitude; late afternoon for kimono-wearing visitors. Access: Free (inner sanctuary has a small donation box). Asakusa Station on the Ginza Line or Toei Asakusa Line.

You enter the temple by walking under a gigantic red lantern. Sensō-ji is open 24 hours a day, so you can visit anytime, and it is really pretty at night when the crowds are gone. The gardens around the temple are also definitely worth exploring.
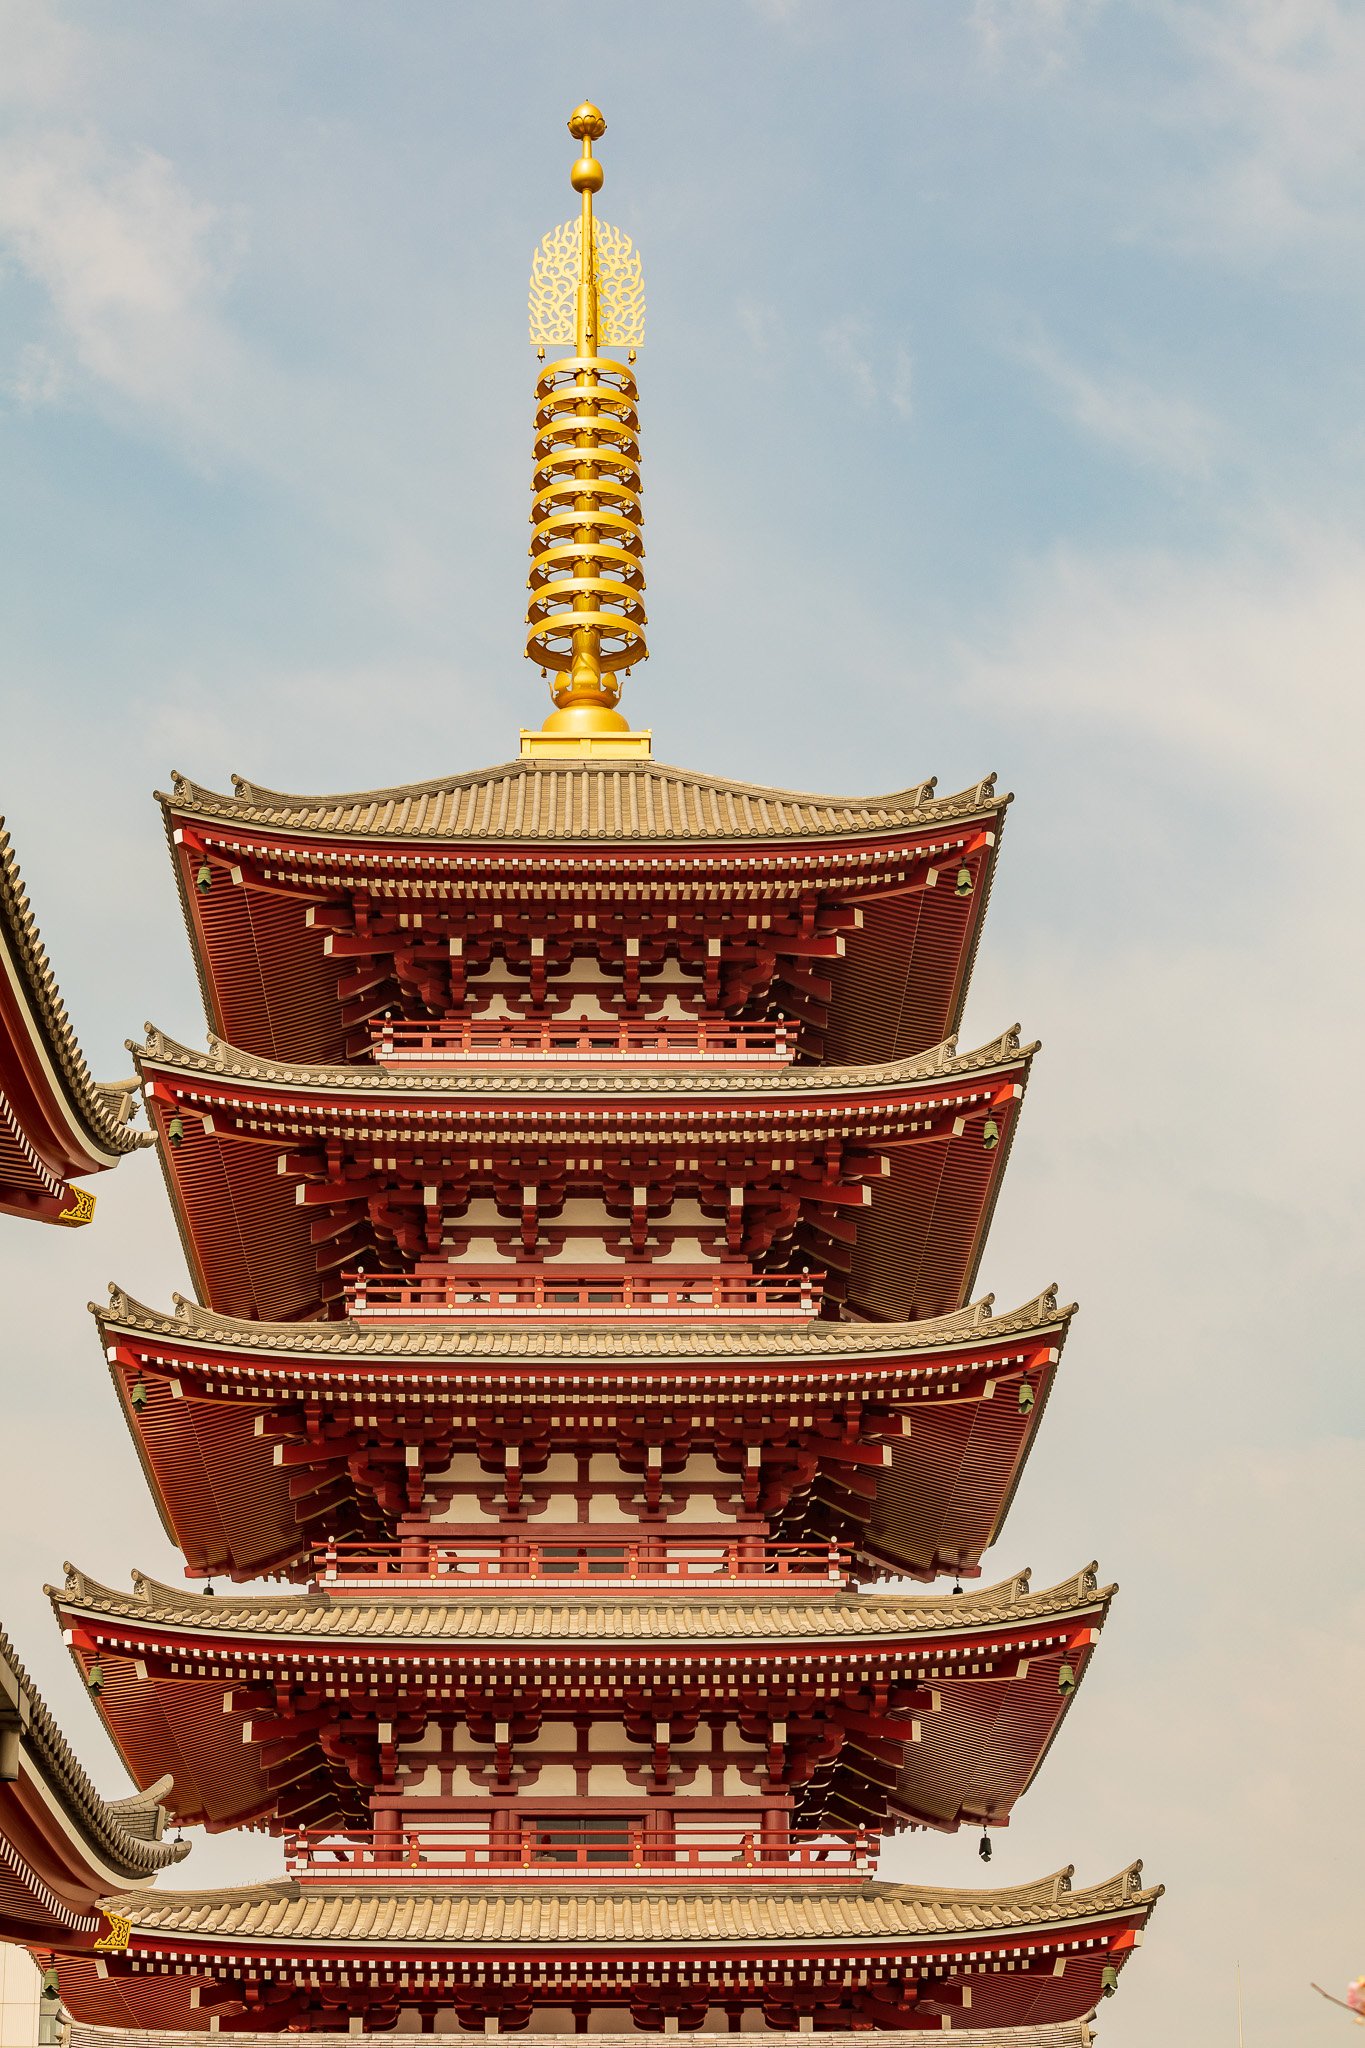
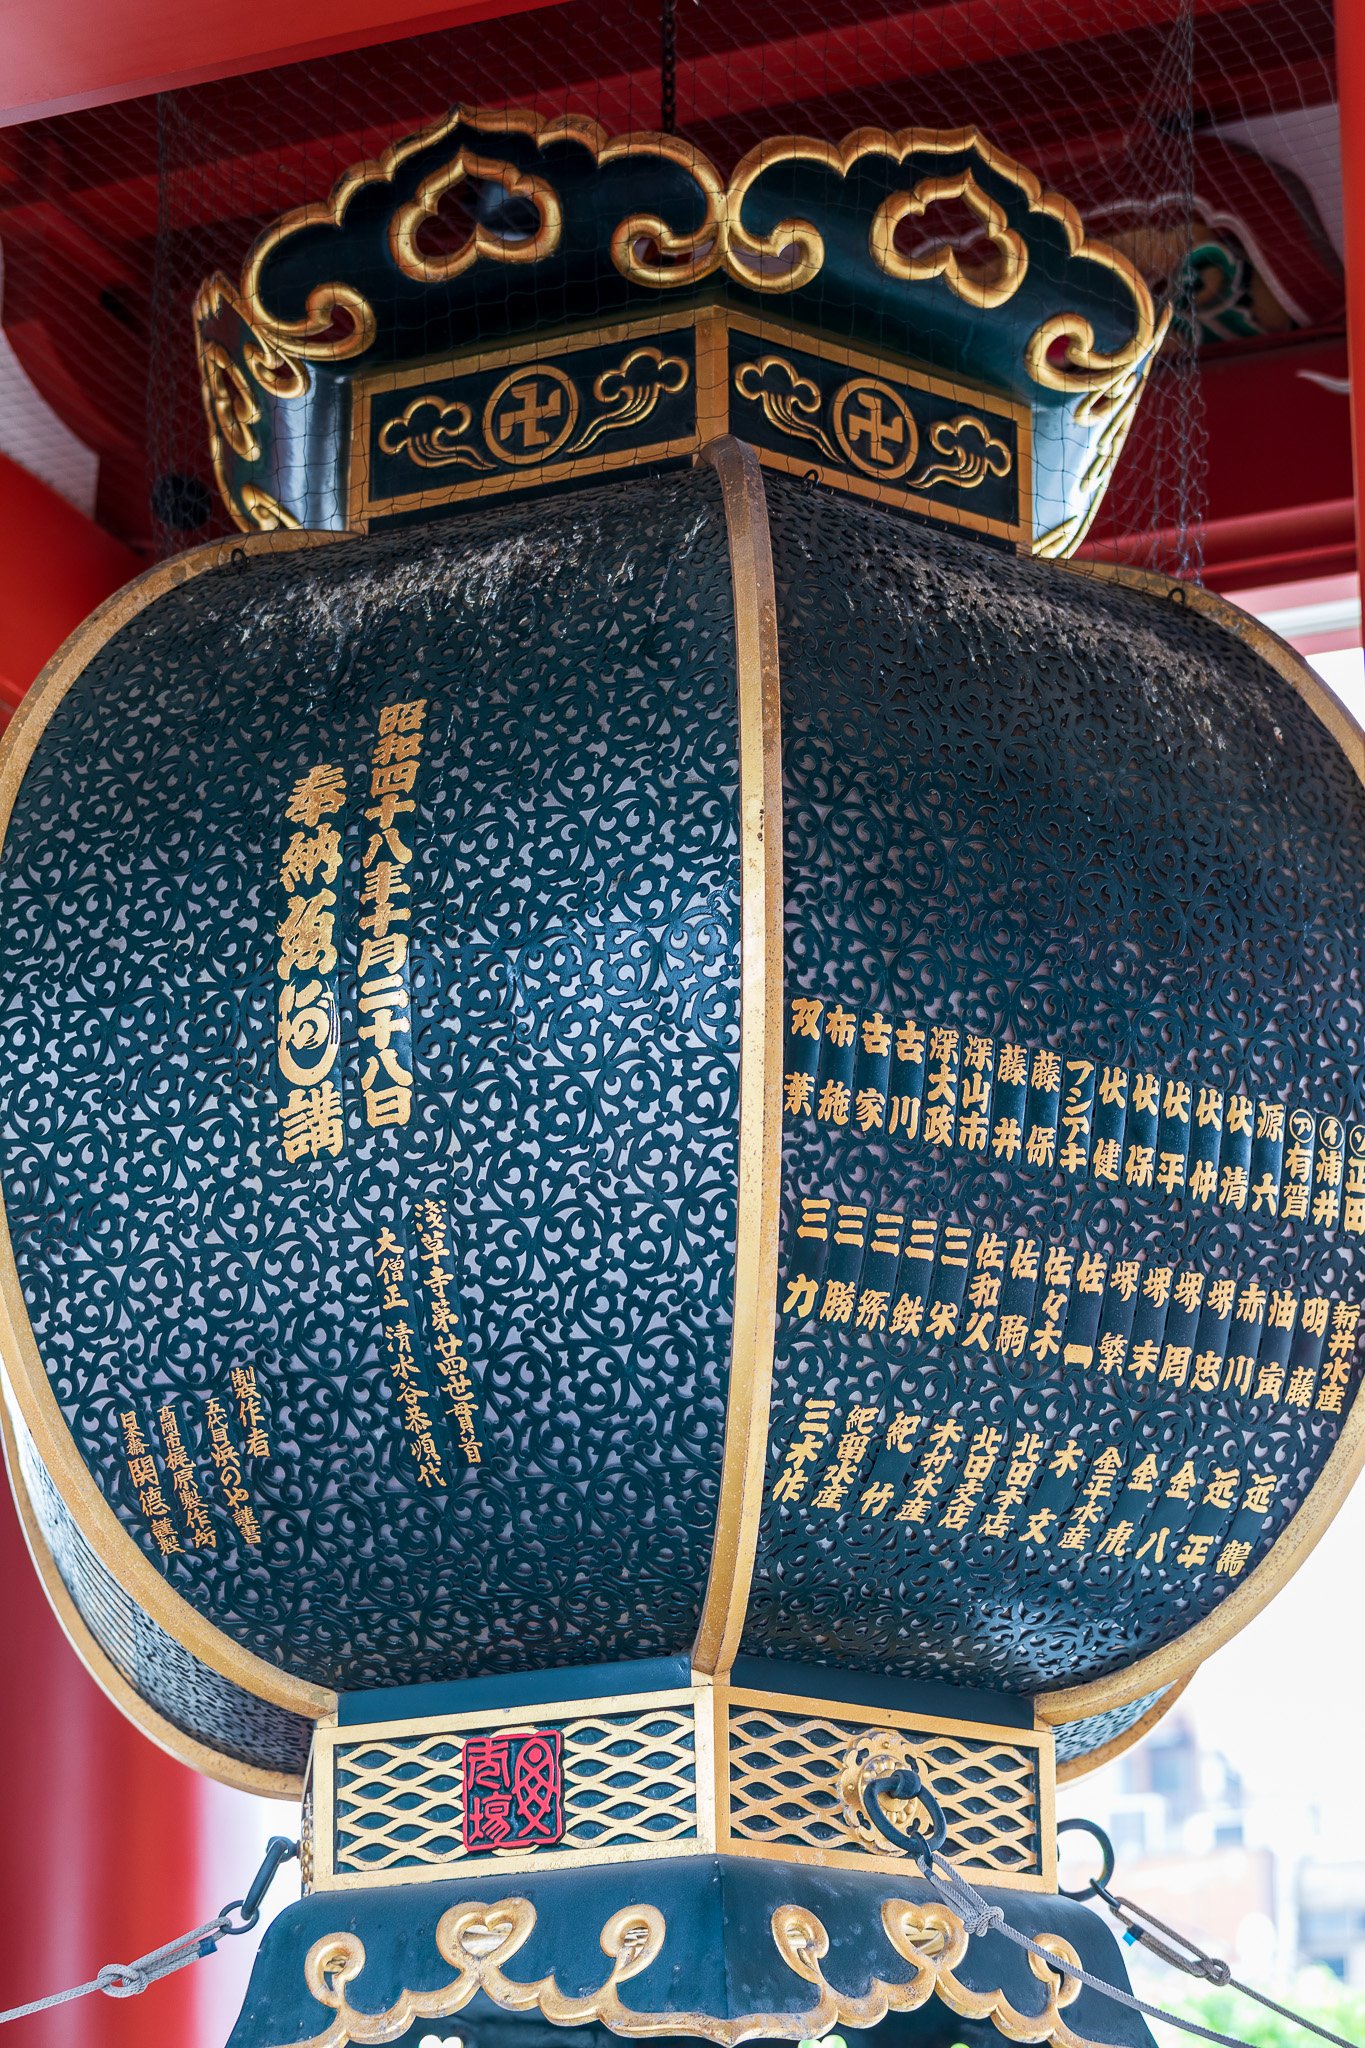
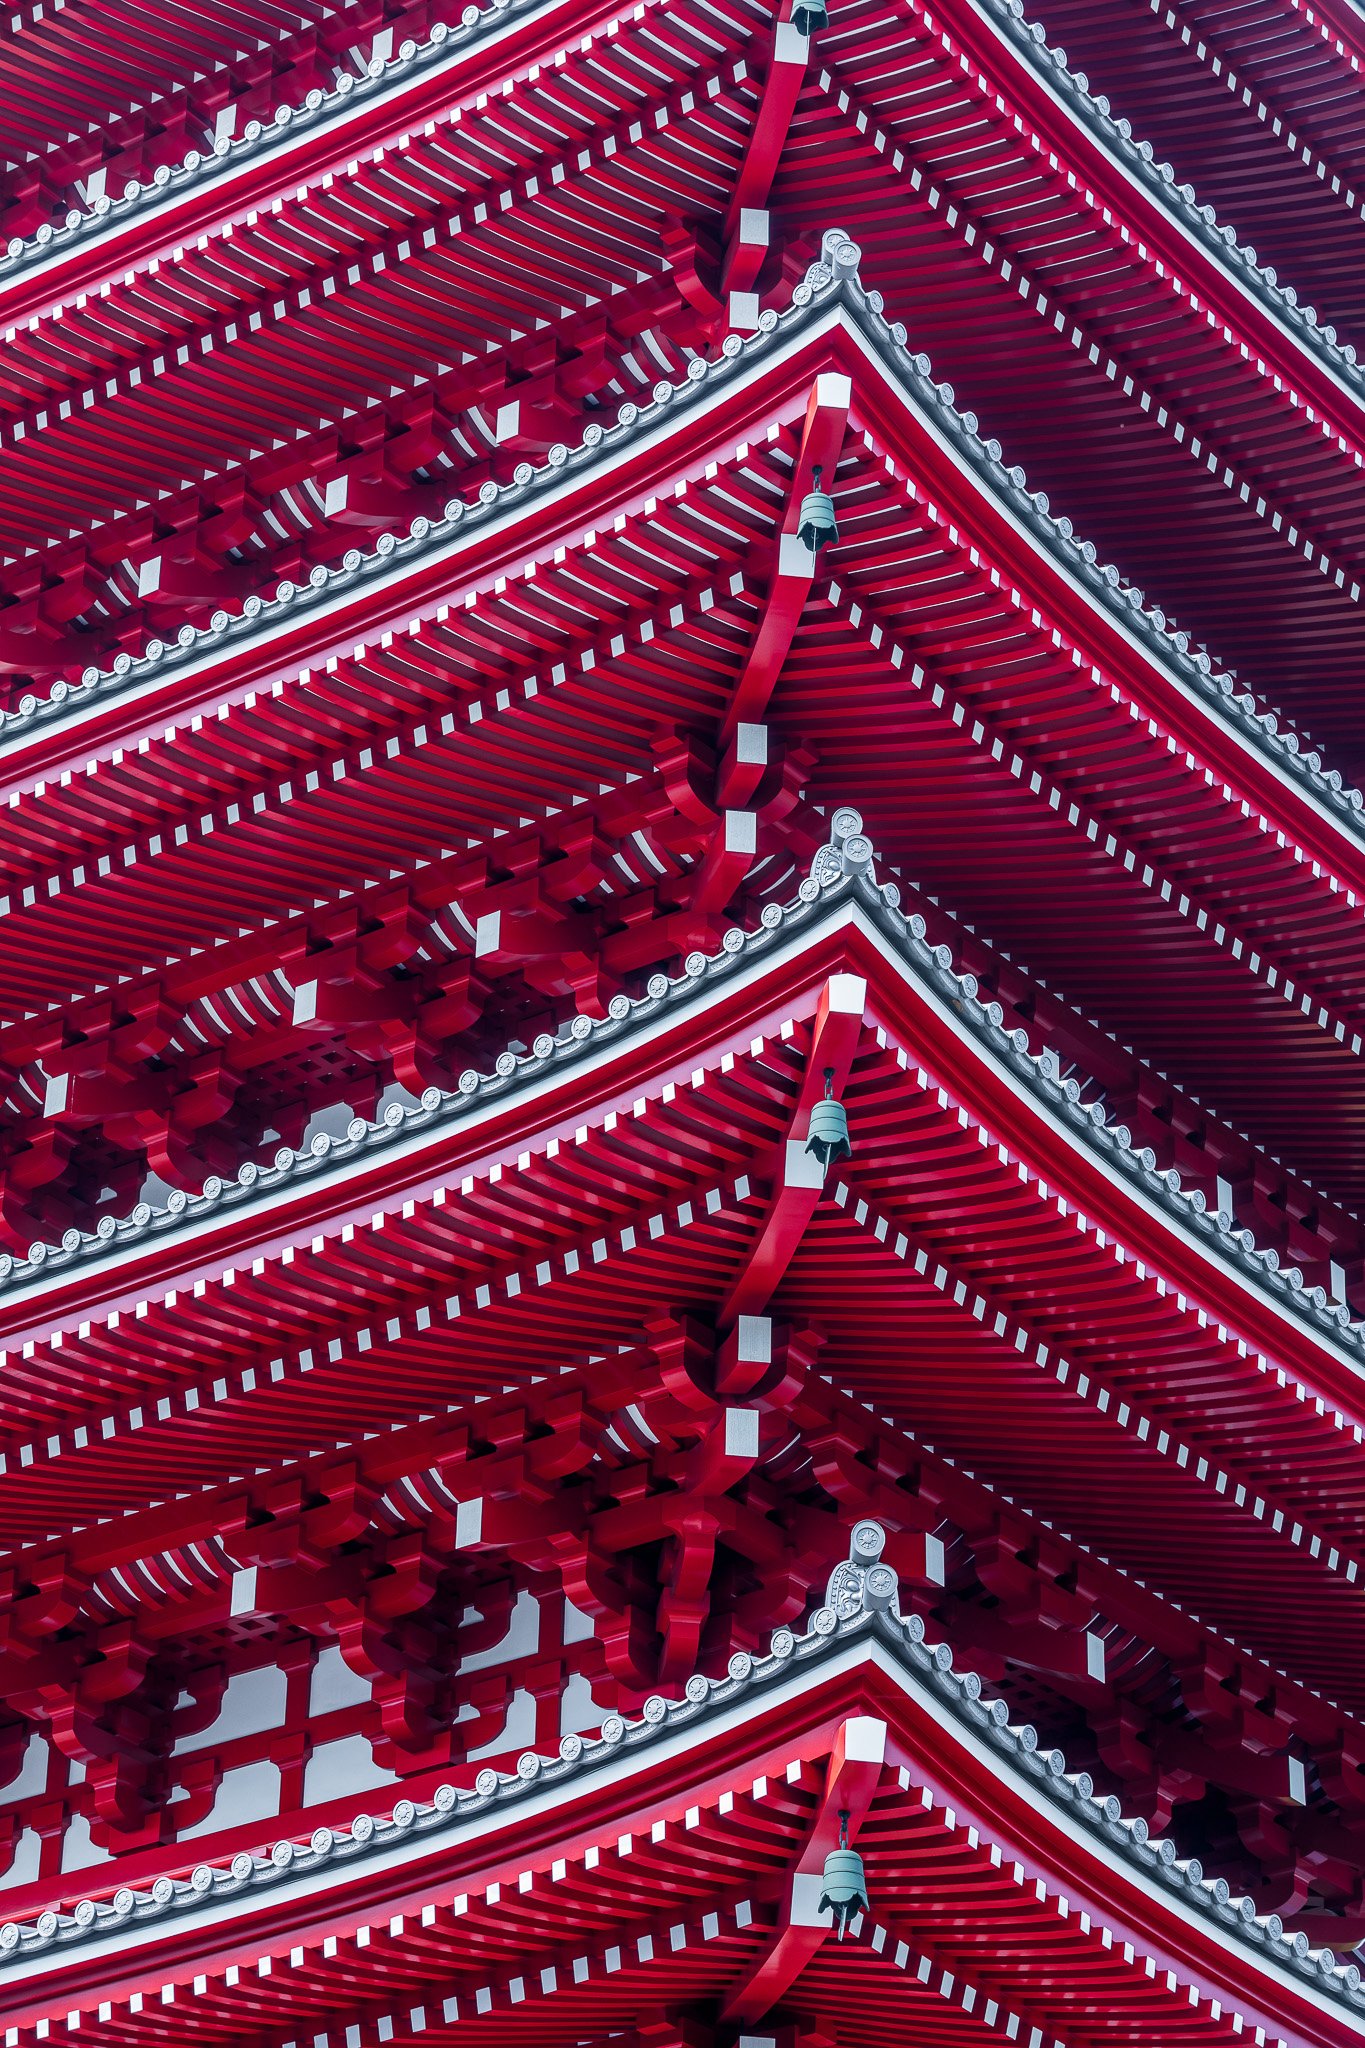
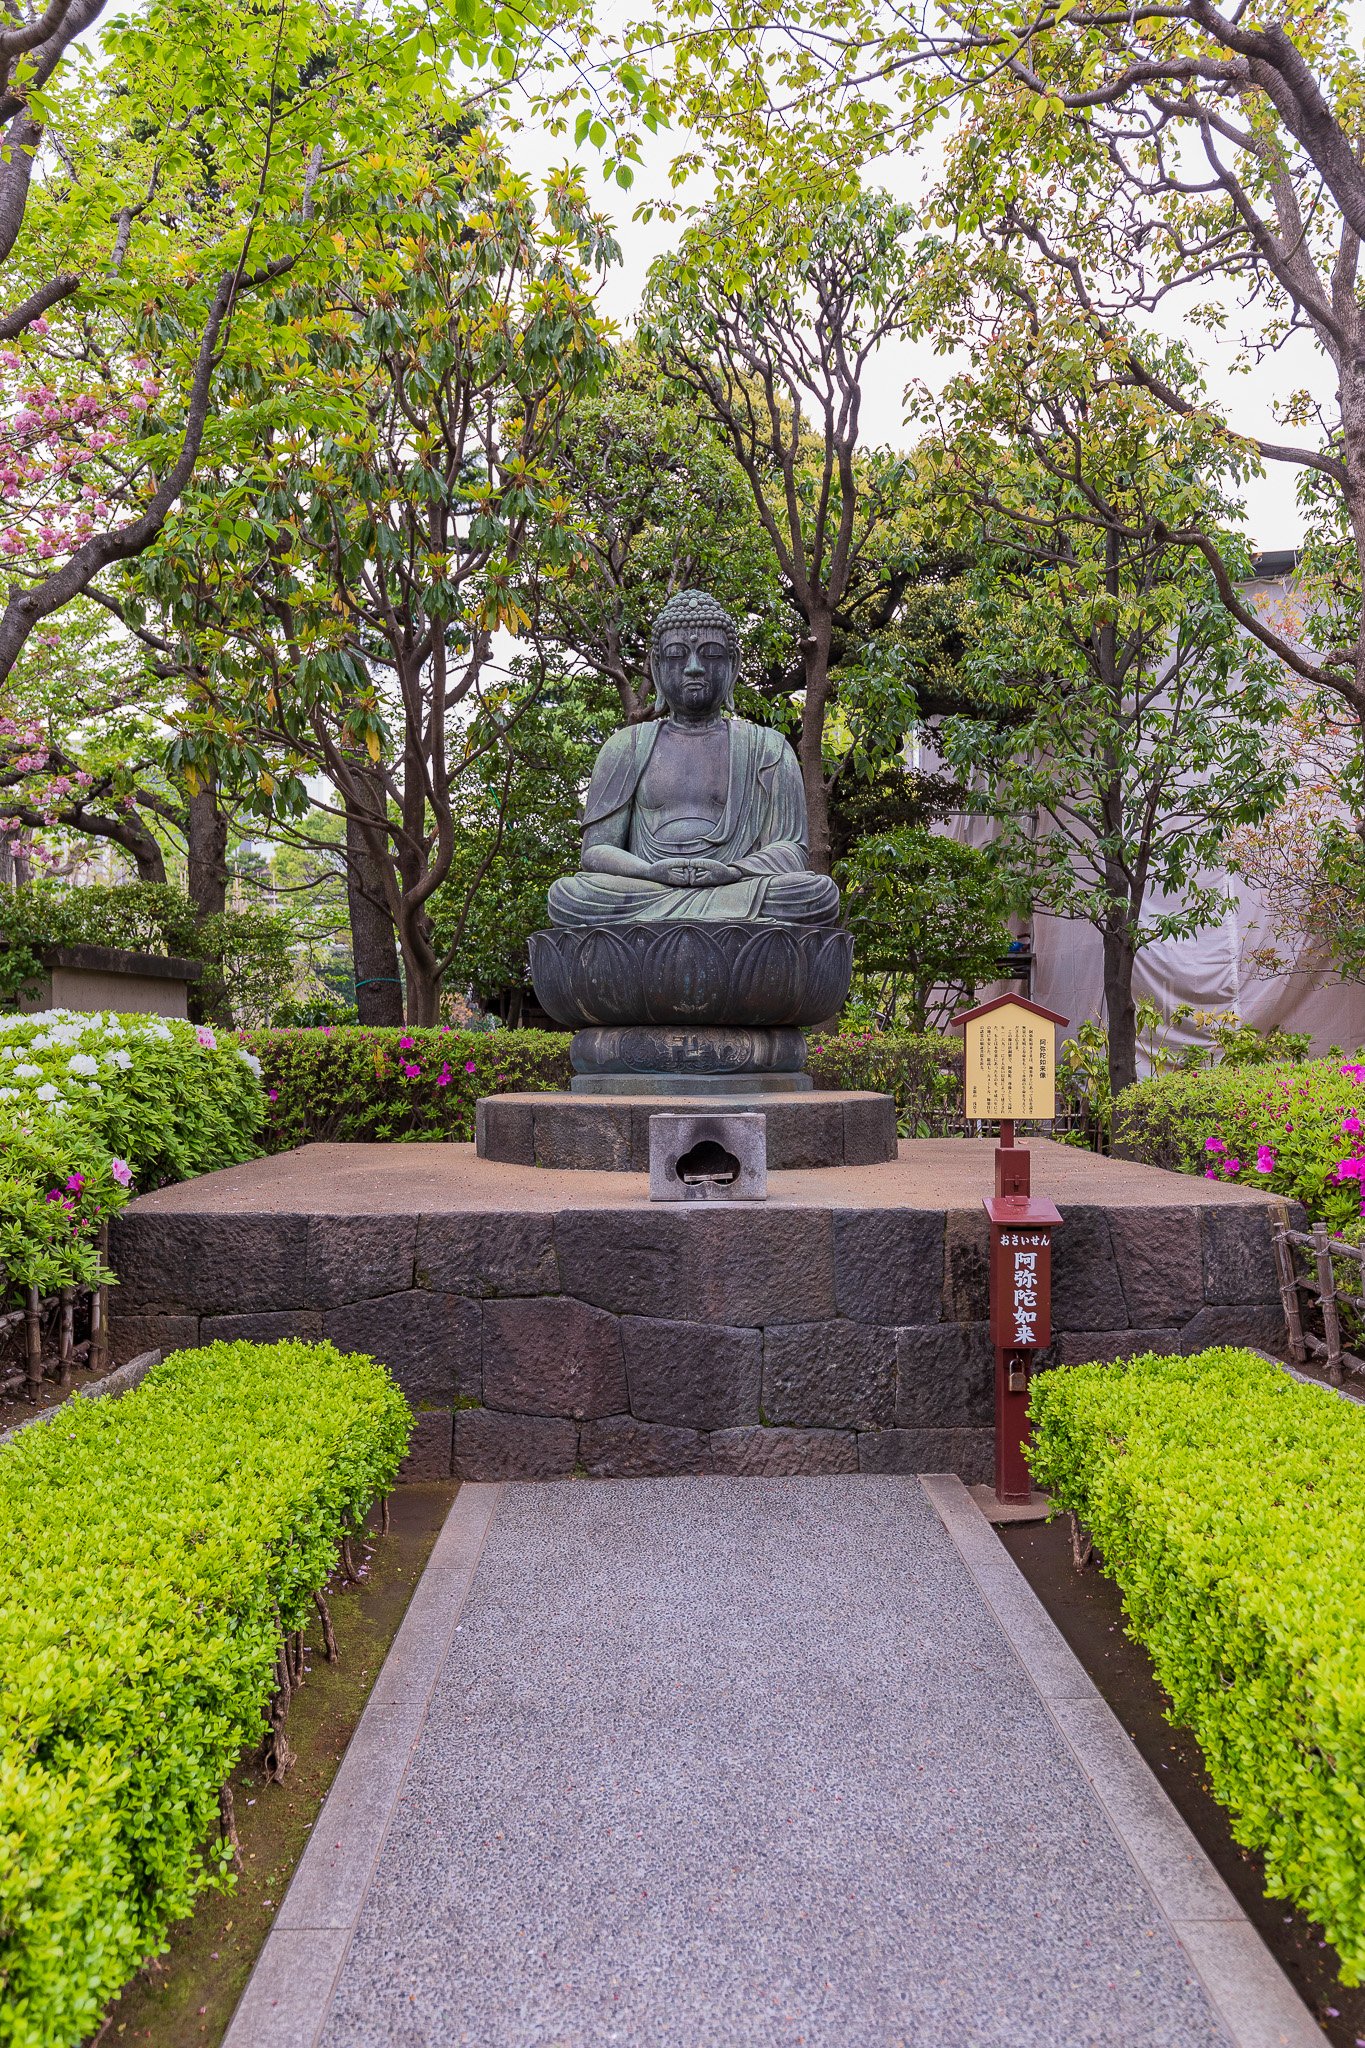
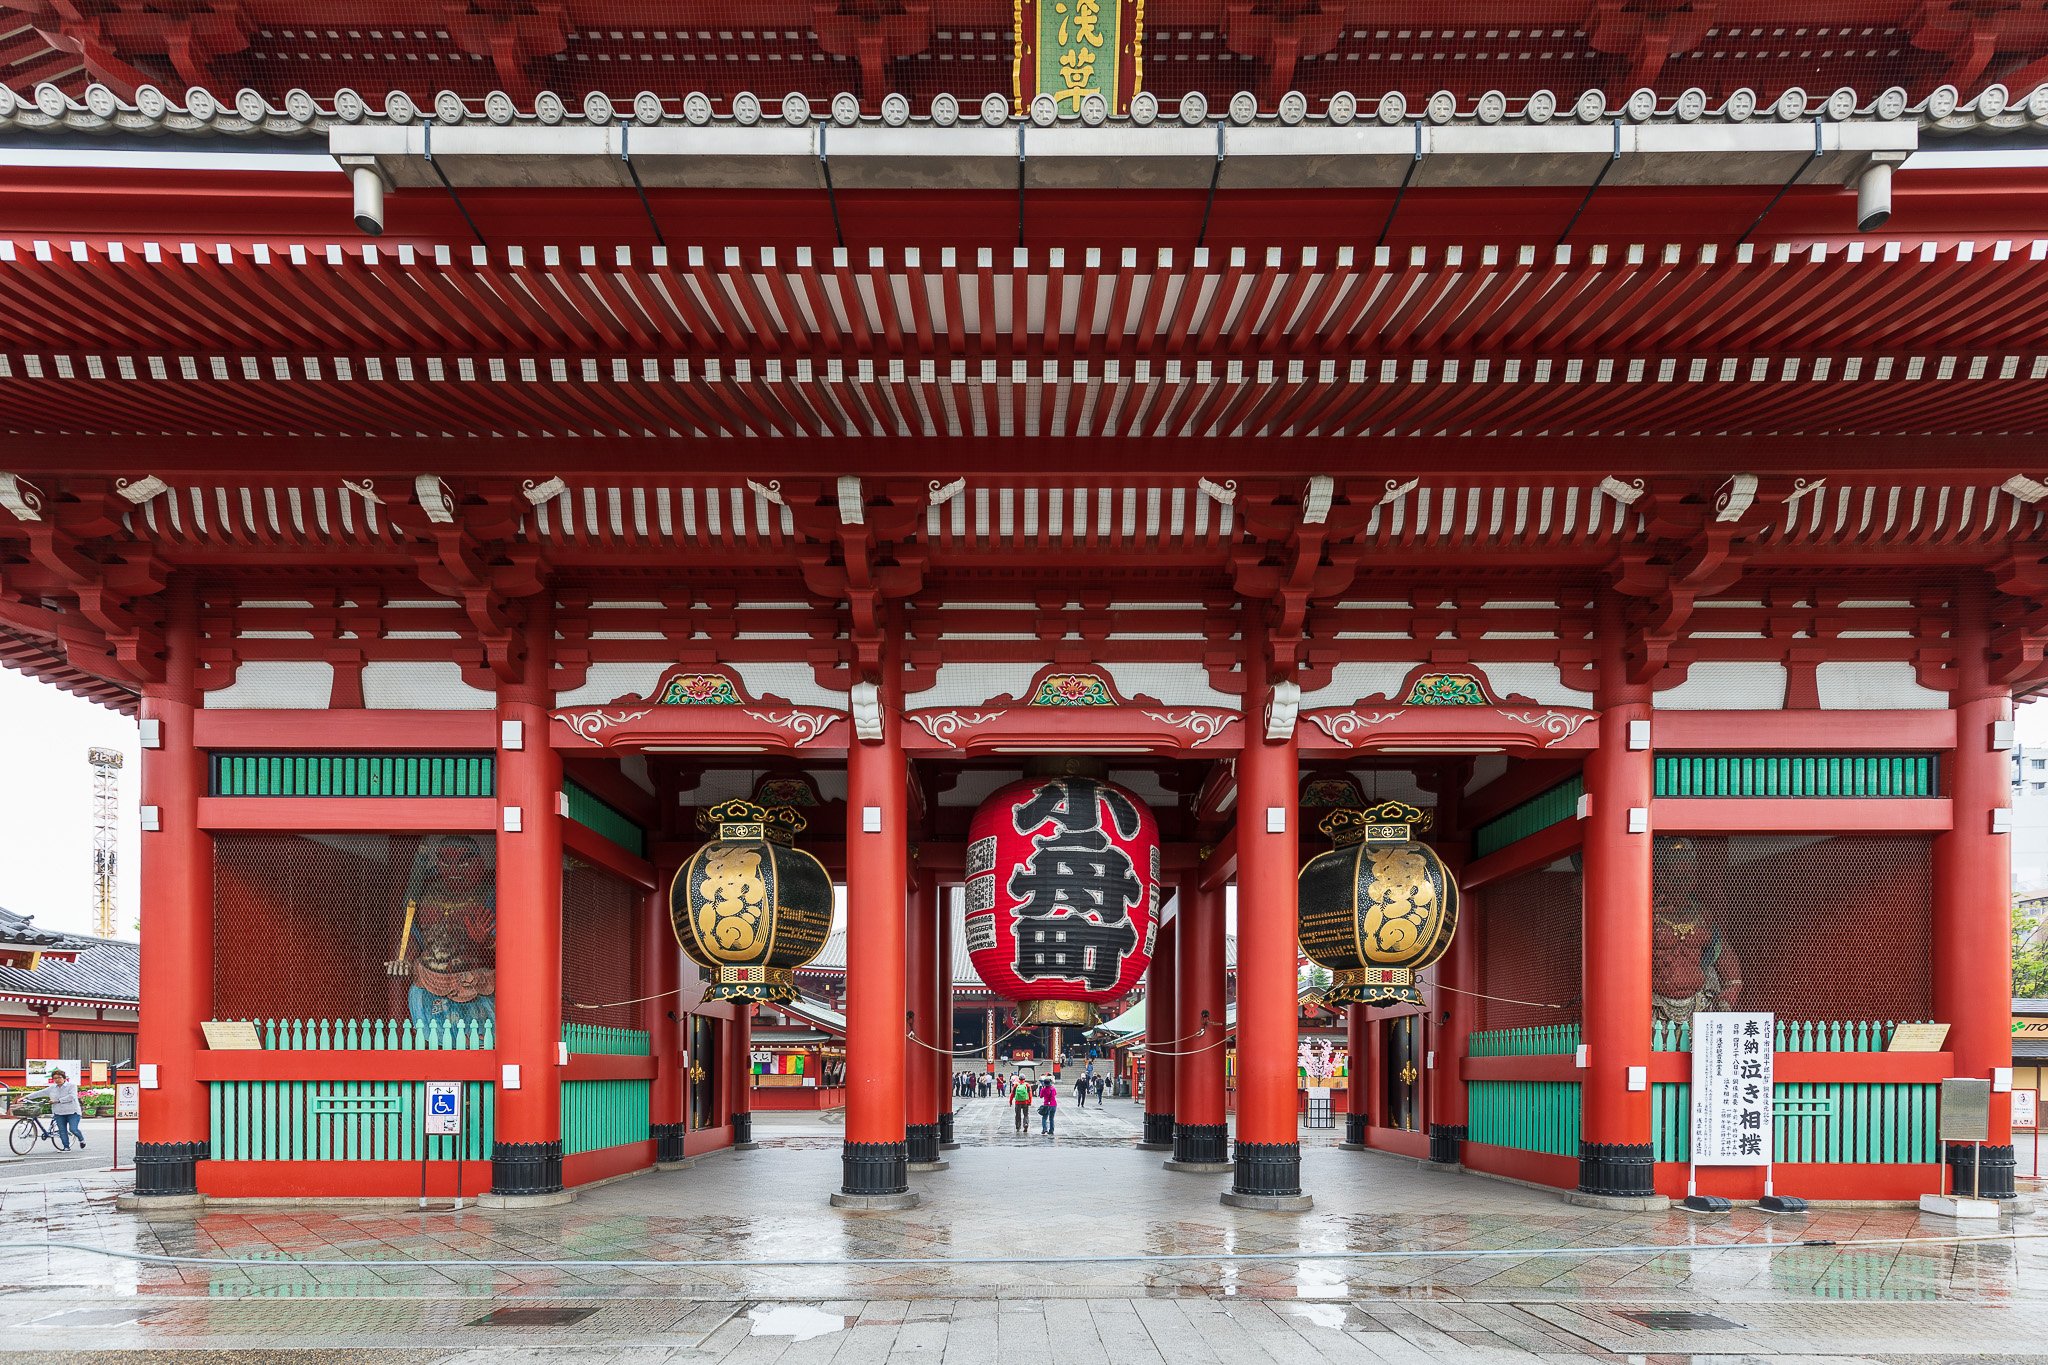
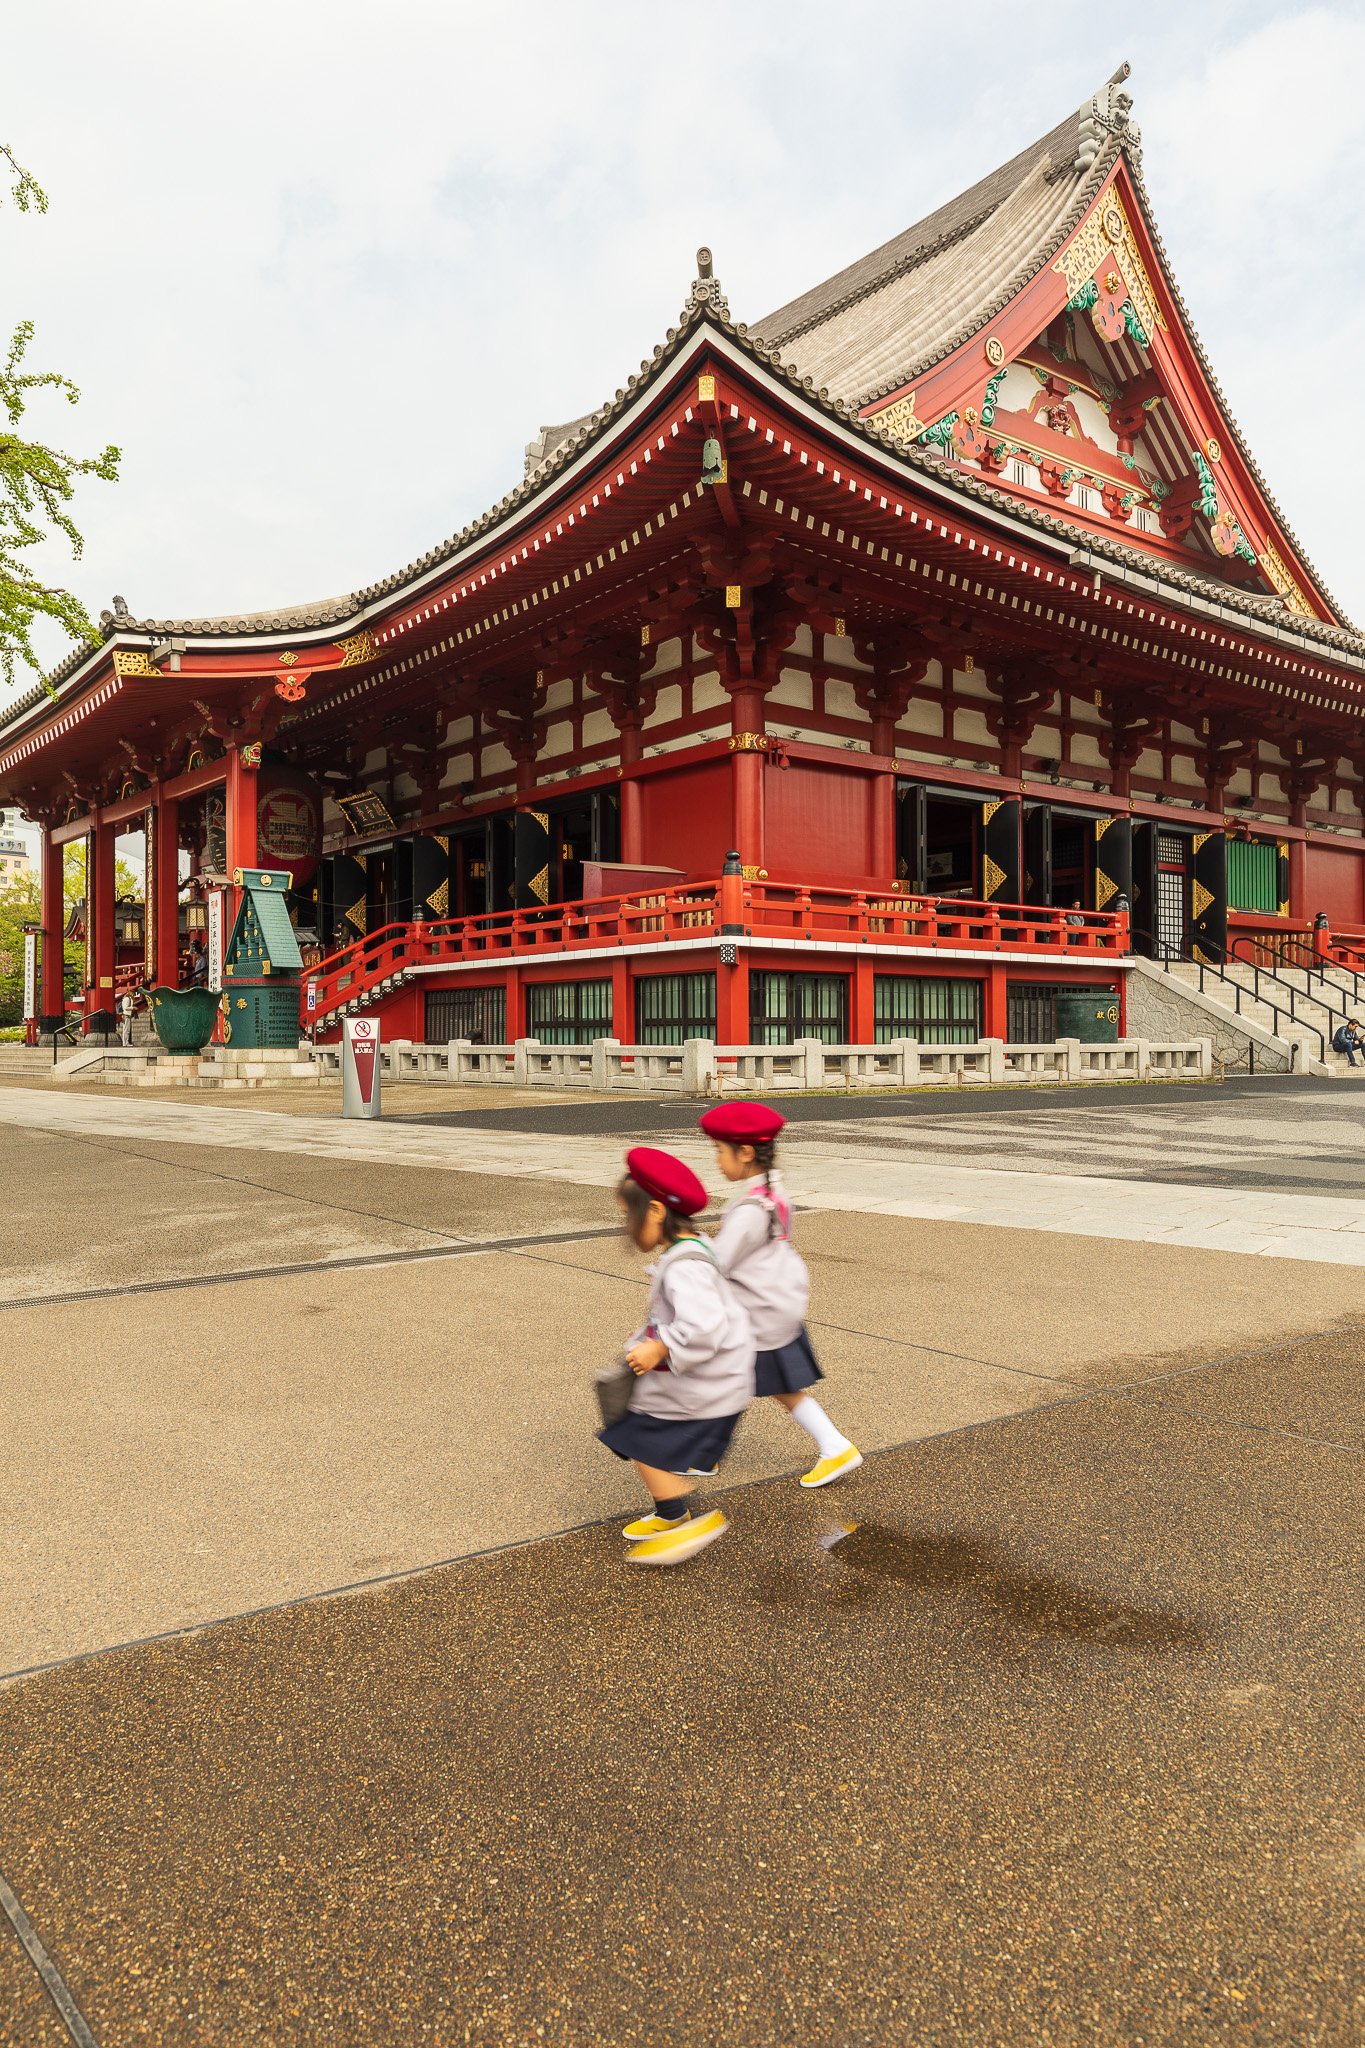
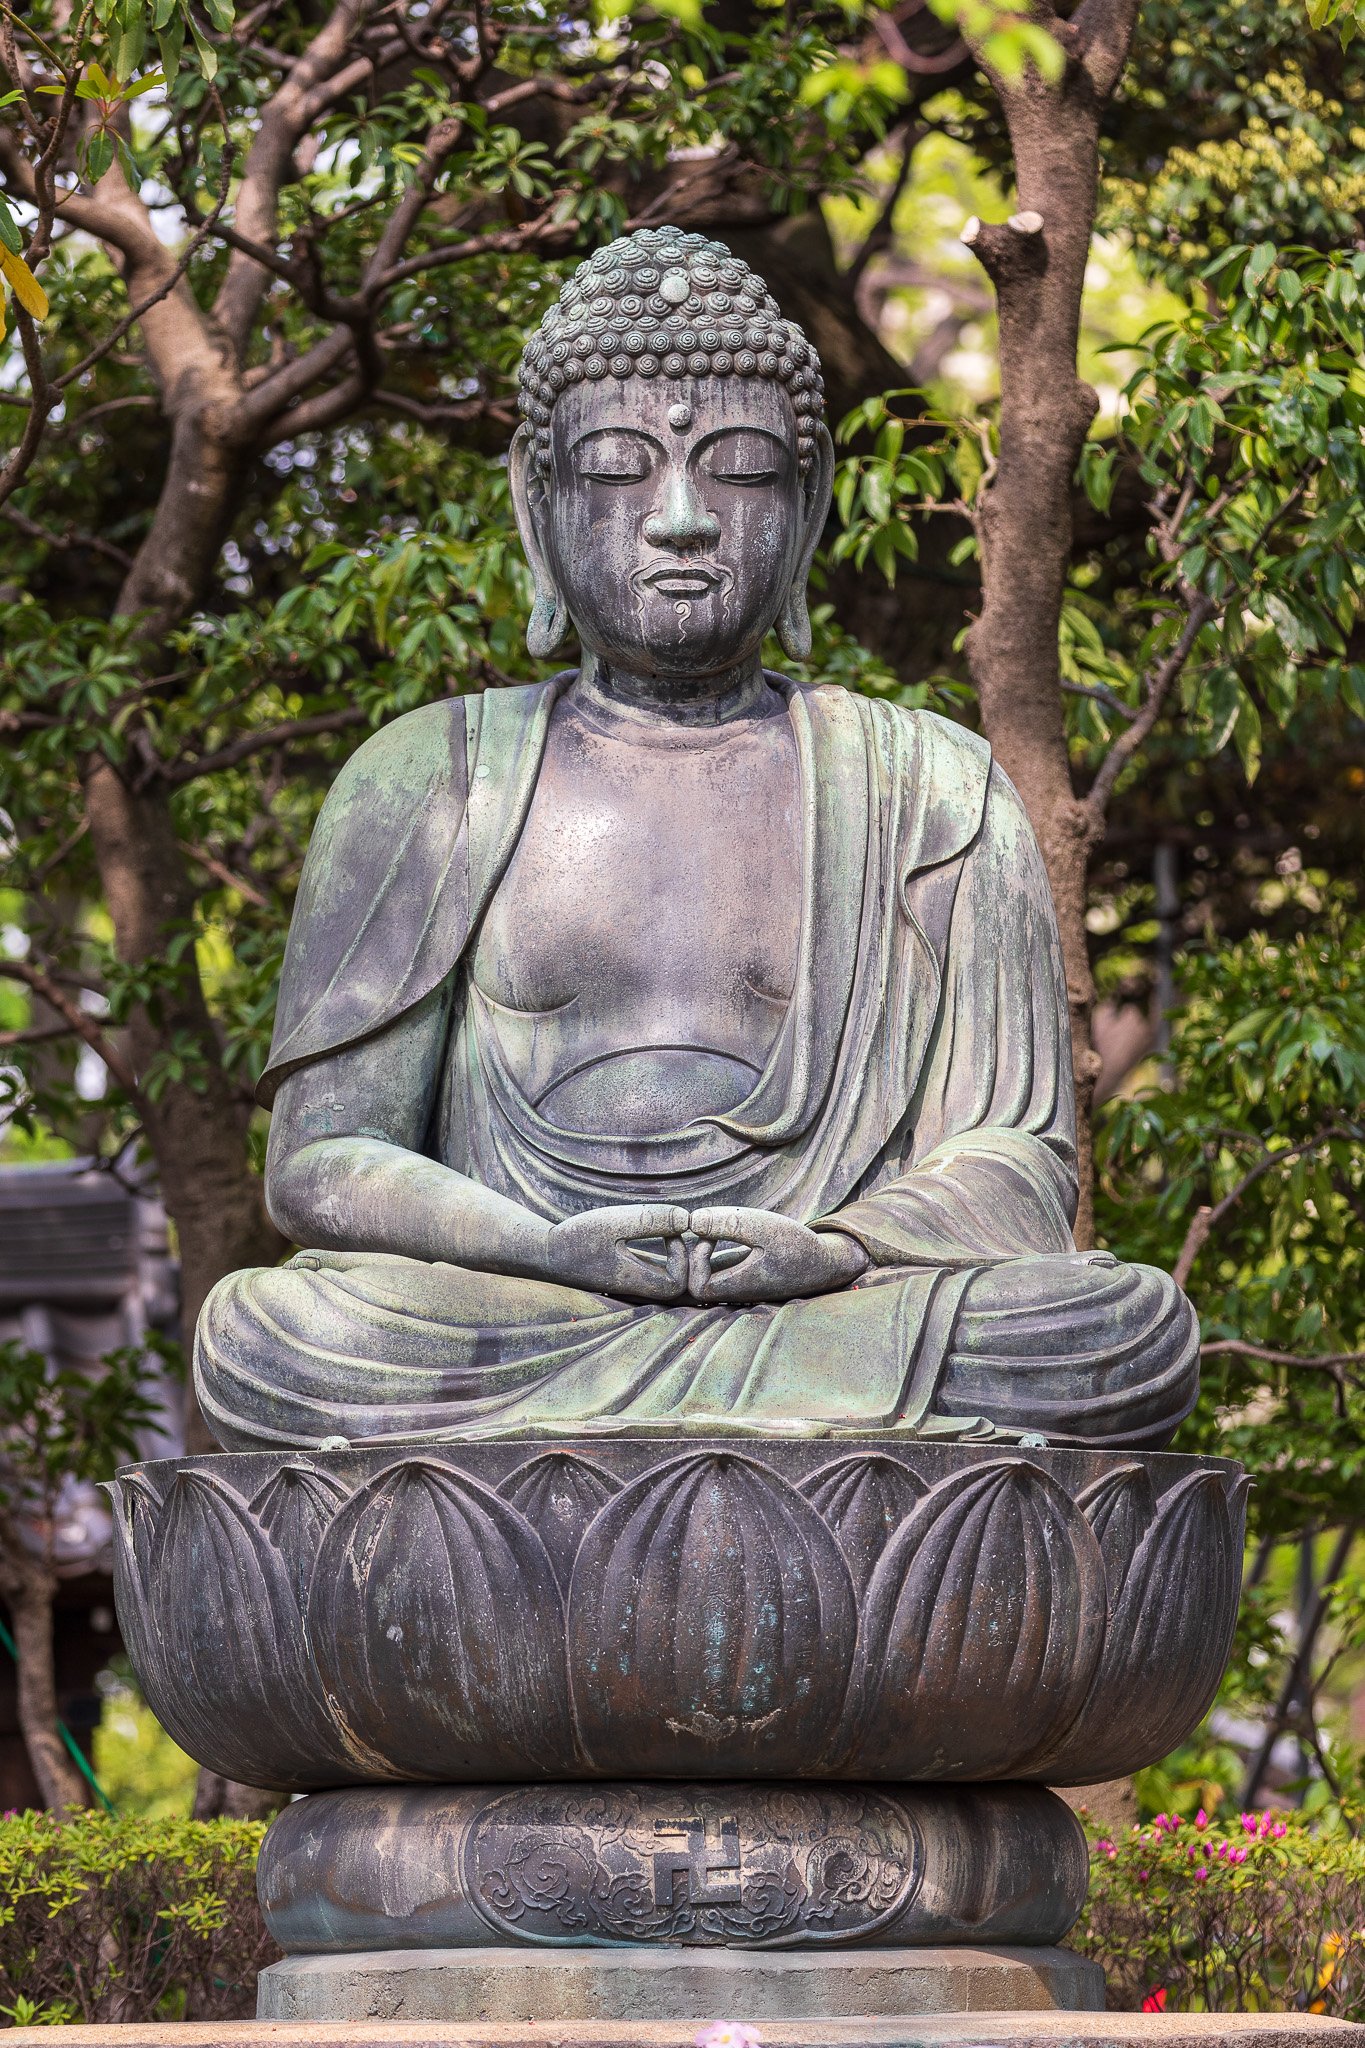

Photo Tip: Go early in the morning when there are no crowds. If you visit in the afternoon, you will find tourists walking throughout the area dressed in traditional Japanese dresses. It makes for a nice photo in the alleyways.
Tokyo Skytree:
One of the newest landmarks in Tokyo, Tokyo Skytree, is one of the top attractions in the city. The tower looks out over the city, providing panoramic views at 634 meters.

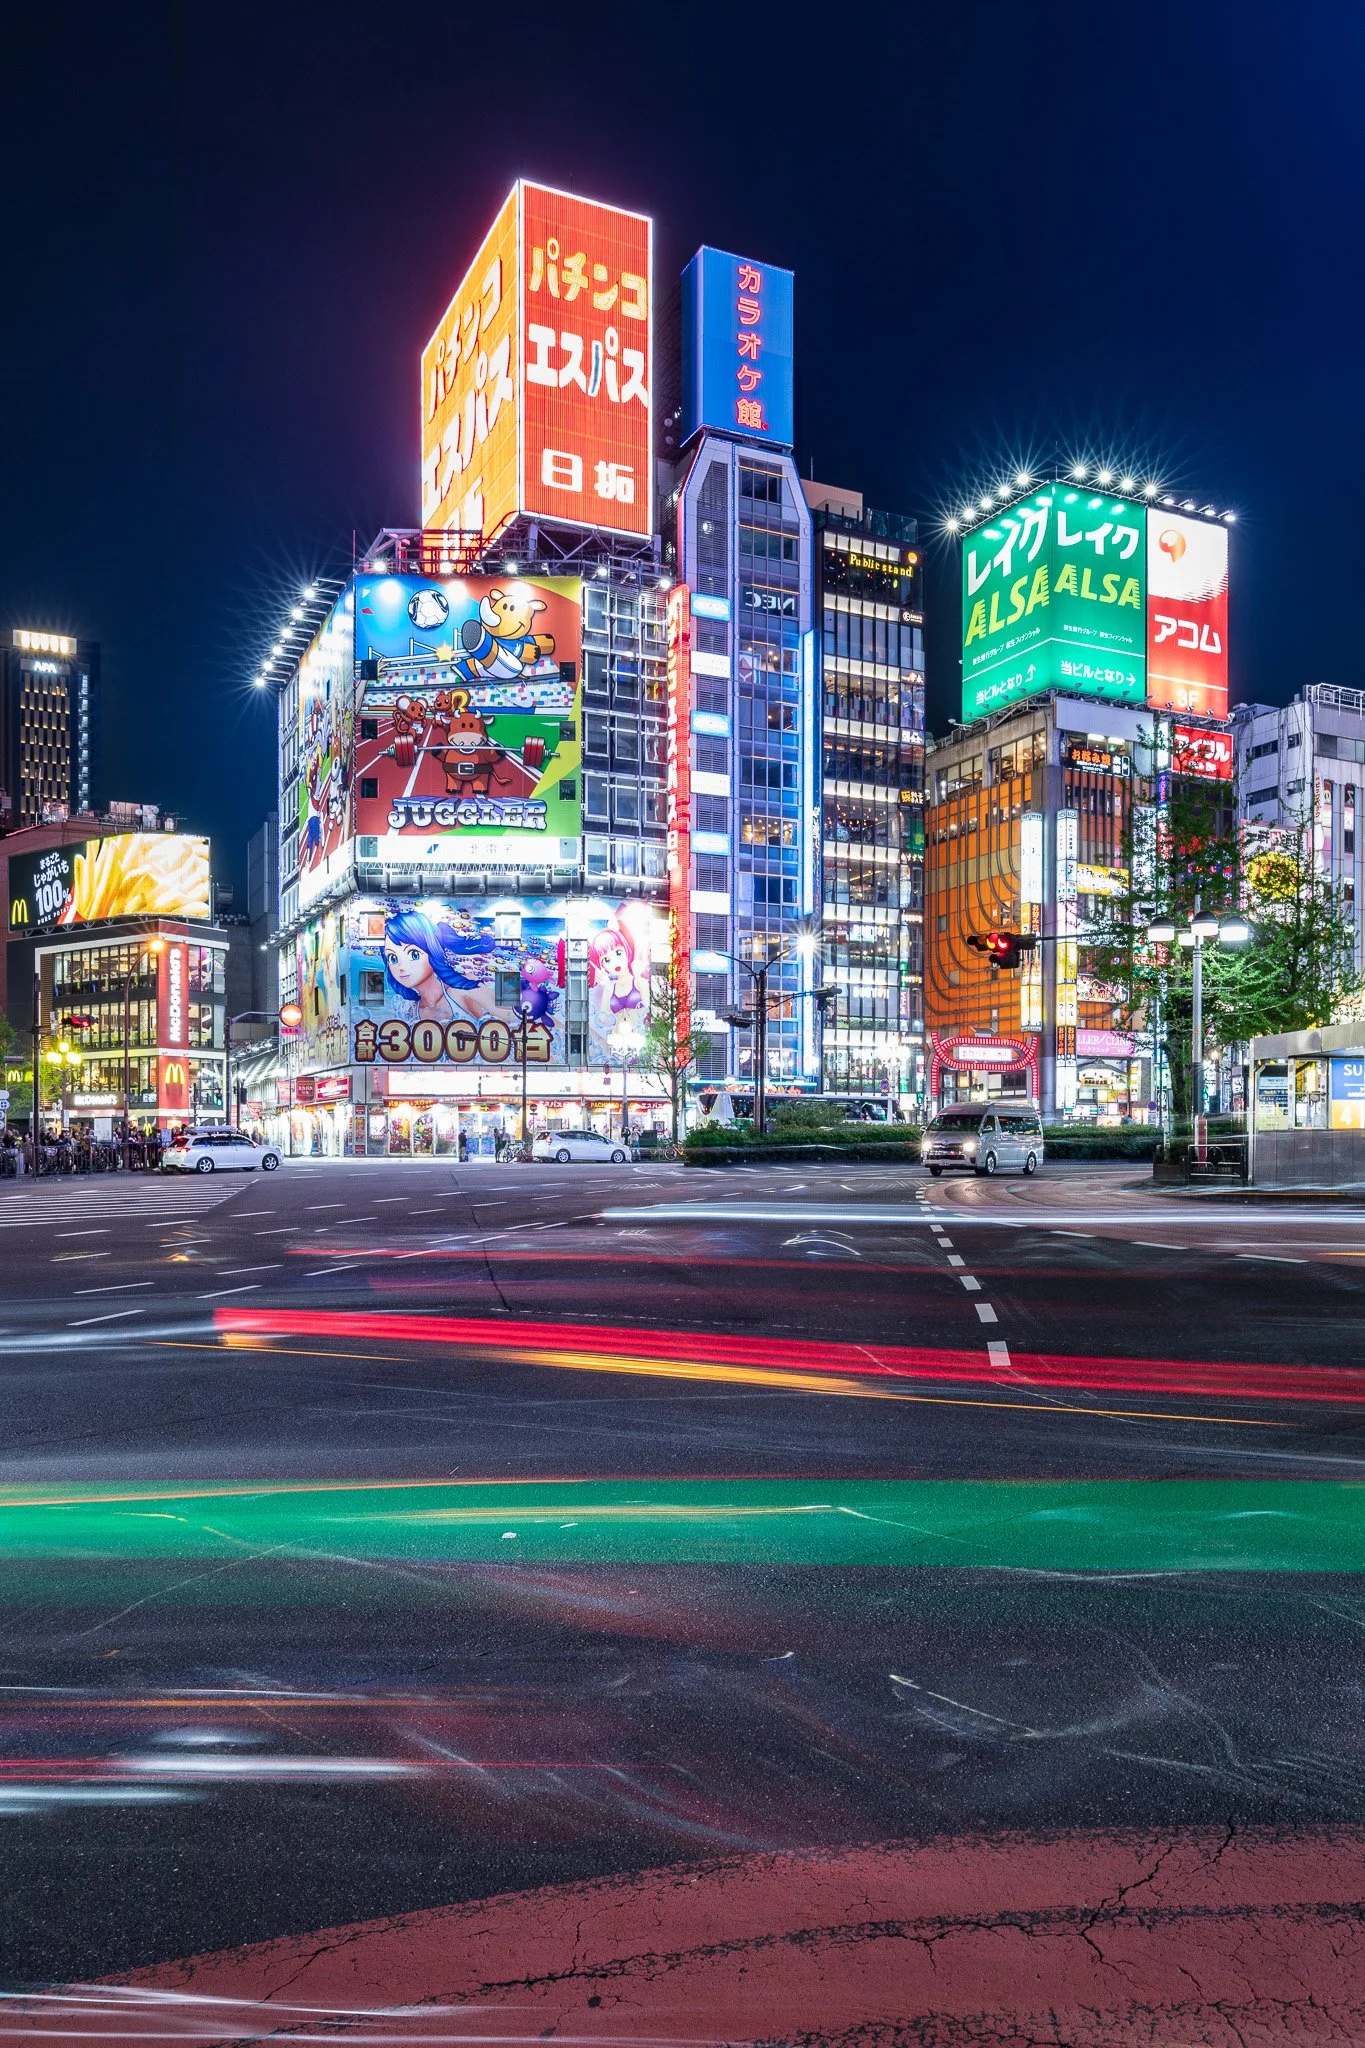
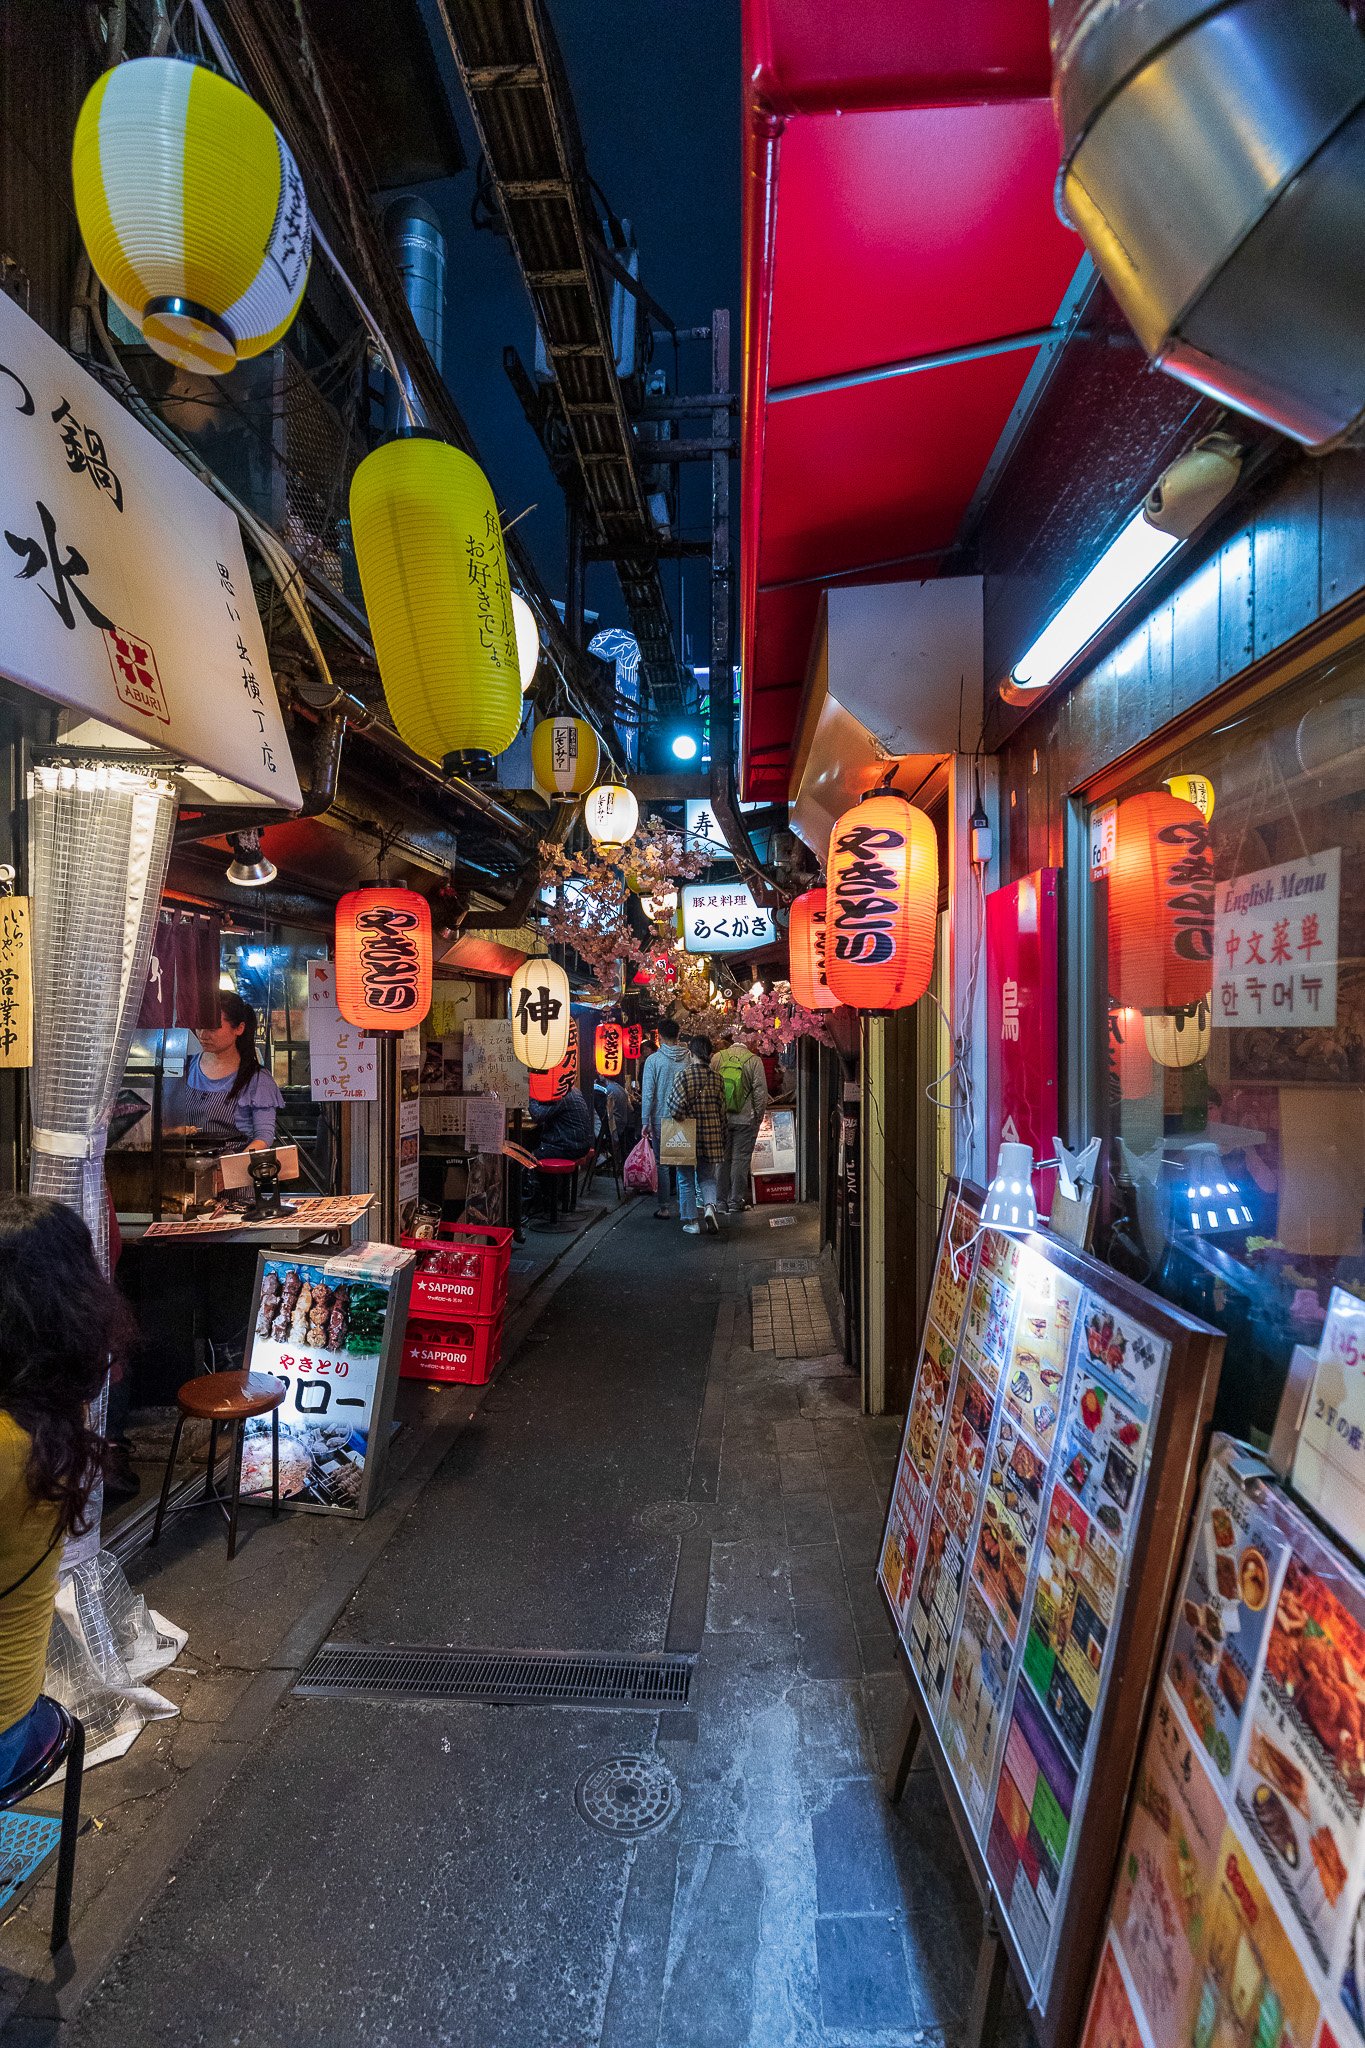
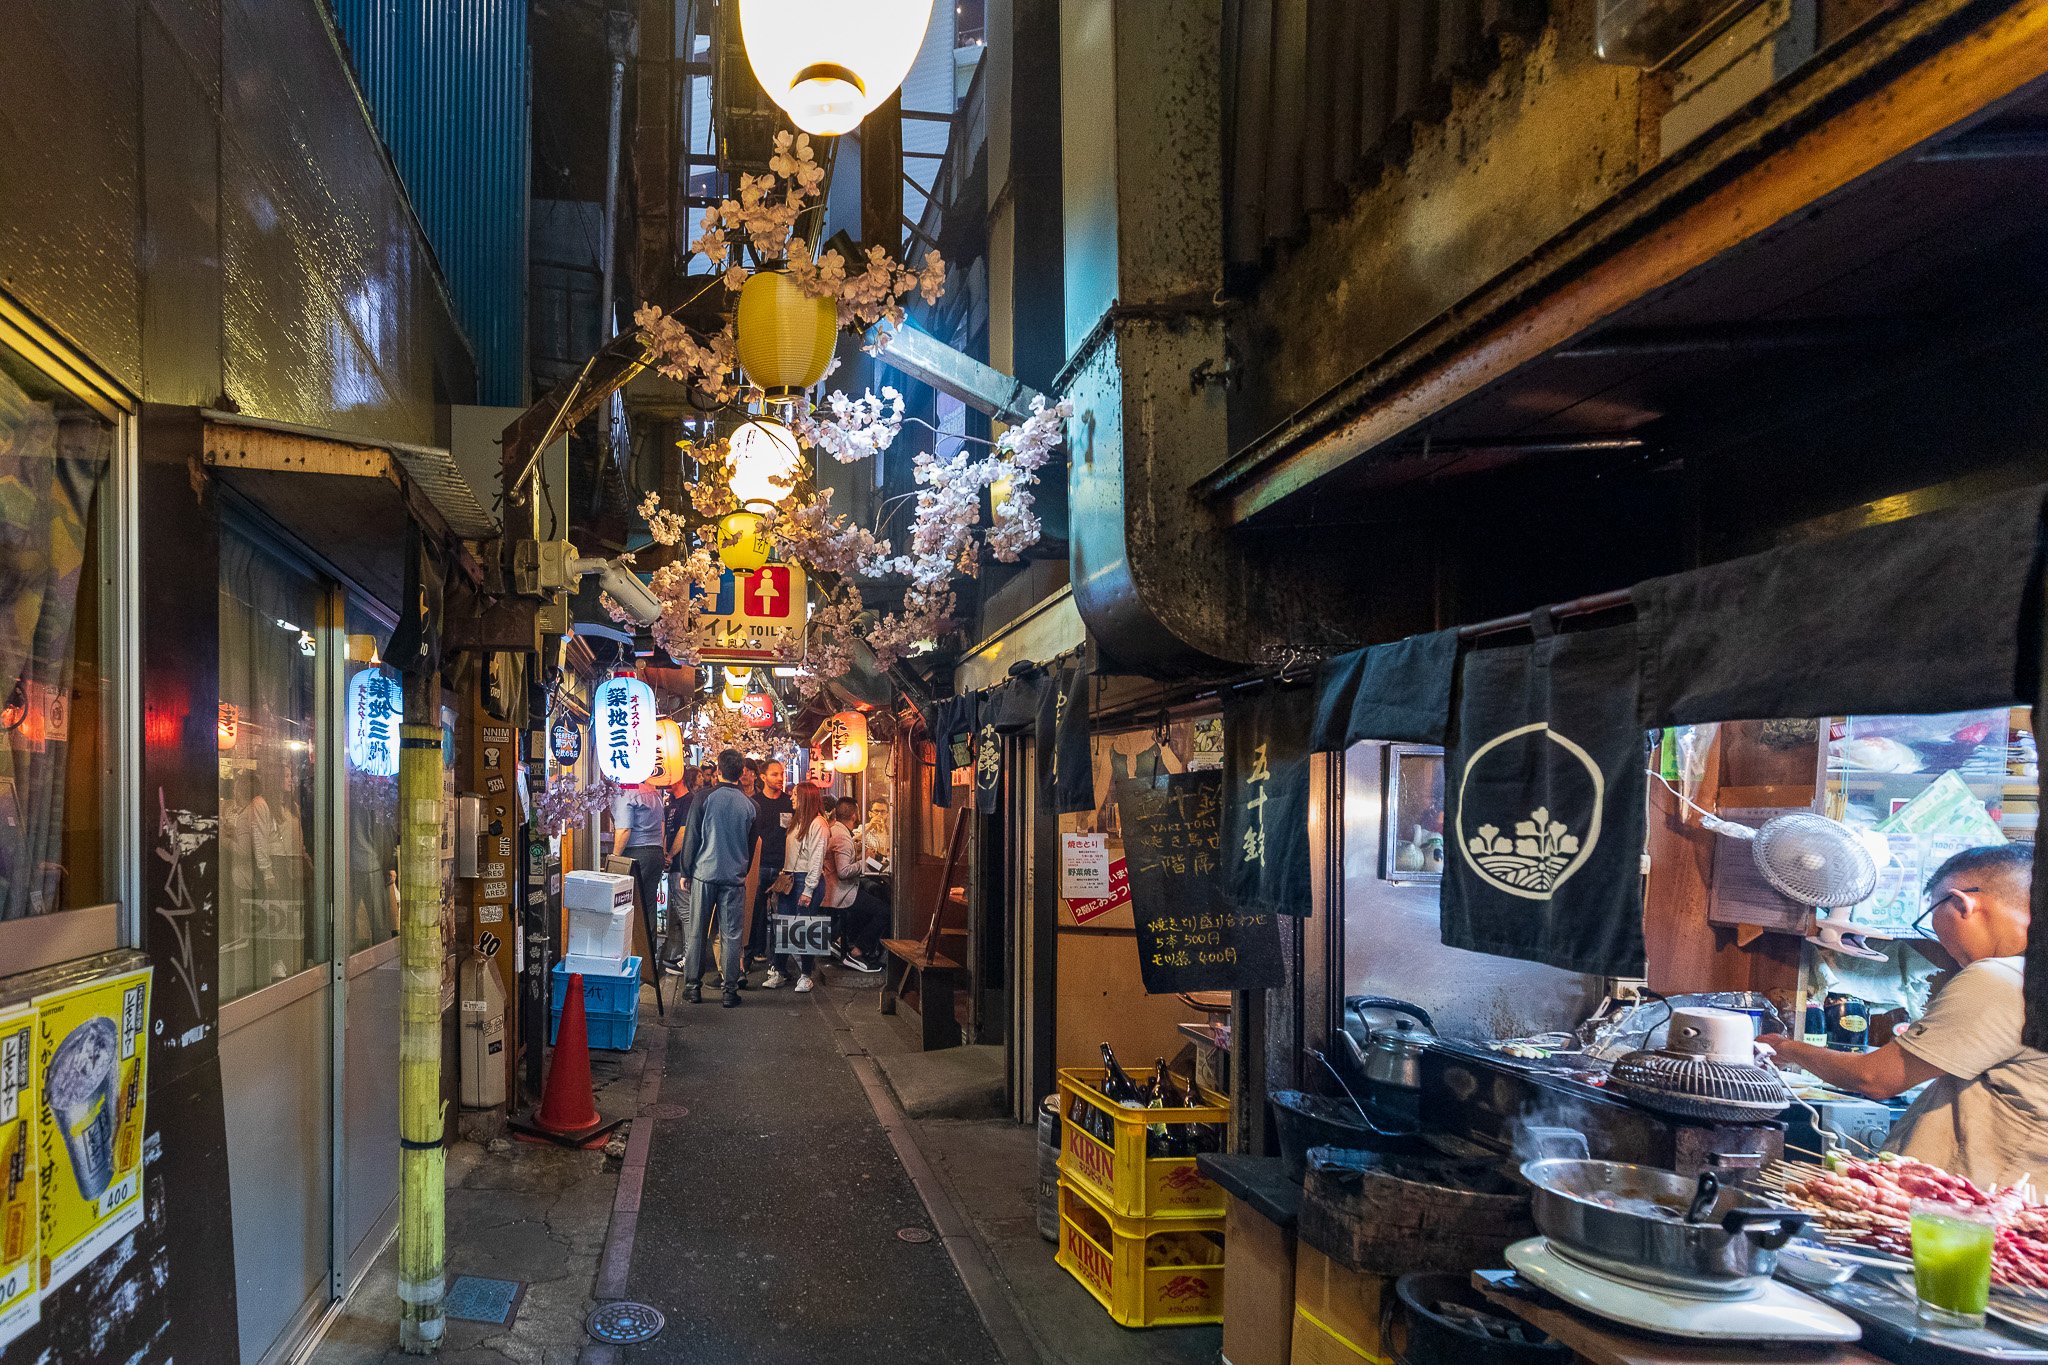
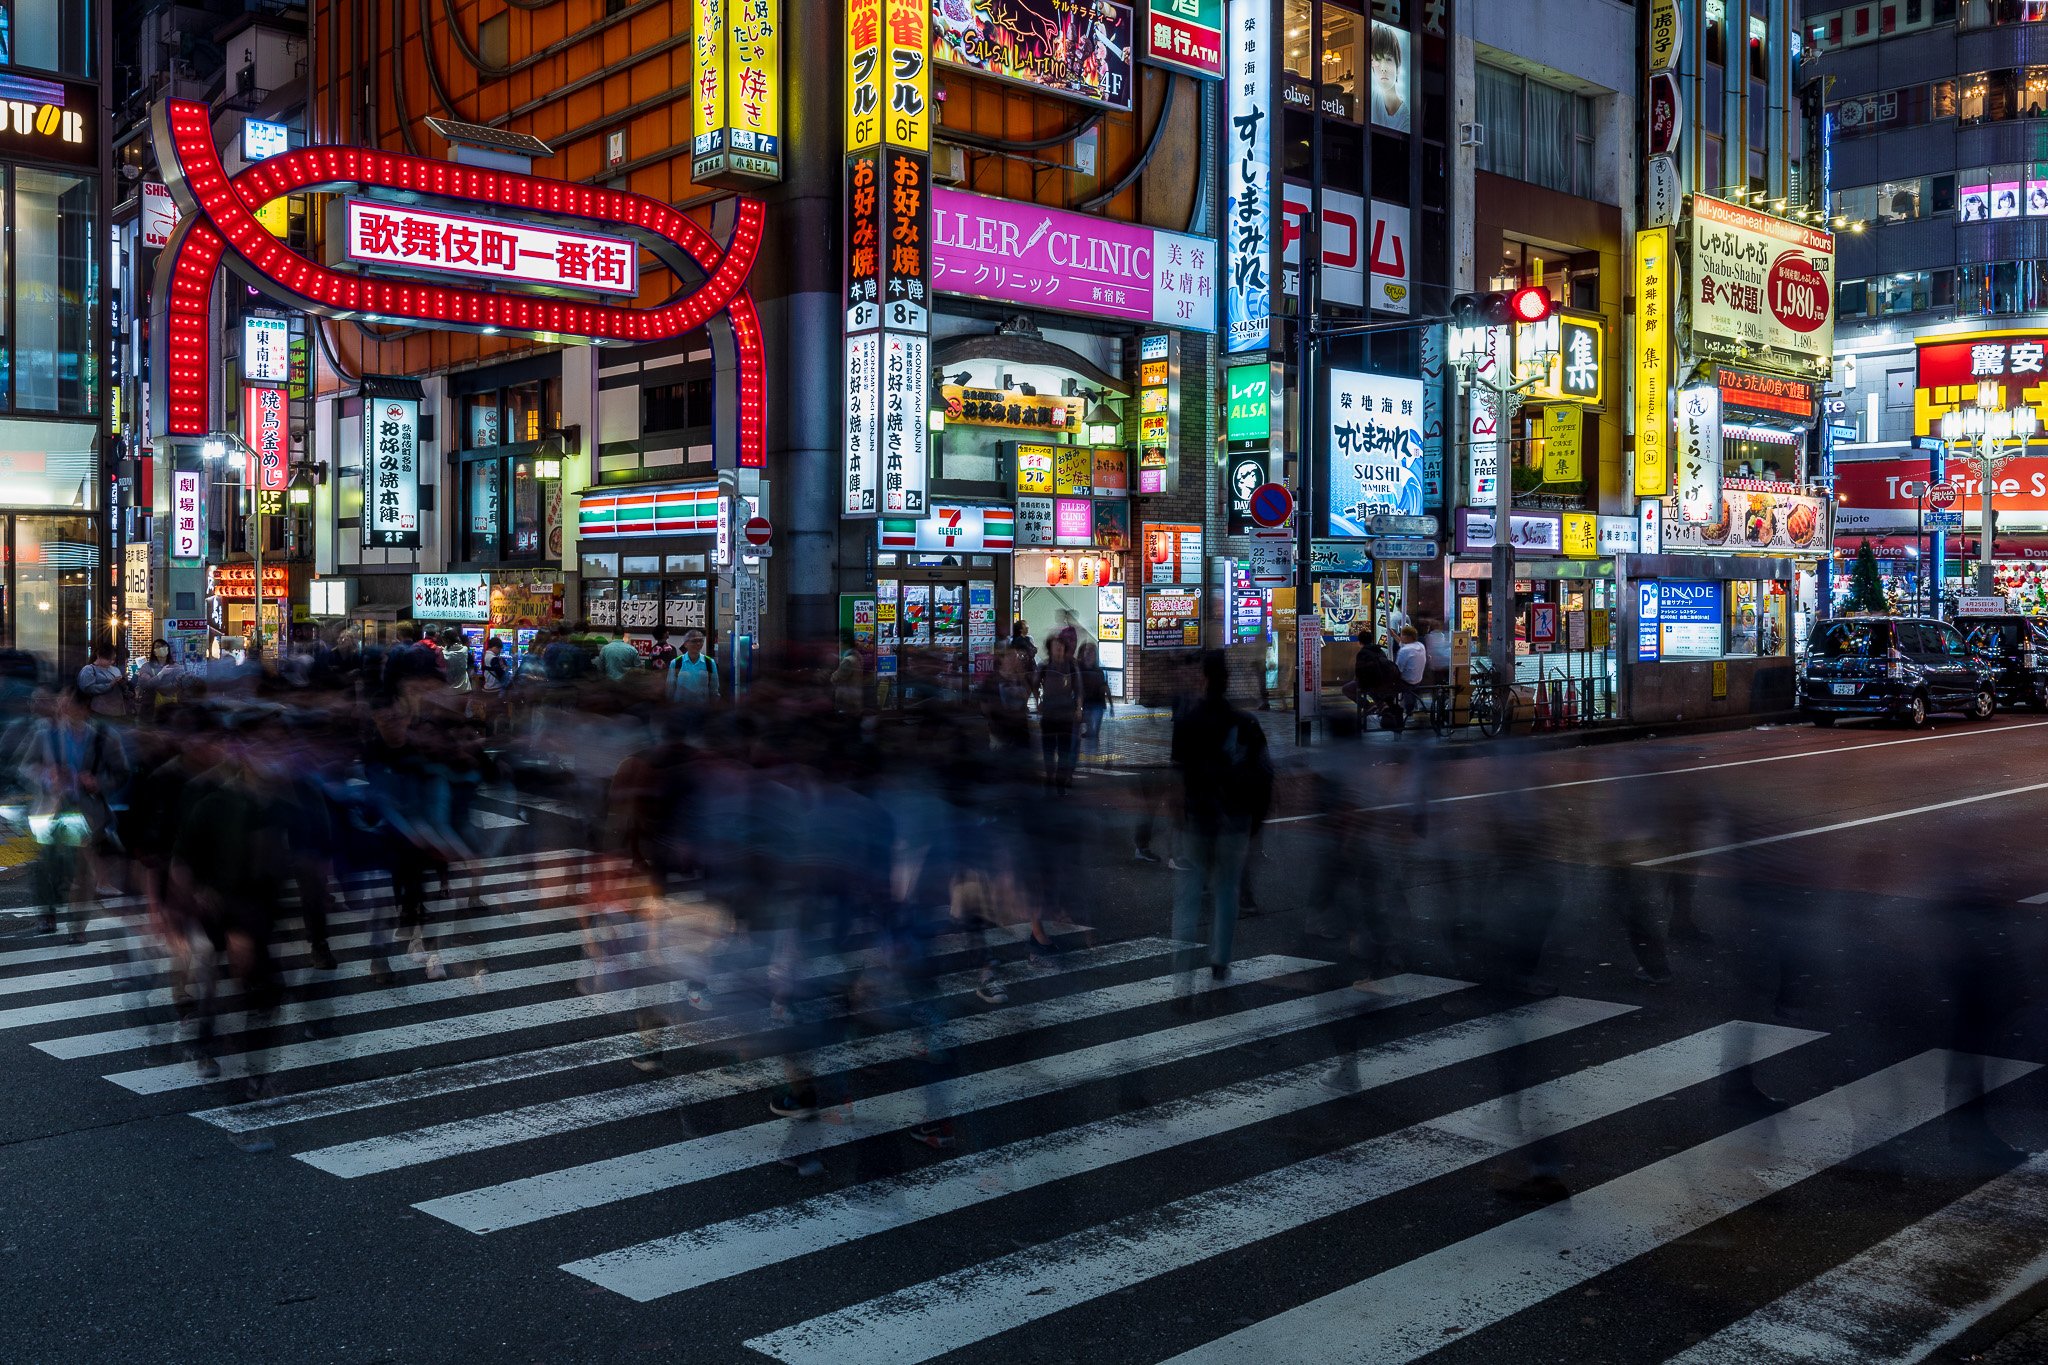
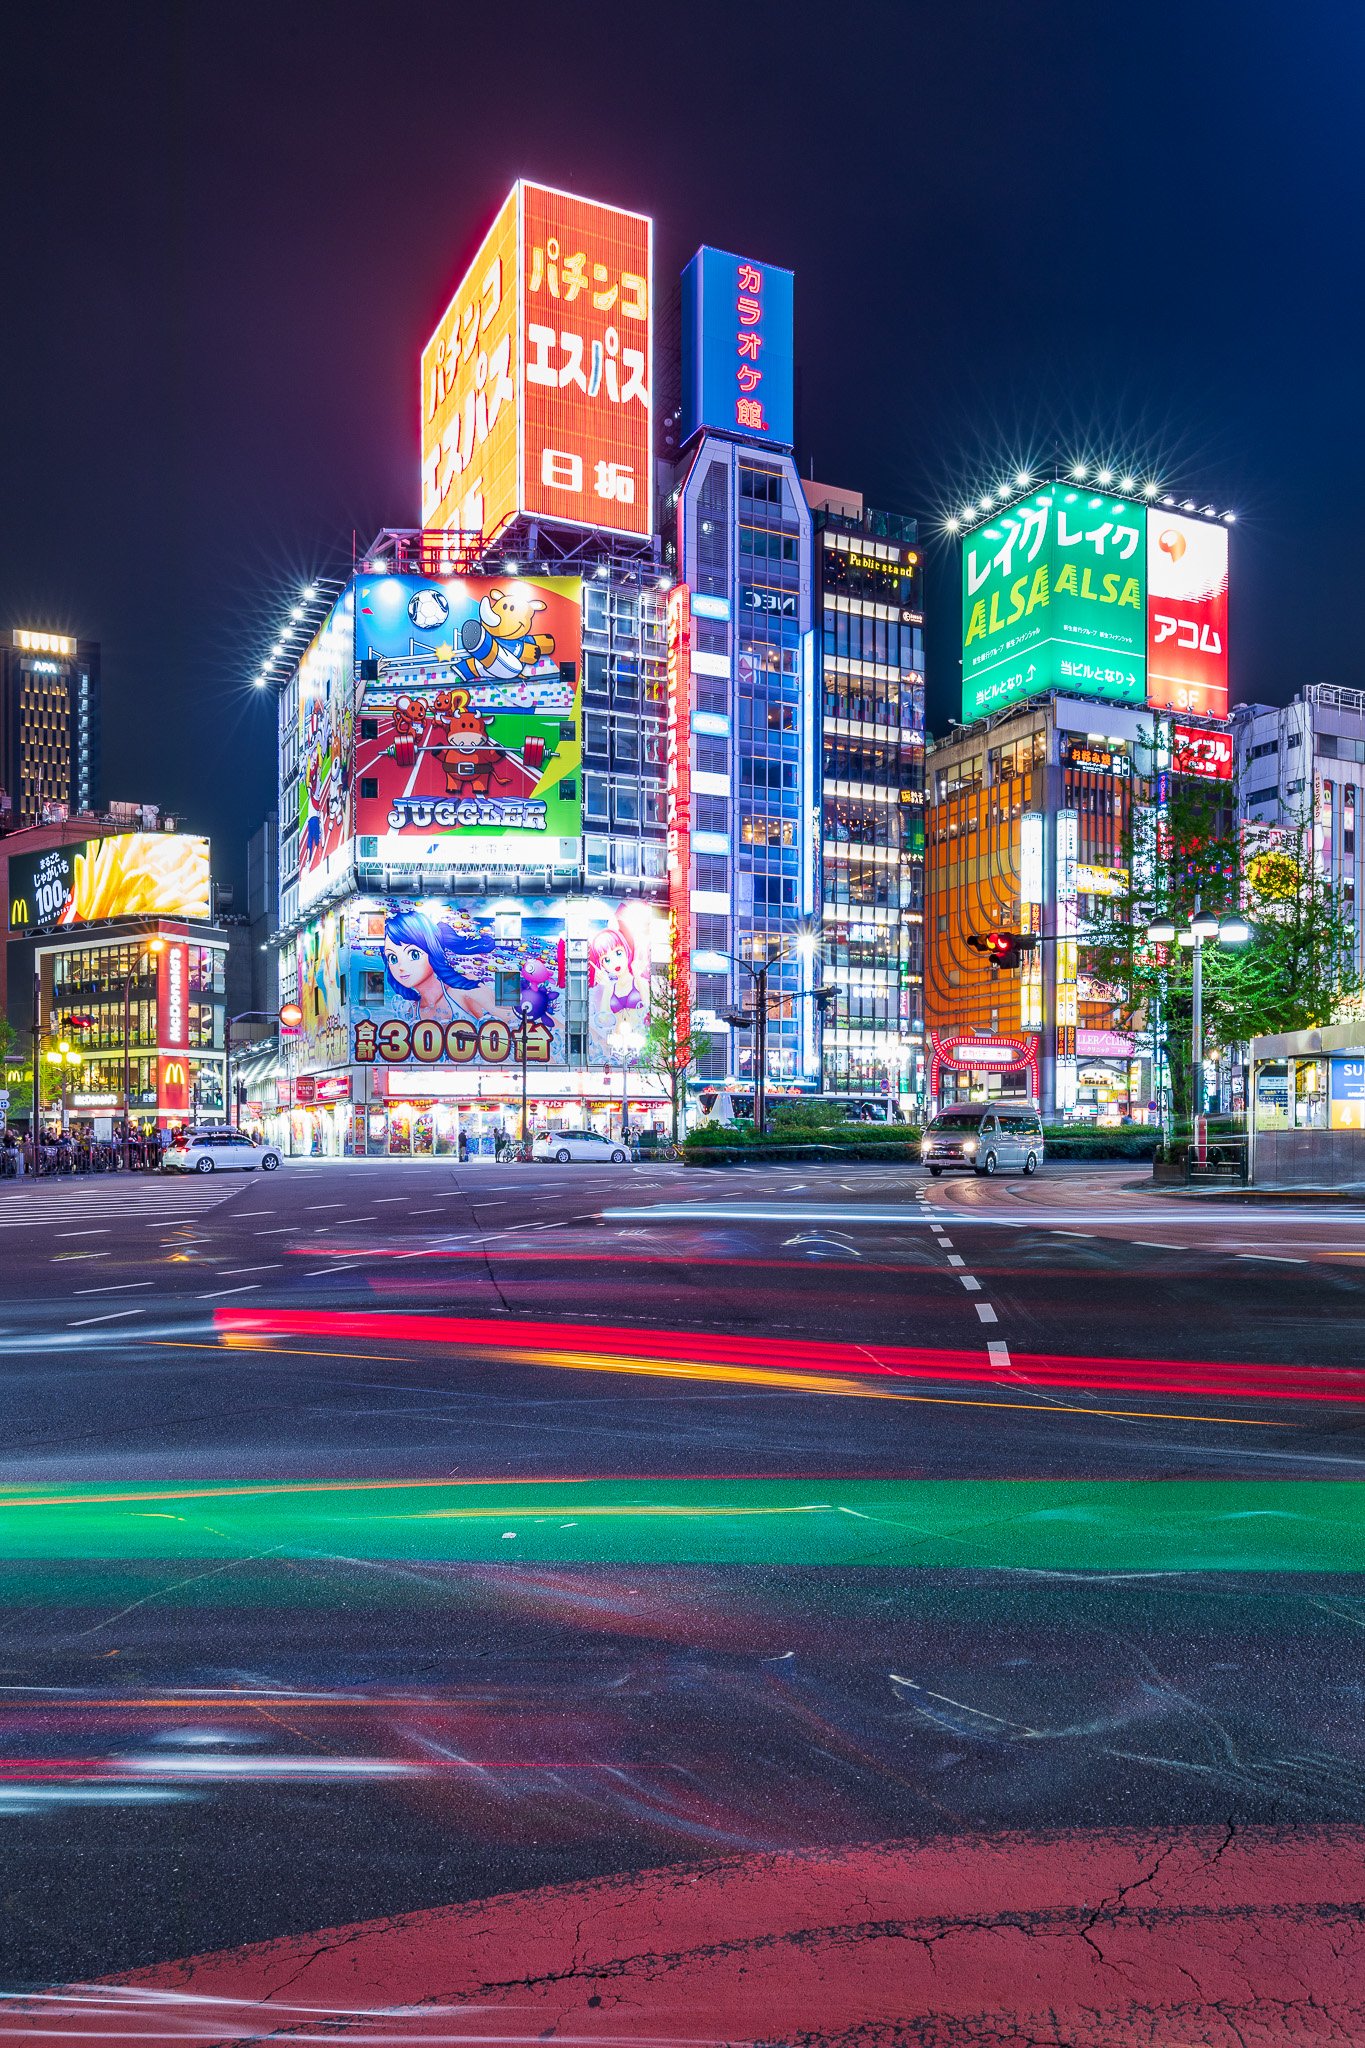
Shinjuku at Night: Kabukicho and Omoide Yokocho
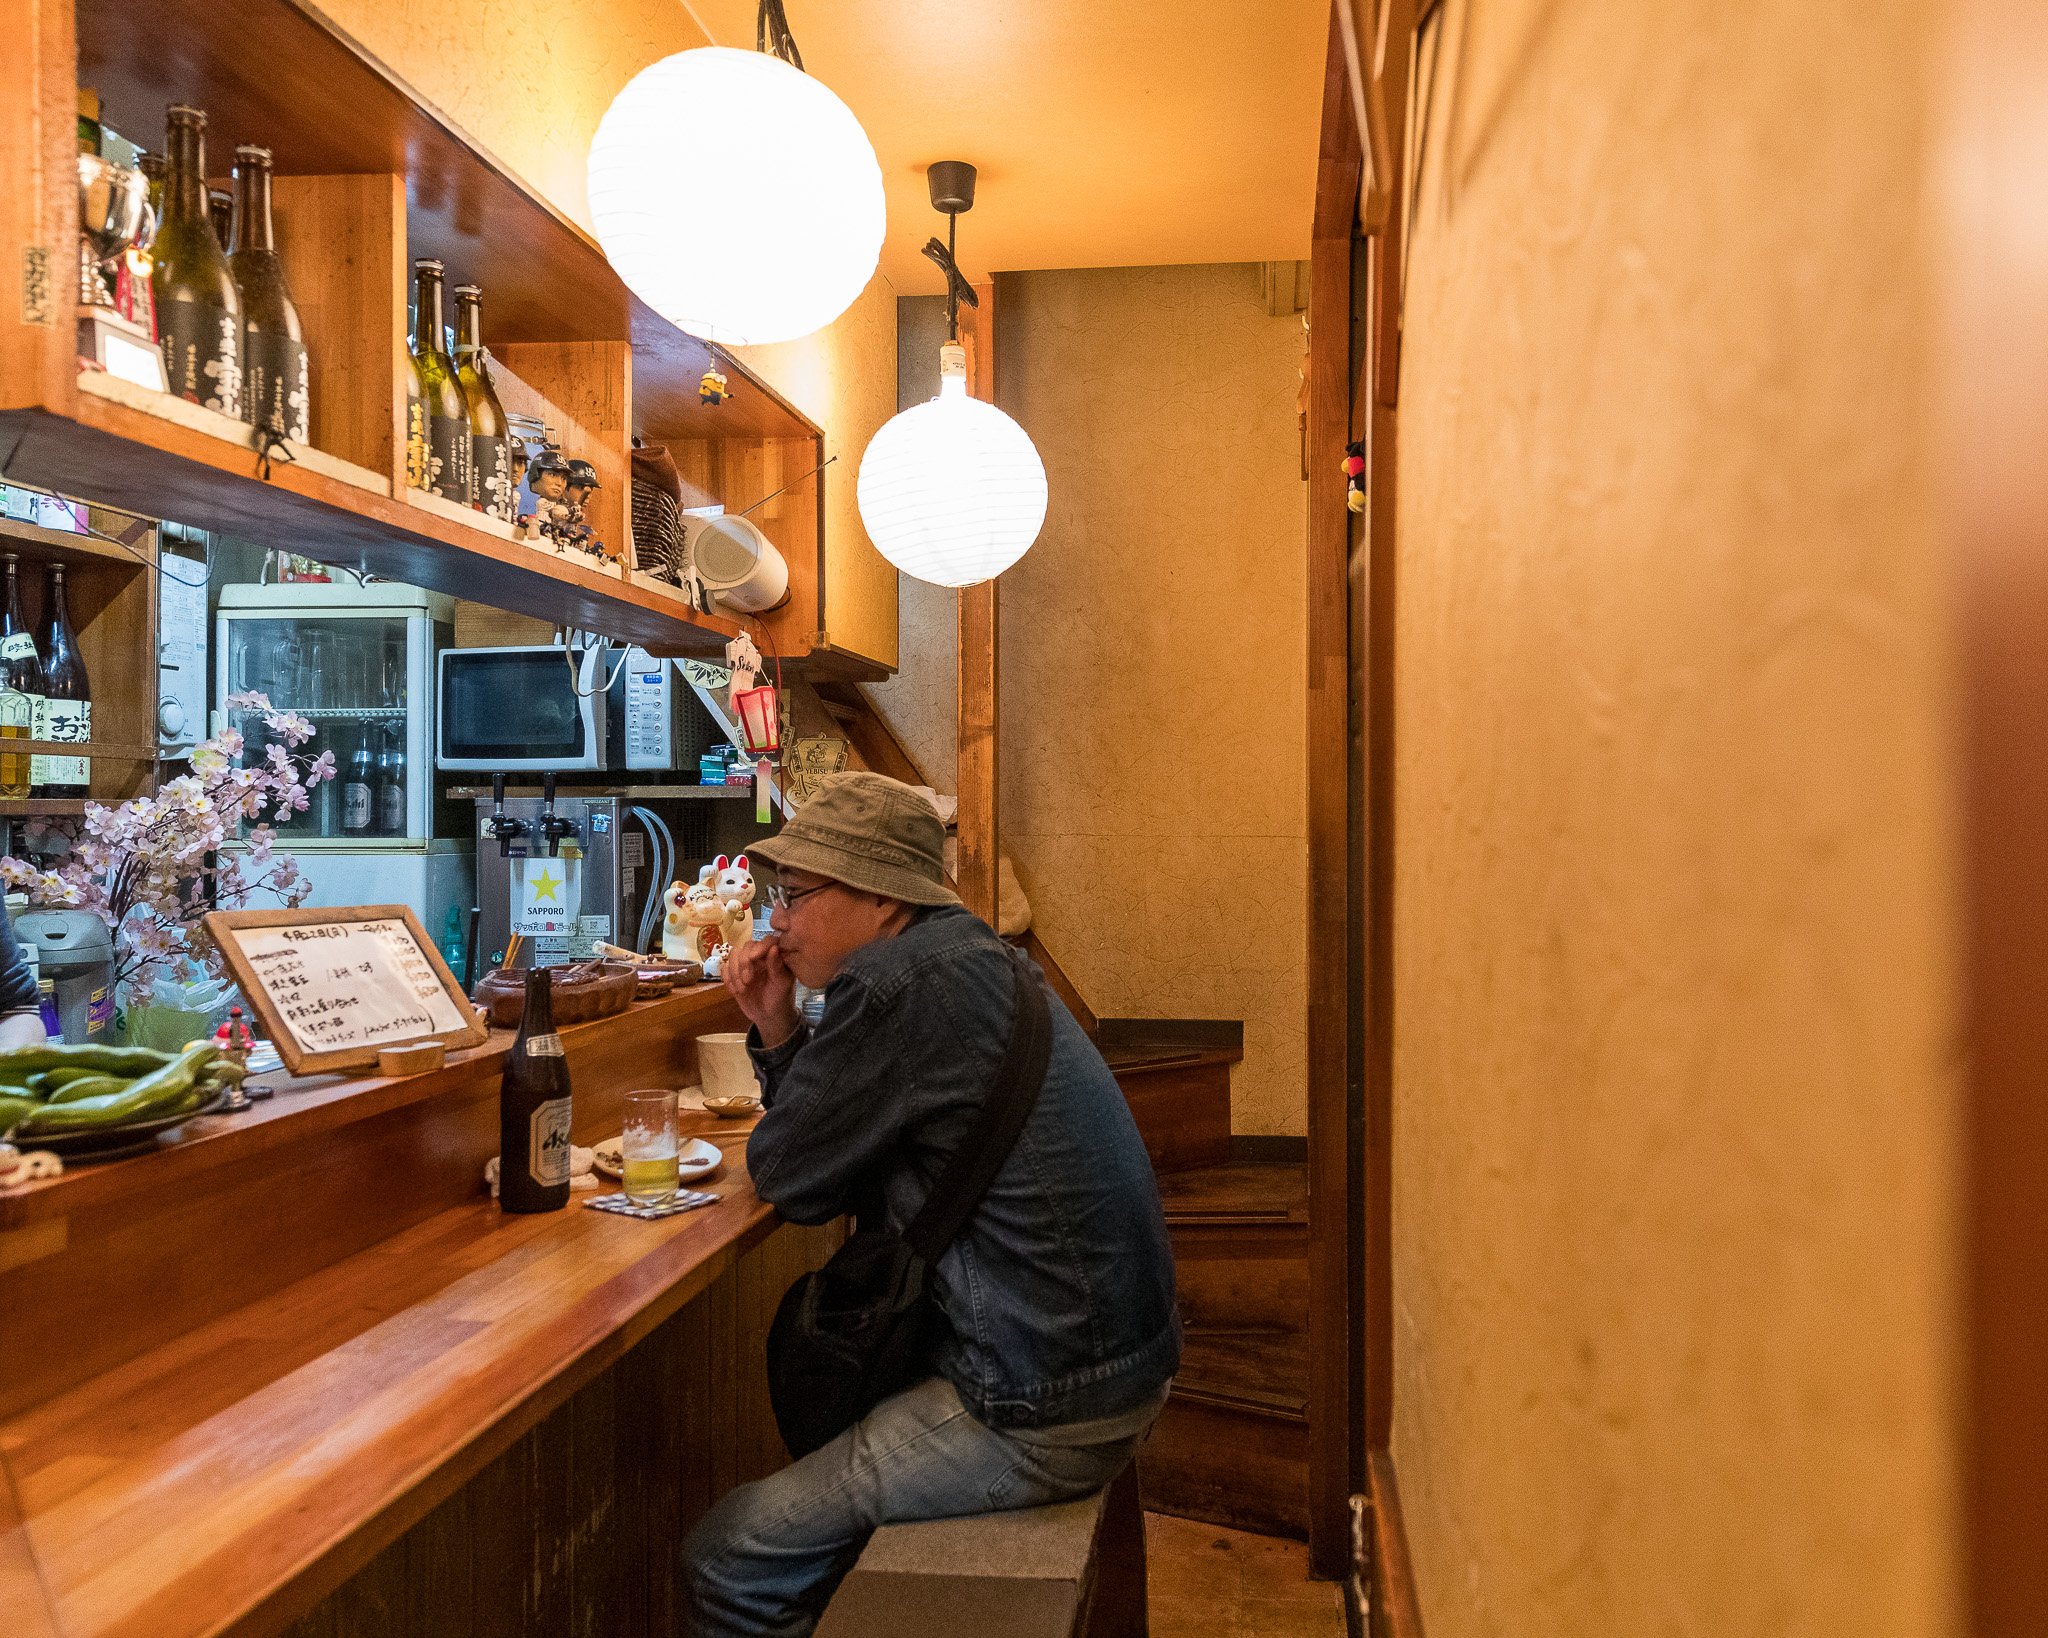
Shinjuku at night is a photographer's full-immersion exercise. Kabukicho, Tokyo's entertainment district, is a dense layering of neon, vertical signage, and constant movement. Streets that look overwhelming at first reveal incredible geometry once you start looking for it: signs stacked floor by floor, reflections in puddles, figures silhouetted against lit doorways.
Omoide Yokocho, the narrow alley just west of Shinjuku Station's east exit, is the opposite in scale but equally compelling. The alley is barely wide enough for two people to pass, and it is lined with tiny yakitori restaurants, each no bigger than a closet, with smoke rising from charcoal grills and locals perched on stools eating skewers and drinking beer. The lantern light is warm and low, the textures are extraordinary, and it smells like charcoal and grilled chicken and something very specific to this part of Tokyo.
📷 Pro Tip: For Kabukicho, a compact travel tripod is essential. Shoot at ISO 800 to 1600 with a 15 to 35mm lens and a 1 to 4 second exposure to capture both the light and the motion of crowds. For Omoide Yokocho, switch to a 50mm prime at f/1.8 and work handheld. The alley is too narrow for a tripod. Focus on faces of diners, smoke rising from grills, and the compression of bodies and light in the frame. Shooting in the alley from outside is acceptable; always ask permission before photographing someone directly inside a small restaurant.
Best time: 9pm to midnight. Access: Free. West Exit of Shinjuku Station.

Tips: Take a Tripod to capture Long Exposure Shots. I would also bring a 15-35 mm lens to photograph the lit buildings. In the Alley, try to capture locals eating in the restaurants.
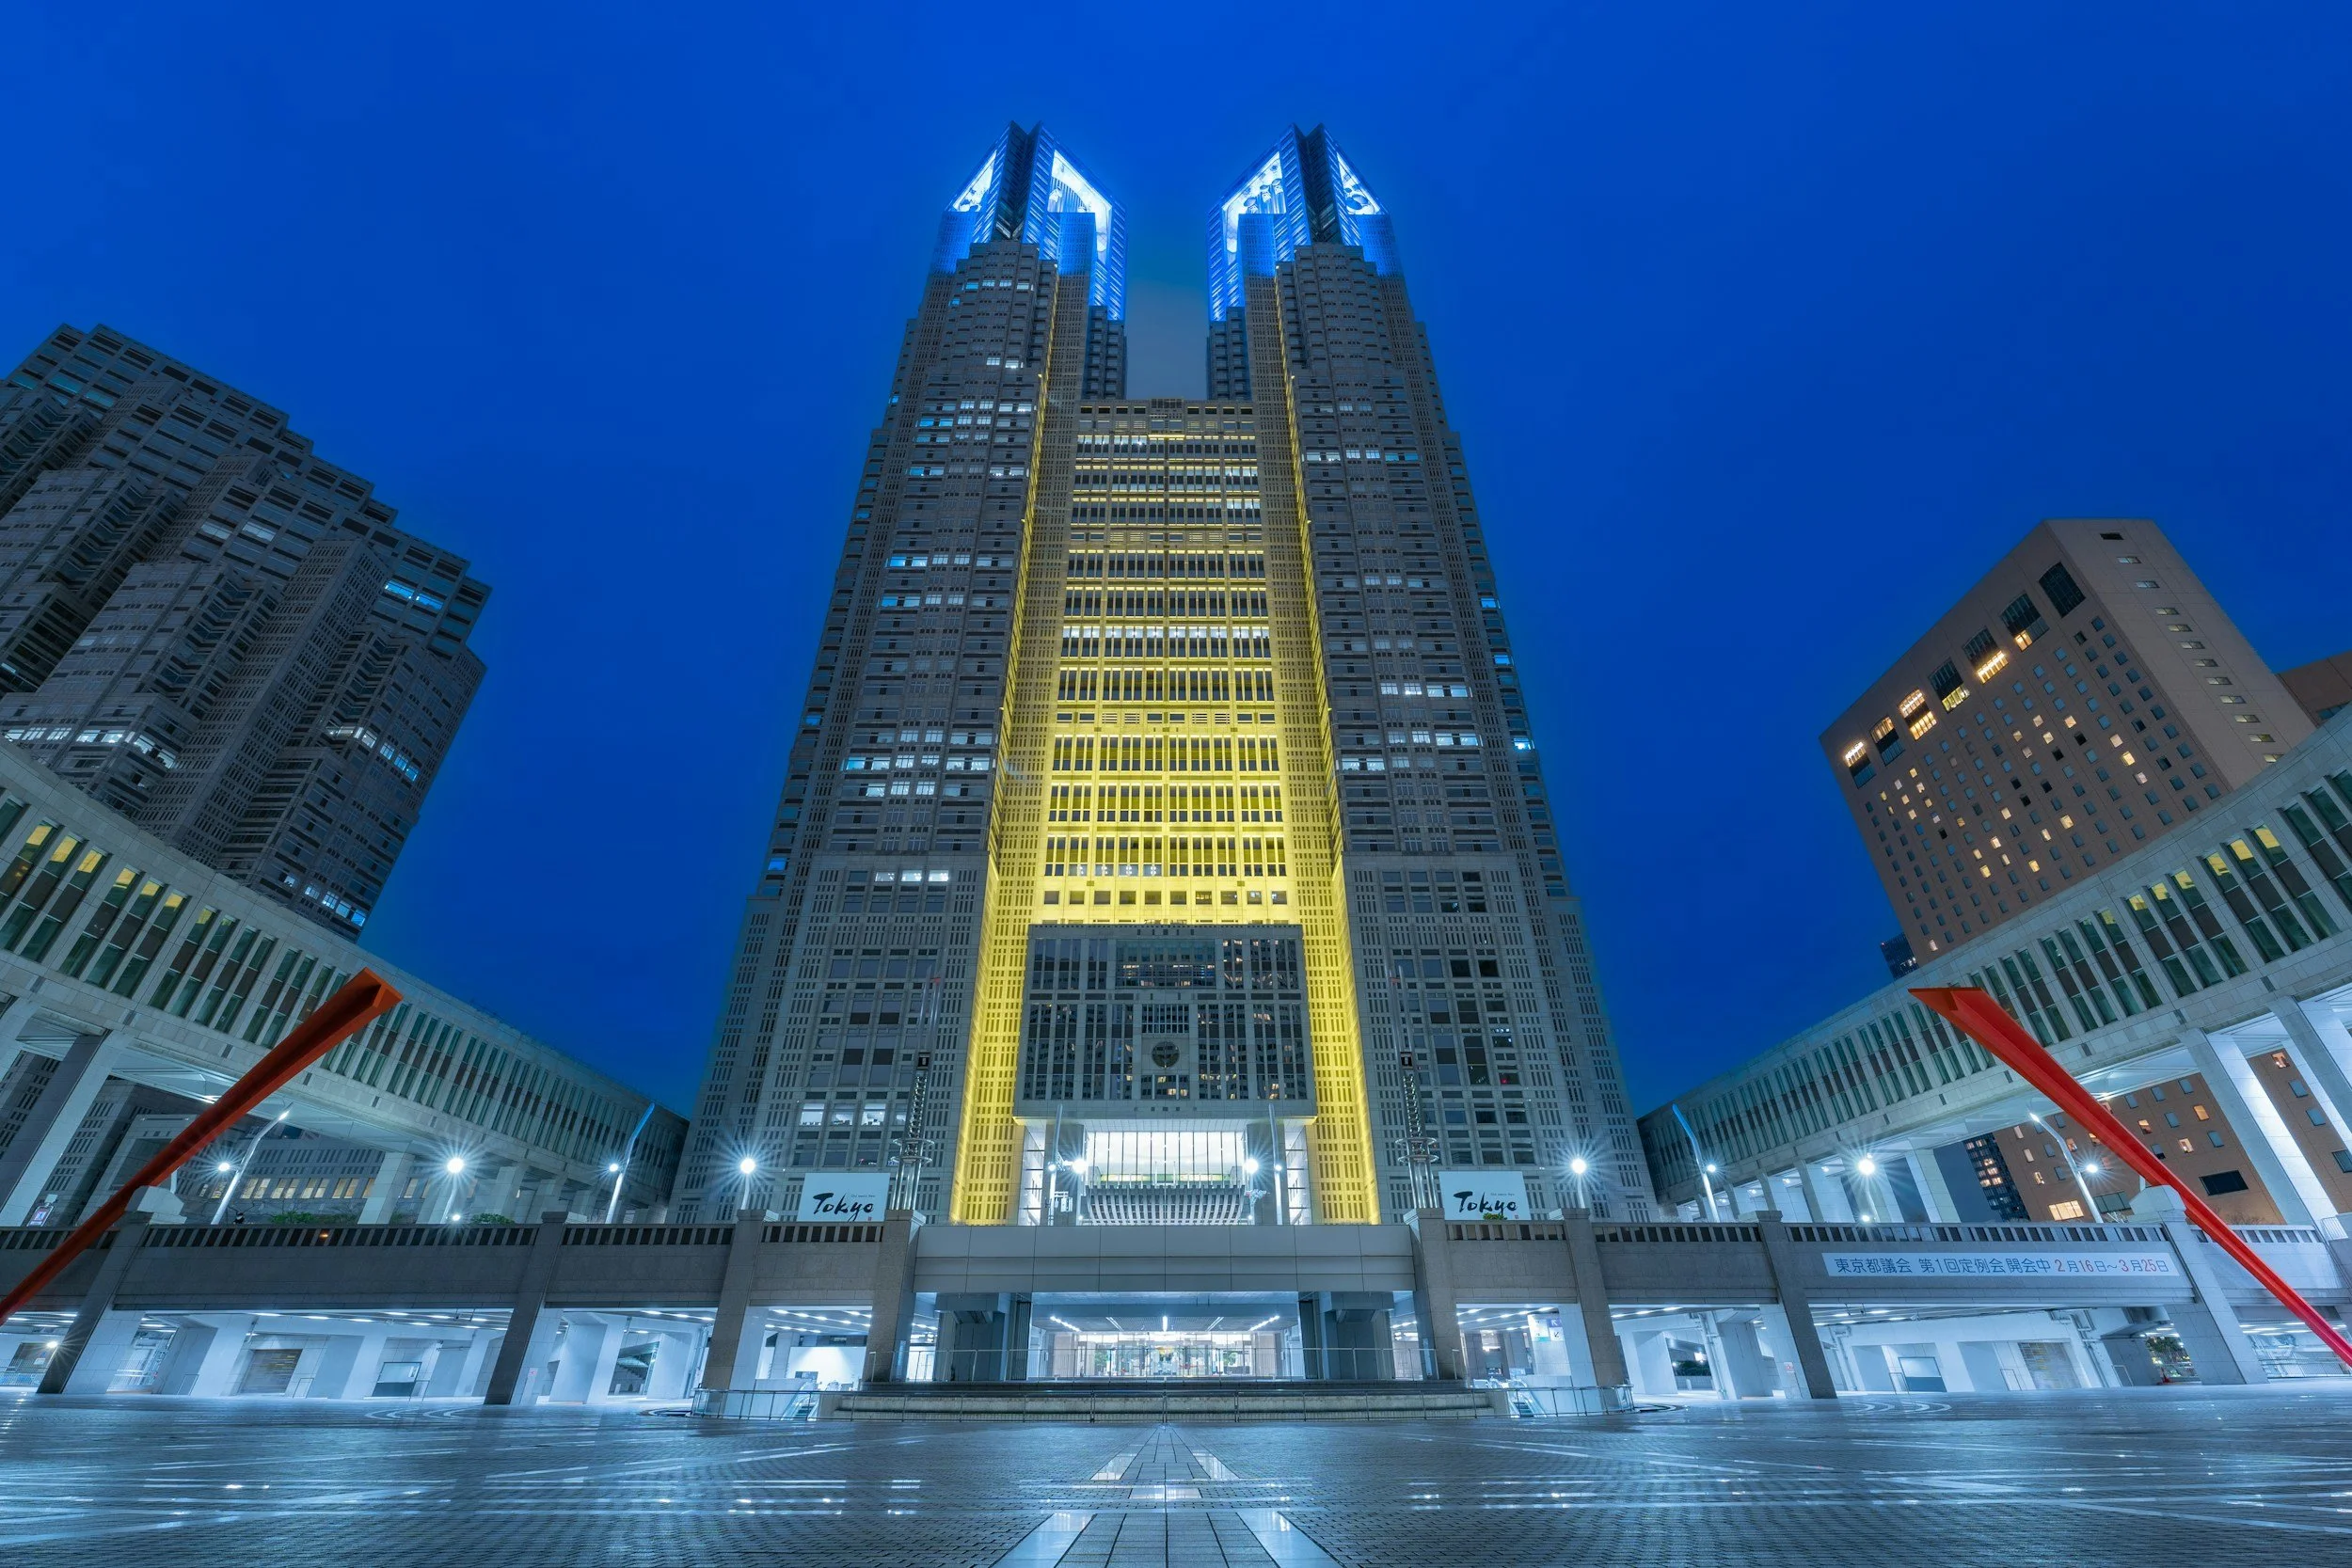
Tokyo Metropolitan Government Building
One of the most underrated free observation decks in Asia. The Tokyo Metropolitan Government Building in Nishi-Shinjuku has twin towers with two separate observation halls on the 45th floor, 202 meters above street level. The North Observatory is typically open in the evening and gives you an unobstructed view across the entire Tokyo skyline, with the Tokyo Skytree to the east and, on clear days, Mount Fuji to the southwest.
This is not the flashiest observation experience in the city. It is no-frills and crowded, but it is free, it is accessible, and the view is exceptional. For photographers, the combination of elevation and free access makes it one of the most practical locations in Tokyo.
📷 Pro Tip: Visit on a clear winter or autumn evening, when visibility is at its best. Bring a standard zoom or telephoto and use the windows as a natural stability surface when you cannot use a tripod. The best light is during the twenty minutes surrounding sunset, when the sky retains color and the city lights are beginning to emerge. Arrive forty-five minutes before sunset to secure window space. On very clear days in winter, check the forecast for Mount Fuji visibility and plan your visit accordingly.
Best time: Sunset into blue hour. Access: Free. Tochomae Station on the Toei Oedo Line.
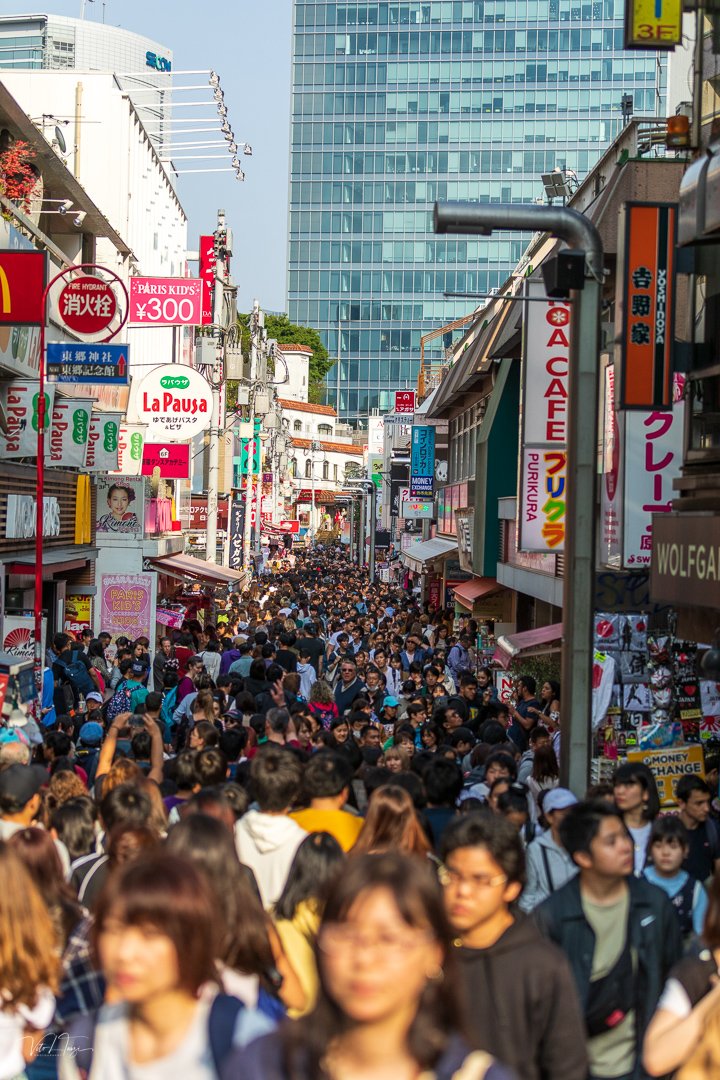
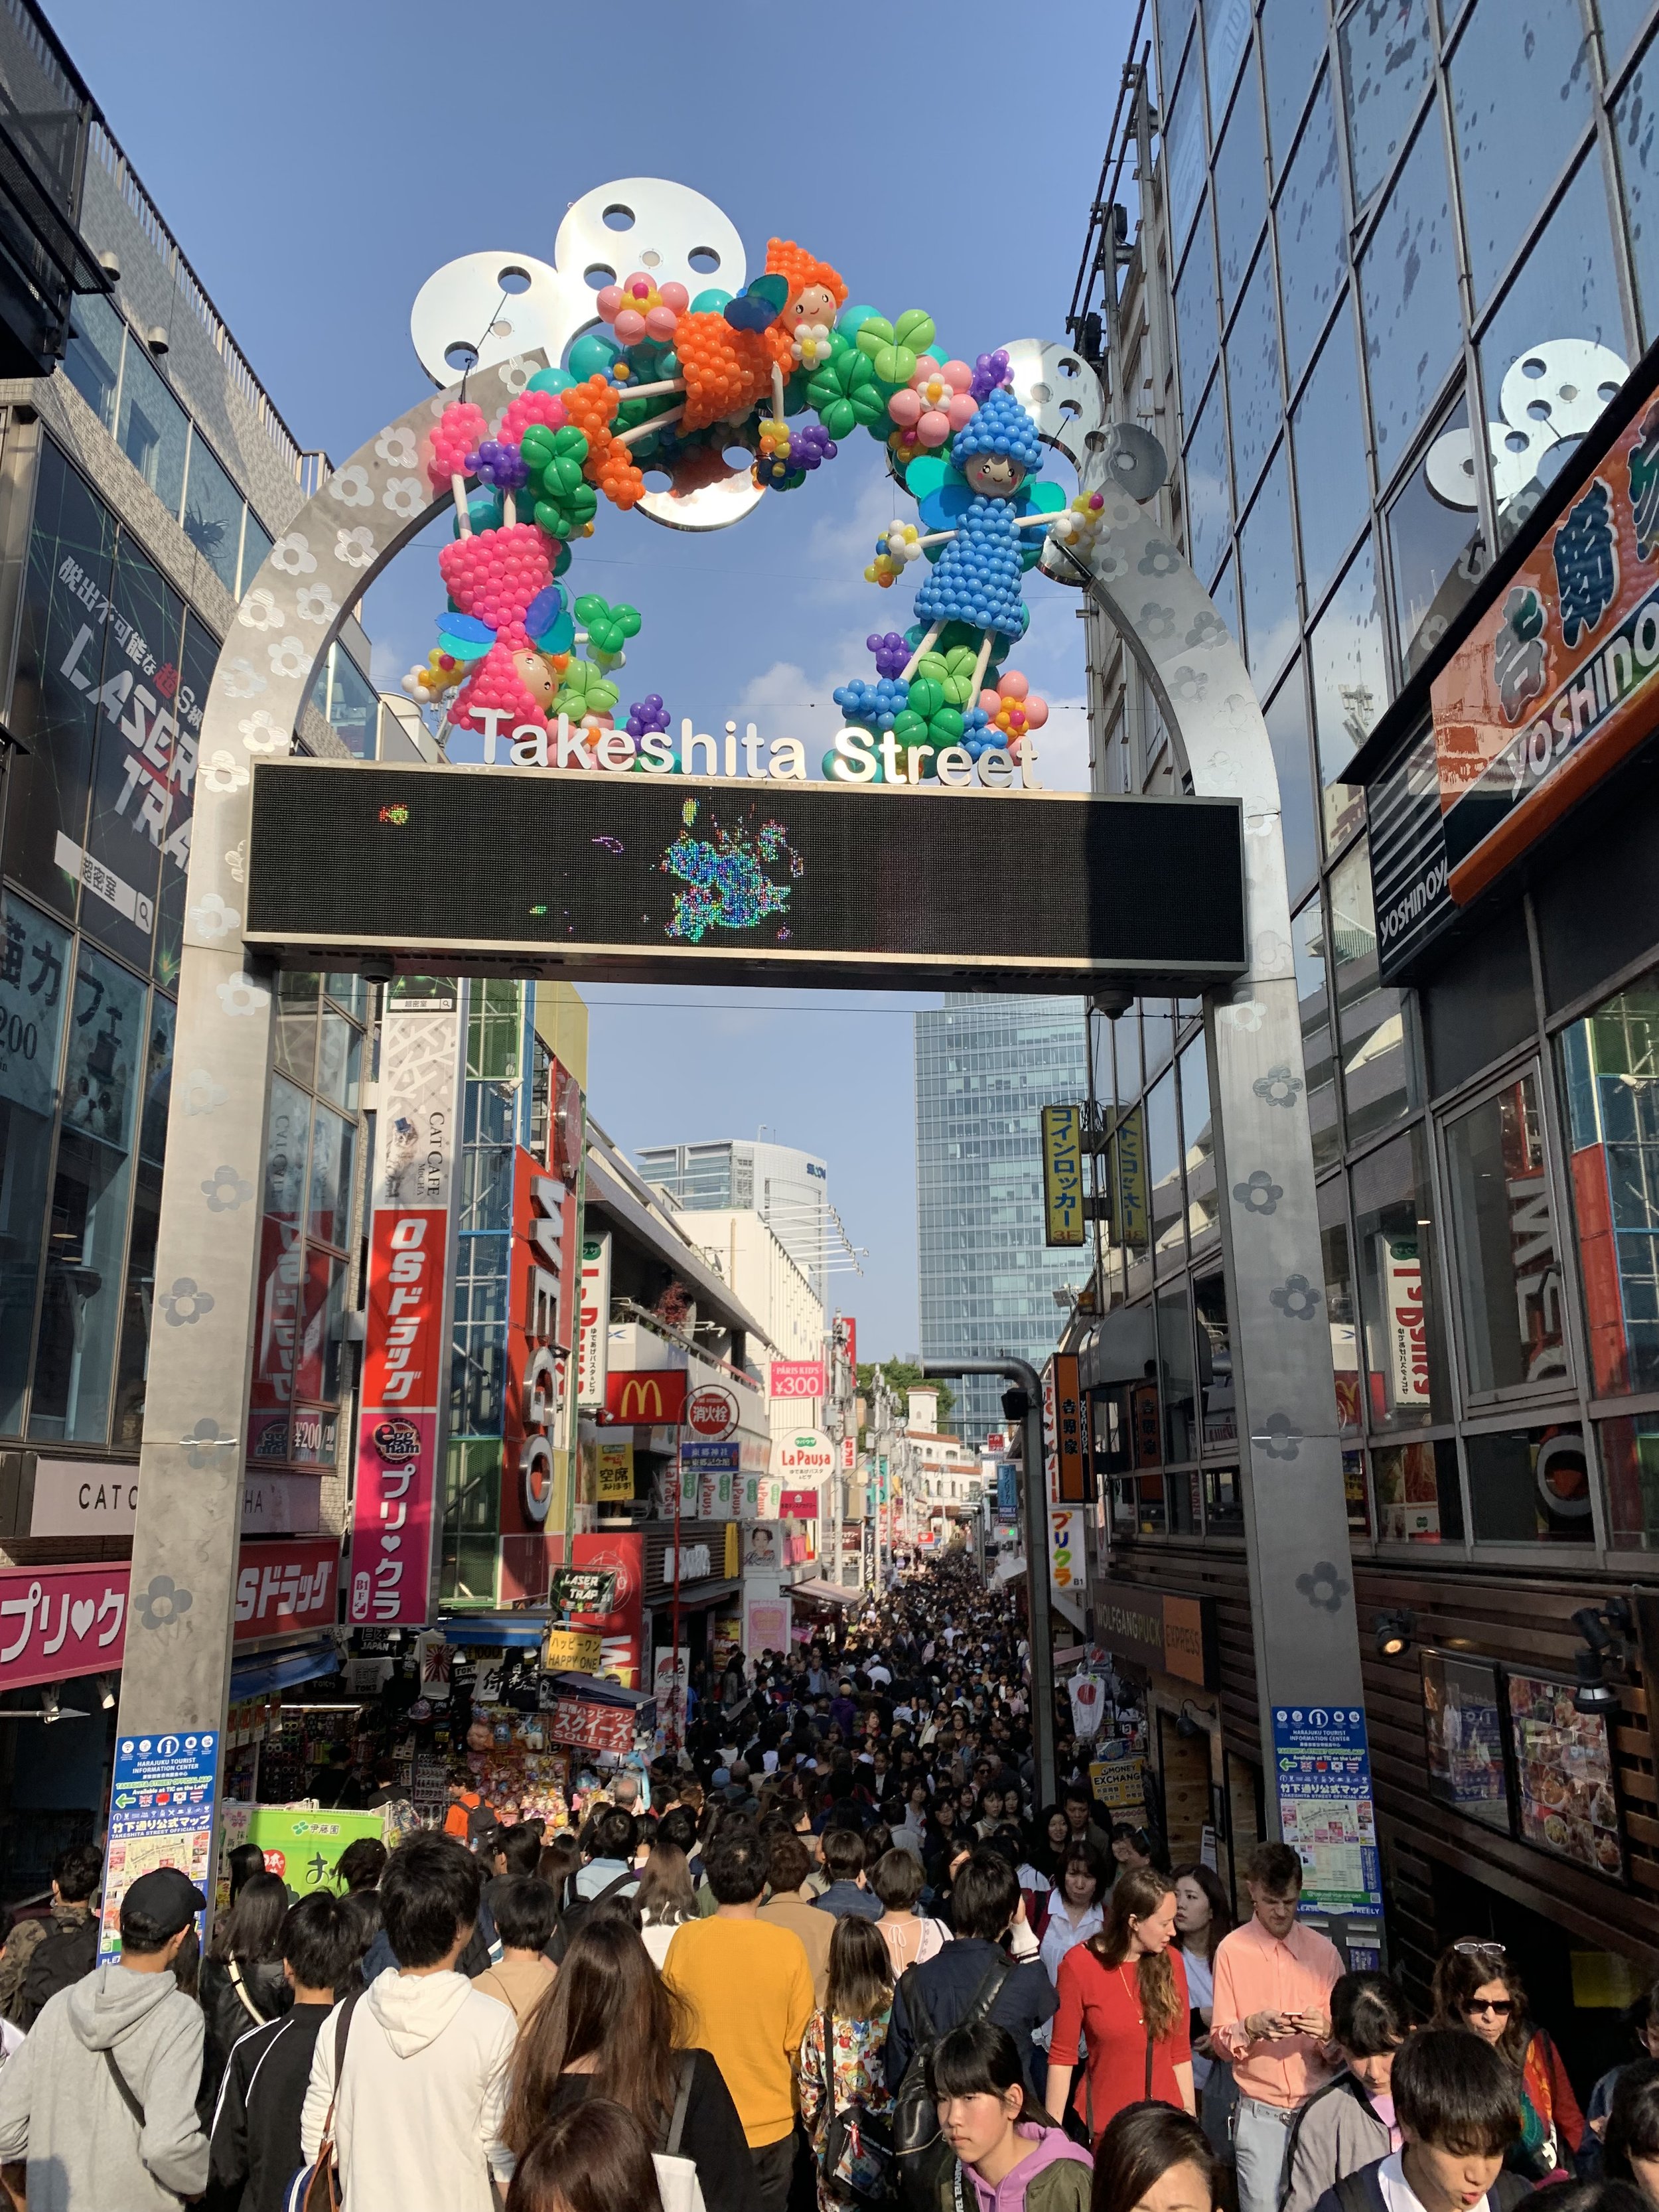
Harajuku Tokyo Plaza
Harajuku is two neighborhoods in one, and they could not be more different from each other. Takeshita Street is narrow, densely packed, and aggressively youthful. Crepe stands, candy-colored fashion boutiques, character merchandise, and teenagers in elaborate outfits crowd the pedestrian lane from mid-morning until evening. The visual density is extreme. Takeshita is loud and chaotic and, photographically, a challenge worth accepting.
Two minutes away, Omotesando is Tokyo's answer to the Champs-Elysées. Wide, tree-lined, architecturally composed, with flagship stores designed by some of the most important architects working today. The contrast between the two streets is one of the sharpest in the city.
At the junction between the two worlds sits the Tokyo Plaza Omotesando Harajuku, known locally as Tokyu Plaza. The entrance is the photograph. An escalator rises through a kaleidoscope of mirrored surfaces that reflect the sky, the shoppers, and each other in a visual loop that is entirely unlike anything else in the city. It draws so many photographers that you will need patience to get a clean composition.
📷 Pro Tip: For Tokyo Plaza's mirror escalator entrance, arrive when the store opens in the morning, before the Instagram crowds build. Position yourself at the base of the escalator looking up, using a wide lens at 16 to 24mm. The reflections work best when the ceiling lights are supplemented by natural light from the skylight above. For Takeshita Street, come on a Saturday afternoon when the crowds and outfits are at their most spectacular. Use a 50mm prime and work close, asking subjects for a quick portrait rather than shooting from a distance. Most people on Takeshita are dressed to be seen and are generally receptive.
Best time: Mornings for Tokyo Plaza; Saturday afternoons for Takeshita Street. Access: Free. Harajuku Station on the JR Yamanote Line.
You will also find in this area the Tokyo Plaza Omotesandō’s entrance, designed as a kaleidoscope full of mirrors. It’s full of Instagrammers.
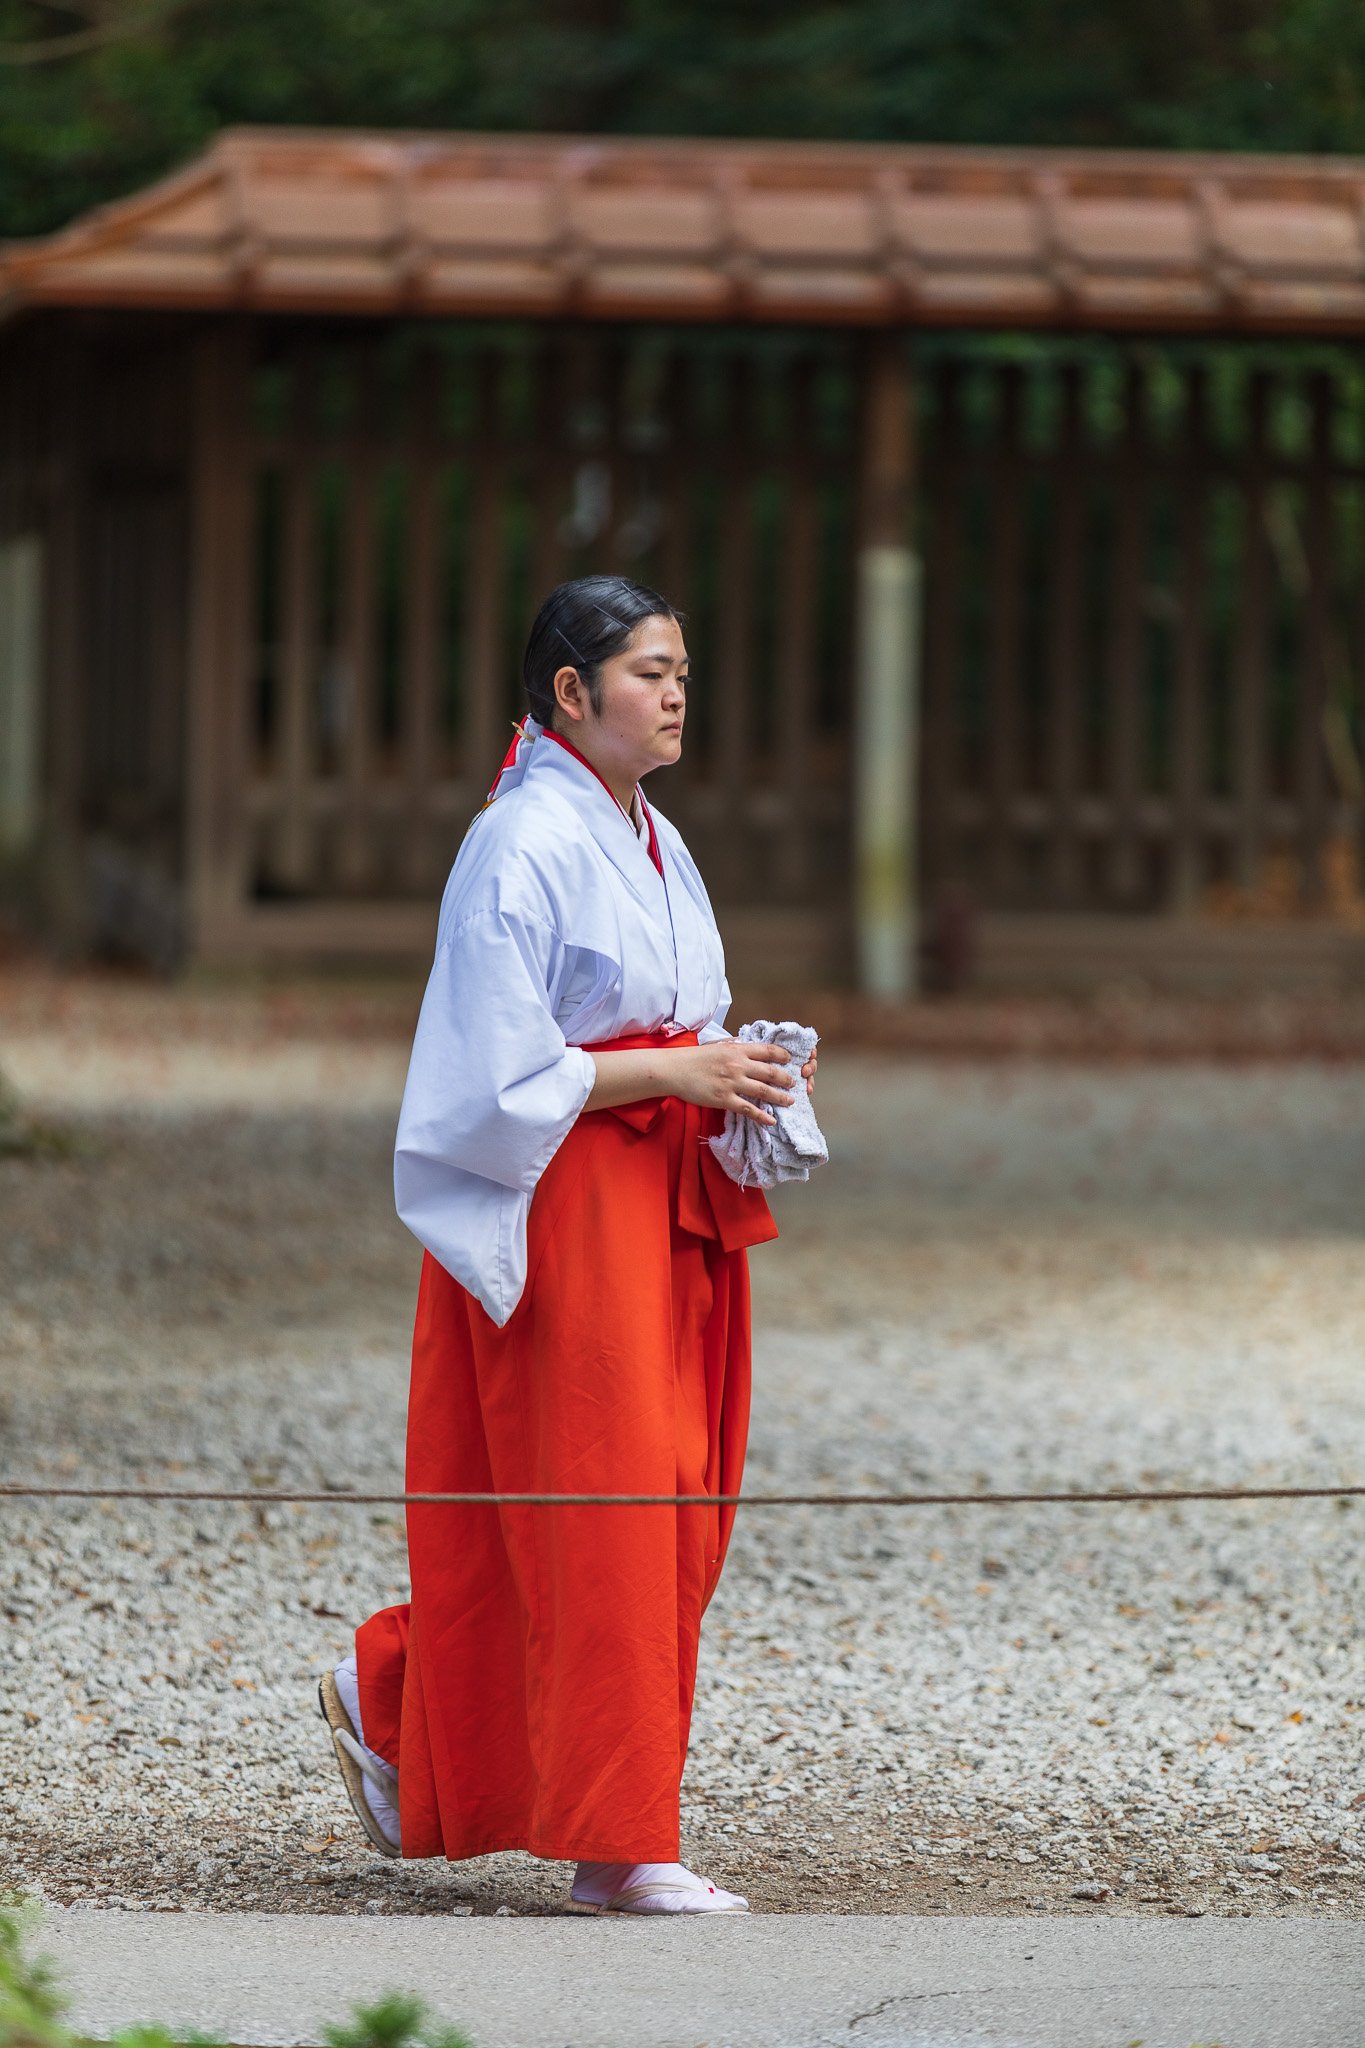
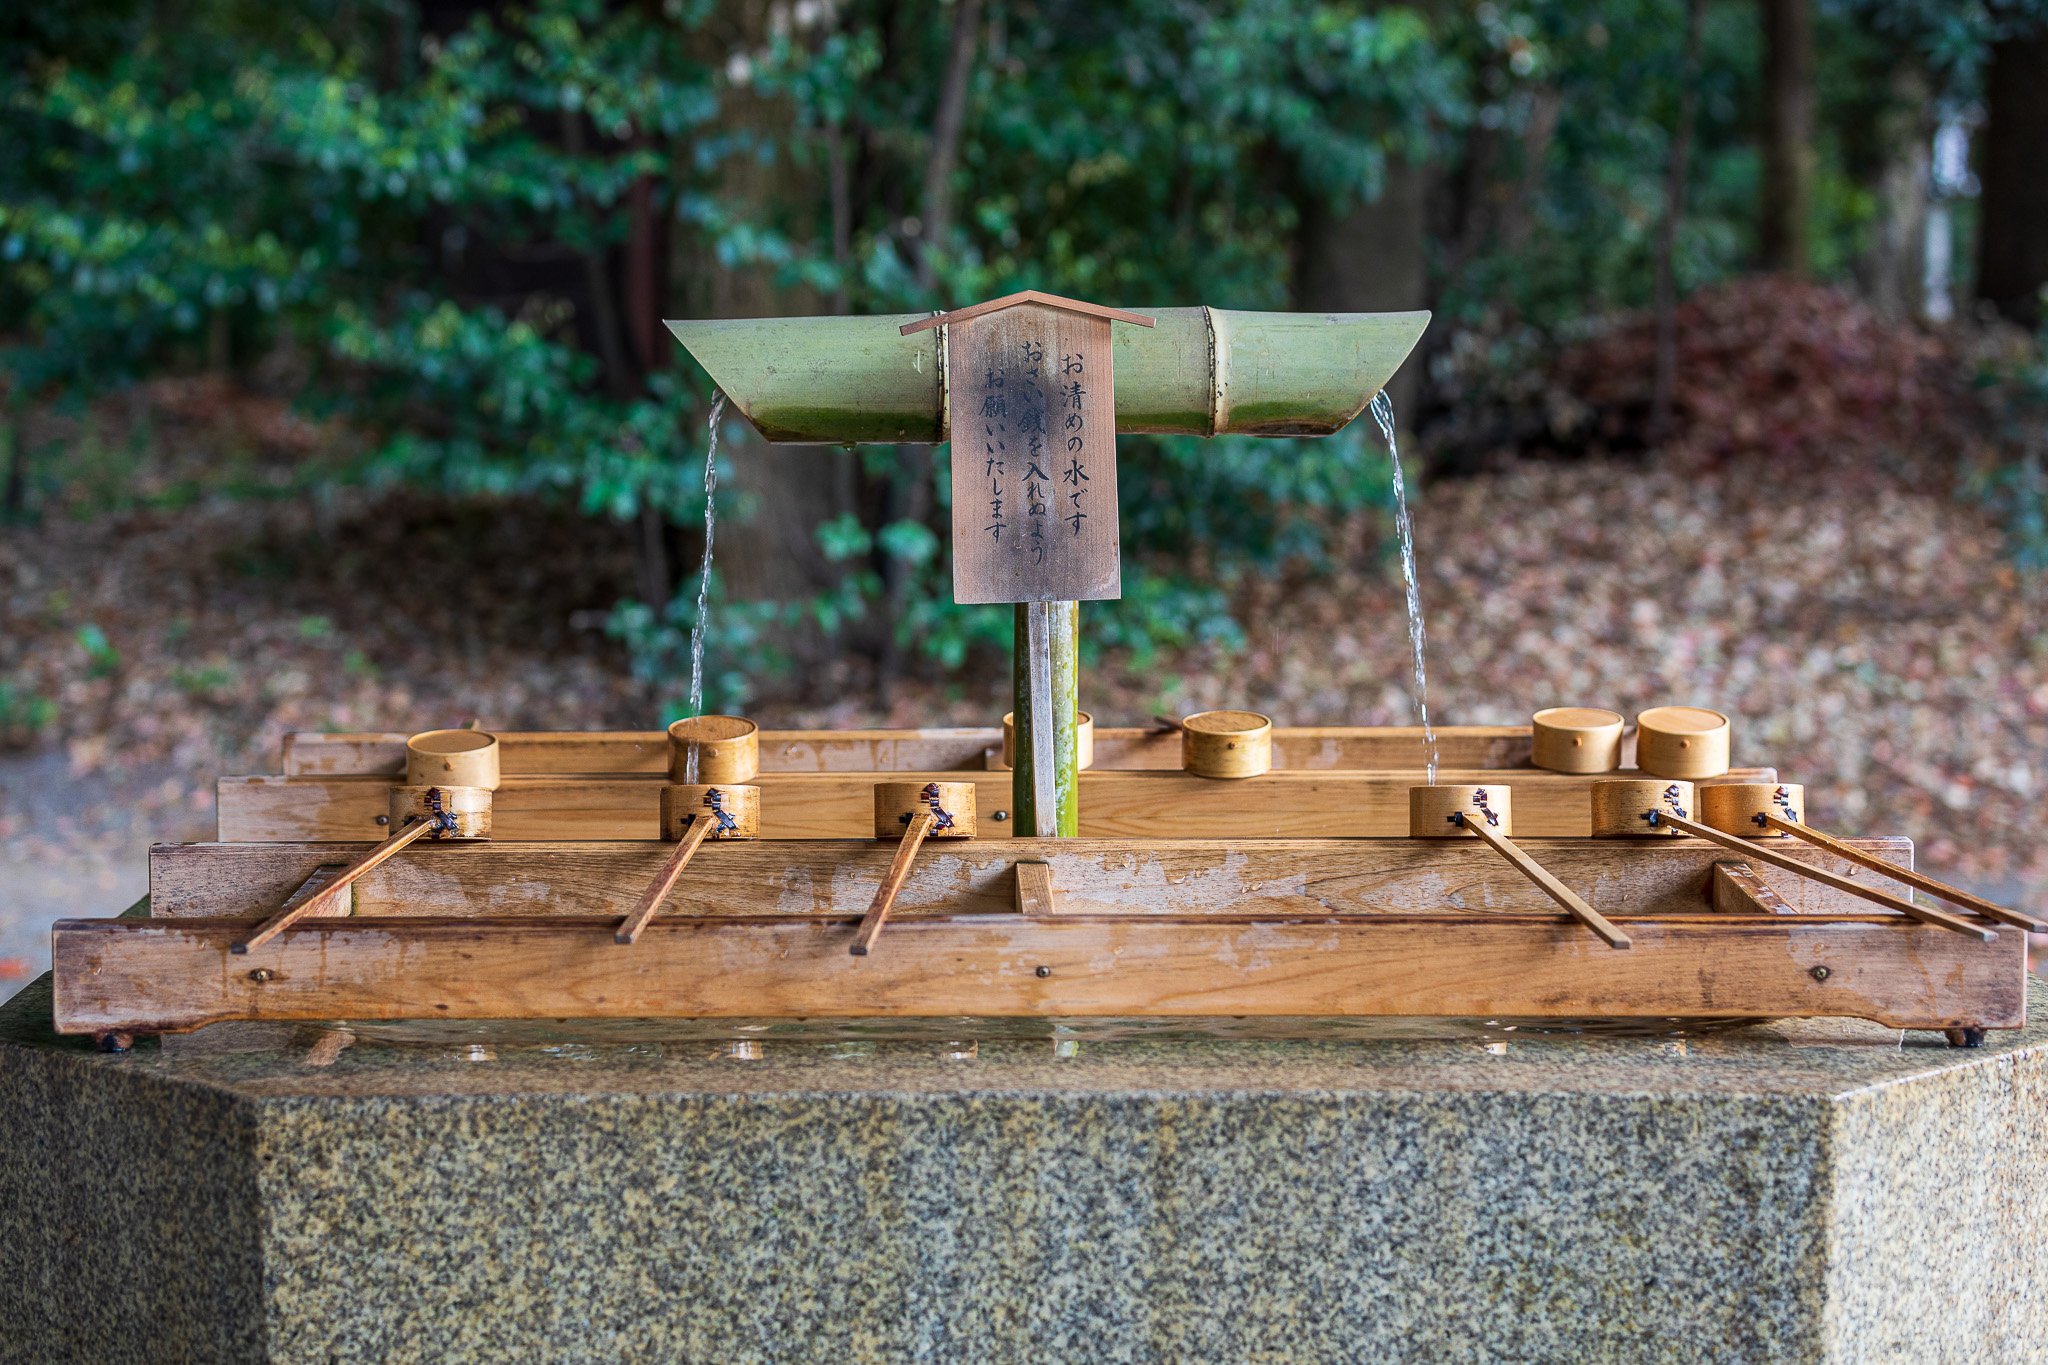
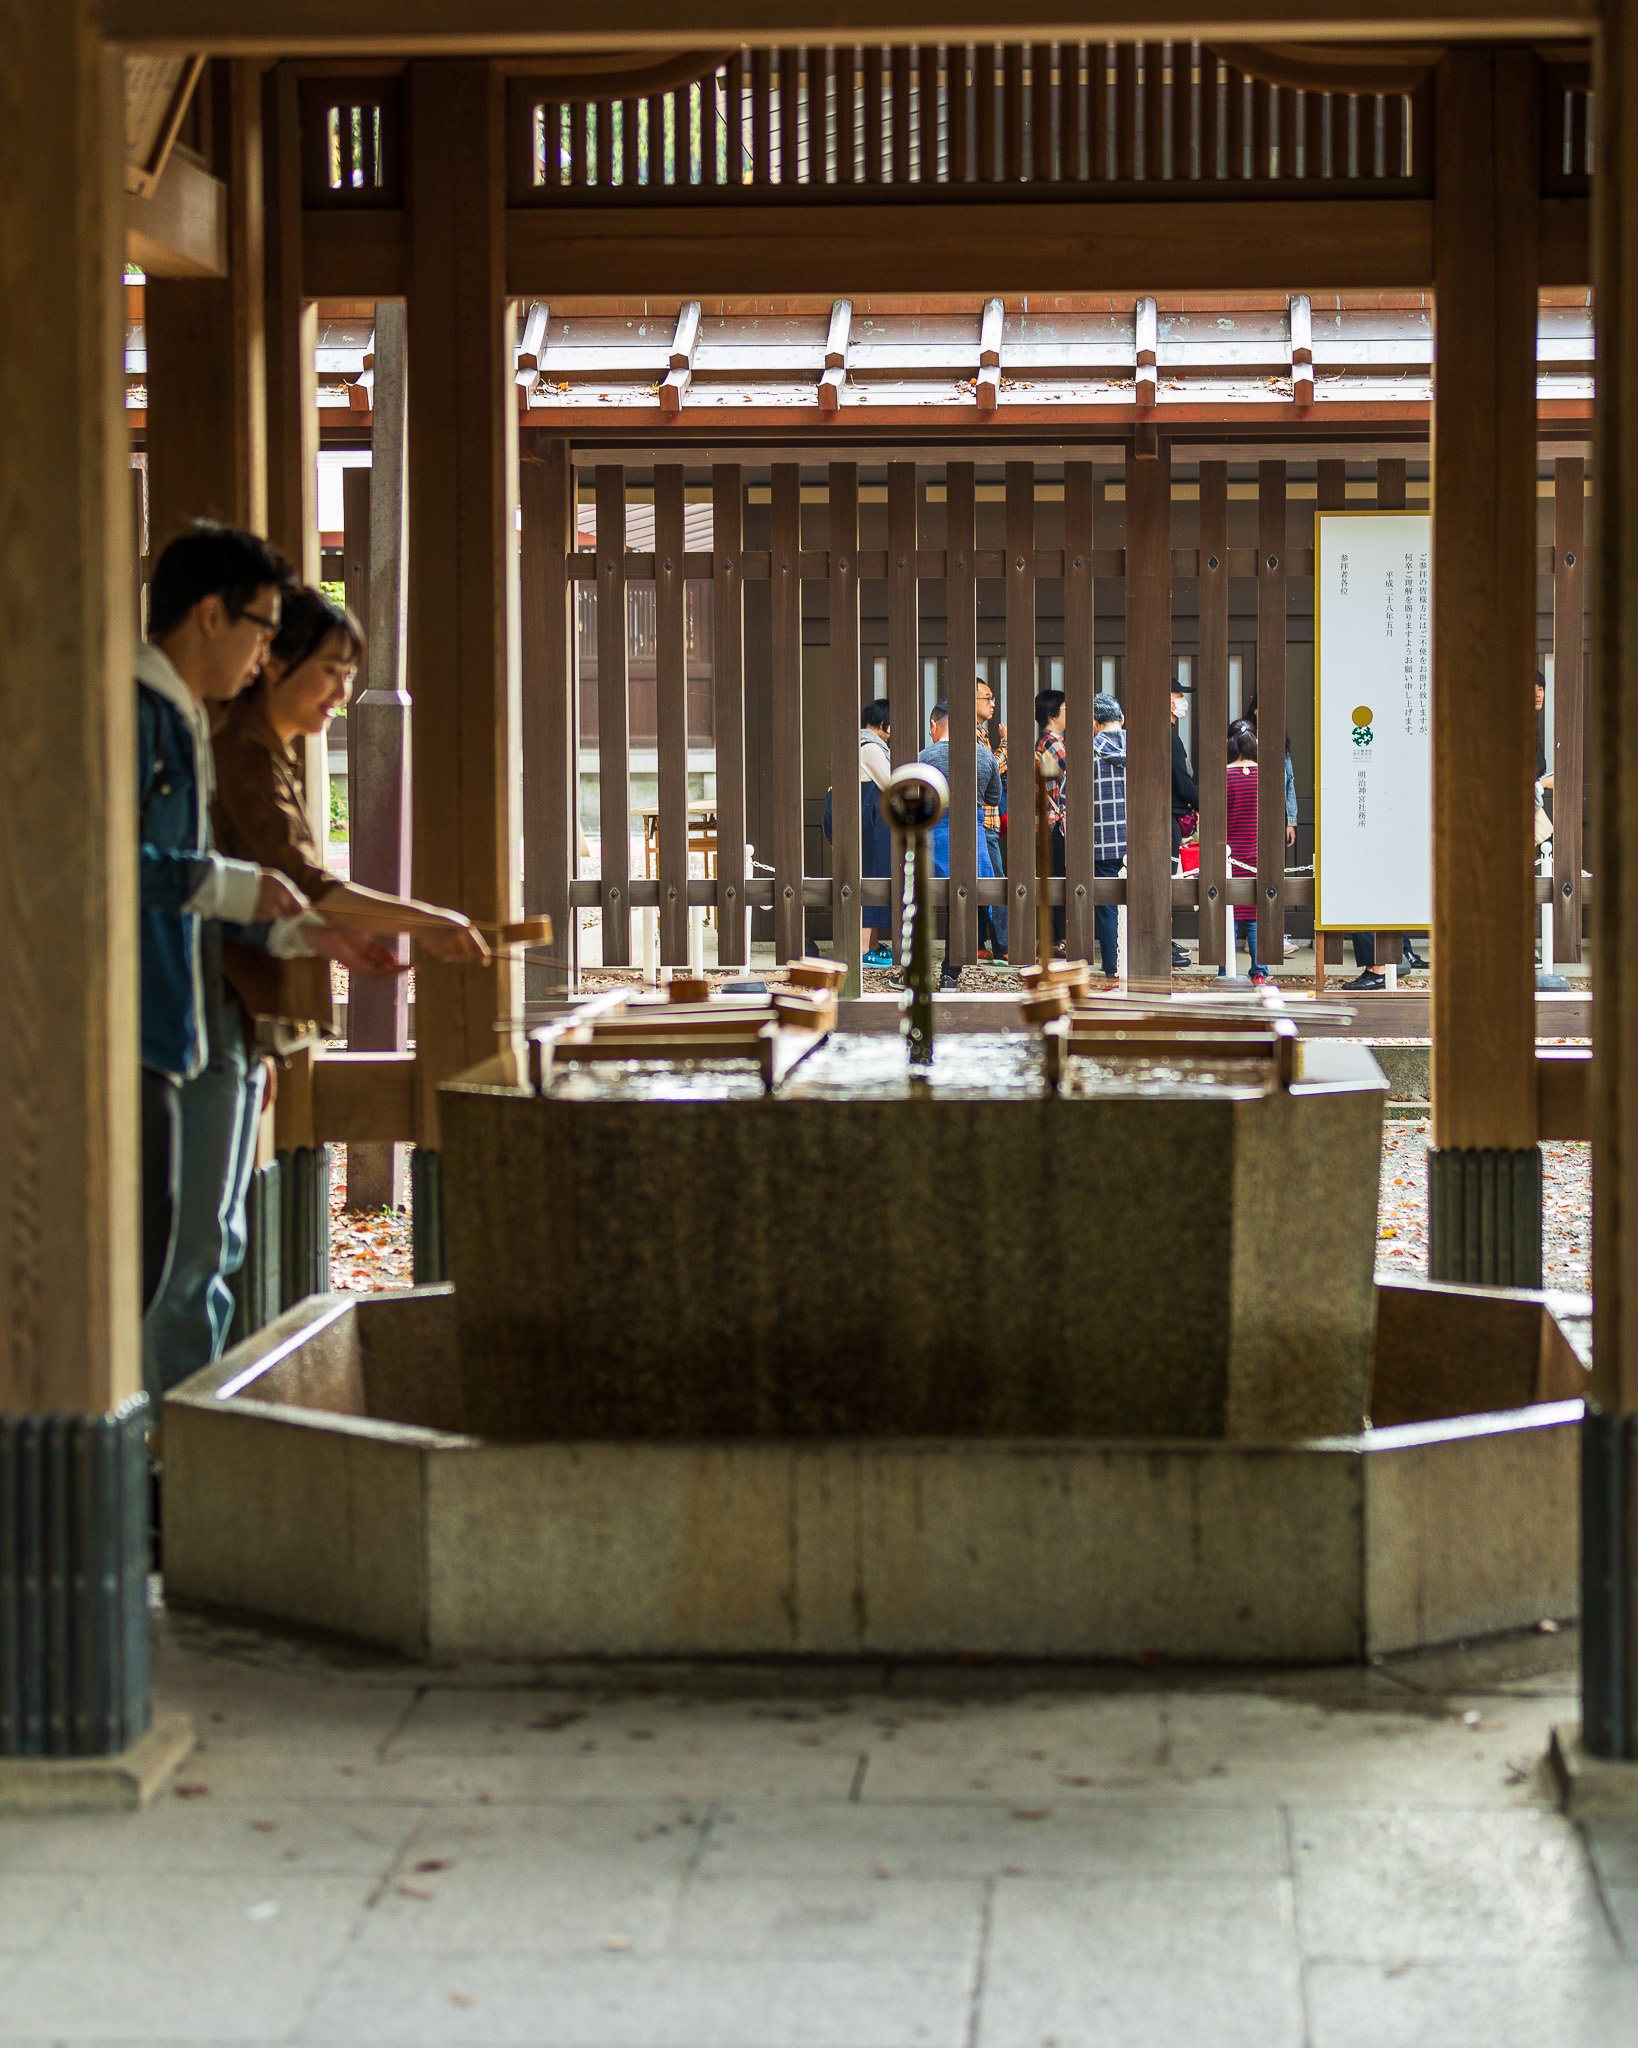
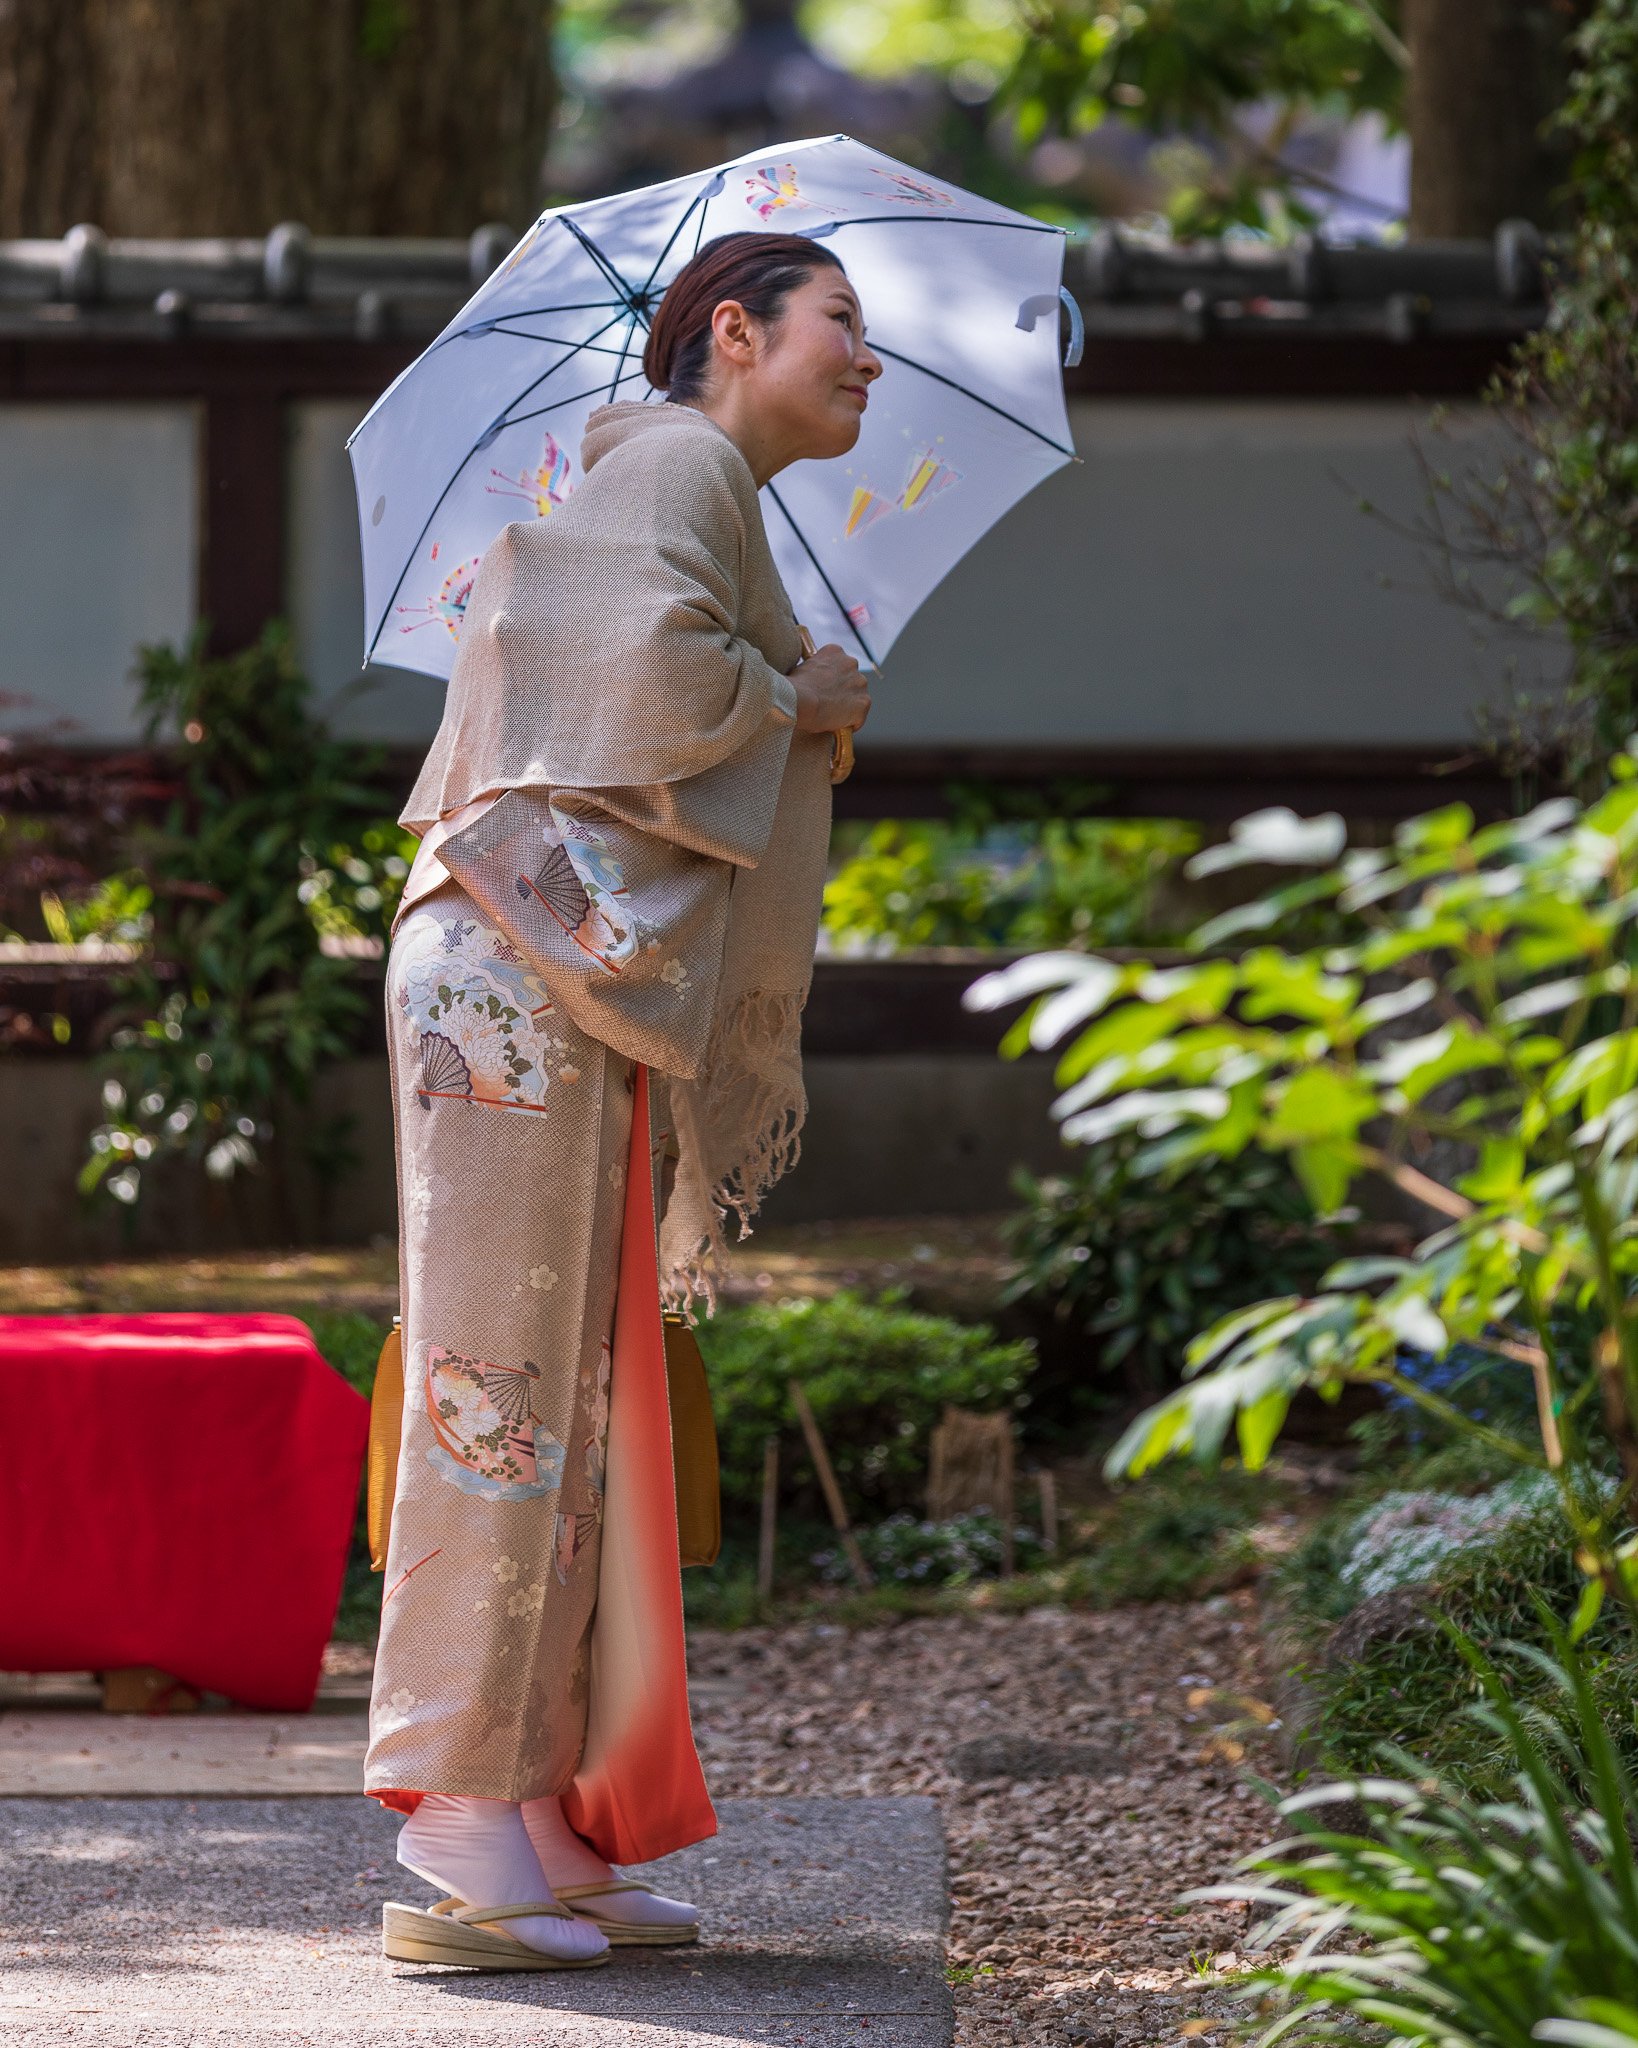
Meiji Shrine and Yoyogi Park
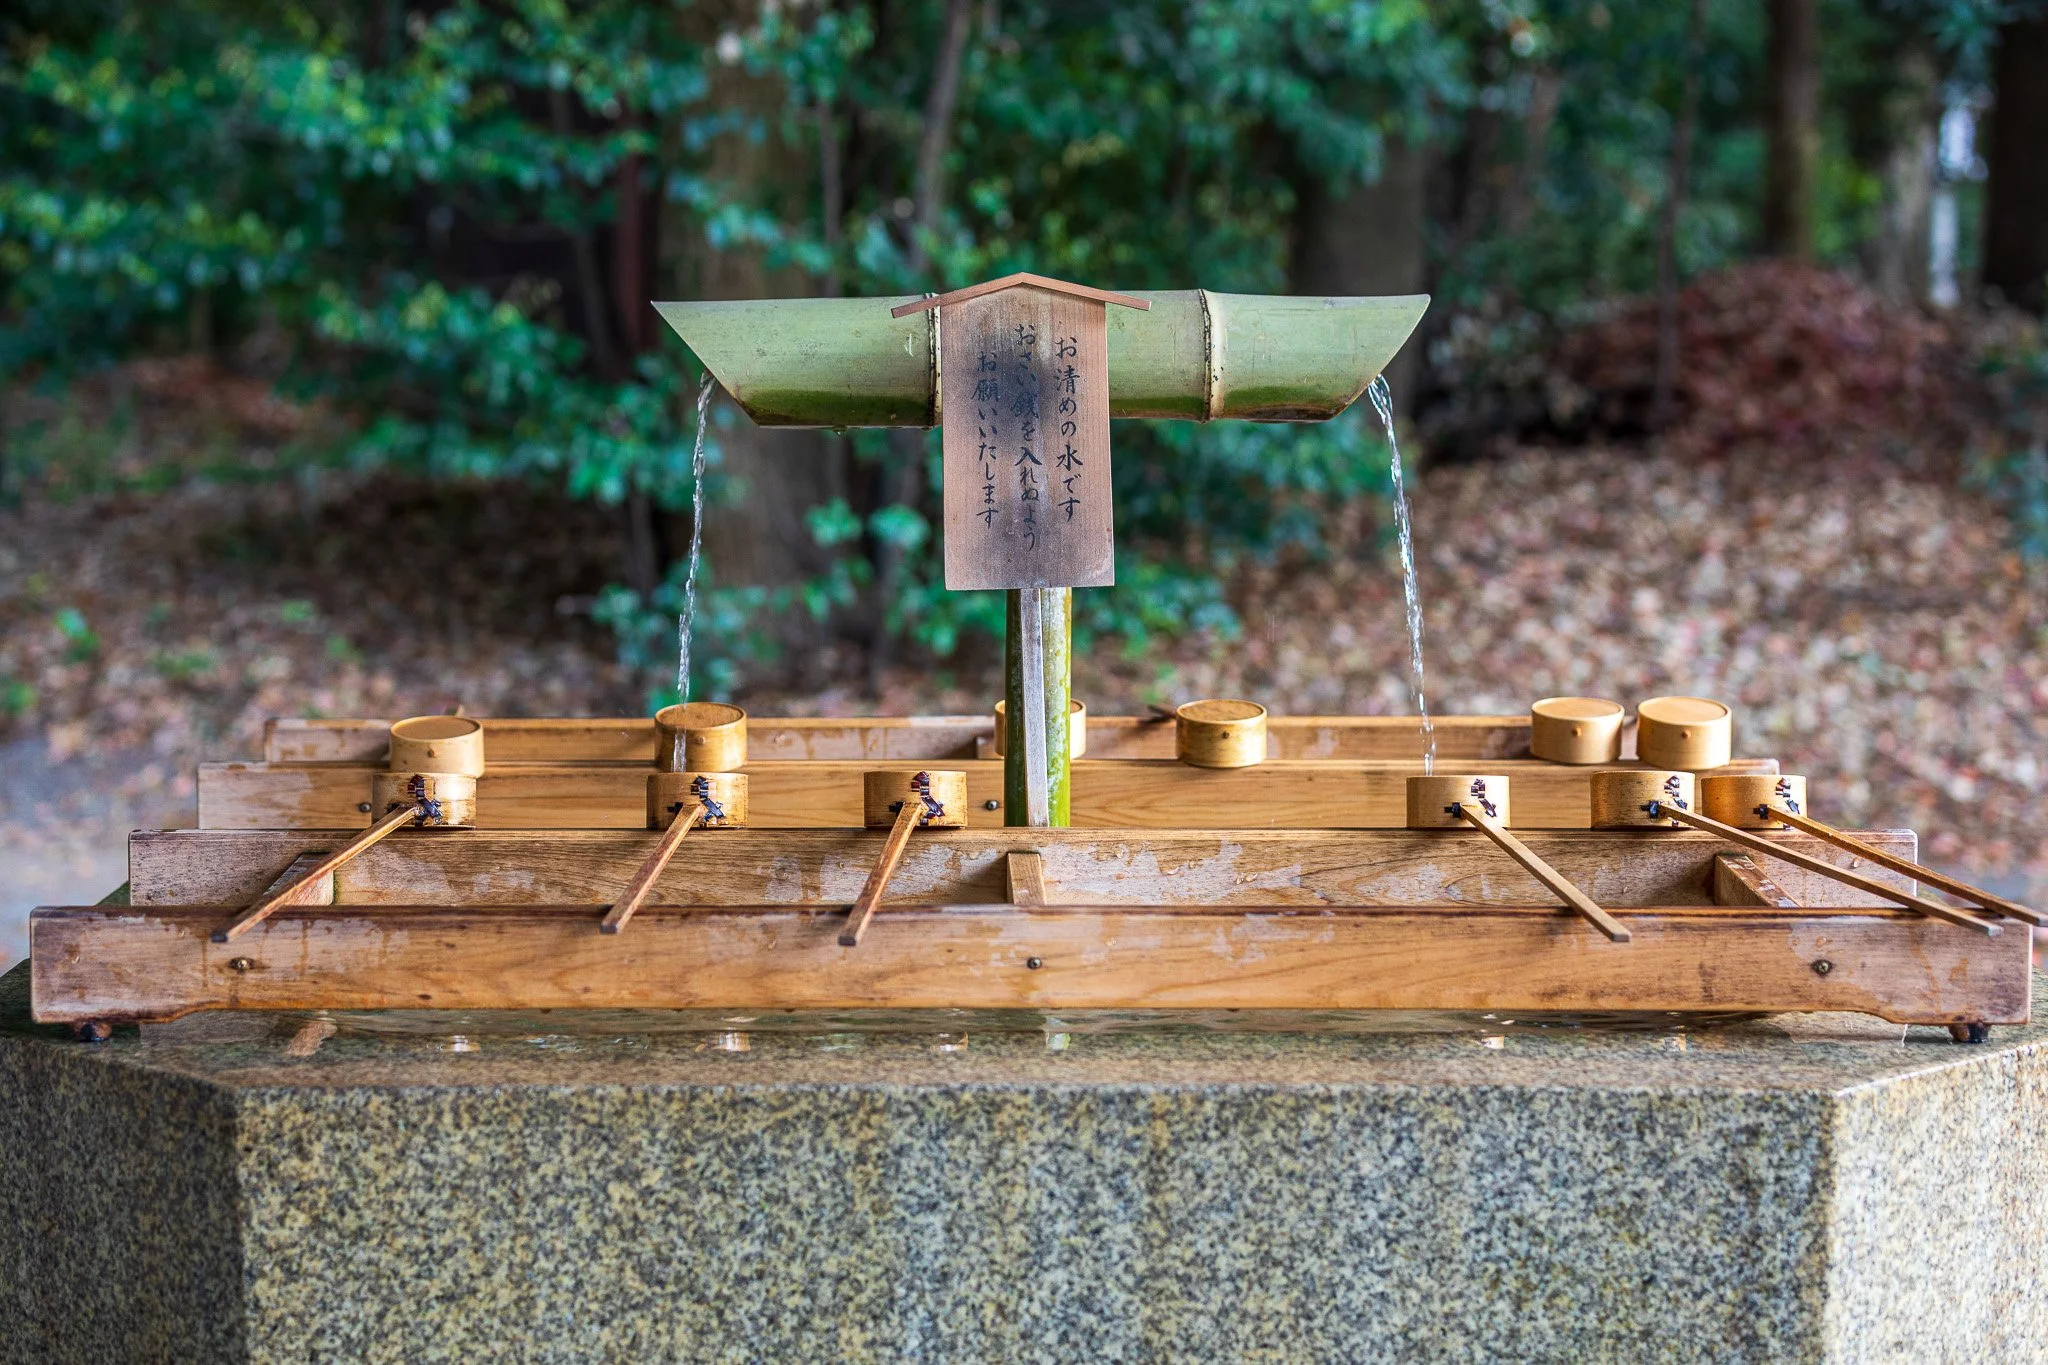
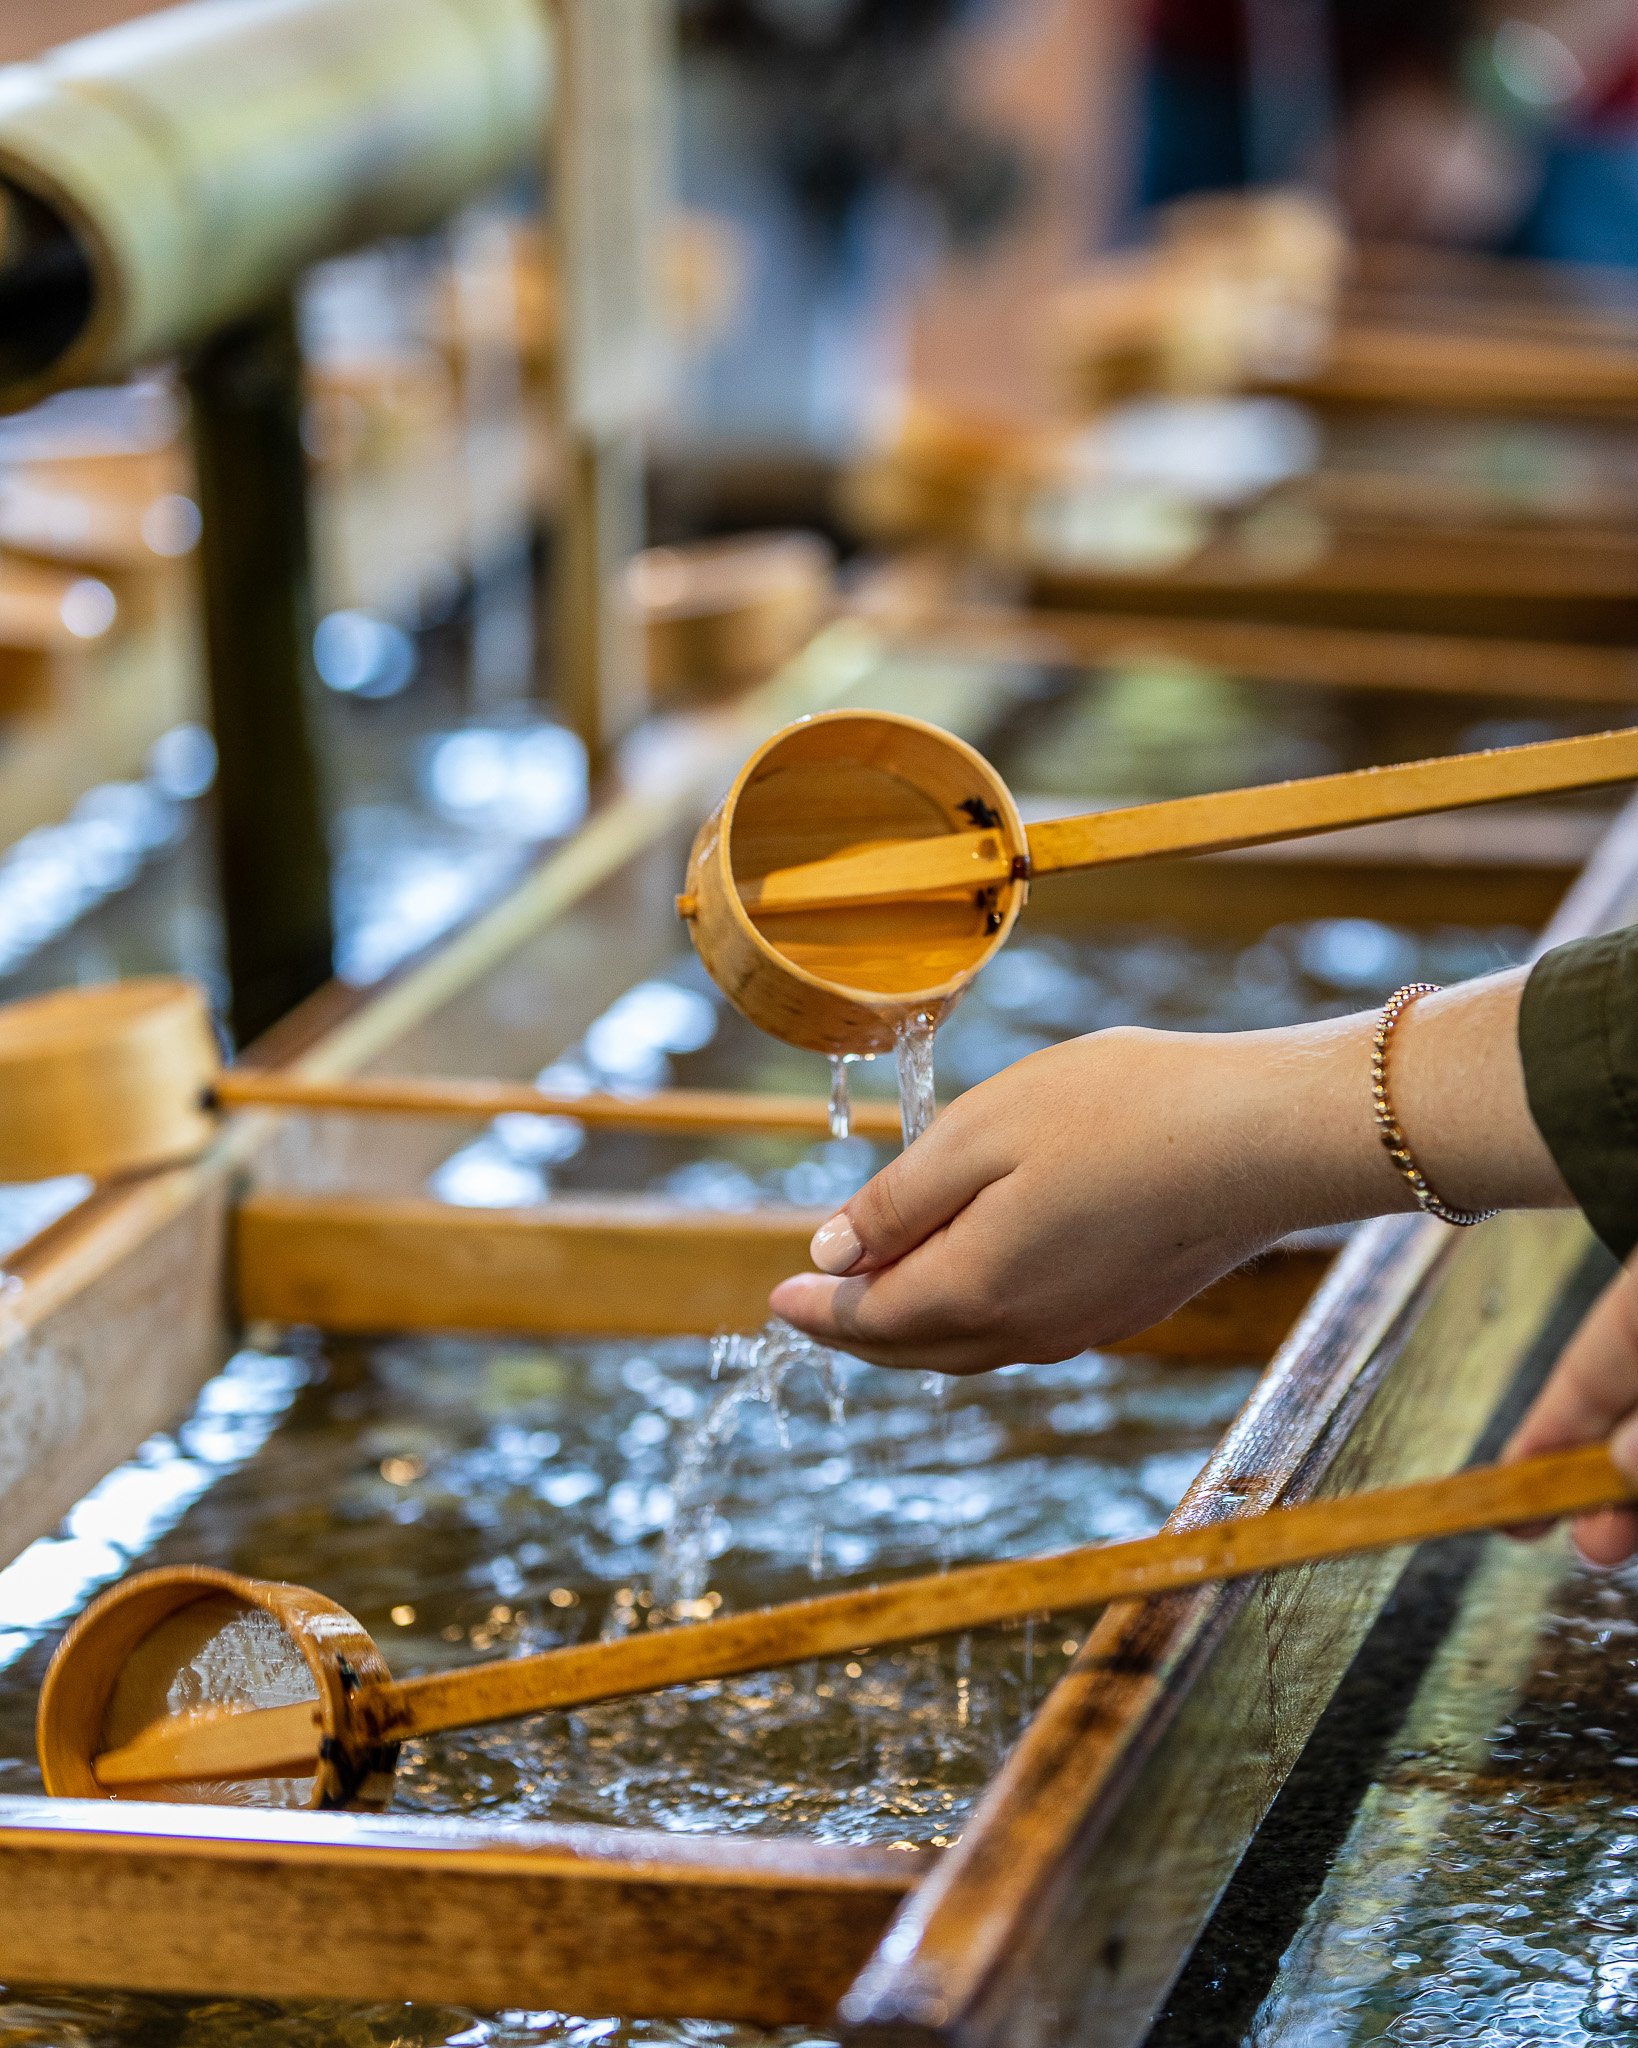
Meiji Shrine is my favorite photography location in all of Tokyo. The approach along the forested avenue from the southern entrance is one of the most powerful compositions in the city: a wide gravel path flanked by towering cedar trees, with the giant wooden torii gate appearing at the end as you walk deeper in. Early morning light filters through the canopy in shafts. You can hear birds.
The shrine itself is dedicated to Emperor Meiji and Empress Shoken and carries a quiet formality that rewards respectful, patient photography. If you time your visit right, you may witness a traditional wedding ceremony in the inner courtyard. I have photographed this several times and it never loses its impact.
Adjacent Yoyogi Park is a completely different energy. On weekends, musicians play, exercise groups gather, and local families spread out under the trees. It is approachable, warm, and ideal for street photography and candid portraits.
📷 Pro Tip: Enter from the southern Harajuku Gate entrance for the full forested avenue approach. Arrive at 6am, as soon as the shrine opens. Position yourself at the base of the main torii gate and use a wide lens (16 to 24mm) to emphasize the scale of the wood against the sky. For the wedding ceremony, if one is taking place in the inner courtyard, photograph from the perimeter using a 70 to 200mm and remain outside the ceremony's boundary. Do not use flash. The morning light in the inner courtyard comes from the east and is at its best between 7 and 9am.
Best time: Dawn. Access: Free. Harajuku Station on the JR Yamanote Line, south exit.

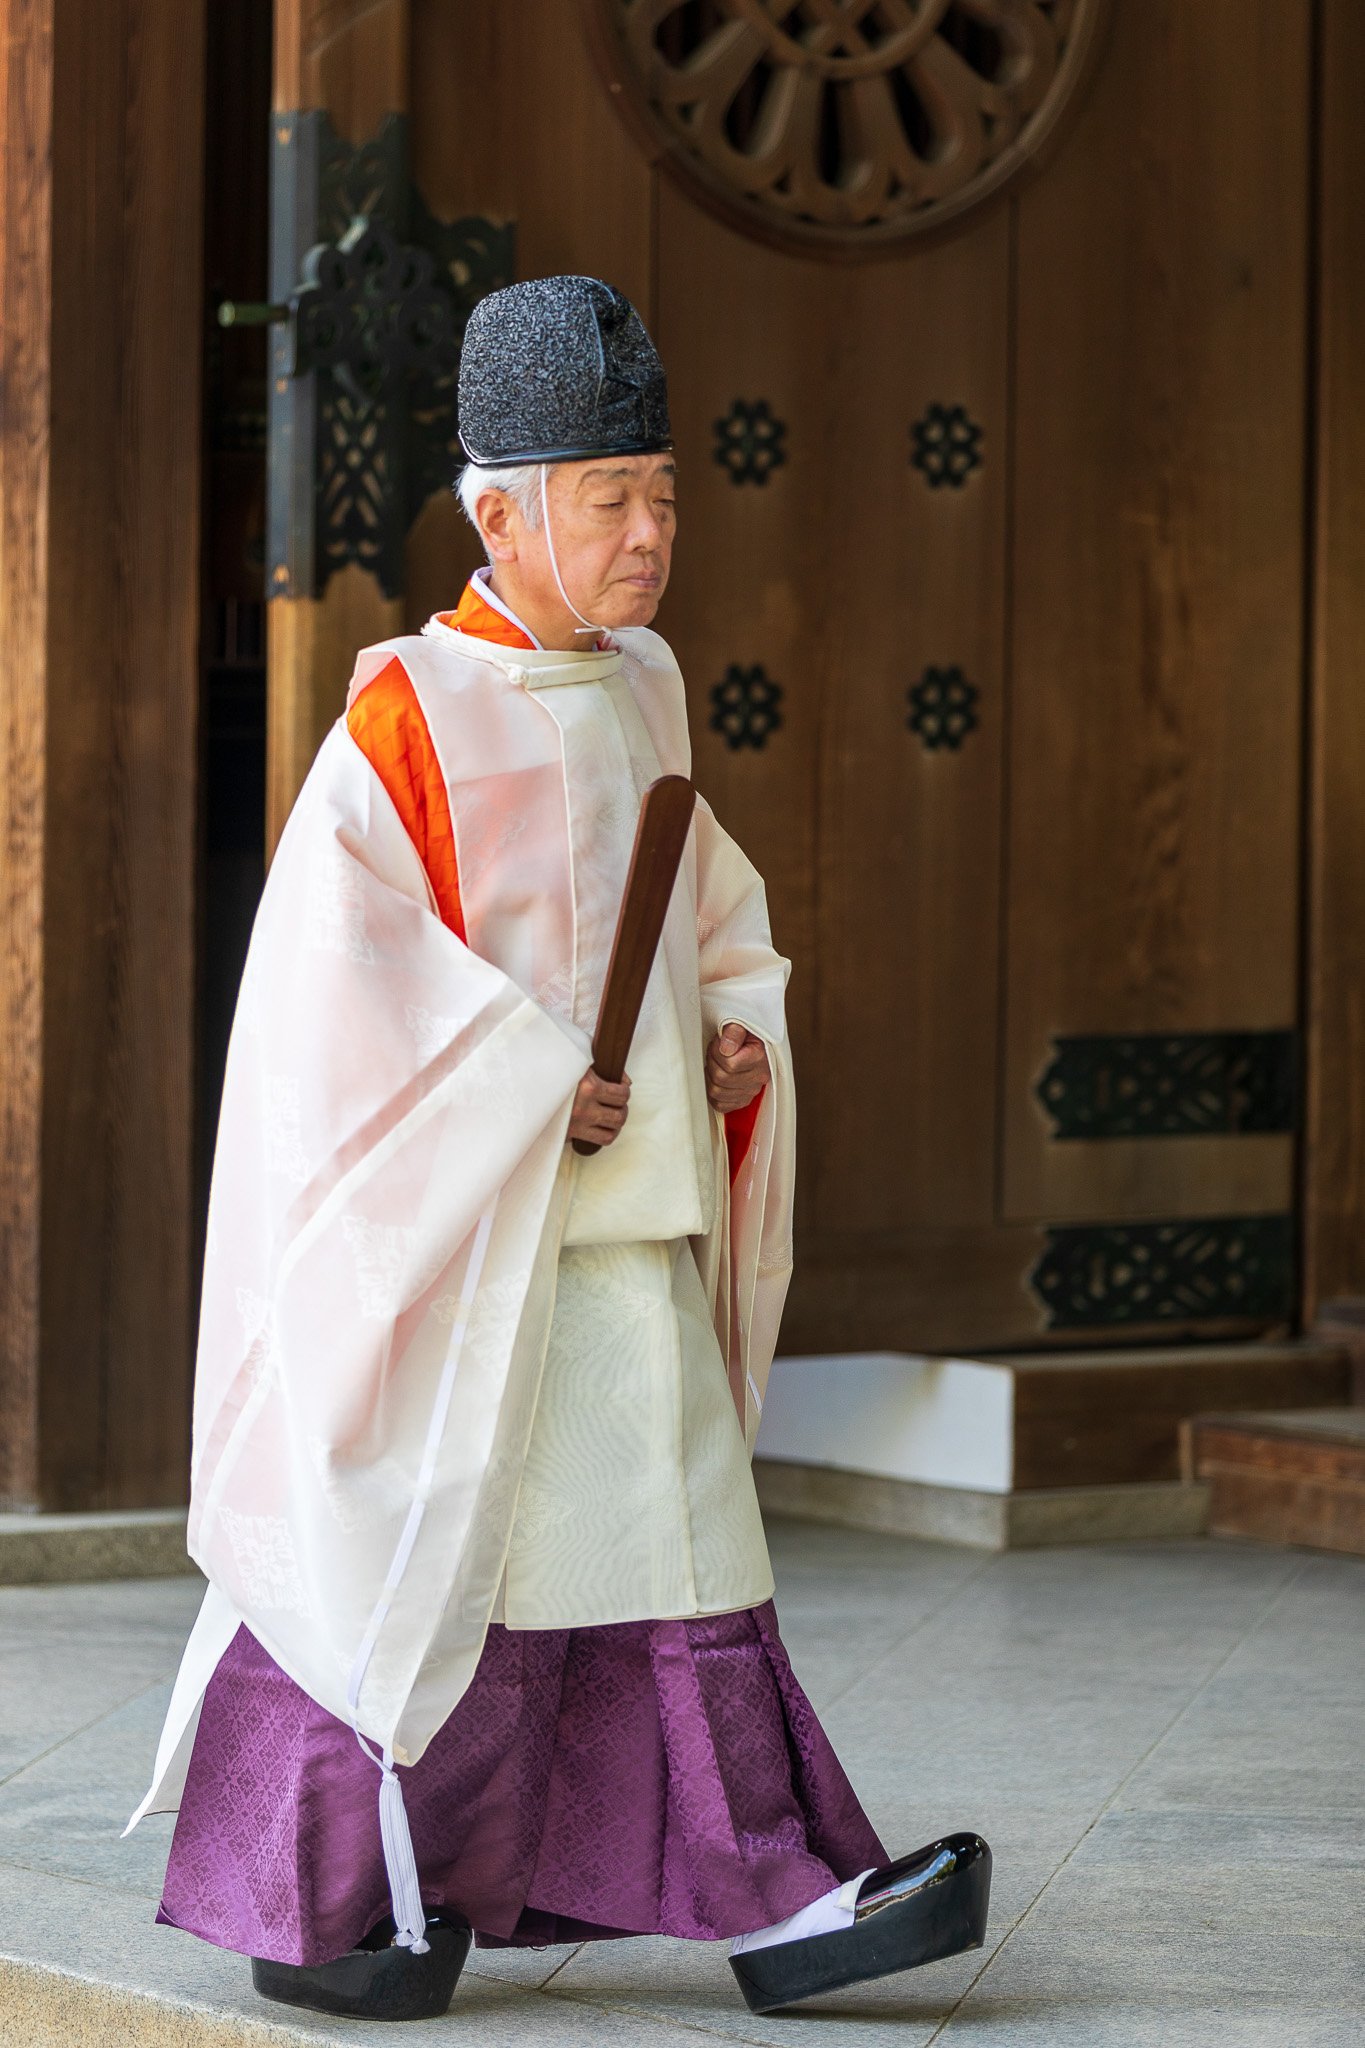
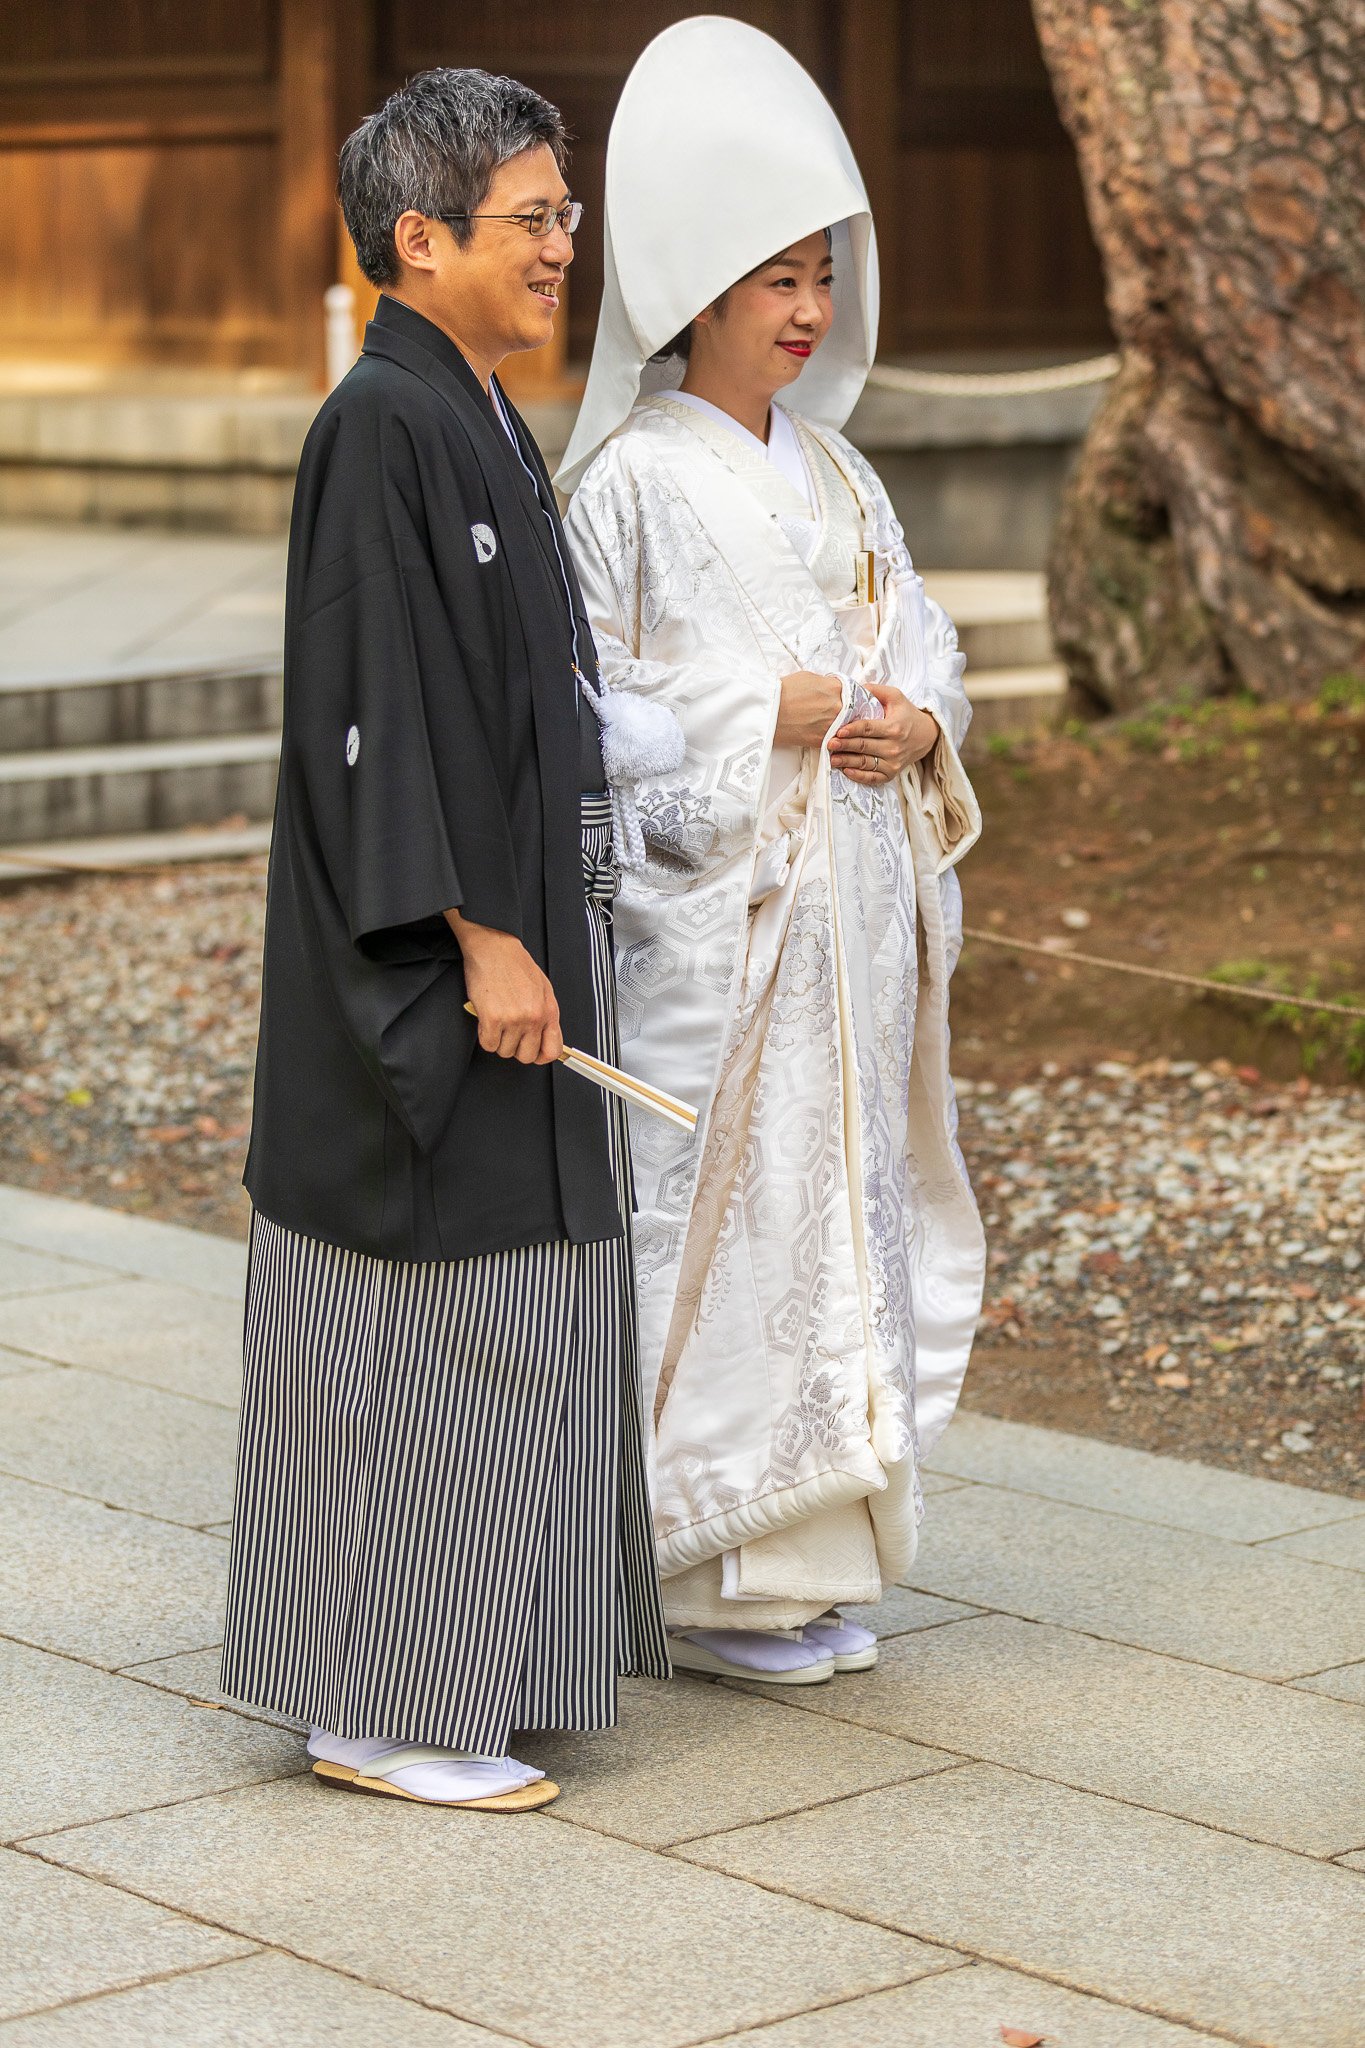
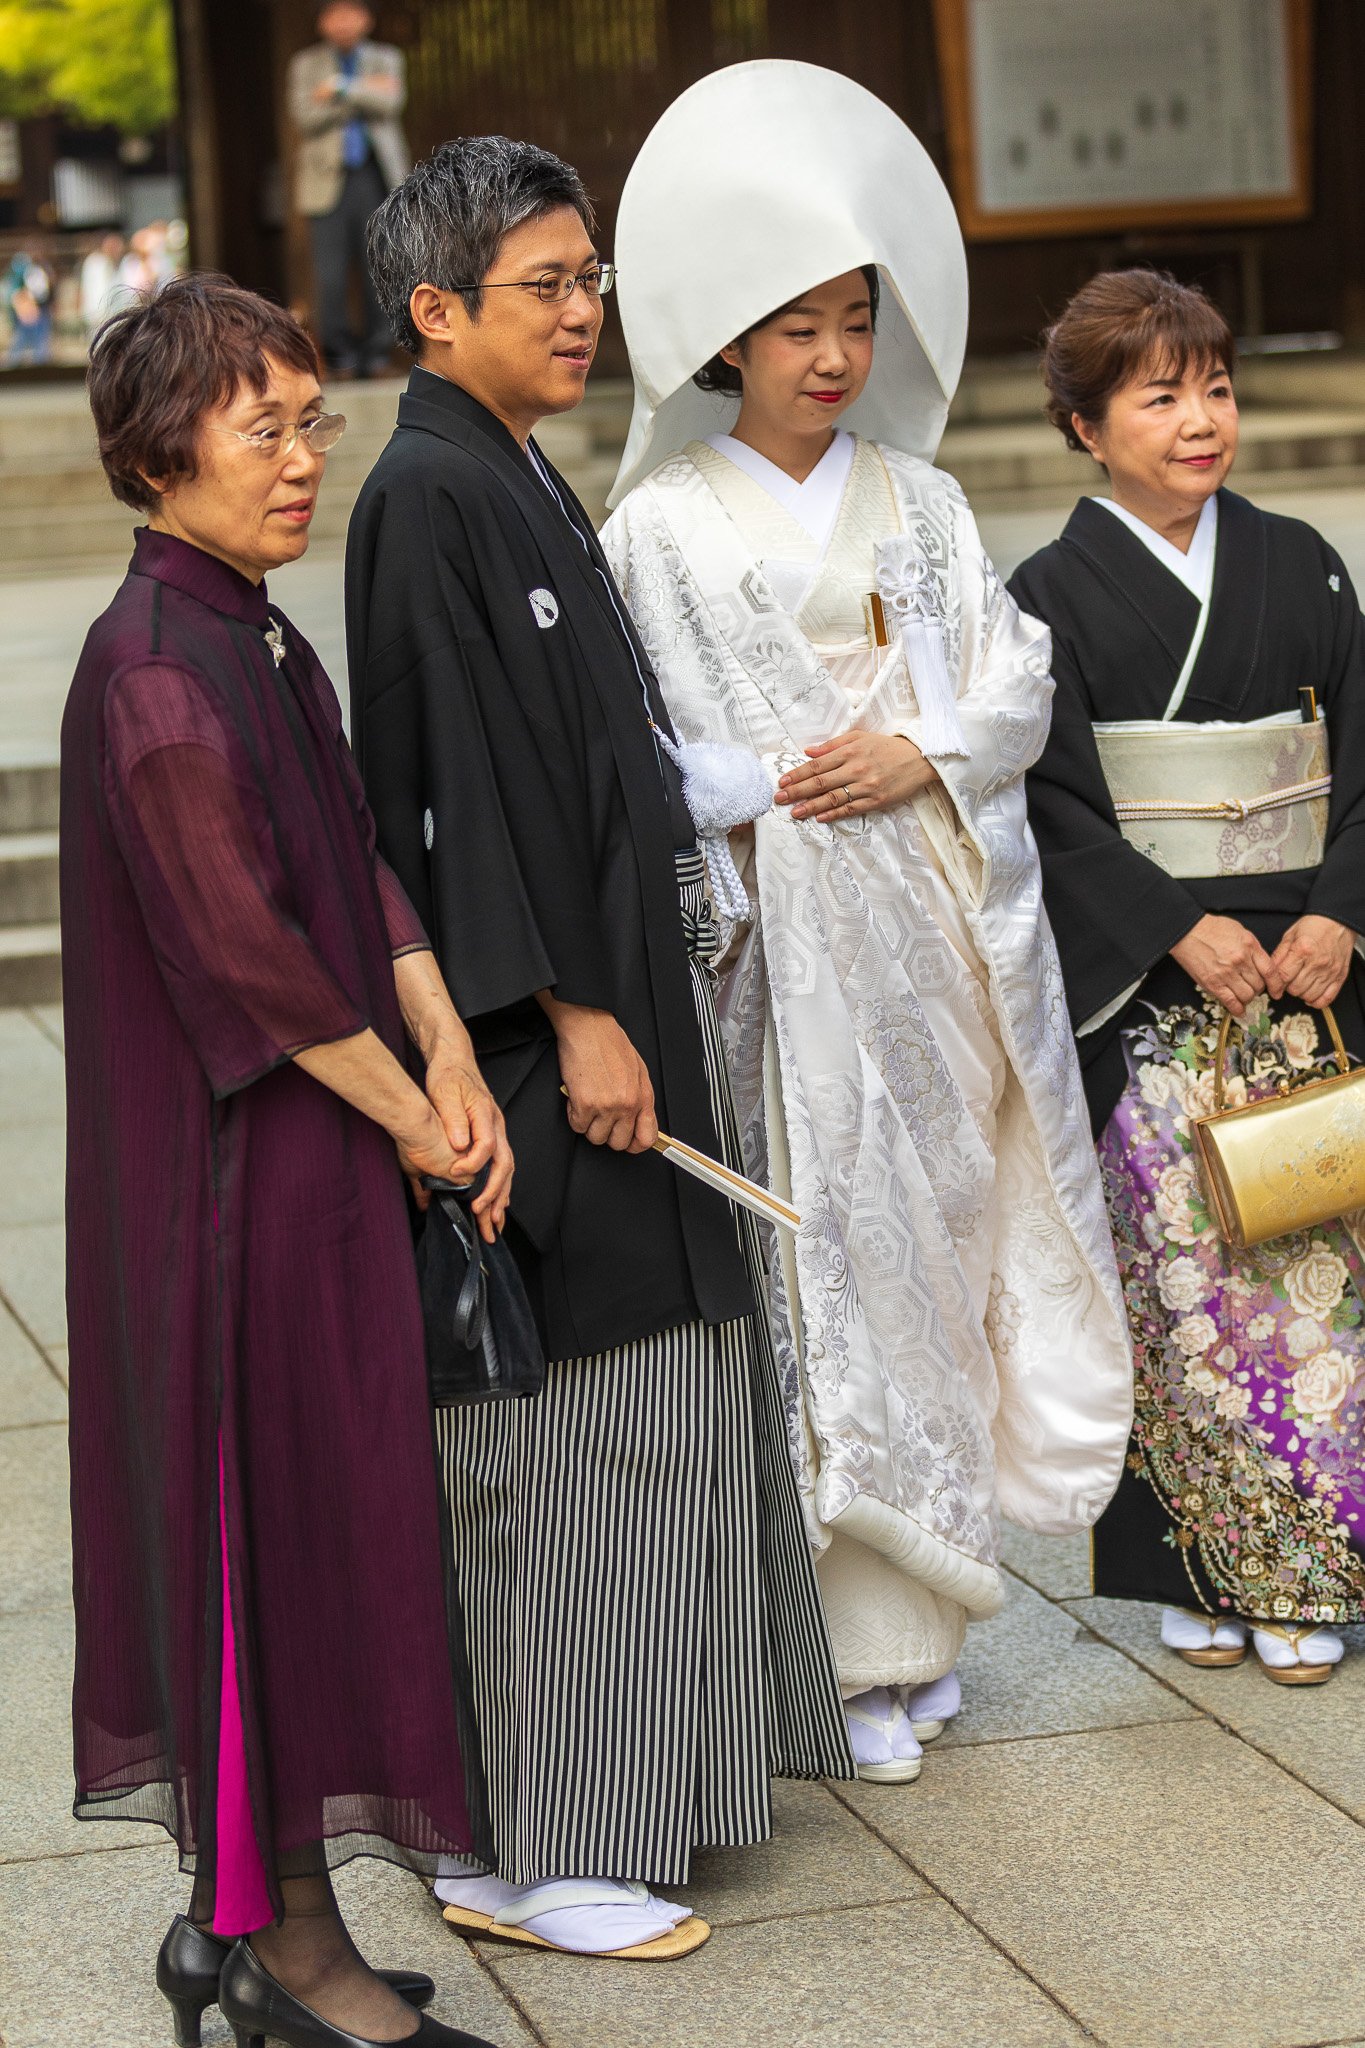
If you are lucky, you might see a traditional Japanese Wedding Ceremony taking place.
Akihabara:
Akihabara is Tokyo's electronics and otaku district, and it is unlike any place I have been. The main boulevard, Chuo-dori, is stacked with multi-story electronics retailers, manga and anime shops, gaming arcades, and maid cafes where costumed staff serve tea and desserts to customers who have found their people. Yodobashi Multimedia Akiba is a camera and electronics store so large it has its own gravity. I walked through it for over an hour and did not see everything. Three aisles of camera bags alone. If you need any gear while you are in Tokyo, this is where you go.
As a photography location, Akihabara is interesting but specific. The visual appeal is not in the buildings or the light; it is in the people and the signage. The street-level density of commercial energy, neon advertising, and concentrated subculture creates a visual atmosphere that is entirely its own.
📷 Pro Tip: Akihabara is most visually compelling at night, when the electronics signage lights up and the street fills with the overlap of salarymen, tourists, and dedicated otaku in cosplay. A 35mm or 50mm prime works well here for street portraits and close-range environmental shots. The density of people in the late evening makes a wide lens feel crowded; tighter focal lengths let you isolate individual characters from the visual noise. The maid cafes generally prohibit photography inside; respect that boundary. For the street itself, stand at the intersection of Chuo-dori and Sotokanda-dori at blue hour and use a 24mm wide to capture the full vertical stack of signage in both directions.
Best time: Evening into night. Access: Free. Akihabara Station on the JR Yamanote Line or Hibiya Line.

Ueno Park
Ueno Park is my favorite park in Tokyo, and I come back every visit. It is, in many ways, Tokyo's equivalent of Central Park: a large, accessible urban park packed with cultural institutions, local life, and photography opportunities across every season.
In spring, the park hosts one of the most famous cherry blossom viewing gatherings in the city. The rows of sakura along the main avenue create a canopy of pale pink that lasts about two weeks and draws enormous crowds. Arrive at dawn to photograph it without them. In autumn, the trees along the park's perimeter turn gold and red. In winter, the Shinobazu Pond reflects bare branches and the open sky.
The park's cultural density is also part of what makes it interesting. The Tokyo National Museum sits at the northern end. A Toshogu Shrine is tucked inside the park. The small zoo has grounds worth walking. The atmosphere on weekends, with families, street musicians, and photographers set up on every bench, is warm and endlessly photogenic.
📷 Pro Tip: For cherry blossoms, arrive at 5:30am to photograph the main avenue in soft pre-dawn light without a single person in the frame. By 7am, the park begins to fill. Position yourself at the base of the central avenue looking north, using a 24 to 70mm lens at eye level to compress the canopy overhead. For the Shinobazu Pond and its surrounding lotus garden, come at golden hour in late summer when the lotus is in full bloom and the afternoon light is raking across the water.
Best time: Dawn for cherry blossoms; golden hour year-round. Access: Free. Ueno Station on the JR Yamanote Line or Tokyo Metro.
Yoyogi Park
The Yoyogi Park is a large park situated five minutes’ walk from the Harajuku Station and the Meiji Shrine. It is also the site where the first successful powered aircraft flight in Japan took place on December 19, 1910. The park is a favorite among locals, and it's where you will see musicians, jugglers, comedians, and exercise groups. It is a beautiful place, primarily in the fall, when you see the colors of the autumn leaves, including the golden leaves of the many ginkgo trees.

The Soho Odaiba:
Odaiba is Tokyo's artificial island in Tokyo Bay, built on reclaimed land and connected to the mainland by the Rainbow Bridge. It has a slightly different energy from the rest of the city: wider streets, futuristic architecture, and a waterfront that gives you an unobstructed view of the Rainbow Bridge and the Tokyo skyline across the bay. The area is popular on weekends with families and young couples, and it feels spacious in a way that central Tokyo does not.
The SOHO Odaiba is the visual anchor of the island for photographers. The building's colorful multi-story facade and grid of doorways and windows creates a graphic, almost abstract exterior that photographs beautifully when the late-afternoon light catches it. At night, when the building is fully illuminated, it becomes a different subject entirely.
📷 Pro Tip: Visit in the early evening, arriving before sunset to catch the building in the last of the warm directional light, then stay as it transitions into full illumination after dark. A standard 24 to 70mm zoom covers both the full facade shot and the tighter detail compositions of individual doorways and window patterns. The best position is directly across the street or slightly to one side, where you can include the colorful exterior without distortion. For the Rainbow Bridge and skyline view from the Odaiba waterfront, bring your tripod and a wide-angle lens. The bridge illuminates at night and reflects across the bay. This is one of the few locations in central Tokyo where a drone might be feasible; check current airspace restrictions for the Odaiba area before flying, as regulations vary from the no-fly zones over central Tokyo.
Best time: Late afternoon into evening. Access: Free to visit exterior. Odaiba Seaside Park Station on the Yurikamome Line, or Telecom Center Station.

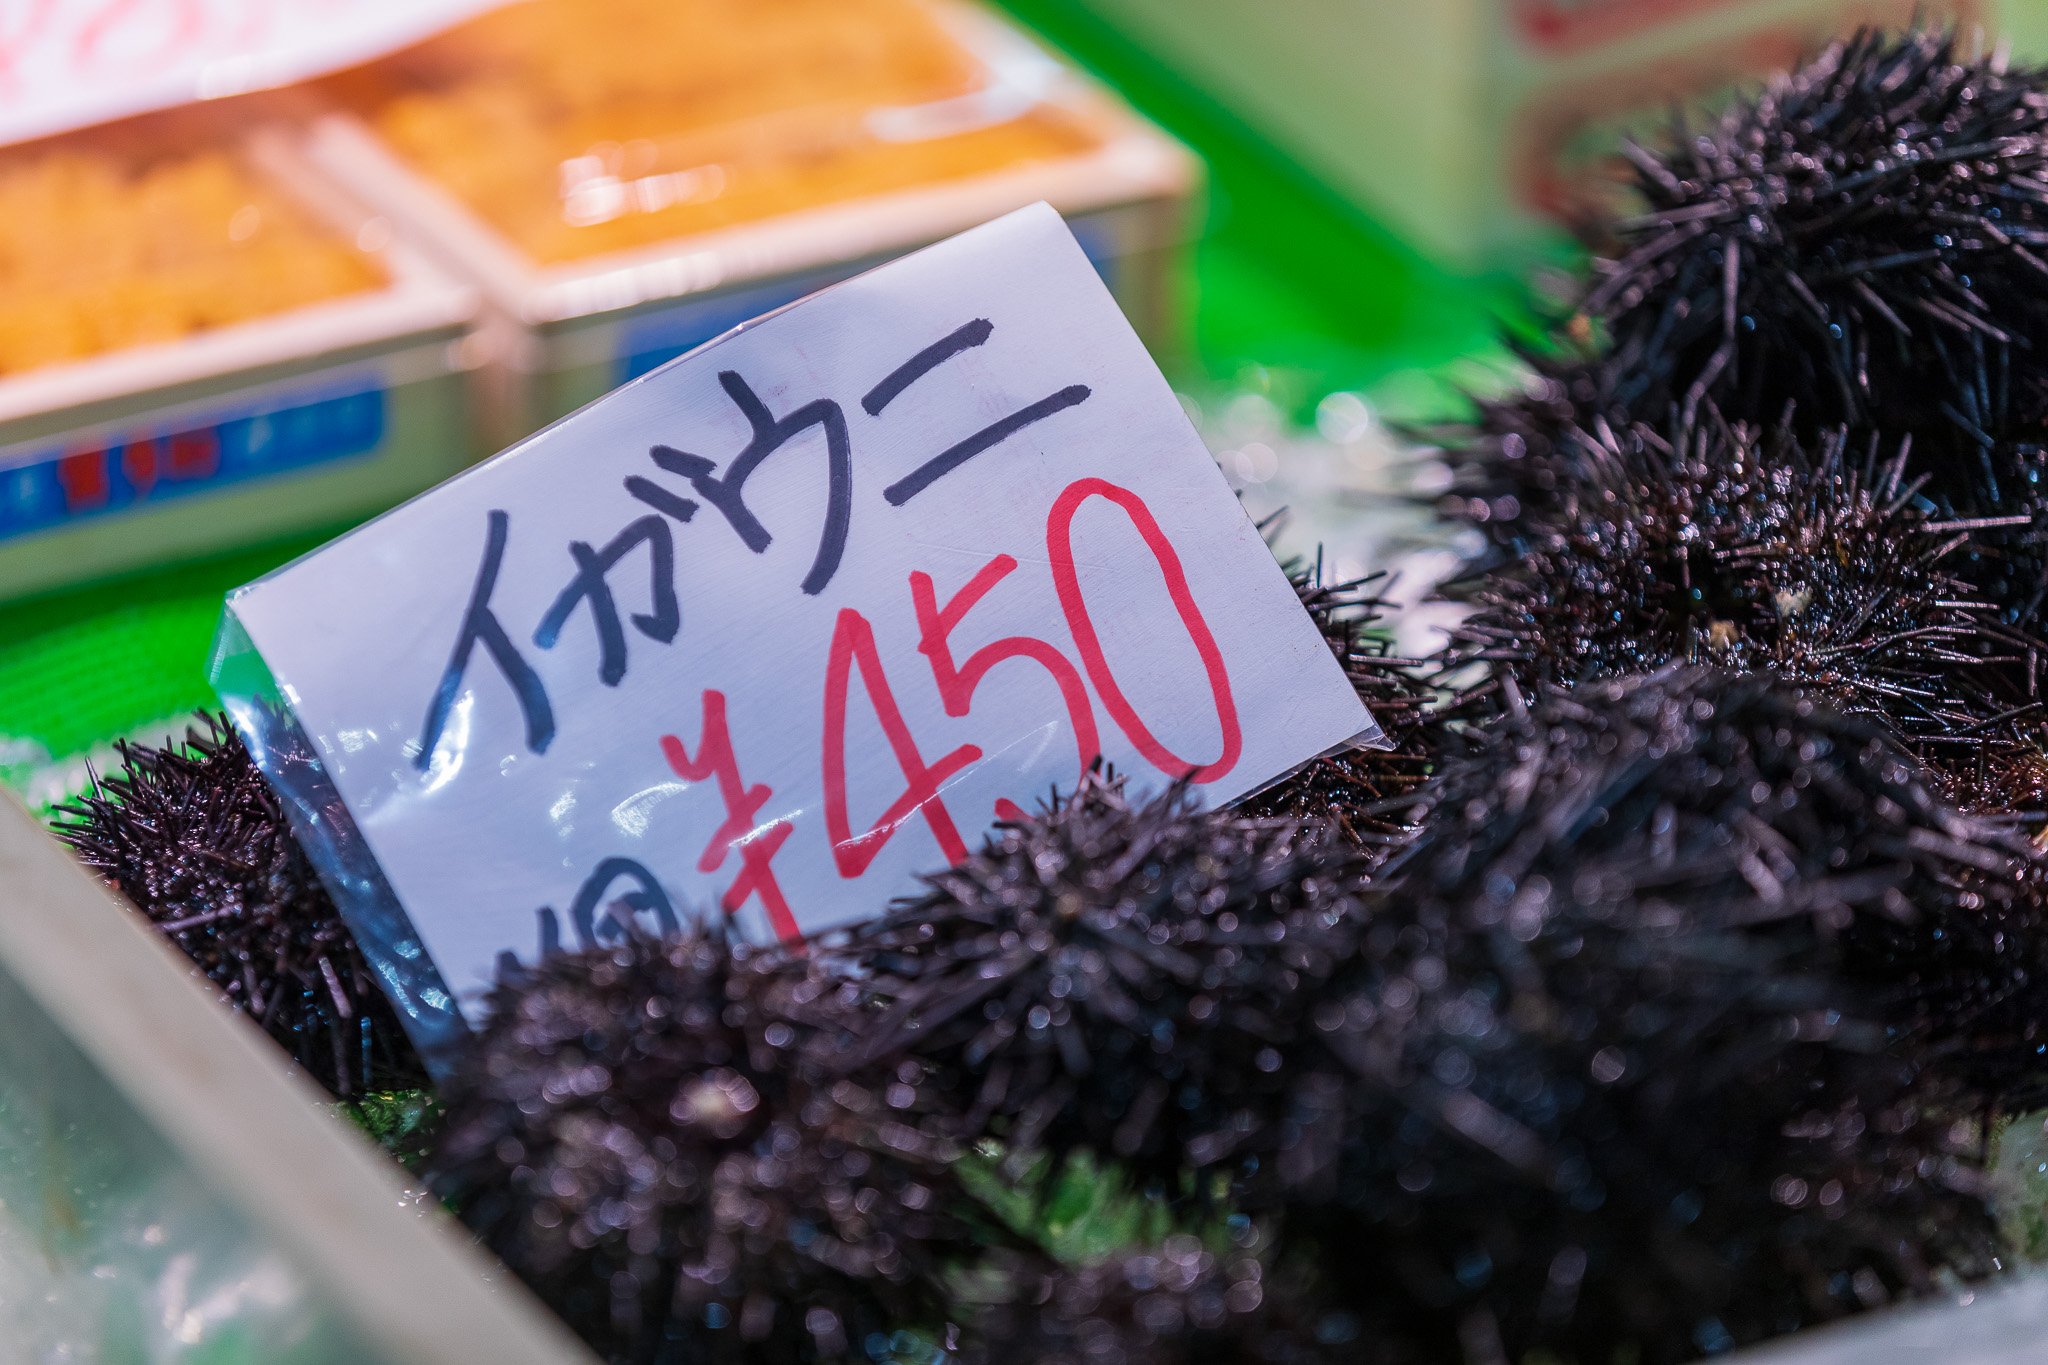
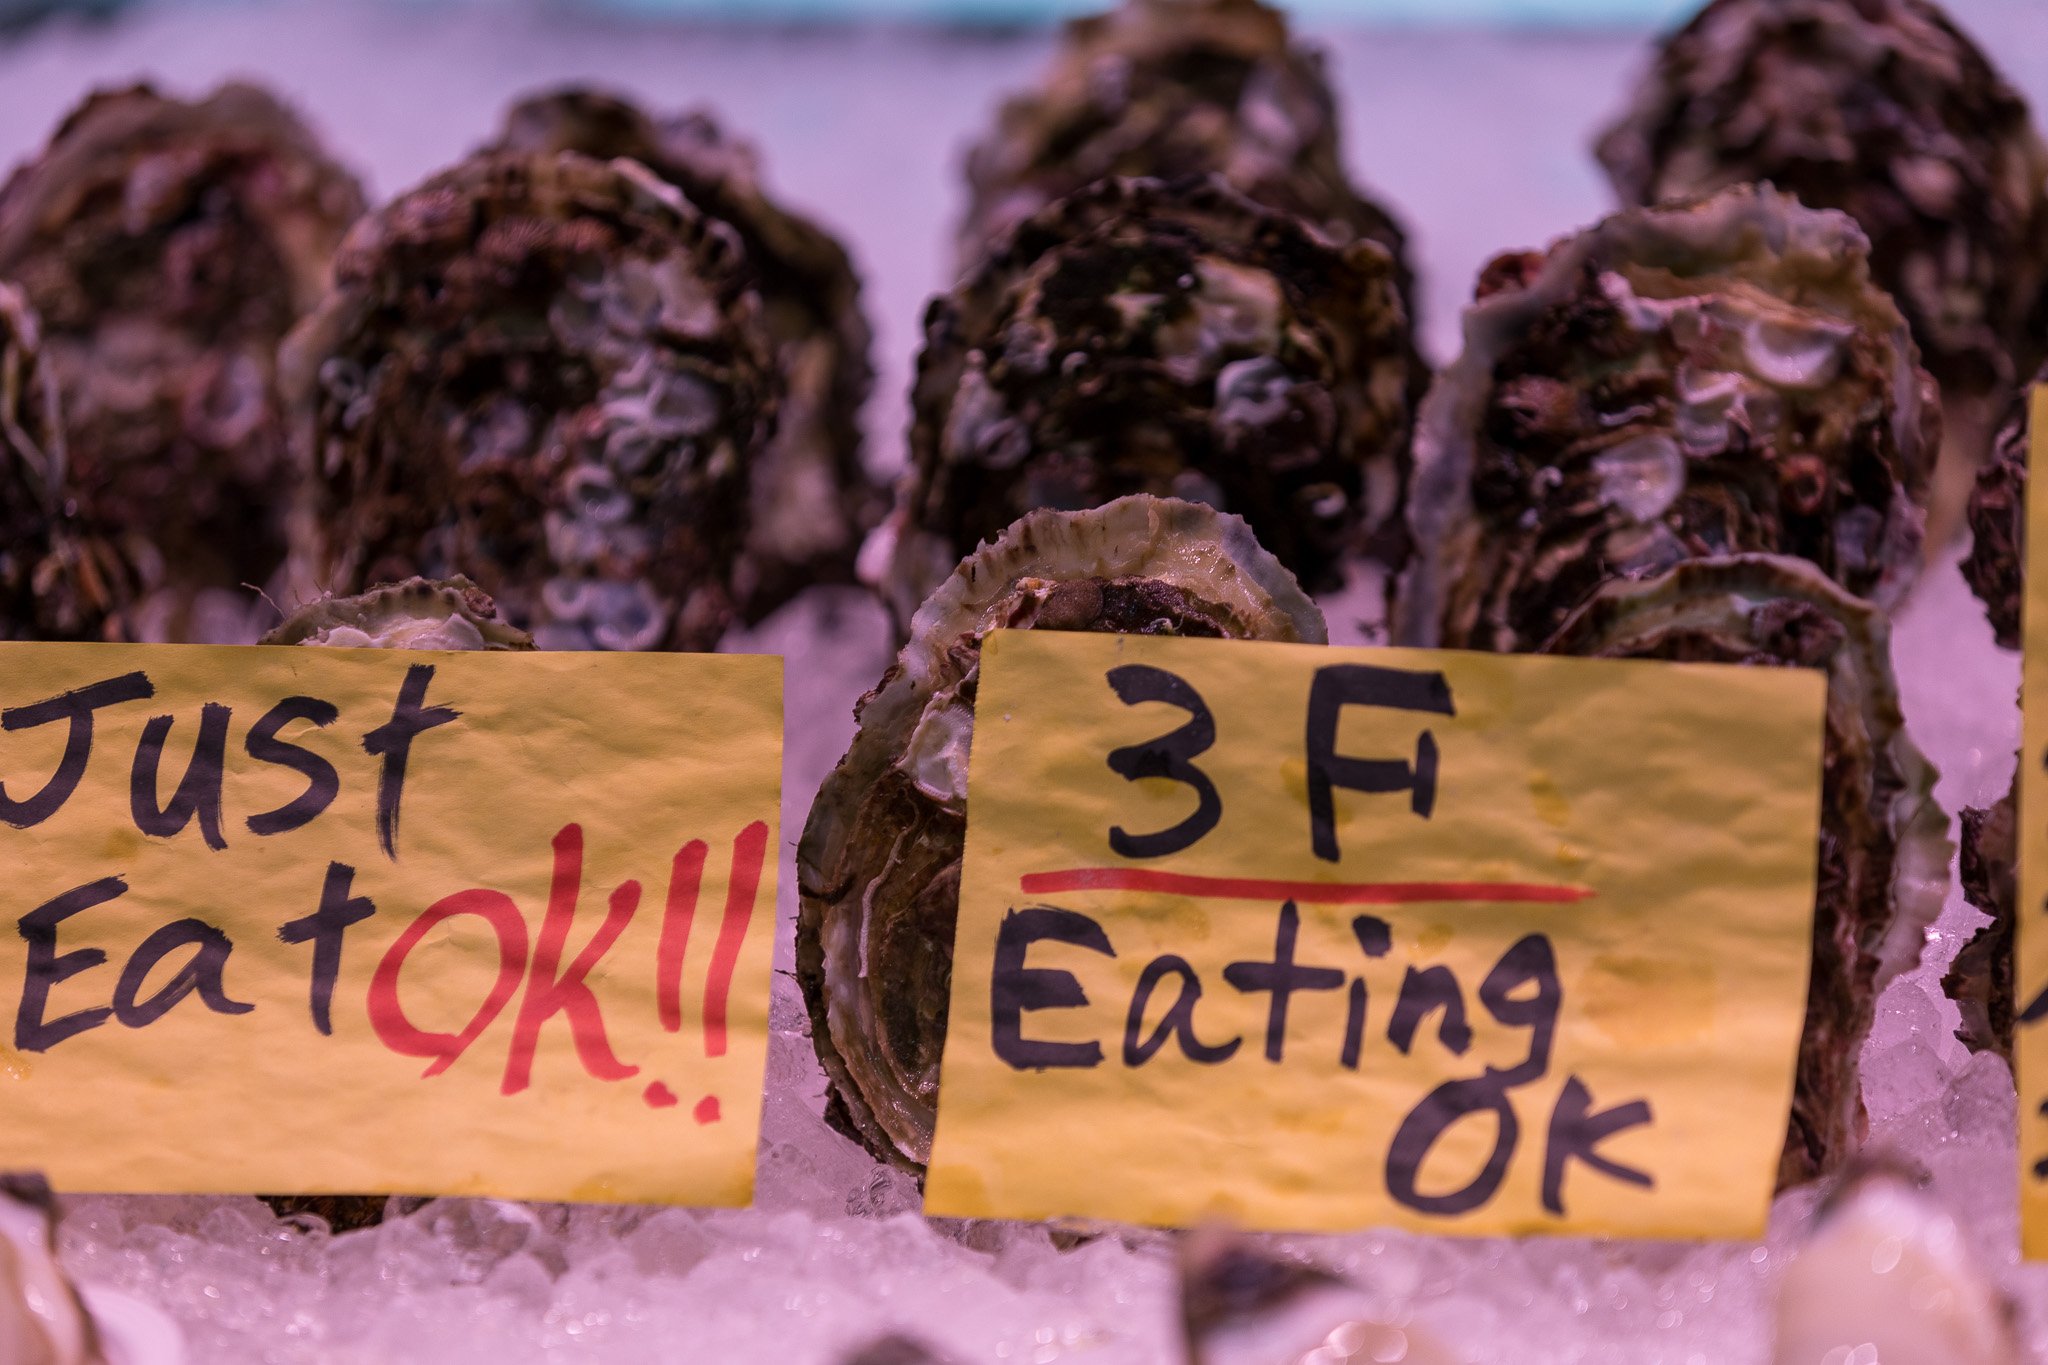
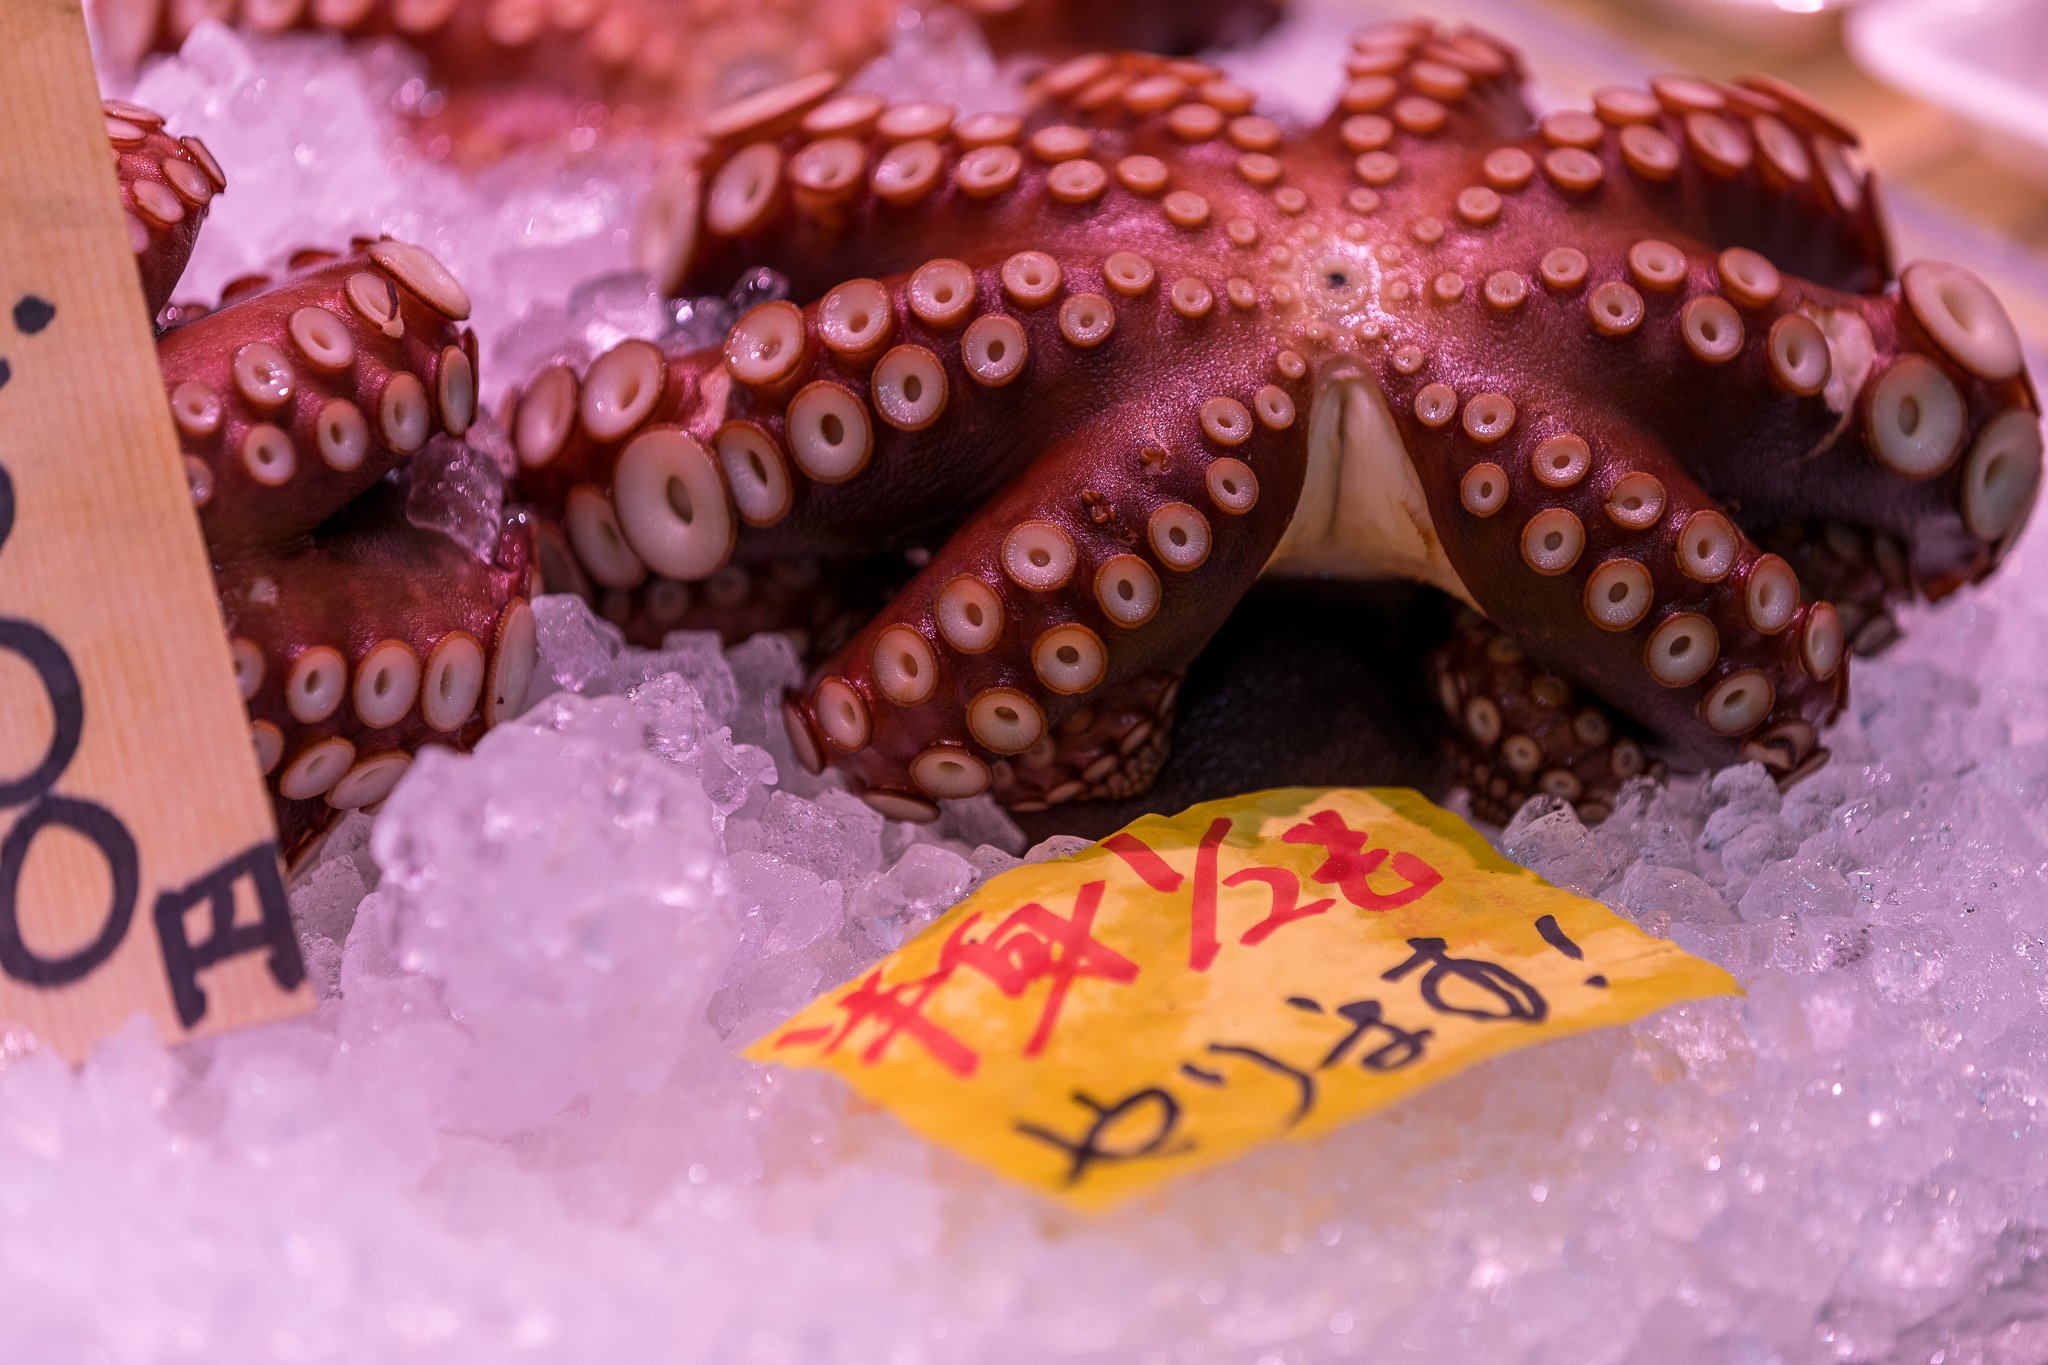
Tsukiji Fish Market:
It is one of the best places in Tokyo to enjoy fresh seafood and is a fun place to walk around. It consists of a few blocks of wholesale and retail shops, as well as restaurants crowded along narrow lanes. A visit to Tsukiji Outer Market is best combined with a fresh sushi breakfast or lunch at one of the local restaurants. The restaurants are typically open from 5:00 in the morning to around noon or early afternoon.

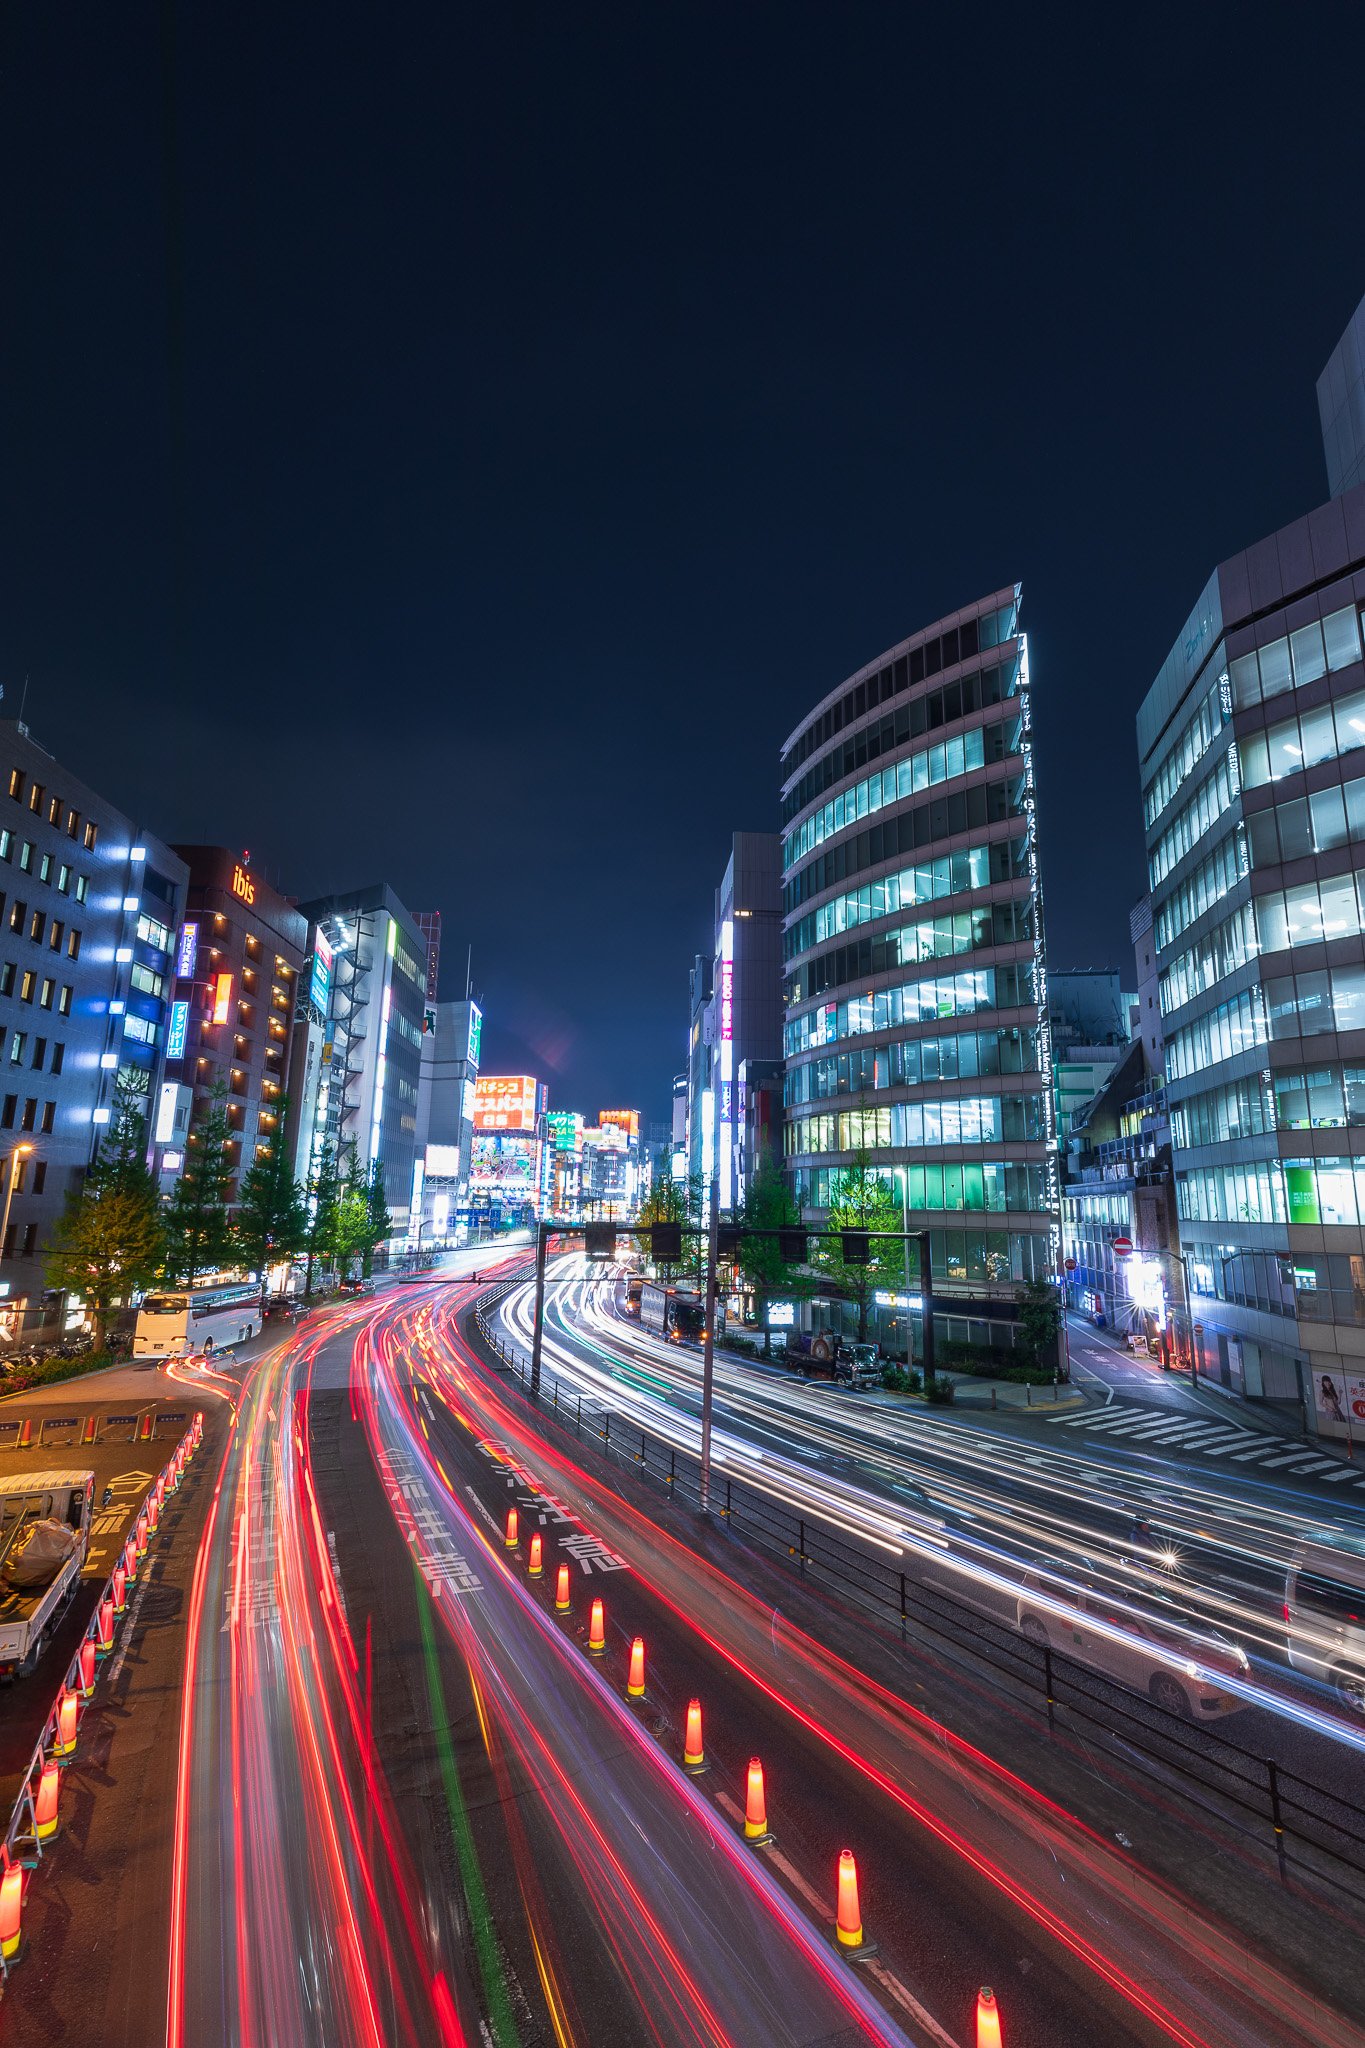
Night Photography
Tokyo, is one of those cities that is made for Night Photography.

Tokyo transforms into a dazzling spectacle at night, with neon lights, bustling intersections, and illuminated landmarks. Night photography in Tokyo opens up endless creative possibilities, from capturing iconic cityscapes to experimenting with long exposures at busy intersections.

Photography Tours
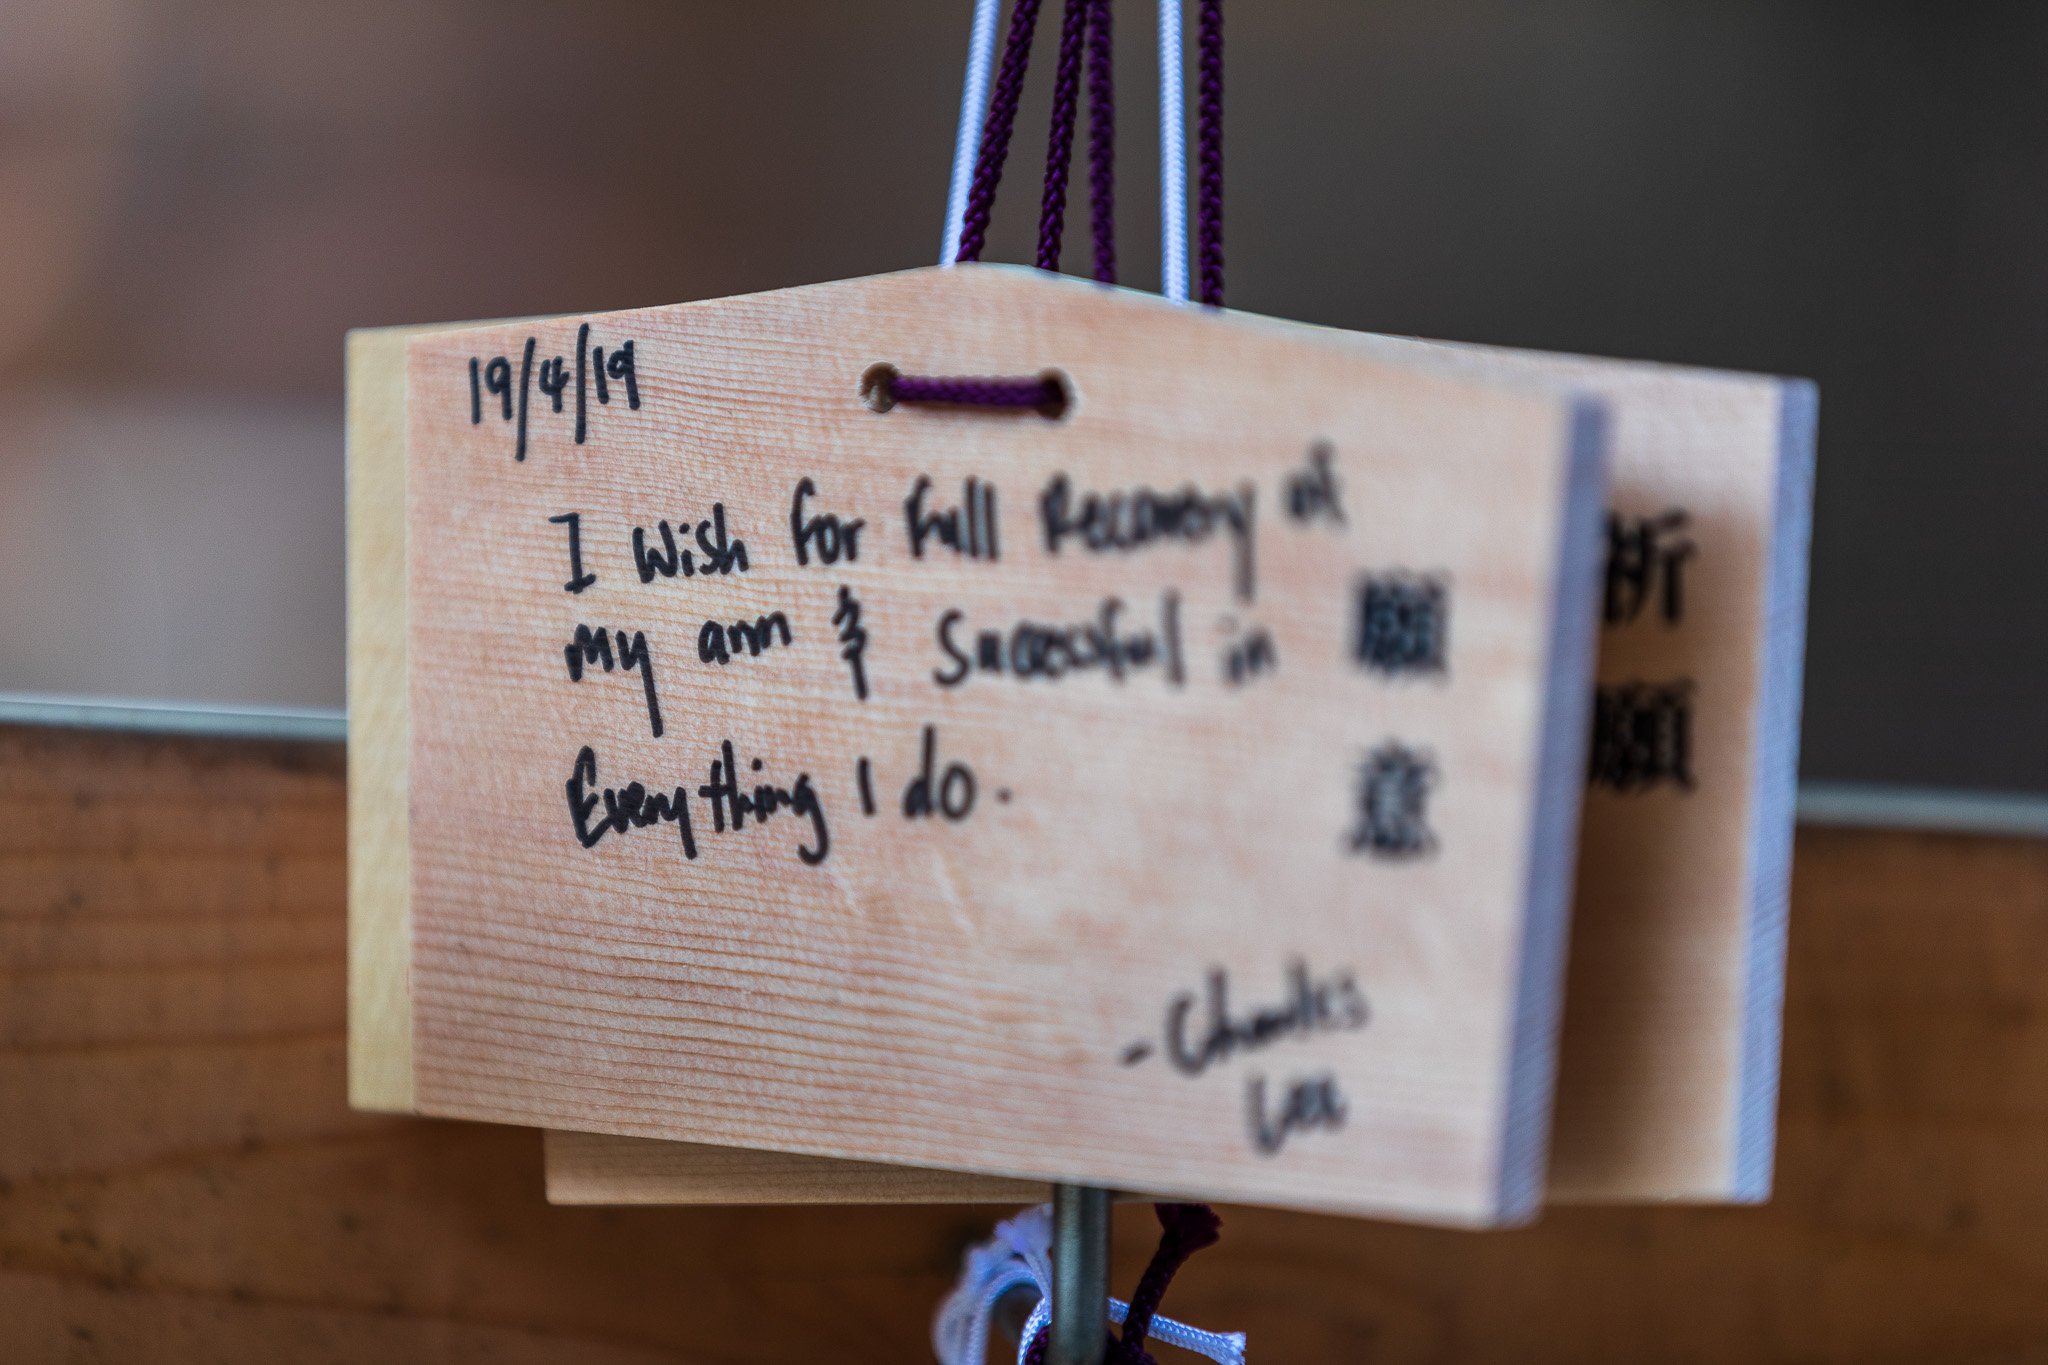
I would highly recommend the Photography Tours from Eyexplore. I took their Night Photography Tour with Charles. Charles is a super-friendly guy who is extremely knowledgeable about photography. During the 2.5-hour non-rushed tour, he took us to the best locations to photograph Tokyo at night. It’s really worth every penny!!
Another great tour is to take a tour with Laurence Bouchard
Festivals and Events Worth Photographing
Cherry Blossom Season (late March to mid-April) is the most photographically significant time of year in Tokyo. Ueno Park, Shinjuku Gyoen, Chidorigafuchi, and Meguro River are the primary locations. Hanami (blossom-viewing) gatherings fill the parks with food, drink, and community. For photographers, the visual opportunity is extraordinary, but timing is everything. The blooms last roughly ten days, and peak timing shifts by a week or two depending on the year. Plan with flexibility if blossom photography is your primary goal.
Sumo Tournaments (January, May, and September) are held in Tokyo at the Ryogoku Kokugikan arena. Watching a sumo match is one of the most culturally specific experiences available in Japan. Inside the arena, the combination of ritual, scale, and atmosphere is unlike anything else. Photography from your seat is permitted; flash photography and tripods are not. A 70 to 200mm lens handles the distance from seating to the dohyo.
Obon Festival (mid-August) is a Buddhist occasion honoring the spirits of ancestors, marked throughout Japan by bon odori (traditional circle dancing) at shrines and temples across the city. Tokyo's version varies by neighborhood, and the smaller shrine celebrations are often more intimate and photographically rewarding than the larger public events. Look for neighborhood festivals rather than the main commercial gatherings.
Tokyo International Film Festival (October) draws filmmakers and industry professionals to Roppongi Hills. The opening ceremony and red carpet events offer portrait photography opportunities, and the surrounding Roppongi area is worth exploring for street and architectural photography in the evenings.
New Year at Meiji Shrine (early January) is one of the largest public gatherings in Japan. Millions of visitors make the hatsumode, the first shrine visit of the new year, in the opening days of January. The lines are enormous and the atmosphere is extraordinary: incense, ceremonial drums, traditional dress, and an unmistakable collective energy. For photographers who do not mind crowds, this is exceptional documentary material.
Final Thoughts
Tokyo is the kind of city that makes you a better photographer without you noticing it happening. The light teaches you discipline. The energy teaches you to anticipate. The quiet teaches you to slow down. You come back from a day of shooting in Tokyo with more frames, more ideas, and more questions than you arrived with. That is rare.
Every time I land at Narita or Haneda and feel the first blast of cool air or summer heat stepping off the plane, I feel the same thing I have felt every time: I am glad to be back. The city delivers something different on each visit, and I have stopped trying to see all of it in one trip. I just try to see it well.
Go to Meiji Shrine at dawn before a single other tourist arrives. Walk the back streets of Asakusa until you find a food stall that has no English menu and just point at what the person next to you is eating. Sit at the counter at Omoide Yokocho and let the smoke and the yakitori and the low light do the work for you. Tokyo will take care of the rest.
If you would like to join a future photography workshop, visit my Workshops page for current offerings and upcoming dates. You can also connect with me on Instagram (@chasinghippoz) and Facebook, or subscribe to the newsletter for travel photography tips, destination guides, and behind-the-scenes stories from more than 75 countries. I look forward to sharing the journey with you.
More Photography & Travel Guides from Chasing Hippoz
My Photography & Travel Guide to Kyoto, Japan— Kyoto is the natural companion to Tokyo, just two and a half hours by Shinkansen. Where Tokyo is kinetic and relentless, Kyoto is meditative and composed. The bamboo grove at Arashiyama, the red torii gates of Fushimi Inari, and the preserved geisha districts of Gion: Kyoto gives you a completely different Japan, and together the two cities tell the full story.
My Photography & Travel Guide to Osaka, Japan — An hour from Kyoto and three hours from Tokyo by bullet train, Osaka has a reputation for food and energy that is distinct from both. Dotonbori at night, Osaka Castle at dawn, and the covered shopping arcades of Namba make it a rewarding complement to a Japan trip that starts or ends in Tokyo.
My Photography & Travel Guide to Hong Kong — Hong Kong is a natural next chapter for anyone who falls hard for the visual intensity of Tokyo. Different in culture and geography, but sharing the same dense urban energy, the same quality of neon at night, and the same reward for photographers willing to get up early and stay out late.

Are you carrying too much camera equipment, but still coming home disappointed with your travel photographs?
You are not alone. Many photographers fall into the packing trap. They bring too much, plan too little, and spend their trip scrambling to capture photographs instead of enjoying the experience.
Capture the World offers a better approach.
In this practical guide, travel photographer Vito L. Tanzi shares the five step system he uses to plan photography trips, pack with purpose, work with the best light, and return home with stronger images.
Inside, you will learn how to:
• Travel lighter without sacrificing image quality
• Choose destinations that match your photography goals
• Visit at the right time for weather, light, wildlife, festivals, or seasonal conditions
• Build a photography itinerary around sunrise, sunset, blue hour, and changing weather
• Select the equipment you will actually use
• Find promising locations before you arrive
• Avoid the stress and exhaustion that can ruin a photography trip
• Stay flexible when weather, crowds, or travel plans change
This guide includes practical planning advice, useful photography tools, real travel examples, and a complete system you can use again and again.
Whether you are preparing for your first international photography trip or planning a weekend closer to home, Capture the World will help you travel with greater purpose, photograph with more intention, and spend less time worrying about what is inside your camera bag.
Because the best photography trip is not the one where you carry everything.
It is the one where you are ready when the right moment appears.
📸 Format: PDF download
Instant Download