My Photography & Travel Guide to Interlaken, Switzerland
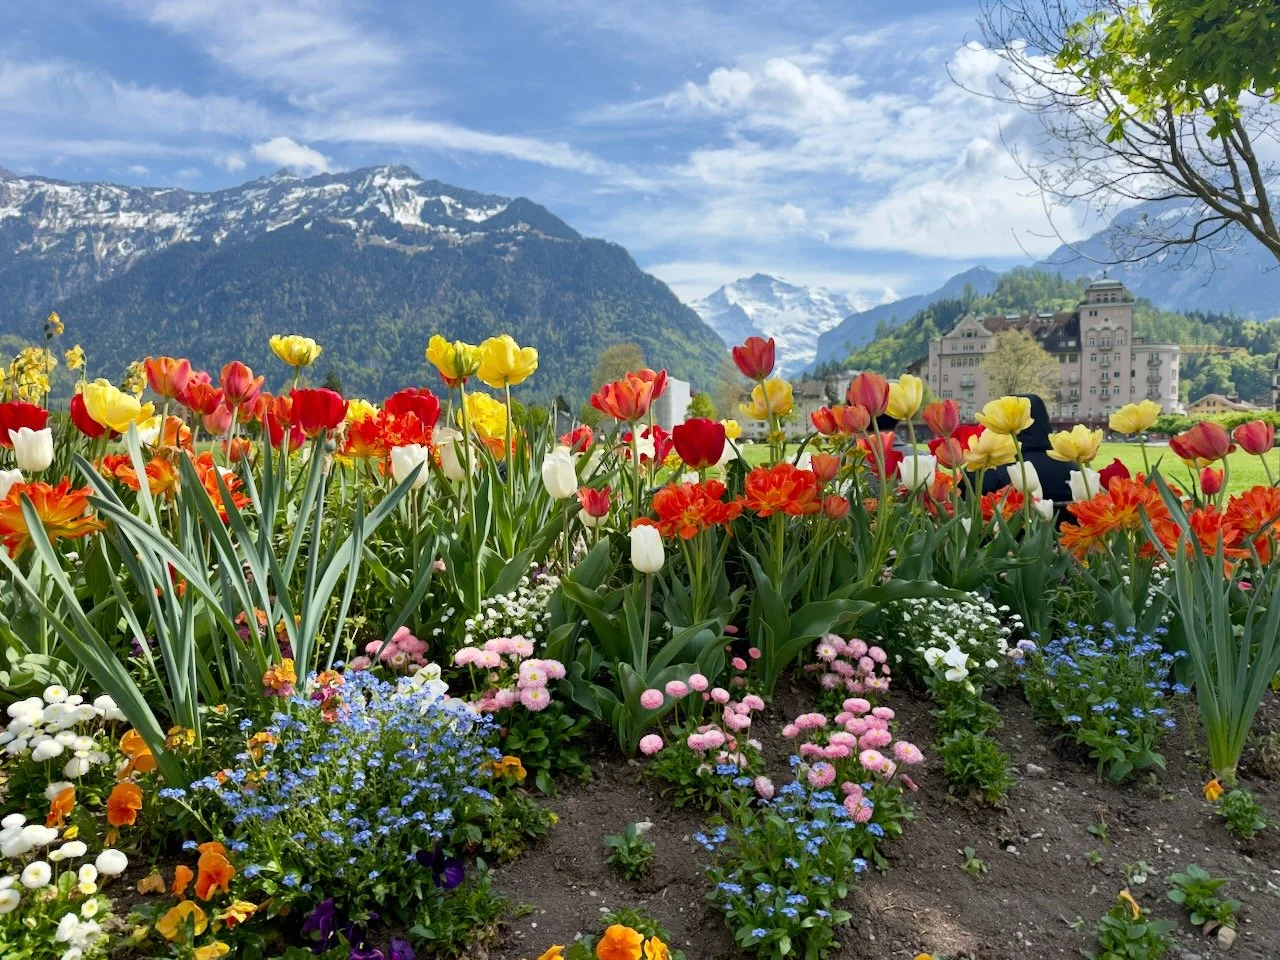
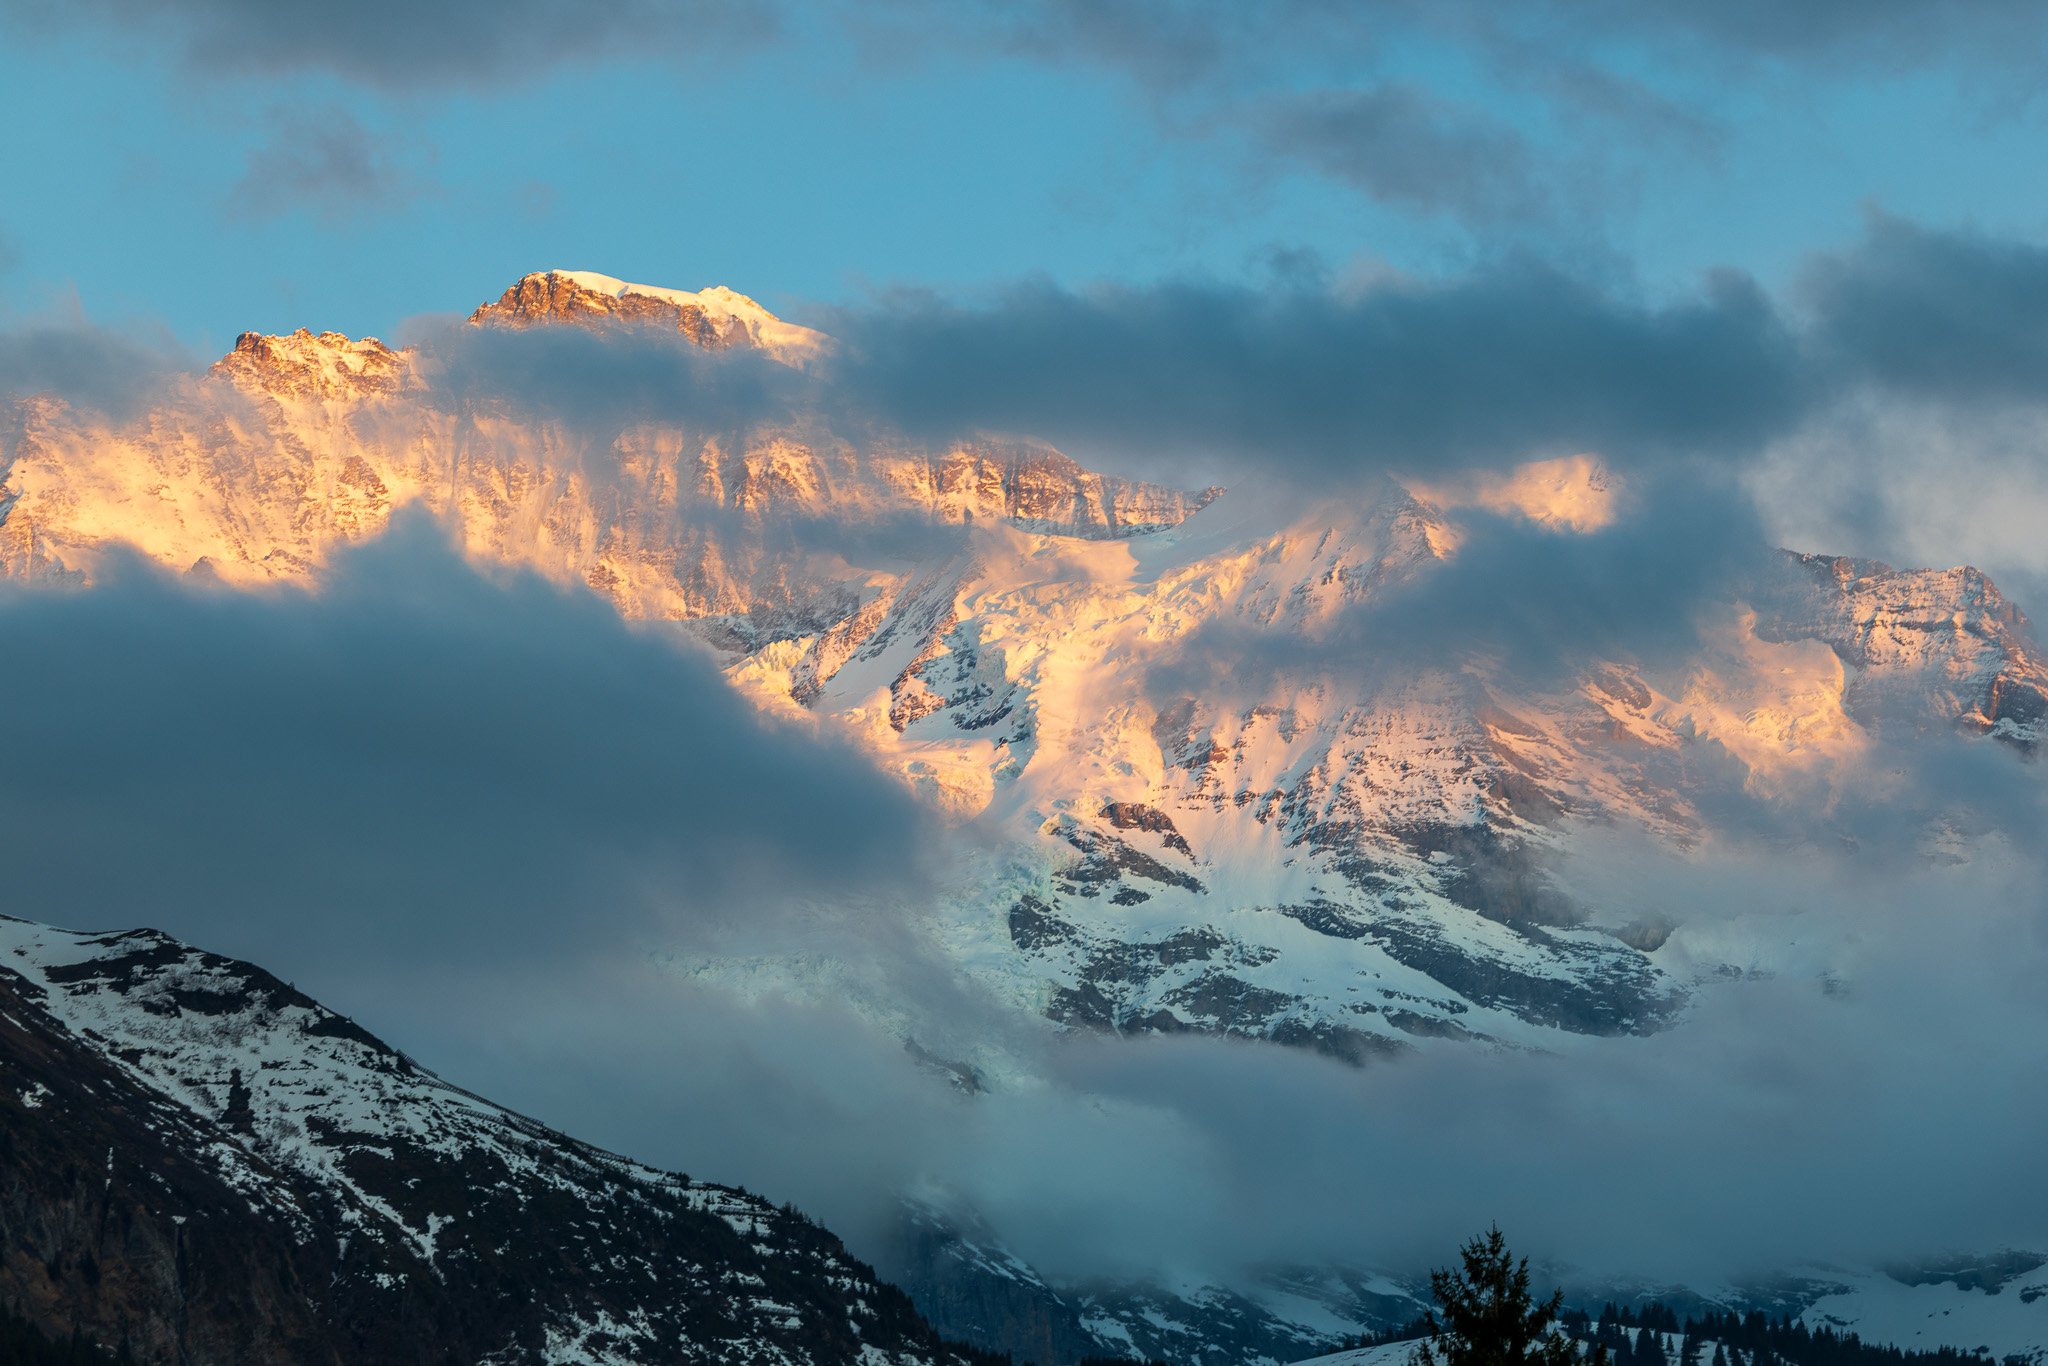
Interlaken sits at the center of one of the most photographically dense regions on the planet. Two lakes, Lake Thun to the west and Lake Brienz to the east, frame the town on either side. Behind them, the Eiger, Mönch, and Jungfrau rise above everything, and the valleys between them, Lauterbrunnen, Grindelwald, and Wengen, are as close to a photographer's dream as the Alps get.
What makes this region so photographically powerful is the scale and the layering. You have foregrounds with wildflowers and wooden bridges, midgrounds of glacial valleys and Swiss villages, and backgrounds of some of the most dramatic mountain peaks in Europe. The light here in summer lasts well into the evening. The golden hour comes late, and the light in the valley is soft, directional, and consistently beautiful. Whether you are shooting from a train window on the Wengernalp Railway, standing on the Two Lakes Bridge at Harder Kulm, or hiking the cliff walk above Grindelwald, there is something in front of your lens everywhere you look.
In this Photography Guide to Interlaken, I share the places and experiences that continue to draw me back. You will find my favorite photography locations, guidance on when and where to shoot, practical travel tips, and gear recommendations, along with cultural insights to help you explore and photograph Interlaken with confidence, respect, and ease.

Where to Stay in Interlaken
Interlaken itself is small, and most properties sit conveniently between Interlaken West and Interlaken Ost train stations, which matters a lot when you are catching early trains to the mountains. The closer you are to Interlaken Ost, the quicker your access to the Harder Kulm funicular and the Jungfrau railway connections. For street photography and access to the main Höheweg promenade, the area between the two stations works well from both ends.
If you are doing a multi-day workshop or photography trip, staying in Interlaken makes more logistical sense than basing yourself up in Lauterbrunnen or Grindelwald, because you can reach both valleys quickly from the town center. That said, the town of Interlaken is not very interesting.
Best Neighborhoods
Höheweg / Town Center: The main promenade lined with grand hotels, shops, and open park space with a direct Jungfrau view. Perfectly central for all excursions.
Matten (south of center): A quieter residential neighborhood immediately south of the Höheweg, with easy walking access to both train stations and a more local feel.
Unterseen: The charming historic district across the Aare River, slightly removed from the main tourist hub. Worth considering if you want a quieter base with character.
Luxury Hotels
Victoria-Jungfrau Grand Hotel & Spa. This is the address in Interlaken. Located on Höheweg, the main promenade, it faces directly toward the Jungfrau massif. The architecture is a 19th-century grand hotel at its most satisfying, and the grounds and terrace offer some of the best mountain views in town without leaving the property. The spa is world-class. Sapori, the Italian restaurant inside, is where our group ate together multiple evenings during the workshop. Make a reservation in advance.
Lindner Grand Hotel Beau Rivage, positioned along the Aare River near Interlaken Ost, is a solid luxury choice with river views, a well-regarded restaurant, and easy access to the train station for early mountain departures. The location is calmer than the central promenade but still walkable to everything.
Hotel Royal St. Georges A Belle Époque property that has aged well. Centrally located, with Victorian-era character throughout and solid modern comfort. The on-site restaurant draws locals as well as guests, which is always a good sign.
Boutique and Mid-Range Hotels
Hotel Carlton-Europe This is where I stayed during our stay. To be honest with you, it is mid-range at best. The rooms are adequate, the location near Interlaken West is convenient, and it functions well as a base when you are spending most of your day in the mountains. Do not go expecting luxury. Go expecting a clean, well-located room and a restaurant that serves food, which is what you need after a long day of shooting.
Hotel Chalet Swiss A traditional chalet-style property that offers direct views of the Eiger, Mönch, and Jungfrau. The rooms are cozy, some with balconies, and the atmosphere is genuinely Swiss rather than generic alpine hotel. Good value for the location and the view.
Hotel Stella Swiss Quality Hotel A four-star mid-range option popular with couples and families. Well-located, clean, comfortable, and a sensible choice if you want something between the big grand hotel and a budget room.
Interlaken
How Many Days to Visit
Three days is the minimum to do Interlaken and the Jungfrau Region properly. In three days, you can cover Harder Kulm, Lauterbrunnen Valley, and Grindelwald First without rushing.
Five days is the photographer's pace. Five days lets you chase light more than once at the same location, get into Wengen on the Wengernalp Railway, do the cliff walk above Grindelwald, reach Kleine Scheidegg for the valley views, and still have an afternoon to edit and rest.
A loose structure for five days:
Day 1: Arrive, settle in. Take the funicular to Harder Kulm for sunset.
Day 2: Early train to Lauterbrunnen. Photograph the valley, the church, and Staubbach Falls. Afternoon up to Wengen on the Wengernalp Railway.
Day 3: Grindelwald First. Take the gondola up, do the cliff walk, and photograph Bachalpsee if time allows.
Day 4: Kleine Scheidegg via train. Wide valley views and the classic three-peak composition. If budget allows, continue to Jungfraujoch.
Day 5: Morning editing session. Afternoon light shoot at Harder Kulm or a lake walk. Dinner at Sapori before departing.
If you have more time, a day trip to the Brünig Pass above Interlaken rewards anyone willing to drive above the valley and find the overlook points. I found a spot there on the last workshop day that I was genuinely nervous about until it worked, and the group came away with some of their best images of the week.
Best Time to Visit Interlaken for Photography
Summer (June through August) is the peak season, and for good reason. The valleys are green, the wildflowers are out, waterfalls run strong from snowmelt, and the light in the evening is exceptional. Golden hour can push past 9 PM in June, which gives you enormous flexibility to shoot the mountains in late light after a full day in the field. The downside is crowds, especially at Lauterbrunnen and Jungfraujoch. Book trains, restaurants, and accommodations well in advance.
Autumn (September and October) is the smart photographer's window. The summer crowds thin out, the light drops earlier and becomes warmer in tone, and you start to see the first dusting of snow on the high peaks, which adds drama to shots across the valleys. October in particular can deliver spectacular color on the lower slopes.
Winter (December through February) transforms the region into something otherworldly. Snow on the valleys, frozen waterfalls, and the Eiger rising white against a cold blue sky. The Harder Kulm funicular closes from late November through March, which limits access to that viewpoint, but everything else stays open for skiing and winter tourism. If you are willing to work in the cold, the images are extraordinary.
Spring (April and May) is underrated. The snow begins to melt, the meadows come back to life, and the waterfalls hit their peak volume. Crowds are manageable, and the mix of snow on the peaks and green on the valley floor is excellent for photography.
For photographers, late June through early October is the sweet spot. Clear skies are most reliable in July and early August. If weather is your priority, those are the weeks to plan for.
Getting Around the Interlaken Region
Interlaken works on trains and buses, and the Swiss rail system is so efficient that you rarely need a car once you are in town. From both Interlaken West and Interlaken Ost stations, you have direct connections to Lauterbrunnen, Grindelwald, and from there, all the mountain railways and cable cars that serve the region. My recommendation is to have a car.
Trains: The Jungfrau Railway system connects Interlaken Ost to Grindelwald, Lauterbrunnen, Kleine Scheidegg, and Jungfraujoch. The Wengernalp Railway runs from Lauterbrunnen up to Wengen, and it is worth noting that the train windows are excellent for photography. I shot some of my favorite images on that line without leaving my seat.
Bus: Local buses run between Interlaken and the surrounding villages. If you are staying near one station and need to reach a trailhead or a viewpoint accessible only by road, the bus network is reliable and easy to navigate.
Car: I drove a rental car for several days, which gave us the flexibility to reach Lauterbrunnen early in the morning before the parking lot filled up and to find spots along the Brünig Pass that no bus route would reach. For the Brünig Pass specifically, a car is the only practical way to scout and stop at viewpoints along the road. If you plan to do any off-the-beaten-path shooting, having a car for a day or two is worth it.
Uber and taxis: Uber operates in Switzerland, and local taxis are available at both train stations. I took a taxi from the hotel to the train station with gear on the morning we departed Zermatt to Interlaken. Easy and straightforward.
On foot: The town of Interlaken itself is walkable. The Höheweg promenade runs the length of the center, and most restaurants, hotels, and shops are within a short walk of either station.

Where to Eat
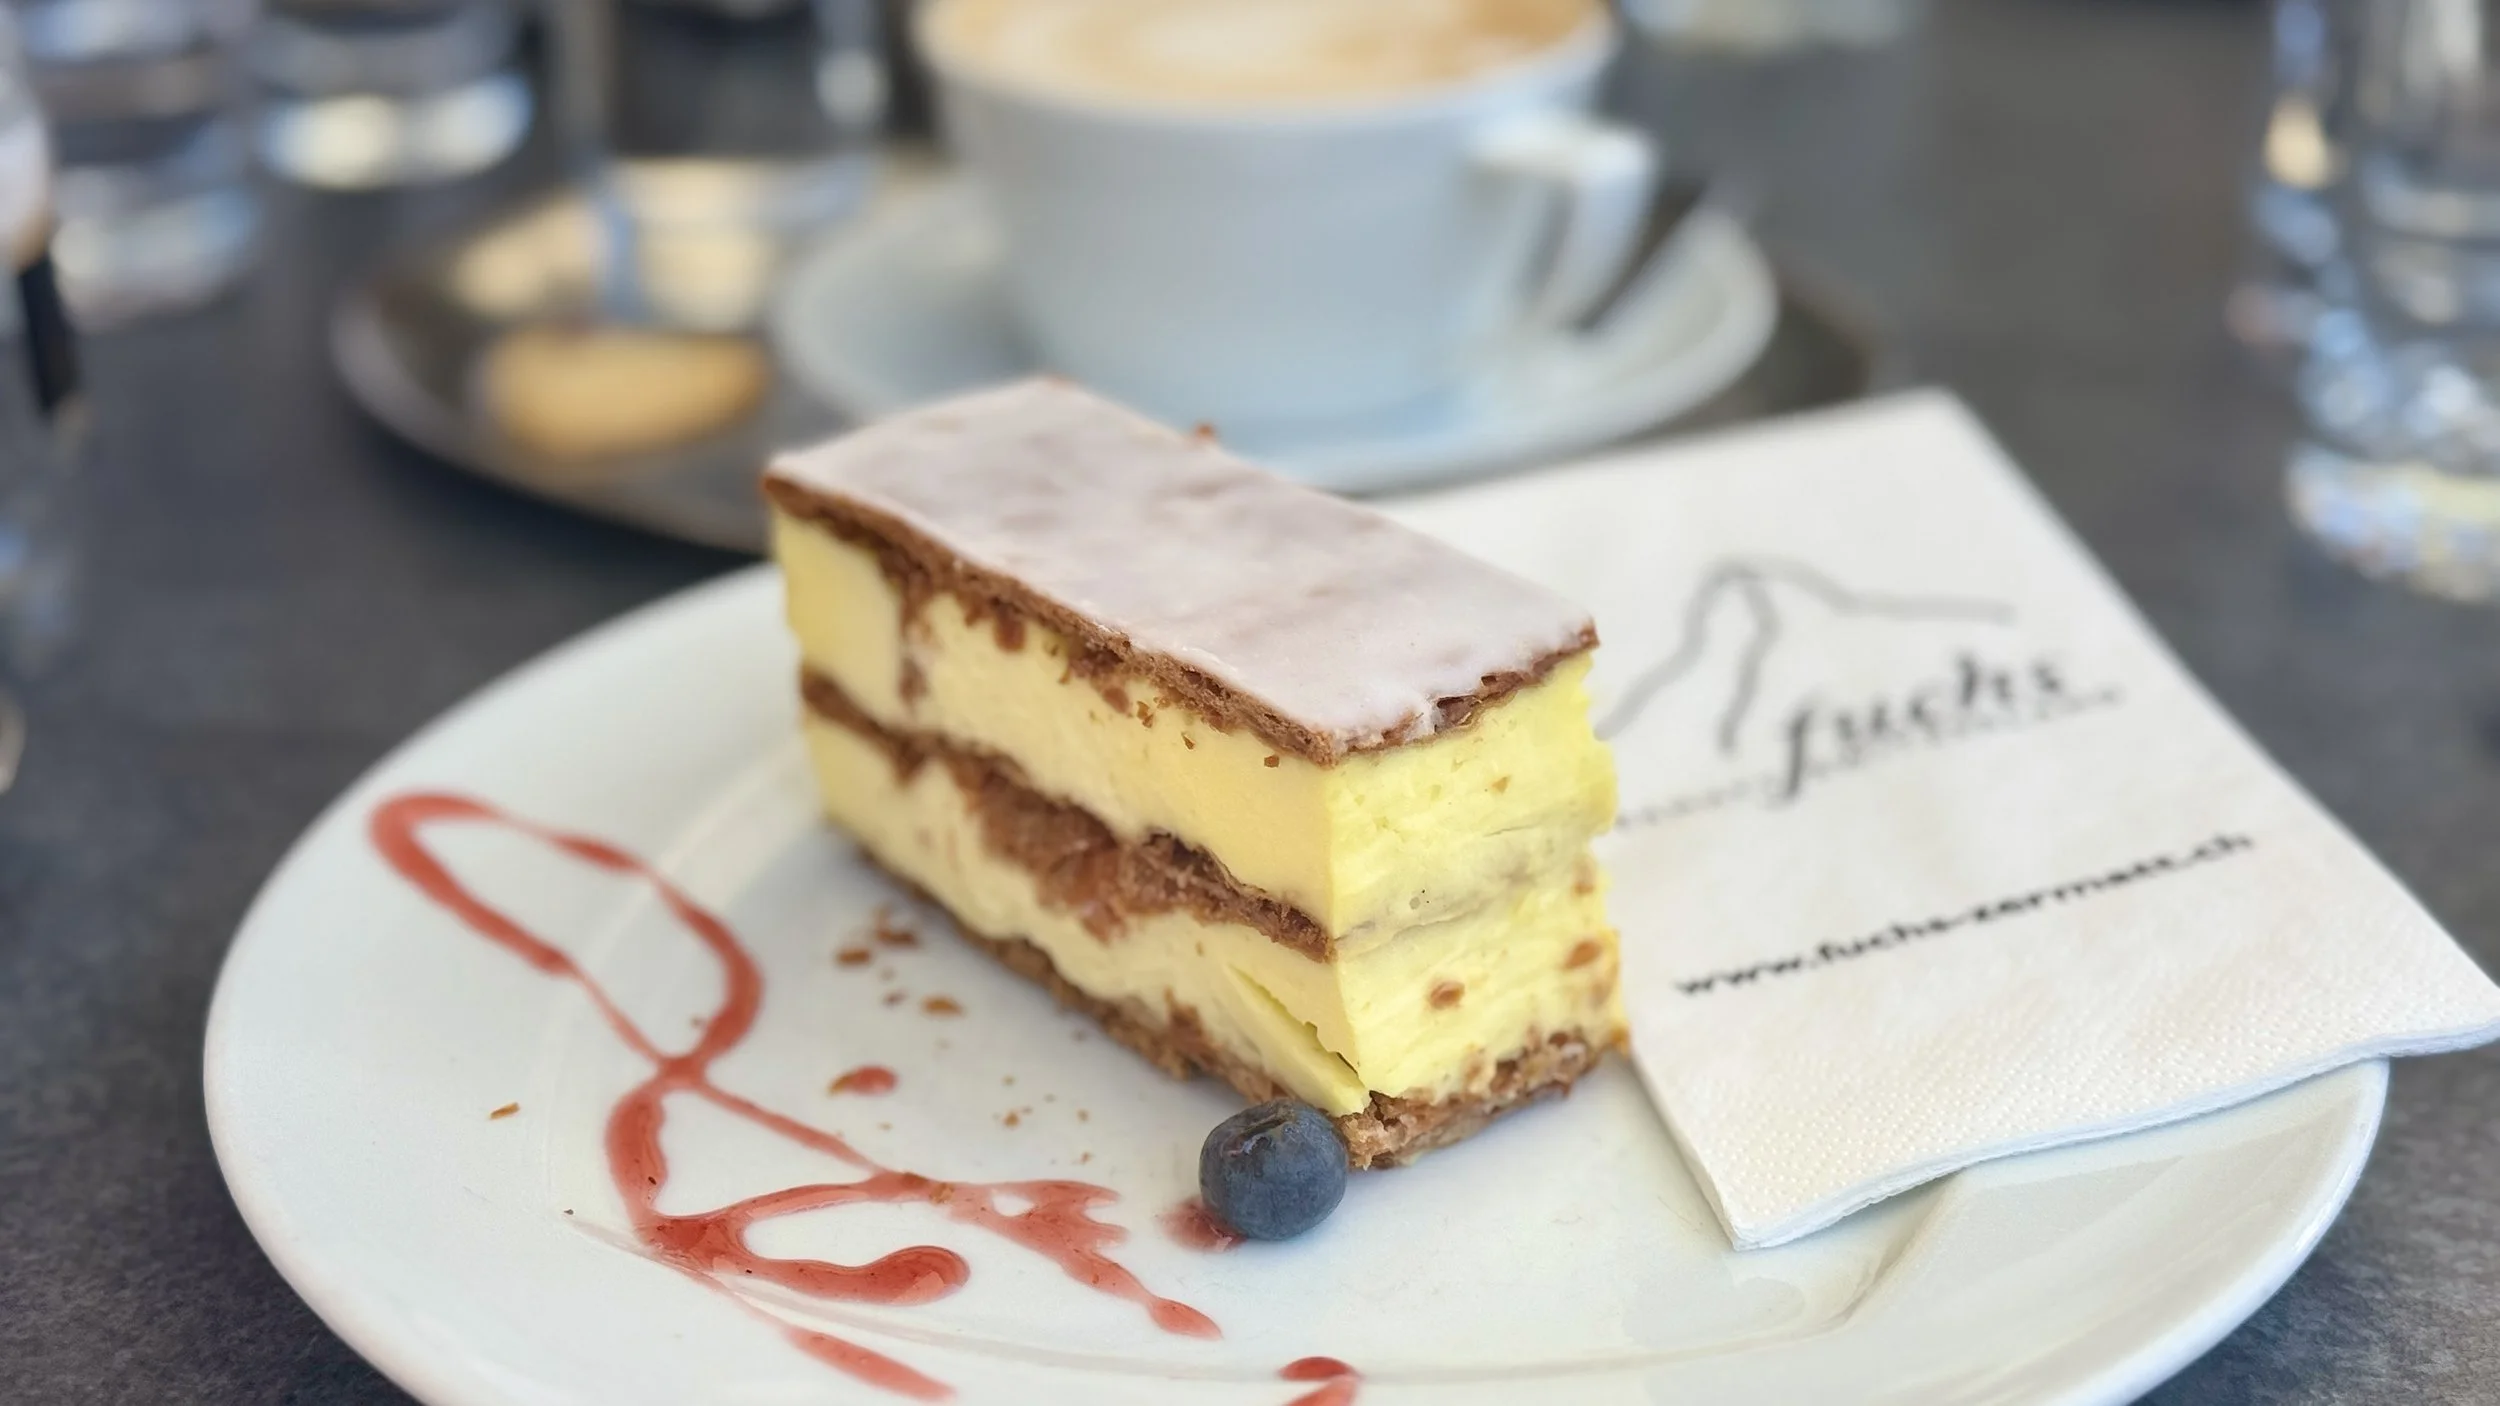
Swiss food in the Bernese Oberland is exactly what you want after a cold morning in the mountains. Rösti, fondue, raclette, fresh lake fish, and good cheese at every turn. Interlaken's restaurant scene is broad for its size, ranging from the polished dining rooms of the grand hotels to simple village cafes above the treeline.
Ristorante e Pizzeria Sapori Inside the Victoria-Jungfrau Grand Hotel on Höheweg 41. This was our dinner spot multiple times during the workshop, and the group kept coming back, which tells you everything. The room itself is beautiful, with high painted ceilings and hardwood floors that feel like a proper Italian restaurant transported into a Swiss grand hotel. The pizzas are excellent. The terrace faces the mountains. When the group had our last dinner together here, the restaurant let us linger well past normal hours, which was genuinely kind. If you are visiting Interlaken, this is the first reservation you should make.
Das Alpe A solid choice for traditional Swiss fare in a more casual setting. Good for a group dinner or a straightforward evening meal after a long day in the mountains.
Bären Restaurant: One of the most authentic local options in town. The cheese fondue is the draw, and it is very good. The restaurant has a 350-year history, which you feel when you walk in. Reservations are recommended, especially on weekends.
Restaurant Taverne (Hotel Interlaken) is consistently recommended for Swiss cuisine with a slightly more modern approach. The setting at Hotel Interlaken is convenient if you are near Interlaken Ost, and the food holds up well.
Harder Kulm Panorama Restaurant The restaurant at the top of the Harder Kulm funicular. Yes, it is a tourist destination, but the setting is genuinely extraordinary. After the model shoot up there with our workshop group, Scott Kelby bought everyone beer and food, which was the kind of spontaneous generosity that makes a trip memorable. The fondue is classic, and dining with the Jungfrau massif in full view at sunset is an experience worth doing at least once.
Luegibrueggli A local favorite on the hill above town overlooking the lake. The terrace is one of the best in the region. Less well-known than the grand hotel restaurants, and better for it. Make a reservation and arrive just before lunch for the best light on the water.
Coffee
Velo Café: A laid-back option near the center, popular with locals and good for vegetarians. Coffee is solid and the vibe is relaxed, which makes it a good editing stop.
Café Spatz: A small, traditional café with homemade jam, fruit cake, and honest coffee. The kind of place you come back to twice. Good for breakfast or a mid-morning break between trains.
Victoria-Jungfrau Café Terrace (La Terrasse Brasserie): If you want afternoon tea with a mountain view and don't mind paying for the surroundings, the terrace at the Victoria-Jungfrau delivers it properly.
Photography Gear to Bring to Interlaken
The Bernese Oberland rewards wide lenses for the valley sweeps and telephoto lenses for isolating the peaks. You will want both on every day out.
Camera bodies: My primary kit for this trip was the Canon EOS R5 Mark II, which handled everything from the low-light train shots in the valley to the fast-moving workshop scenarios. The Sony A7R V is an excellent alternative for its resolution on the landscape shots. The Nikon Z8 works equally well. For a lighter walk-around, the Leica Q3 is hard to argue with in terms of image quality in a compact form.
Lenses:
15-35mm f/2.8: Essential. The valley compositions at Lauterbrunnen and the panoramic shots at Harder Kulm both benefit from this range.
24-70mm f/2.8: The most versatile lens in the bag for the villages, the restaurants, and anything in between.
70-200mm f/2.8: For isolating the Eiger face, compressing the layers in the valley, and pulling in distant waterfalls. I used this constantly on the workshop.
400mm f/2.8: Overkill for most of the region, but if you are specifically after the peaks in tight detail, it delivers.
Accessories:
Tripod or Platypod: Mandatory for blue hour and long exposures on the waterfalls. I used the Platypod in tight bridge situations where a full tripod would not fit.
ND filters (3, 6, and 10-stop): Essential for the waterfalls at Lauterbrunnen. A 10-stop ND in the morning at Staubbach Falls turns the cascade into silk.
Extra batteries: Cold morning temperatures drain batteries faster than expected. Bring two spares minimum.
Samsung T7 SSD: My standard field backup. Copy your cards every evening.
Drone: Switzerland requires registration with the Federal Office of Civil Aviation (FOCA) for any drone with a camera, regardless of weight, as of 2023. Drones over 250g require an online exam in addition to registration. Flying over crowds is prohibited, and the maximum altitude is 120m above ground level. Some nature reserves and cantonal areas have additional restrictions. Check the FOCA drone map and the Skyguide app before any flight in the region. If you want to fly without going through the full registration process, a sub-250g drone still requires camera registration under current rules.
iPhone Photography
The Bernese Oberland is genuinely excellent for iPhone photography. The scale of the scenery plays well at wide angles, and the light in summer is often soft enough that the phone sensor handles it cleanly.
At Lauterbrunnen Valley: Switch to the ultrawide lens (0.5x) for the full valley sweep standing on the road between the walls. The compressed standard lens flattens the drama. The ultrawide captures why the place looks the way it does.
At Harder Kulm: Use the telephoto lens (3x or 5x depending on your model) to compress the two lakes with the town between them. The wide view is great from the bridge, but the telephoto gives you the composition you see on every postcard of Interlaken.
On the Wengernalp Railway: Shoot through the window on Burst mode. The train moves slowly enough that you can time your shots, but the vibrations require burst to guarantee a sharp frame. Use the standard lens rather than the ultrawide to keep distortion minimal on the mountain compositions.
Blue hour at Harder Kulm: If you stay for sunset, switch to Night mode and brace against the bridge railing for stability. The lake reflections and the ambient glow over Interlaken in Night mode are genuinely strong images, even without a tripod.

Best Photography Locations
Harder Kulm
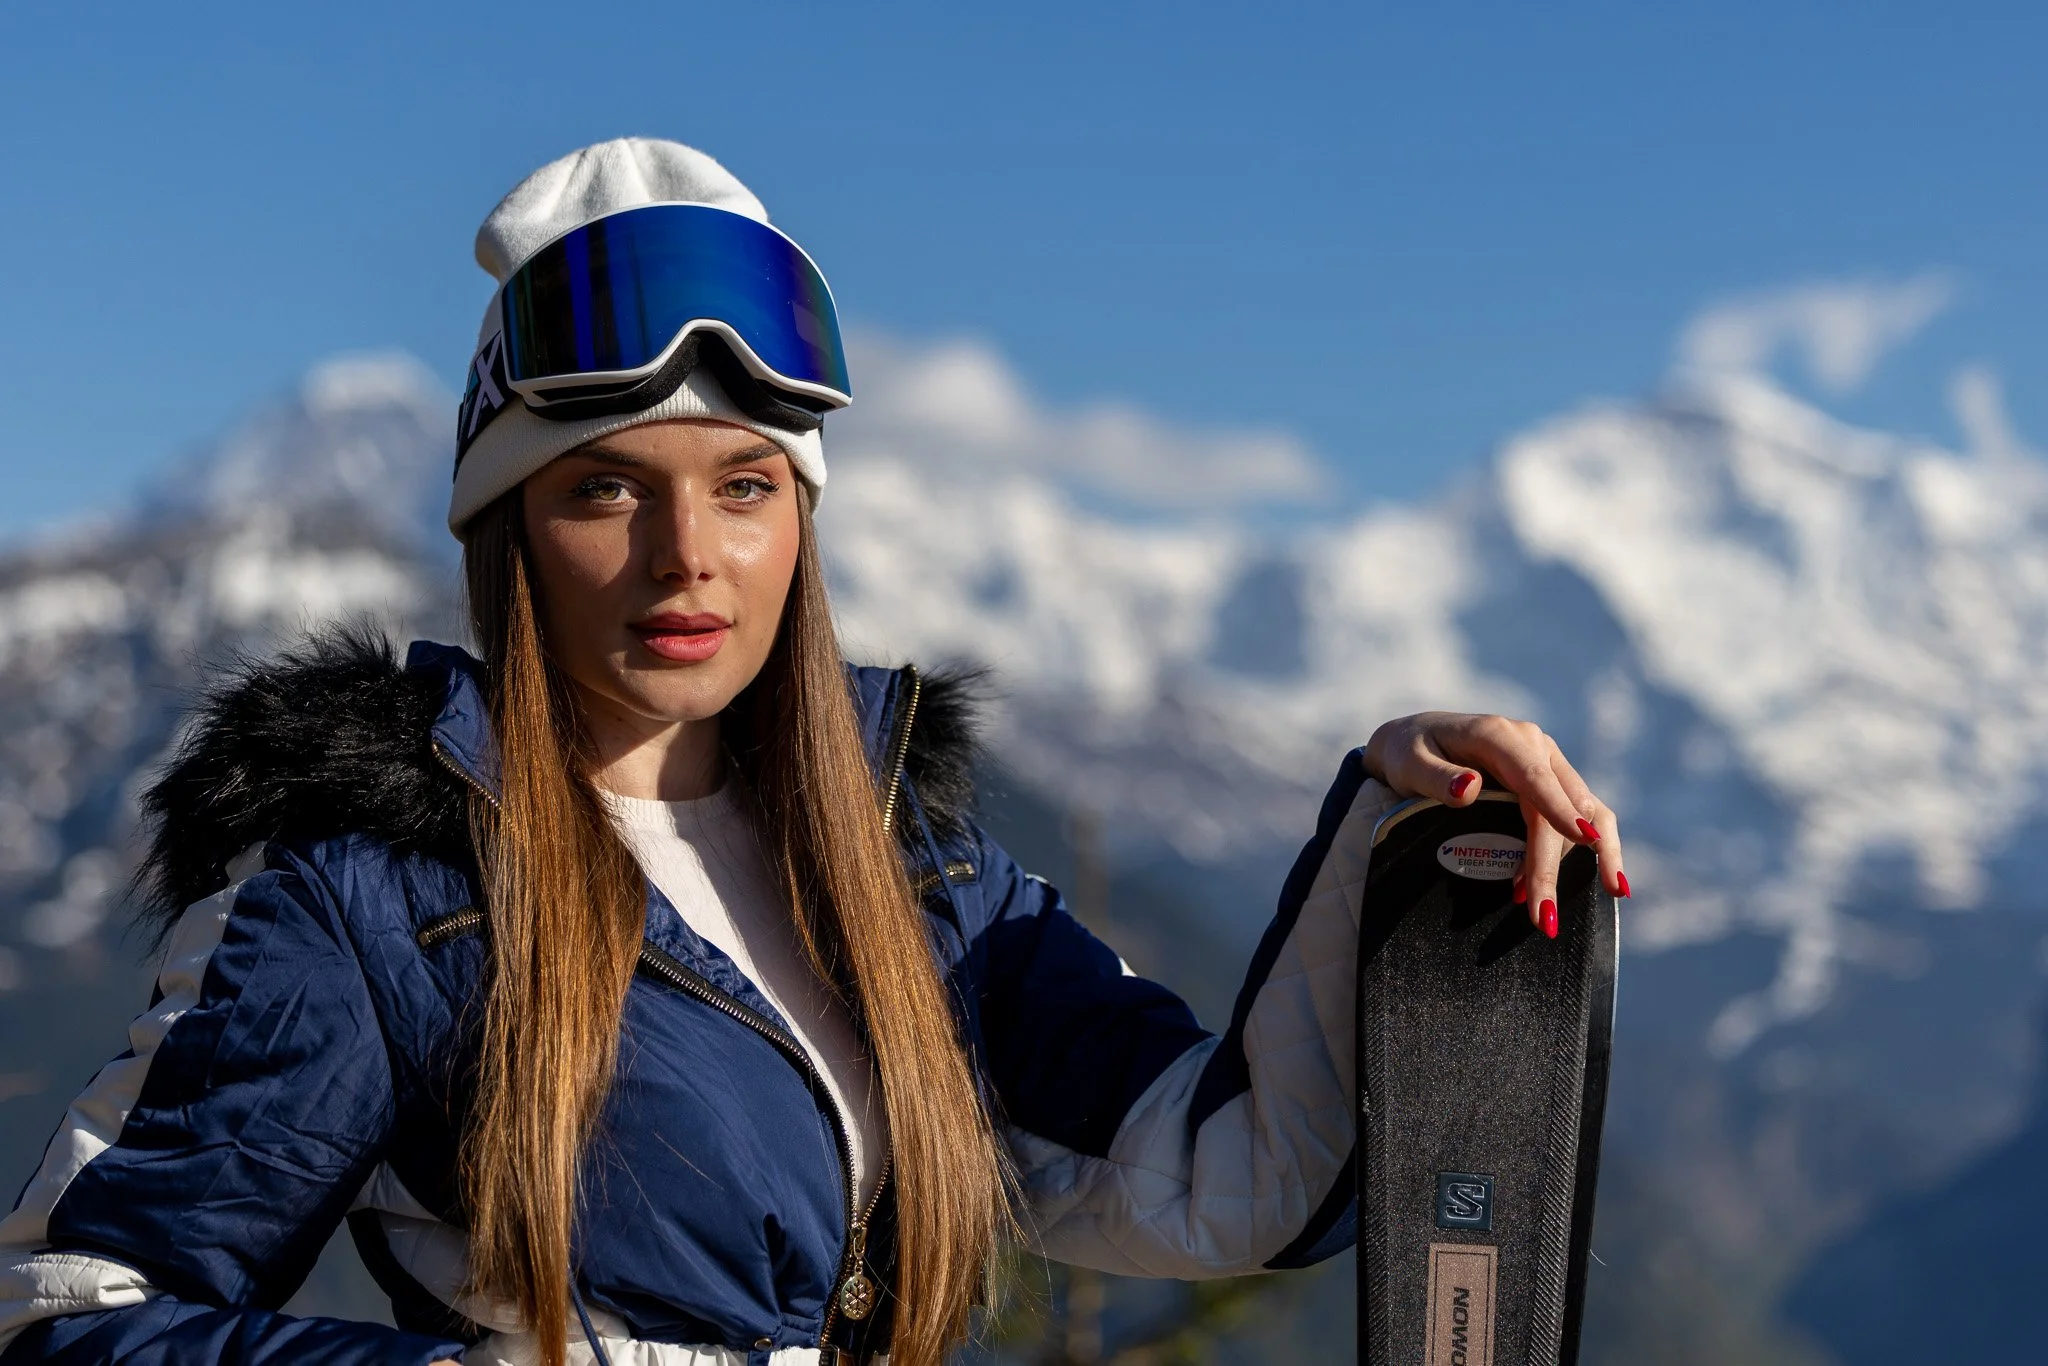
The short funicular from Interlaken Ost takes you to 1,322 meters in ten minutes. From the Two Lakes Bridge at the top, you look west over Lake Thun and east over Lake Brienz with the town of Interlaken between them and the Jungfrau massif behind. It is the single most immediately satisfying viewpoint in the region. Our workshop group came here in the late afternoon with a model named Tanya from Ukraine, who was warm and generous with her time, and the shoot produced some of the best portraits of the trip with those mountains as the backdrop.
The Two Lakes Bridge is the money shot. Walk to the end of the walkway and turn back toward the restaurant building with both lakes visible on either side of you. That is the composition that appears on every Interlaken postcard and tourism photo you have ever seen.
📷 Pro Tip: For the Two Lakes Bridge panorama, position yourself at the far end of the bridge facing back toward the mountain restaurant. Use a focal length between 24mm and 35mm to capture both lakes in the same frame. Arrive 45 minutes before sunset for the best light; the funicular runs evening trips specifically timed for sunset, which takes the logistics out of it. For the wider valley panorama, move to the main terrace overlook and use a 16-24mm lens. If you are photographing with a model or subject, use a longer focal length (85-135mm) to separate them from the background while keeping the peaks sharp behind. The funicular operates mid-April through late November; it closes for the winter season.
Best time: Late afternoon through sunset. Access: Funicular ticket required. Five-minute walk from Interlaken Ost station.
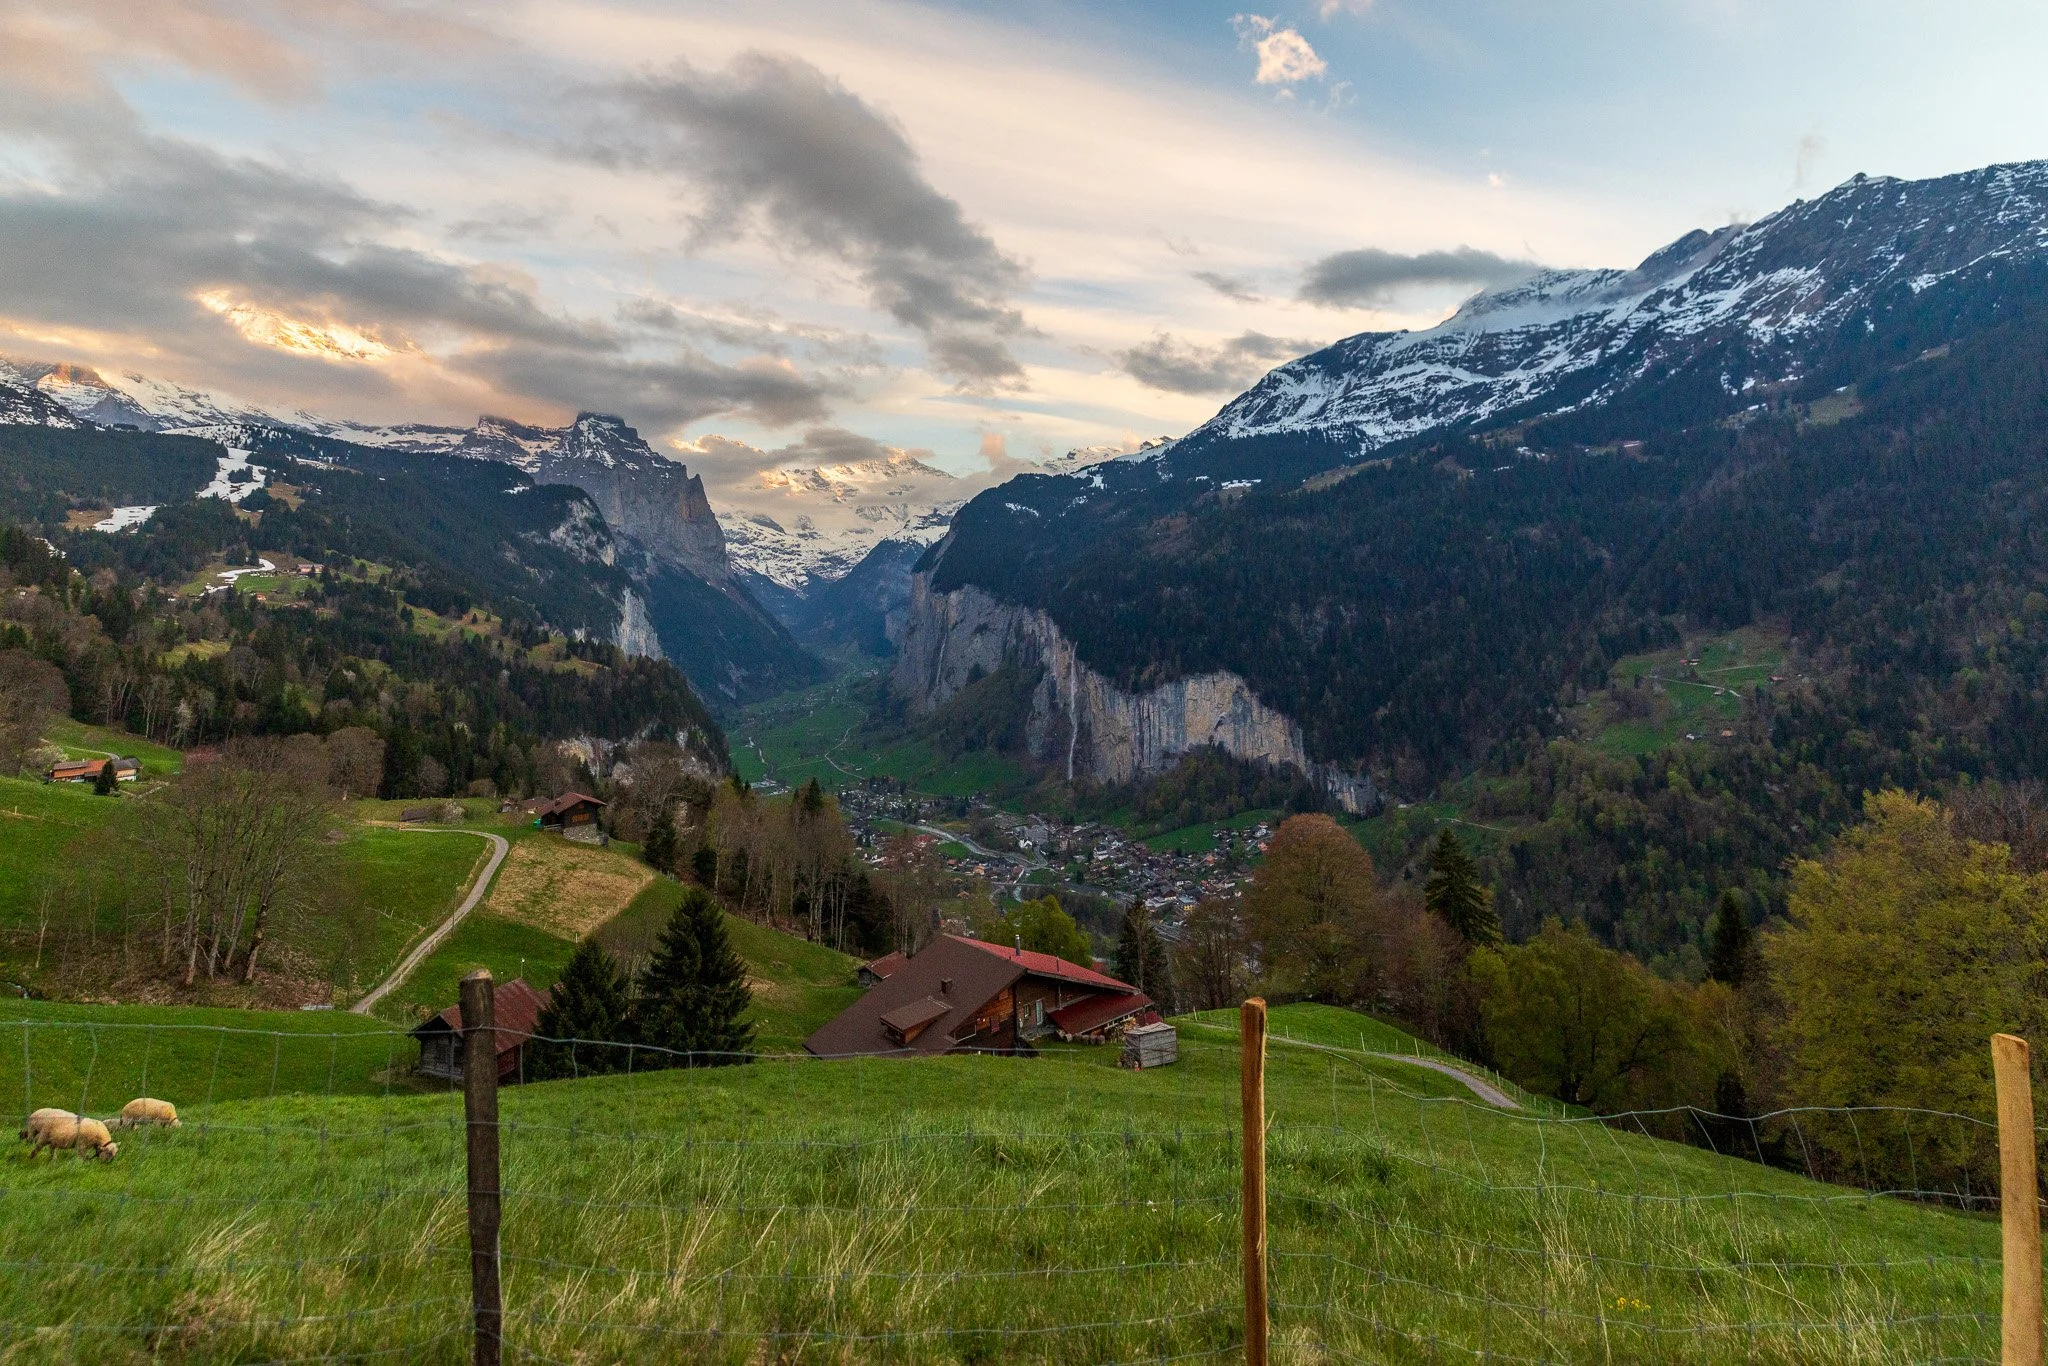
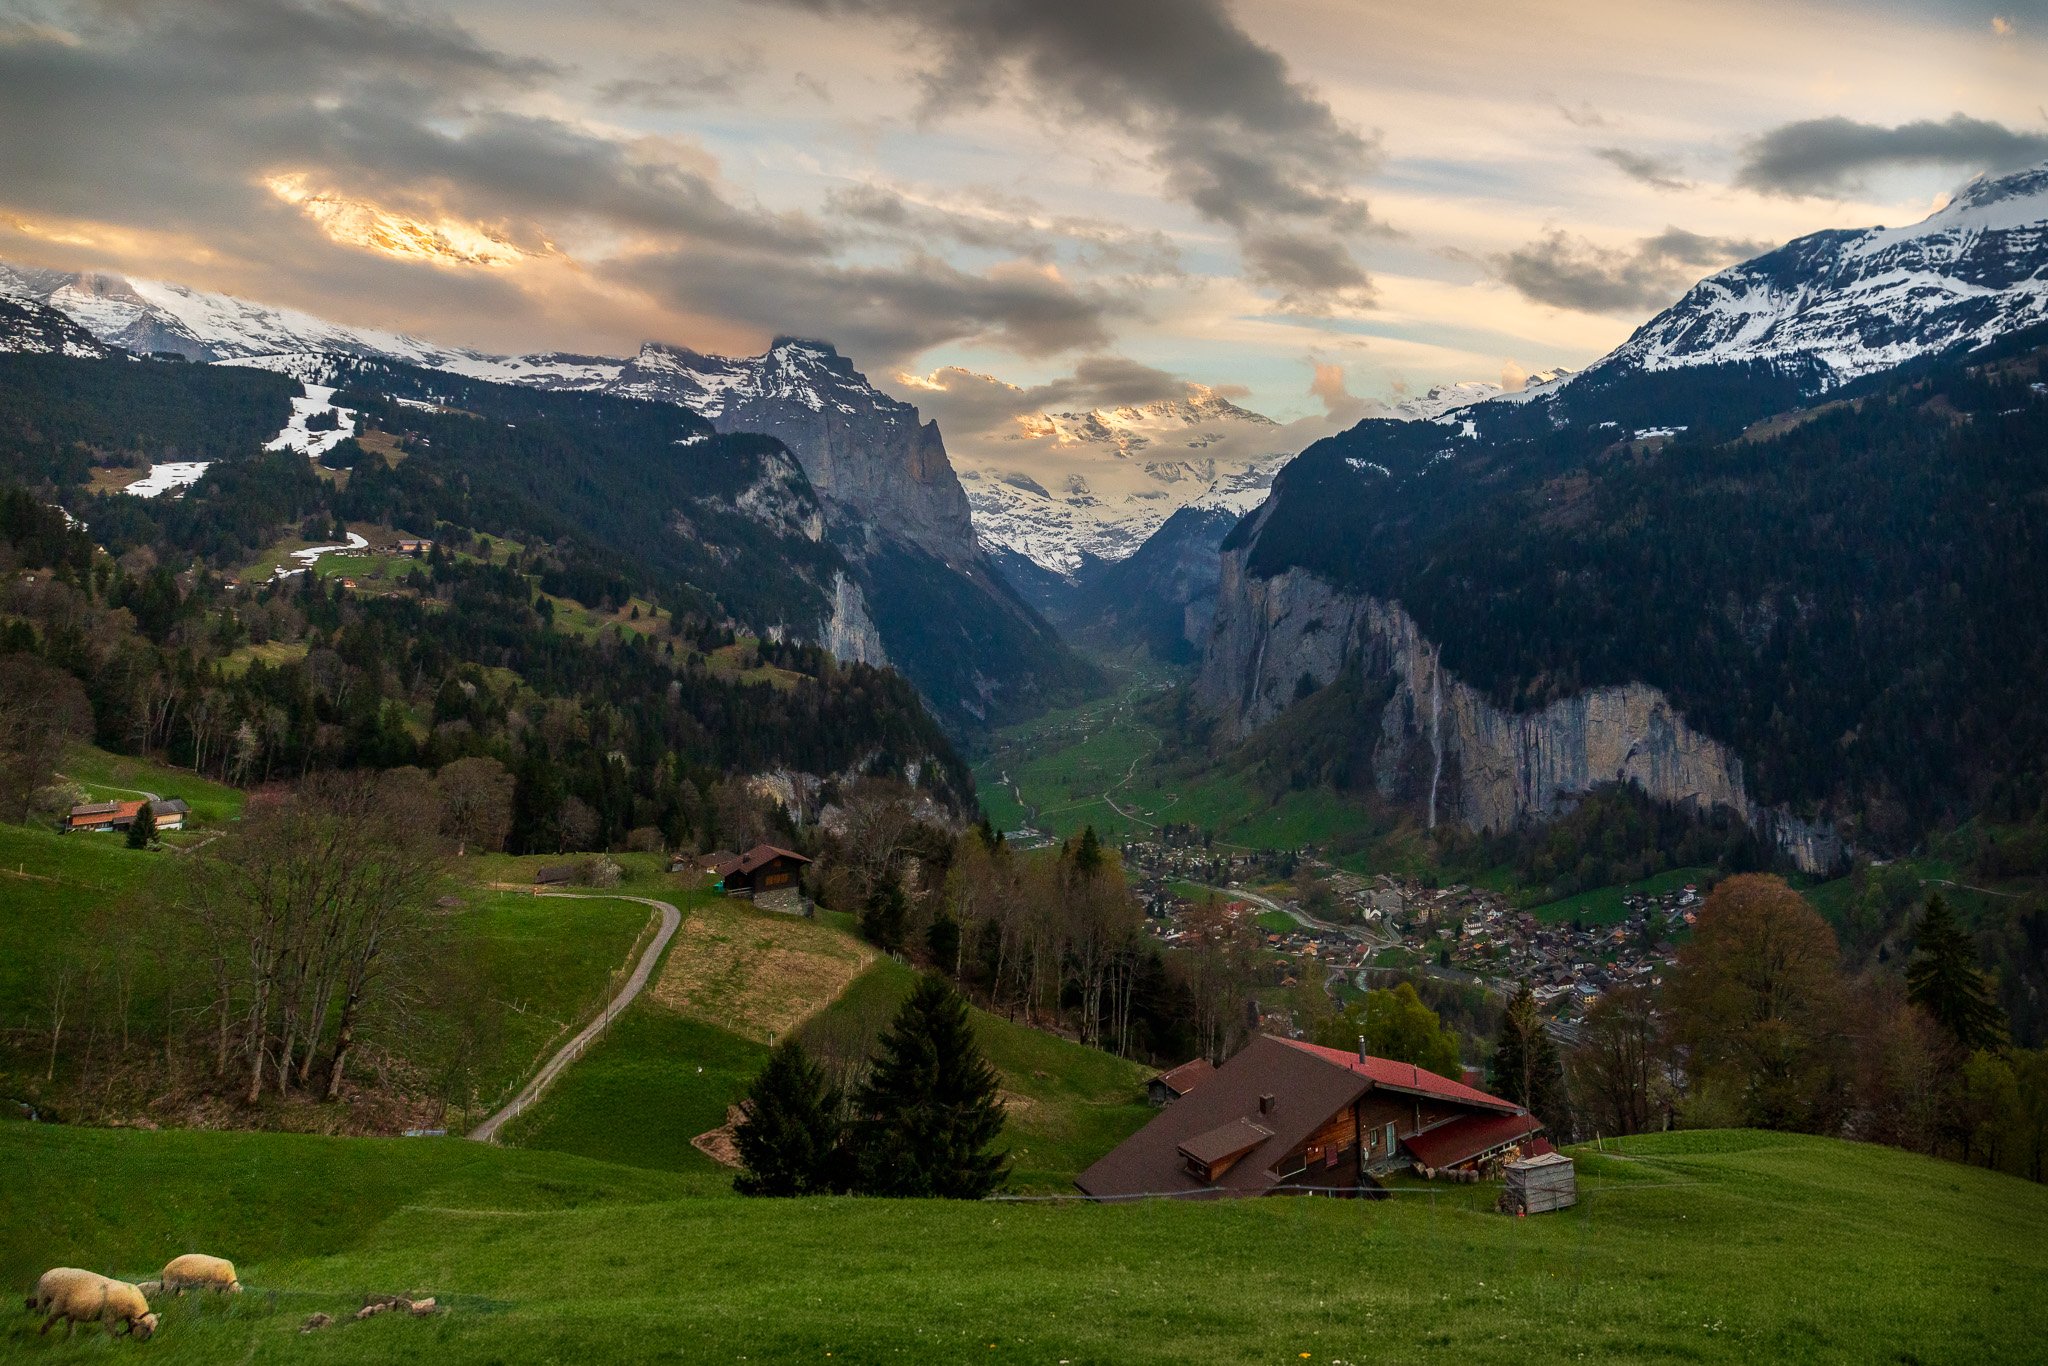
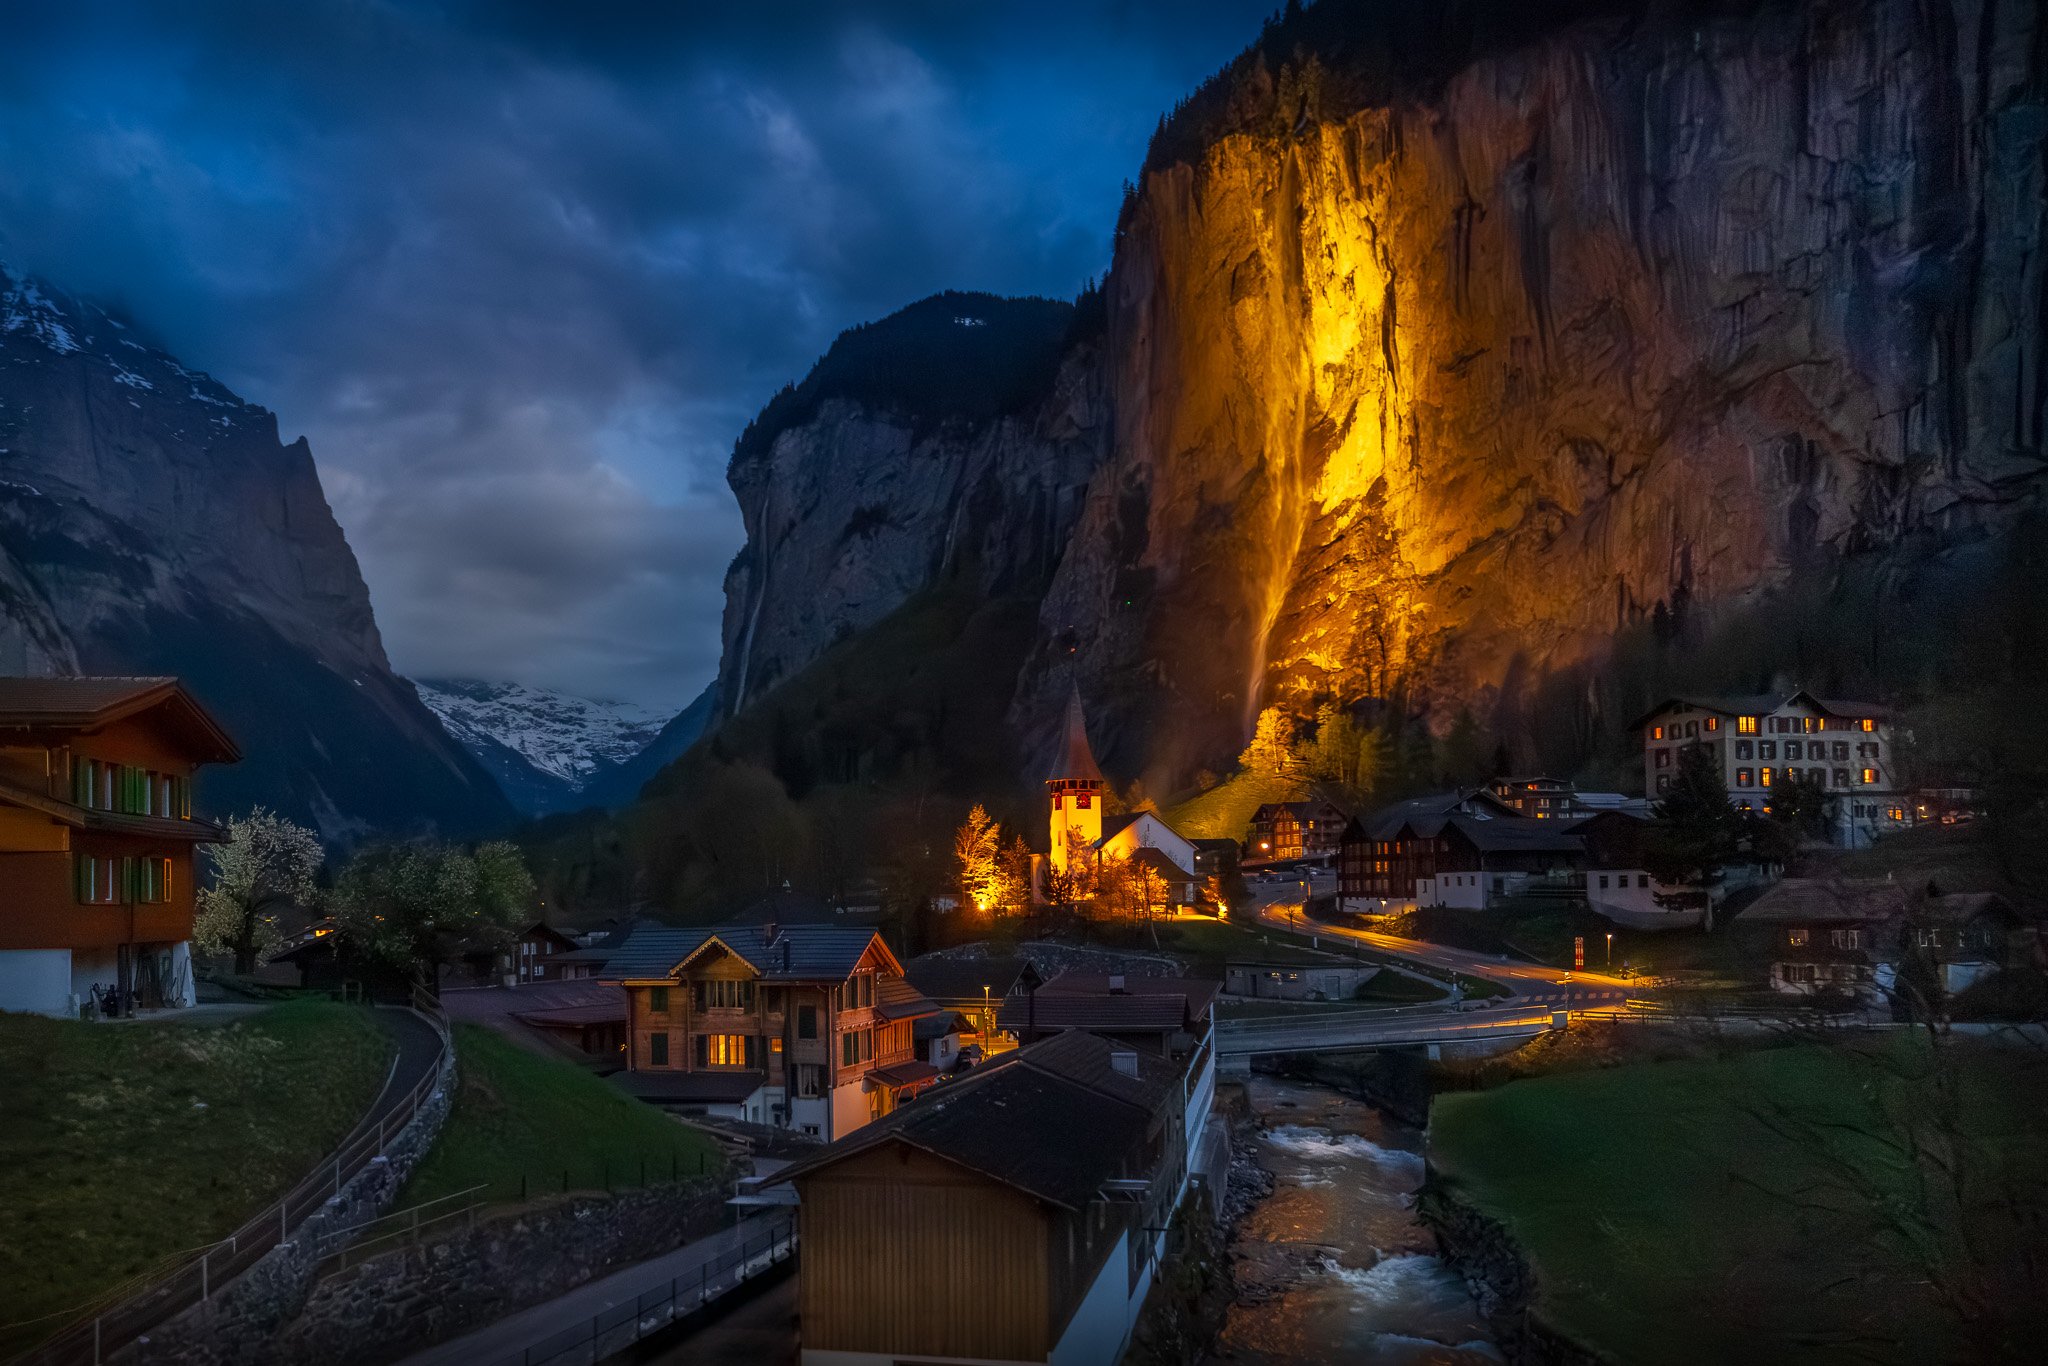
Lauterbrunnen Valley
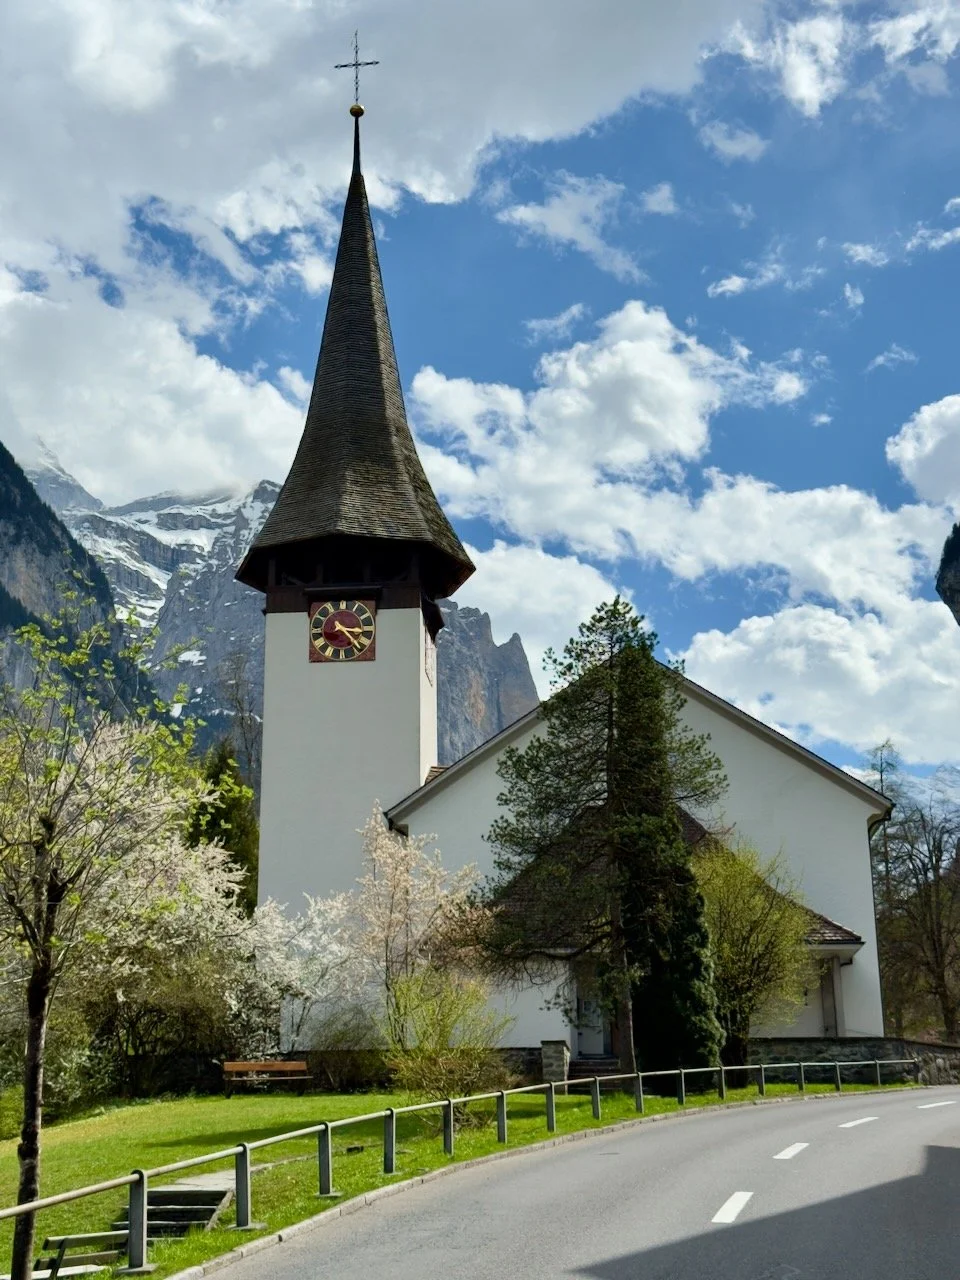
Lauterbrunnen is one of the most photographed valleys in Switzerland, and once you stand in it, you understand why. The valley floor is flat and green. The walls on either side rise vertically to several hundred meters. Waterfalls pour off the cliff edges from multiple points, and the village church sits in the center of the valley with the cliffs framing it from behind.
I photographed Lauterbrunnen from the classic roadside viewpoint and also from the bridge, which gives a different angle with the water running beneath you and the walls rising on both sides.
📷 Pro Tip: For the church and waterfall composition, take the Wengernalp Railway up to Wengen and then walk back along the upper trail toward the valley edge before descending. In the late afternoon or early evening, the light falls on the church and the waterfall from behind you, eliminating the harsh contrast that makes midday shots from the valley floor flat. Use a focal length in the 70-120mm range to compress the church against the waterfall behind it. The roadside viewpoint on the valley floor is best in the morning, when light hits the cliff face before it goes into shadow. Access is free; the train to Lauterbrunnen from Interlaken Ost takes about 20 minutes.
Best time: Early morning (valley floor) or late afternoon/evening (upper trail). Access: Free. Transit from Interlaken Ost, direct train.

The Train to Wengen and the Wengernalp Railway
Wengen is a car-free village perched on a sunny plateau above Lauterbrunnen at 1,274 meters, reachable only by the Wengernalp Railway (WAB) from Lauterbrunnen station. The train itself, a traditional green cogwheel railway that has been climbing this route since 1893, is one of the most genuinely scenic short train journeys in Switzerland. It climbs steeply out of the valley floor, passes the viewpoint for the Staubbach Falls from above, and arrives at Wengen in about 12 minutes.
The village is quiet, traditional, and thoroughly photogenic: wooden chalets with geranium-filled window boxes, cows on the pastures above the rooftops, and a full face of the Eiger, Mönch, and Jungfrau visible from almost every street. From Wengen, the Wengernalp Railway continues upward to Kleine Scheidegg, making it the natural midpoint on the journey from Lauterbrunnen to the high Alps.
At 19.1 kilometers, the WAB is the longest continuous cogwheel railroad in the world.
On the way down from Wengen by train in the evening, I caught a shot of the church and a waterfall behind it that won photo of the week at the workshop. I will tell you exactly how to get that shot below.
Pro Tip: For the shot from the train of the Staubbach Falls from above, sit on the left side (facing uphill, toward Wengen). The viewpoint opens up briefly just before the Wengen station as the train emerges from the last tunnel. Set your shutter speed to at least 1/250 to avoid motion blur from the moving train. For the village of Wengen itself, the view back down into the Lauterbrunnen Valley from the village lanes is extraordinary and almost always uncrowded in the early morning.
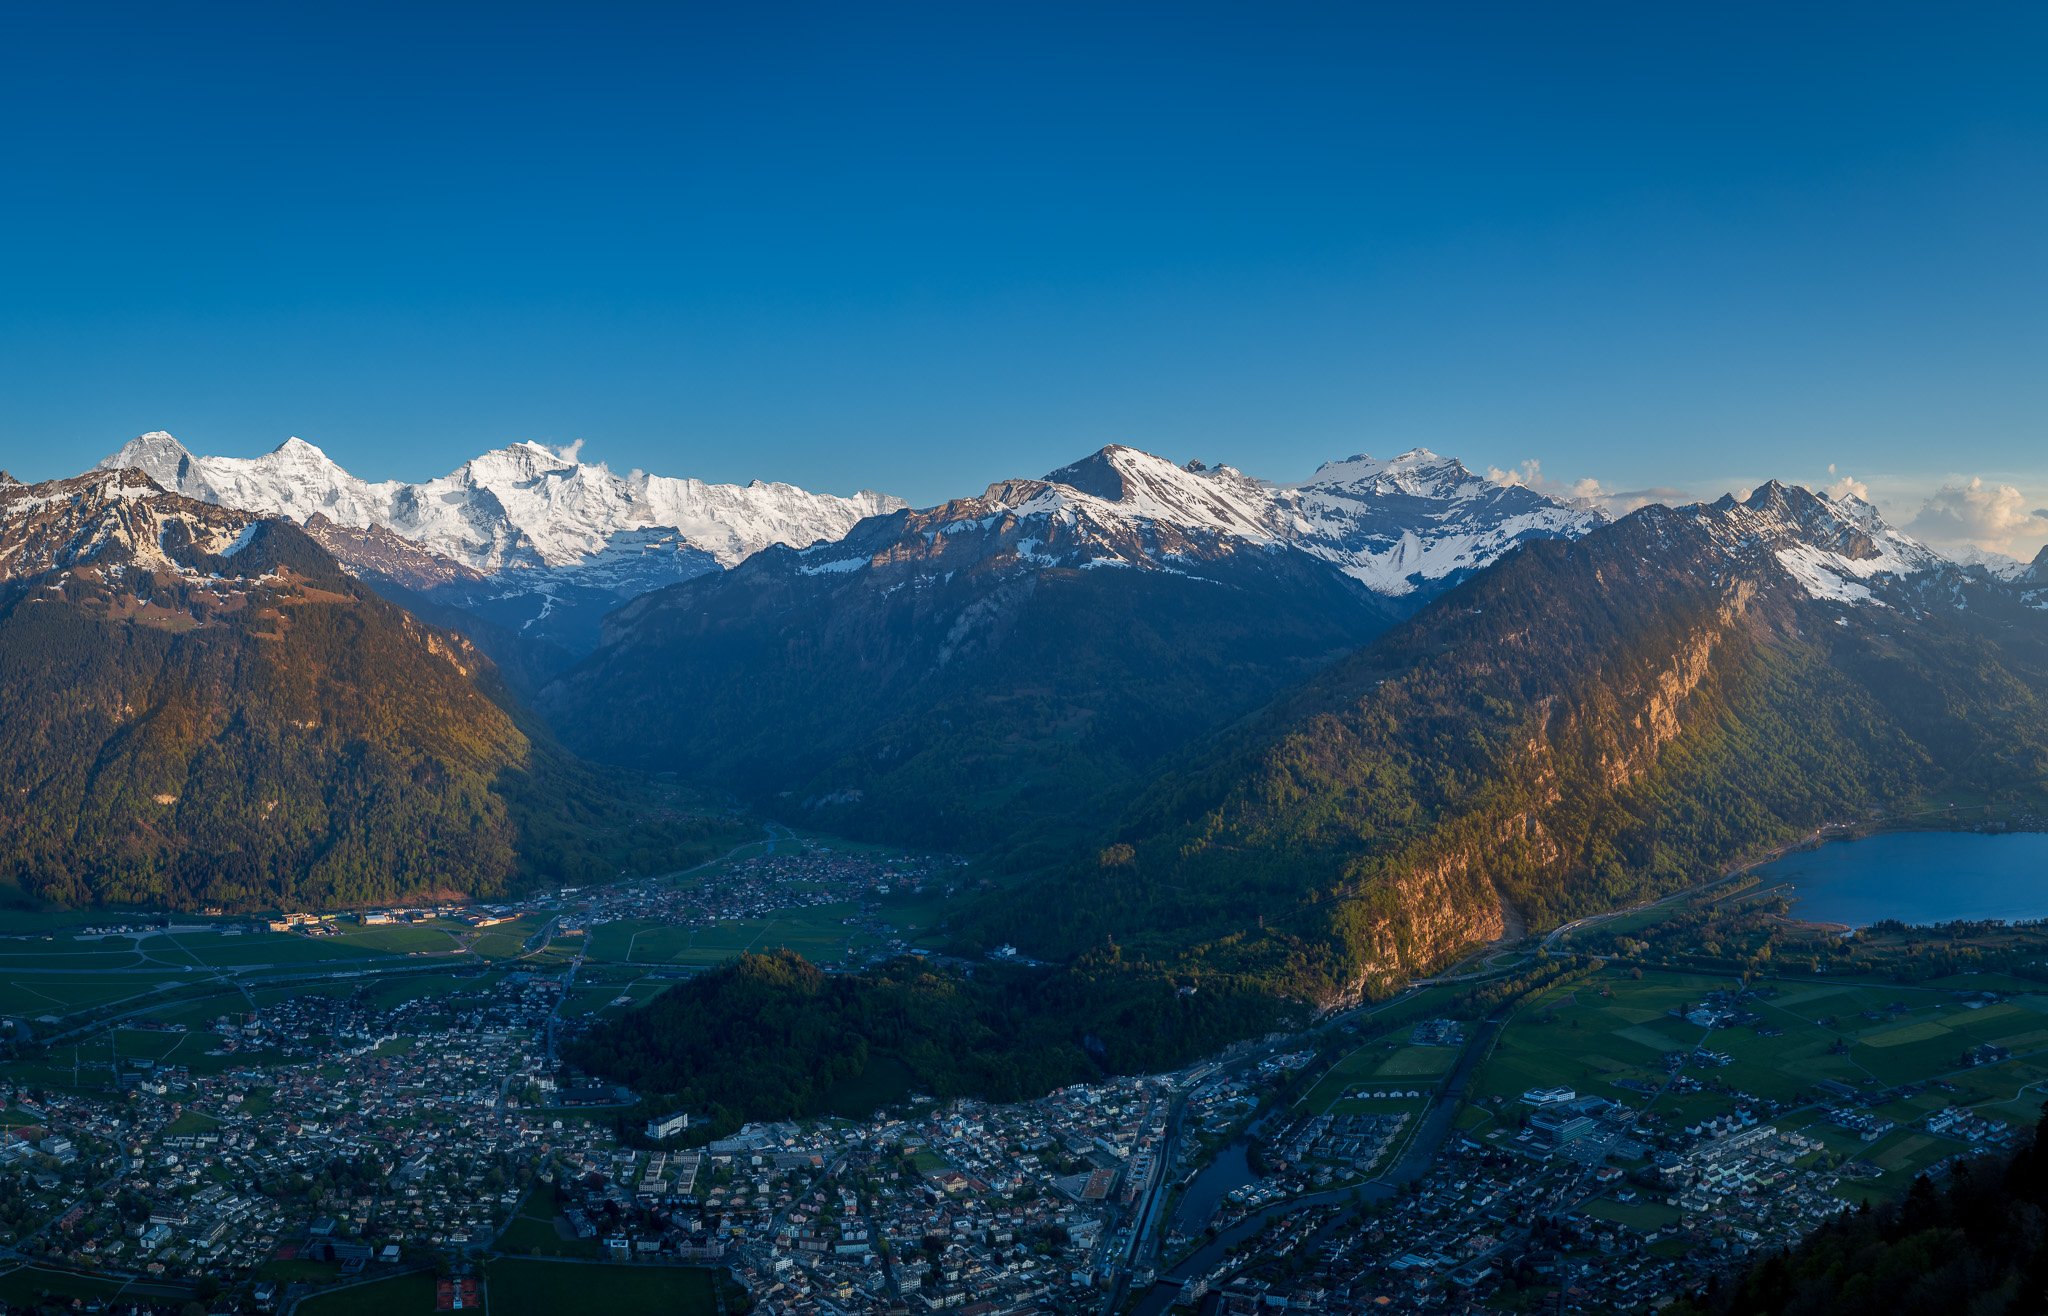
Kleine Scheidegg
Kleine Scheidegg sits at the high pass between the Grindelwald and Lauterbrunnen valleys and is the point where the cogwheel railway branches off toward Jungfraujoch. The classic three-peaks composition of Eiger, Mönch, and Jungfrau is most directly seen from here. The train to Kleine Scheidegg from Interlaken Ost passes through Grindelwald or Lauterbrunnen, depending on the route, and the views from the train window alone justify the ticket.
I arrived here on the workshop's first full day and took some of my most satisfying wide landscape images of the trip from the station area. The trains themselves are photogenic, especially the vintage cogwheel cars against the mountain backdrop.
📷 Pro Tip: From the station platform, face southwest for the classic Eiger-Mönch-Jungfrau line-up. Use a 24-70mm lens for the balanced composition of all three peaks. For a tighter shot of the Eiger North Face, switch to 70-200mm and position the train in the lower third of the frame for scale. Early morning before 9 AM has significantly fewer people at the station. Cloud behavior around the peaks can be spectacular in the afternoon; if you see clouds building, stay patient rather than leaving, because the drama of peaks emerging from cloud can be among the most powerful images you take in the region.
Best time: Early morning for clear peaks; afternoon for dramatic cloud. Access: Train ticket required. Cogwheel train from Grindelwald or Lauterbrunnen.

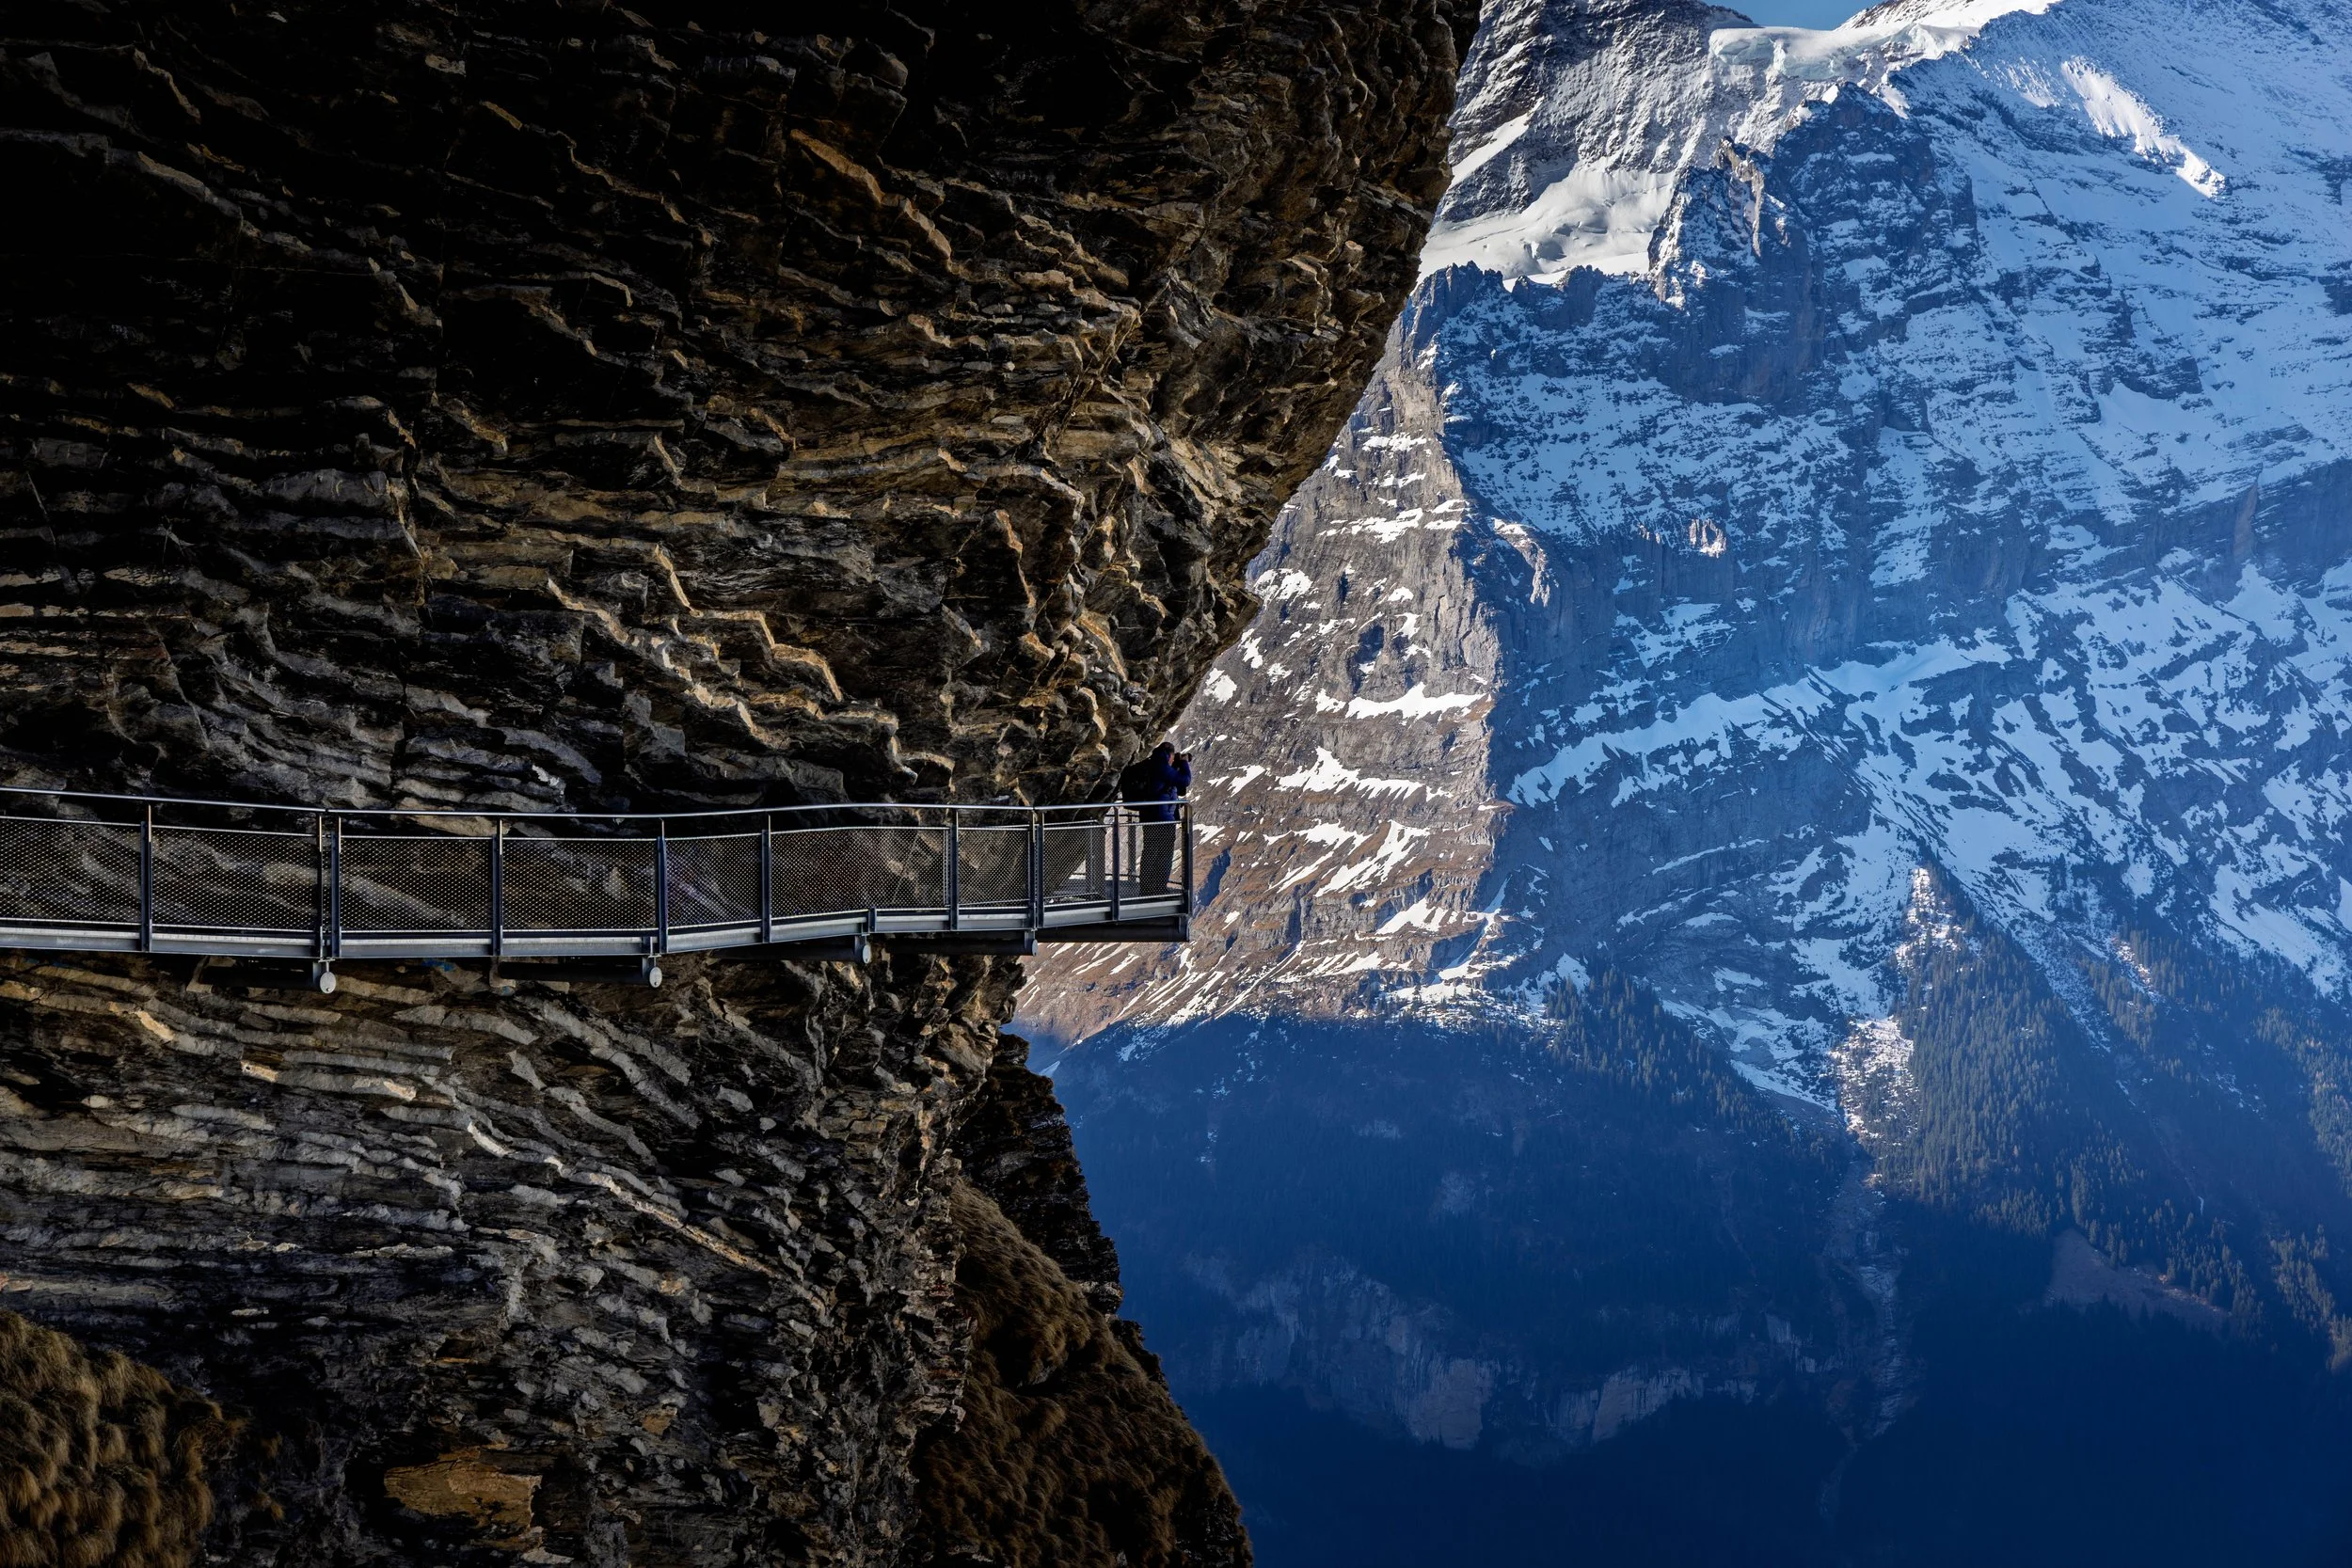
Grindelwald First and the Cliff Walk
The gondola from Grindelwald to First takes about 30 minutes and gains significant altitude, depositing you on a ridge with views across the valley to the Wetterhorn and Schreckhorn. The cliff walk that runs from the First station along a metal walkway suspended on the face of the cliff is one of the more exhilarating things I have done with a camera in hand. The exposure is real, the views looking down into the valley are extraordinary, and the walk ends at a viewing platform that is genuinely worth the journey up.
I enjoyed the cliff walk more than I expected. Carry your camera on a strap you trust, because there are sections where both hands are useful.
📷 Pro Tip: The cliff walk faces west and northwest, which means afternoon light falls on the valley below you from behind, creating good separation between the foreground ridge and the mountain backgrounds. Shoot at the wider end of your range (16-24mm) to capture the full sweep of the valley and sky from the platform. For detail shots of the cliff walk itself, move to 35-50mm and position the walkway diagonally through your frame with the peak behind. The gondola to First runs daily; check the Jungfrau Railway schedule for first and last departures before planning your day around light conditions.
Best time: Afternoon for valley light. Access: Gondola ticket required from Grindelwald; train from Interlaken Ost to Grindelwald is approximately 35 minutes.
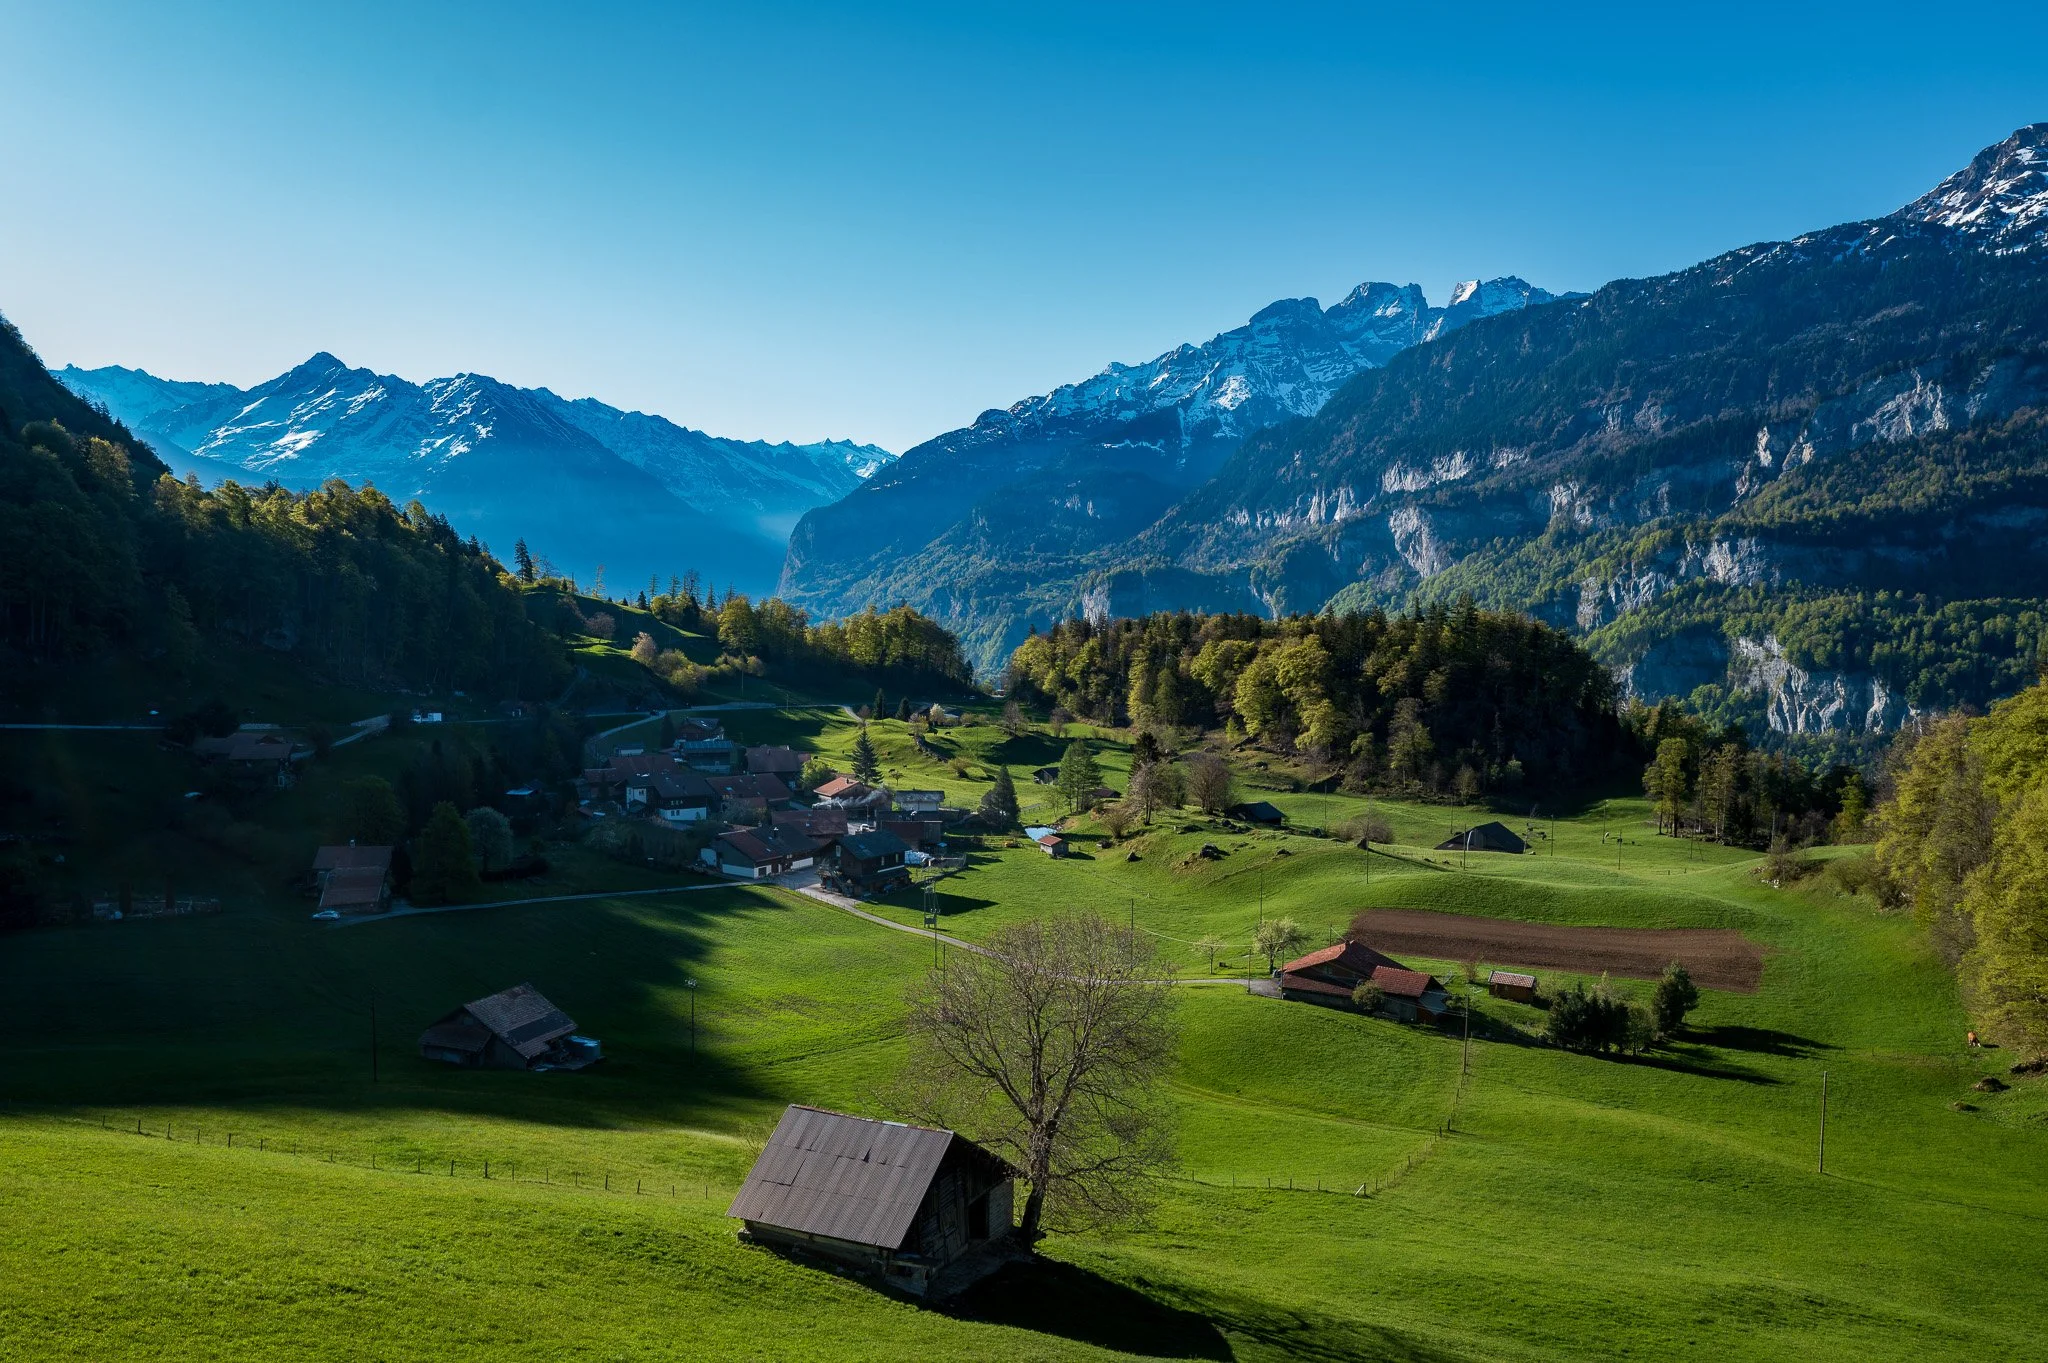
The Brünig Pass
This one is not on the typical photography tour, and that is exactly why it is on this list. The Brünig Pass road rises above Interlaken to the northeast, and the overlook points along the highway offer a high-angle view back over the lakes and the town that most visitors never see. On our final workshop morning, I suggested we drive up to find a spot, and I will be honest: I was nervous. The first location I had in mind did not work. But the second one, an overlook off the highway just above a tunnel, gave the group exactly what I had hoped for. Scott said it was one of the best shots of the workshop. That kind of payoff makes the stress worth it.
📷 Pro Tip: Drive the Brünig Pass road east from Interlaken toward Meiringen. Stop at any of the pullouts above the tunnel sections for elevated views looking back toward the lakes. The composition works best in the morning, when light falls from the east across the town and the water reflects it cleanly. Use a 70-200mm lens to compress the layers of lake, town, and mountains into a single frame. The road is accessible by rental car only; there is no consistent public transport that stops at the photography overlooks. Plan at least an hour to find and test multiple pullouts.
Best time: Morning. Access: Rental car required.
Lake Brienz and the Giessbach Falls
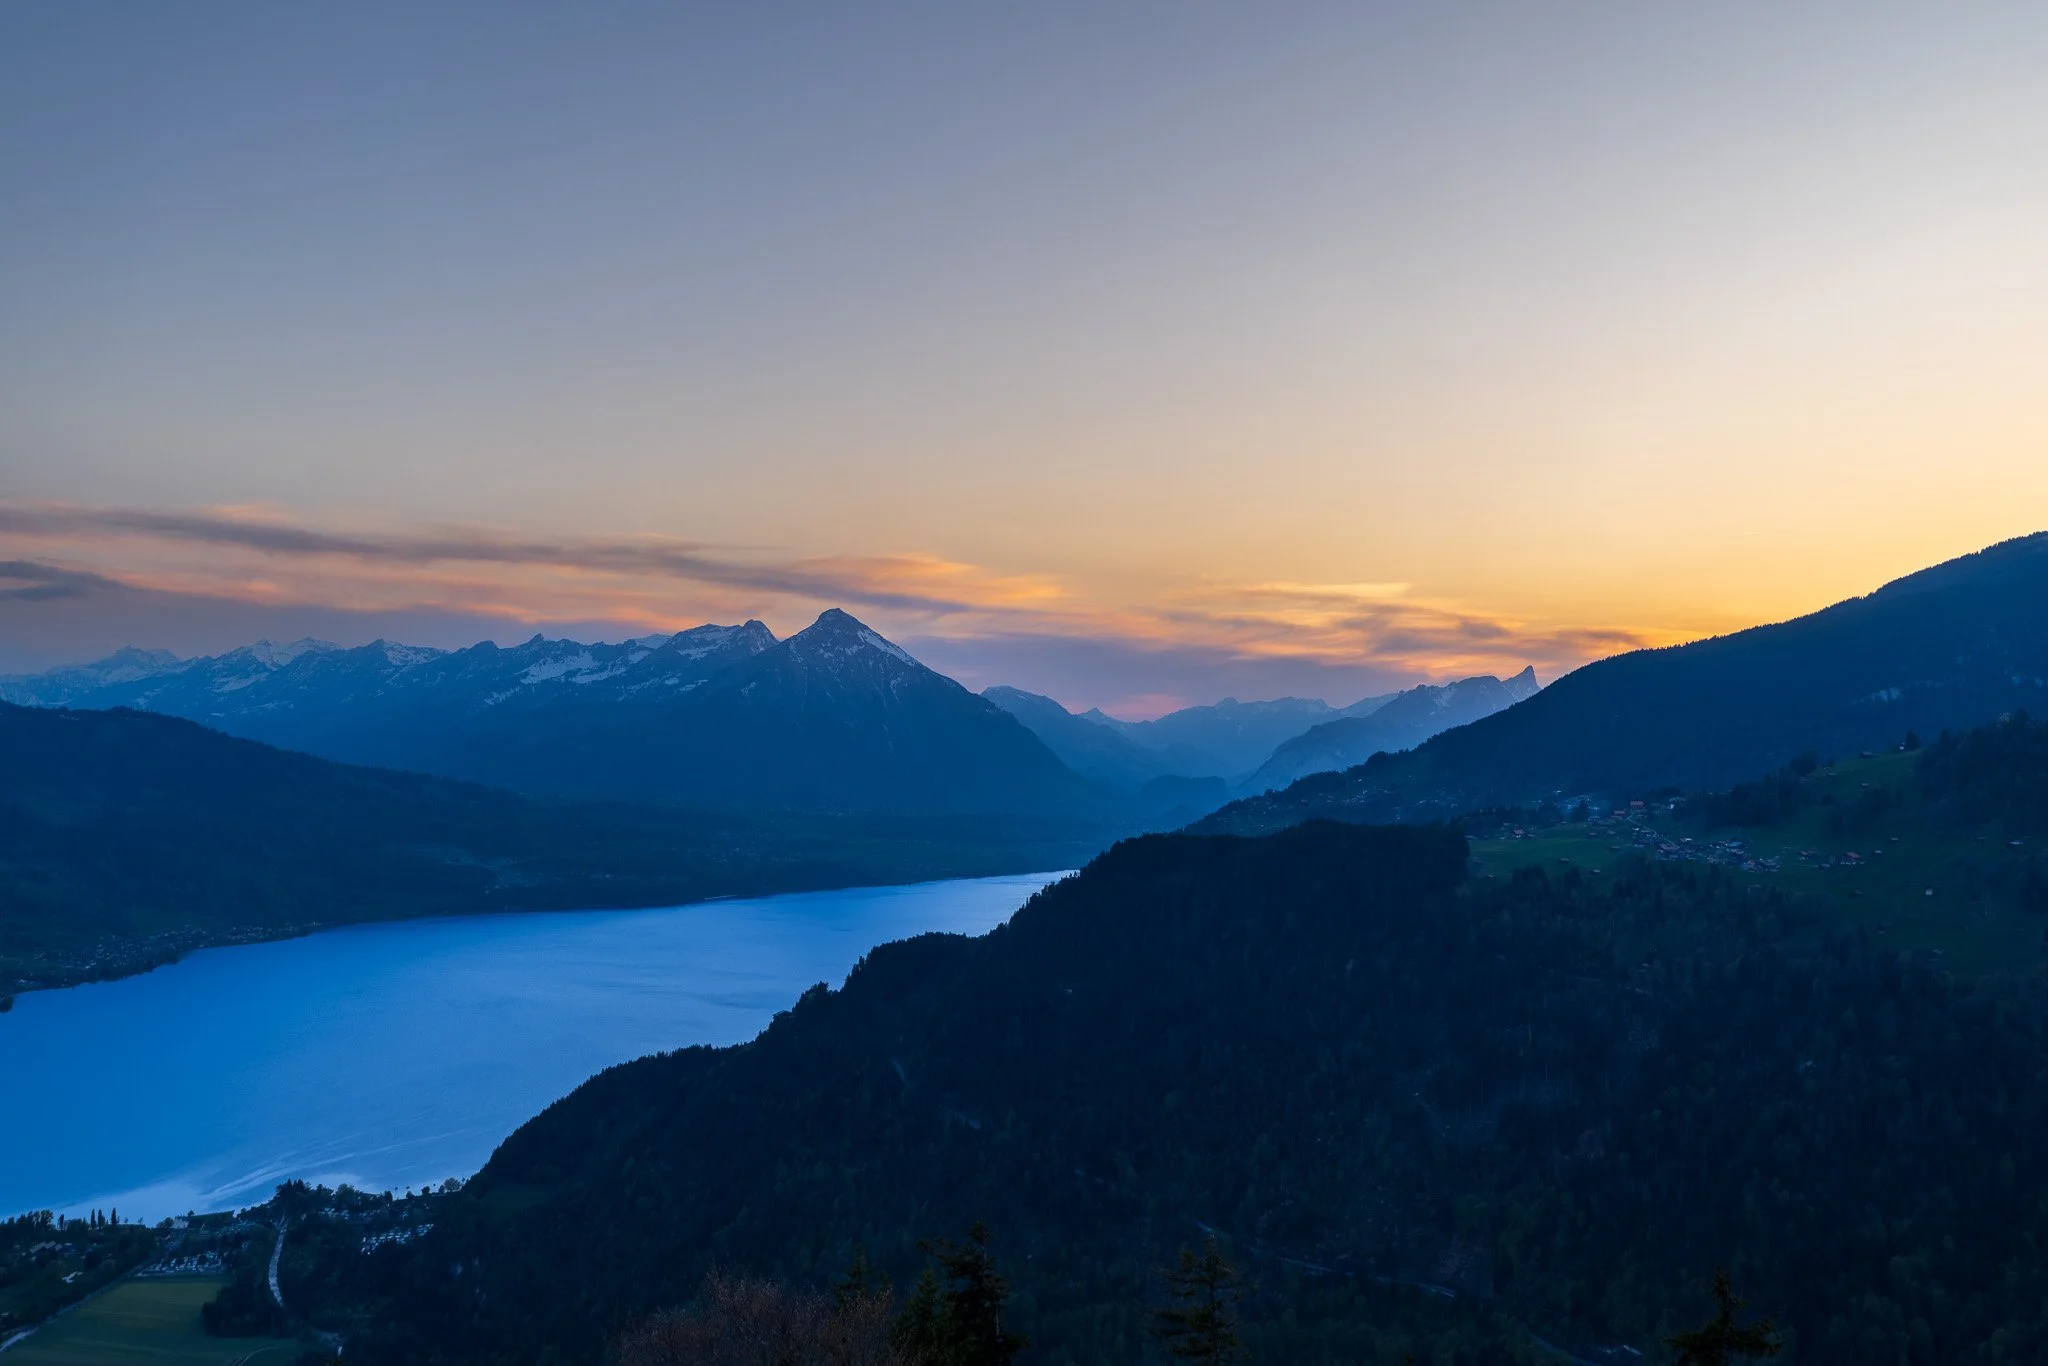
Interlaken sits between two lakes, and both deserve your camera. Lake Brienz, to the east, is arguably the more dramatic: its color is an intense turquoise-green produced by glacial silt, and it is flanked by steep, forested slopes that plunge directly into the water. The Giessbach Falls, at the far end of the lake, cascade down fourteen stages of rock face from the Bernese Oberland plateau above to the lake shore below, where an ornate Victorian hotel still receives guests by funicular from the lakeside.
Reach Lake Brienz by train from Interlaken Ost (fifteen minutes to Brienz) or by boat, which takes about an hour and allows you to shoot the entire lake from water level with the mountains above.
Pro Tip: The boat journey on Lake Brienz is the best water-level photography experience in the Interlaken region. Sit at the bow for unobstructed forward shots and use a polarizing filter to cut the surface glare and reveal the extraordinary turquoise depth of the water. The Giessbach Falls are best photographed in the morning, when the sun is directly behind you as you face the falls from the lakeside dock. A 70-200mm covers the full height of the waterfall cascade from a comfortable shooting distance.
Festivals & Events
Unspunnen Festival: A traditional Swiss folk festival held in Interlaken roughly every twelve years, featuring stone-throwing competitions, traditional costumes, wrestling, and folk music. The next full edition is in the early 2030s, but smaller related events happen periodically. If the full festival aligns with your visit, do not miss it for photography of traditional Swiss culture.
Jungfrau Marathon (September) One of the most photographically interesting road races in the world. The marathon starts in Interlaken and climbs to Kleine Scheidegg at over 2,000 meters of elevation gain. The runners moving through the alpine villages against the mountain backdrop is extraordinary for photojournalism-style work. Crowds are significant in the town center.
Interlaken Classic (July) An open-air orchestral concert held on the Hohematte park in the center of Interlaken, with the Jungfrau massif as the backdrop. The combination of a formal concert setting with the mountains behind creates a genuinely unusual photography opportunity. Evening light during summer concerts falls perfectly on the stage from the west.
Trucker and Country Festival (July) An unusual but photogenic event, combining American country music with trucks, held annually in Interlaken. The visual contrast of cowboy hats against Swiss alpine peaks is exactly as interesting as it sounds.
Swiss National Day (August) August 1st brings fireworks, bonfires, and traditional celebrations across the region. Lake Thun and Lake Brienz both host firework displays that reflect on the water. Long exposures on this evening from a stable lakeside position can produce some of the best images of the trip.
Final Thoughts
There is a moment on the last morning in Interlaken when you realize you have barely scratched the surface. I had photographed four valleys, taken a workshop class, done a model shoot at 1,300 meters, won a photo competition, suggested a shooting location that actually worked, and shared several dinners with people who love photography as much as I do. I was tired in the good way. That is what Interlaken does to you.
The Bernese Oberland is one of the most approachable mountain photography destinations in the world. The trains go everywhere, the light is generous, and the subjects are in every direction. You do not need to be an extreme hiker or a technical climber to get extraordinary images here. You need to wake up early, check the sky, and be willing to stay out late when the light turns warm. The region will take care of the rest.
If you are building a Switzerland itinerary around photography, do not try to do everything in one day. Give the region at least five days, and let each valley show itself to you on its own terms.
My Photography & Travel Guide to Zermatt, SwitzerlandThe natural companion to any Interlaken trip. Zermatt and Interlaken are connected by train with a few changes, and together they cover the two most photogenic corners of the Swiss Alps. Zermatt gives you the Matterhorn and the Gornergrat Railway; Interlaken gives you the Jungfrau and the lake country. Do both.
My Photography & Travel Guide to Lucerne, Switzerland An hour from Interlaken by train, Lucerne offers a completely different register of Swiss photography: the Chapel Bridge, the old city, Lake Lucerne, and Mount Pilatus in the distance. It pairs naturally with Interlaken as either a day trip or an overnight extension on your way to or from Zurich.
My Photography & Travel Guide to Zurich, Switzerland The starting or ending point for most Swiss itineraries and a surprisingly strong photography city. After the mountain days in Interlaken, walking the Zurich lakeshore at night with a camera is exactly the right way to wind down. I have done it, and it is better than you expect.
If you would like to join a future photography workshop, visit my Workshops page for current offerings and upcoming dates. You can also connect with me on Instagram (@chasinghippoz) and Facebook, or subscribe to the newsletter for travel photography tips, destination guides, and behind-the-scenes stories from more than 75 countries. I look forward to sharing the journey with you.
Finally—a beginner-friendly photography guide that makes sense.
If you've ever picked up a camera and thought, "Now what?" this is the book for you.
Photography Made Simple is written for adults who are just starting out and want a clear, encouraging, real-world approach to learning photography. Whether you're using a DSLR, mirrorless, or just your smartphone, this guide walks you through the basics—without the jargon or tech overwhelm.
Inside, you'll learn:
The only camera settings you really need to know to get started
How to shoot sharper, more intentional photos using light and composition
Simple tips for portraits, landscapes, travel, and everyday life
What gear you do (and don’t) need
How to create better photos without upgrading your camera
You’ll also get practical exercises, cheat sheets, and tips for organizing and editing your images—plus the confidence to shoot off Auto Mode for good.
This is not a textbook. It’s a friendly guide to seeing the world with fresh eyes—and finally capturing what you see the way you imagine it.
📸 Format: PDF download
Pages: 100+
Perfect for: Beginners, hobbyists, and anyone ready to take better photos without the stress