Fireworks Photography Tips
The first time I tried to photograph fireworks, I came home with forty-seven photos of pure black sky and nothing else. I had the right camera. I had no idea my autofocus was going to fail me the second the sky went dark, and I never thought to check.
Here's the good news. Fireworks photography is one of the most forgiving genres out there once you understand a handful of core ideas. You don't need luck. You don't need a $4,000 lens. You need a plan, a few minutes of setup before the first burst goes up, and the confidence to ignore your camera's autofocus, because it's about to fail you spectacularly.
This guide covers the full picture: gear, settings, timing, composition, and the mistakes that quietly ruin most fireworks photos. Whether you're shooting with a mirrorless body or just your phone, you'll walk away with a shot worth posting.
Why Your Camera Struggles With Fireworks & How to Outsmart It
Autofocus needs contrast and light to lock onto something. A dark sky with nothing in it gives your camera nothing to grab, which is why so many fireworks photos come back soft. Here's the sequence that actually works: let autofocus lock onto the first burst or two, since a bright explosion against a dark sky is exactly the kind of contrast autofocus can grab onto. Once you see it's sharp on your LCD, switch to manual focus and don't touch it again for the rest of the show. You get the accuracy of autofocus without gambling on it holding steady all night. If you'd rather skip that step entirely, focus manually on a distant light or the horizon before the show starts and lock it there from the beginning. Either way works. The mistake is trusting autofocus to keep working once the sky goes fully dark between bursts.

Camera Settings That Actually Work
Forget "correct exposure" as a concept for fireworks. There isn't one setting that fits every burst, every distance, or every finale. But there is a reliable starting point.
Mode: Manual, or Shutter Priority (you set the shutter speed, the camera picks the aperture for you) if you'd rather split the workload
Shutter speed: 2 to 6 seconds. Longer gives you multiple bursts layered into one frame. Shorter isolates a single burst cleanly.
Aperture: f/8 to f/16. Fireworks are bright. A wide-open aperture will blow out your highlights into a white blob.
ISO: 100. Fireworks provide their own light. You don't need help from ISO, and pushing it up just adds noise to your night sky.
White balance: Daylight or a fixed Kelvin setting. Auto white balance will shift color between shots and drive you crazy in editing.
Long Exposure Noise Reduction: OFF. This setting makes your camera take a second "dark frame" exposure equal in length to your first, just to cancel out noise. During a live show, that means your camera is busy for six extra seconds while three more bursts go up without you. Turn it off and clean up any noise later in Lightroom.
Pro Tip: Vary your shutter speed as the show progresses instead of locking one number in for the whole night. Start around 2 seconds for the opening bursts when things are spaced out, then push to 4 to 6 seconds once the pace picks up so you capture layered trails instead of single dots. Check your LCD every few shots and adjust. Nobody nails it on the first frame, including me.
Or skip the guesswork entirely and use Bulb mode. Instead of picking a shutter speed in advance and hoping it matches what the sky does, Bulb mode lets you hold the shutter open for as long as you're pressing the release, and close it the instant you decide the shot is done. Press down when a burst launches, watch it bloom and fade, then let go. You're reacting to the actual show in real time instead of guessing a number before it happens. This is the single easiest way for a beginner to stop missing the timing. You'll want a remote release or your camera's built in Bulb timer so you're not introducing shake by holding the button with your finger.
The Composition Mistake Almost Everyone Makes
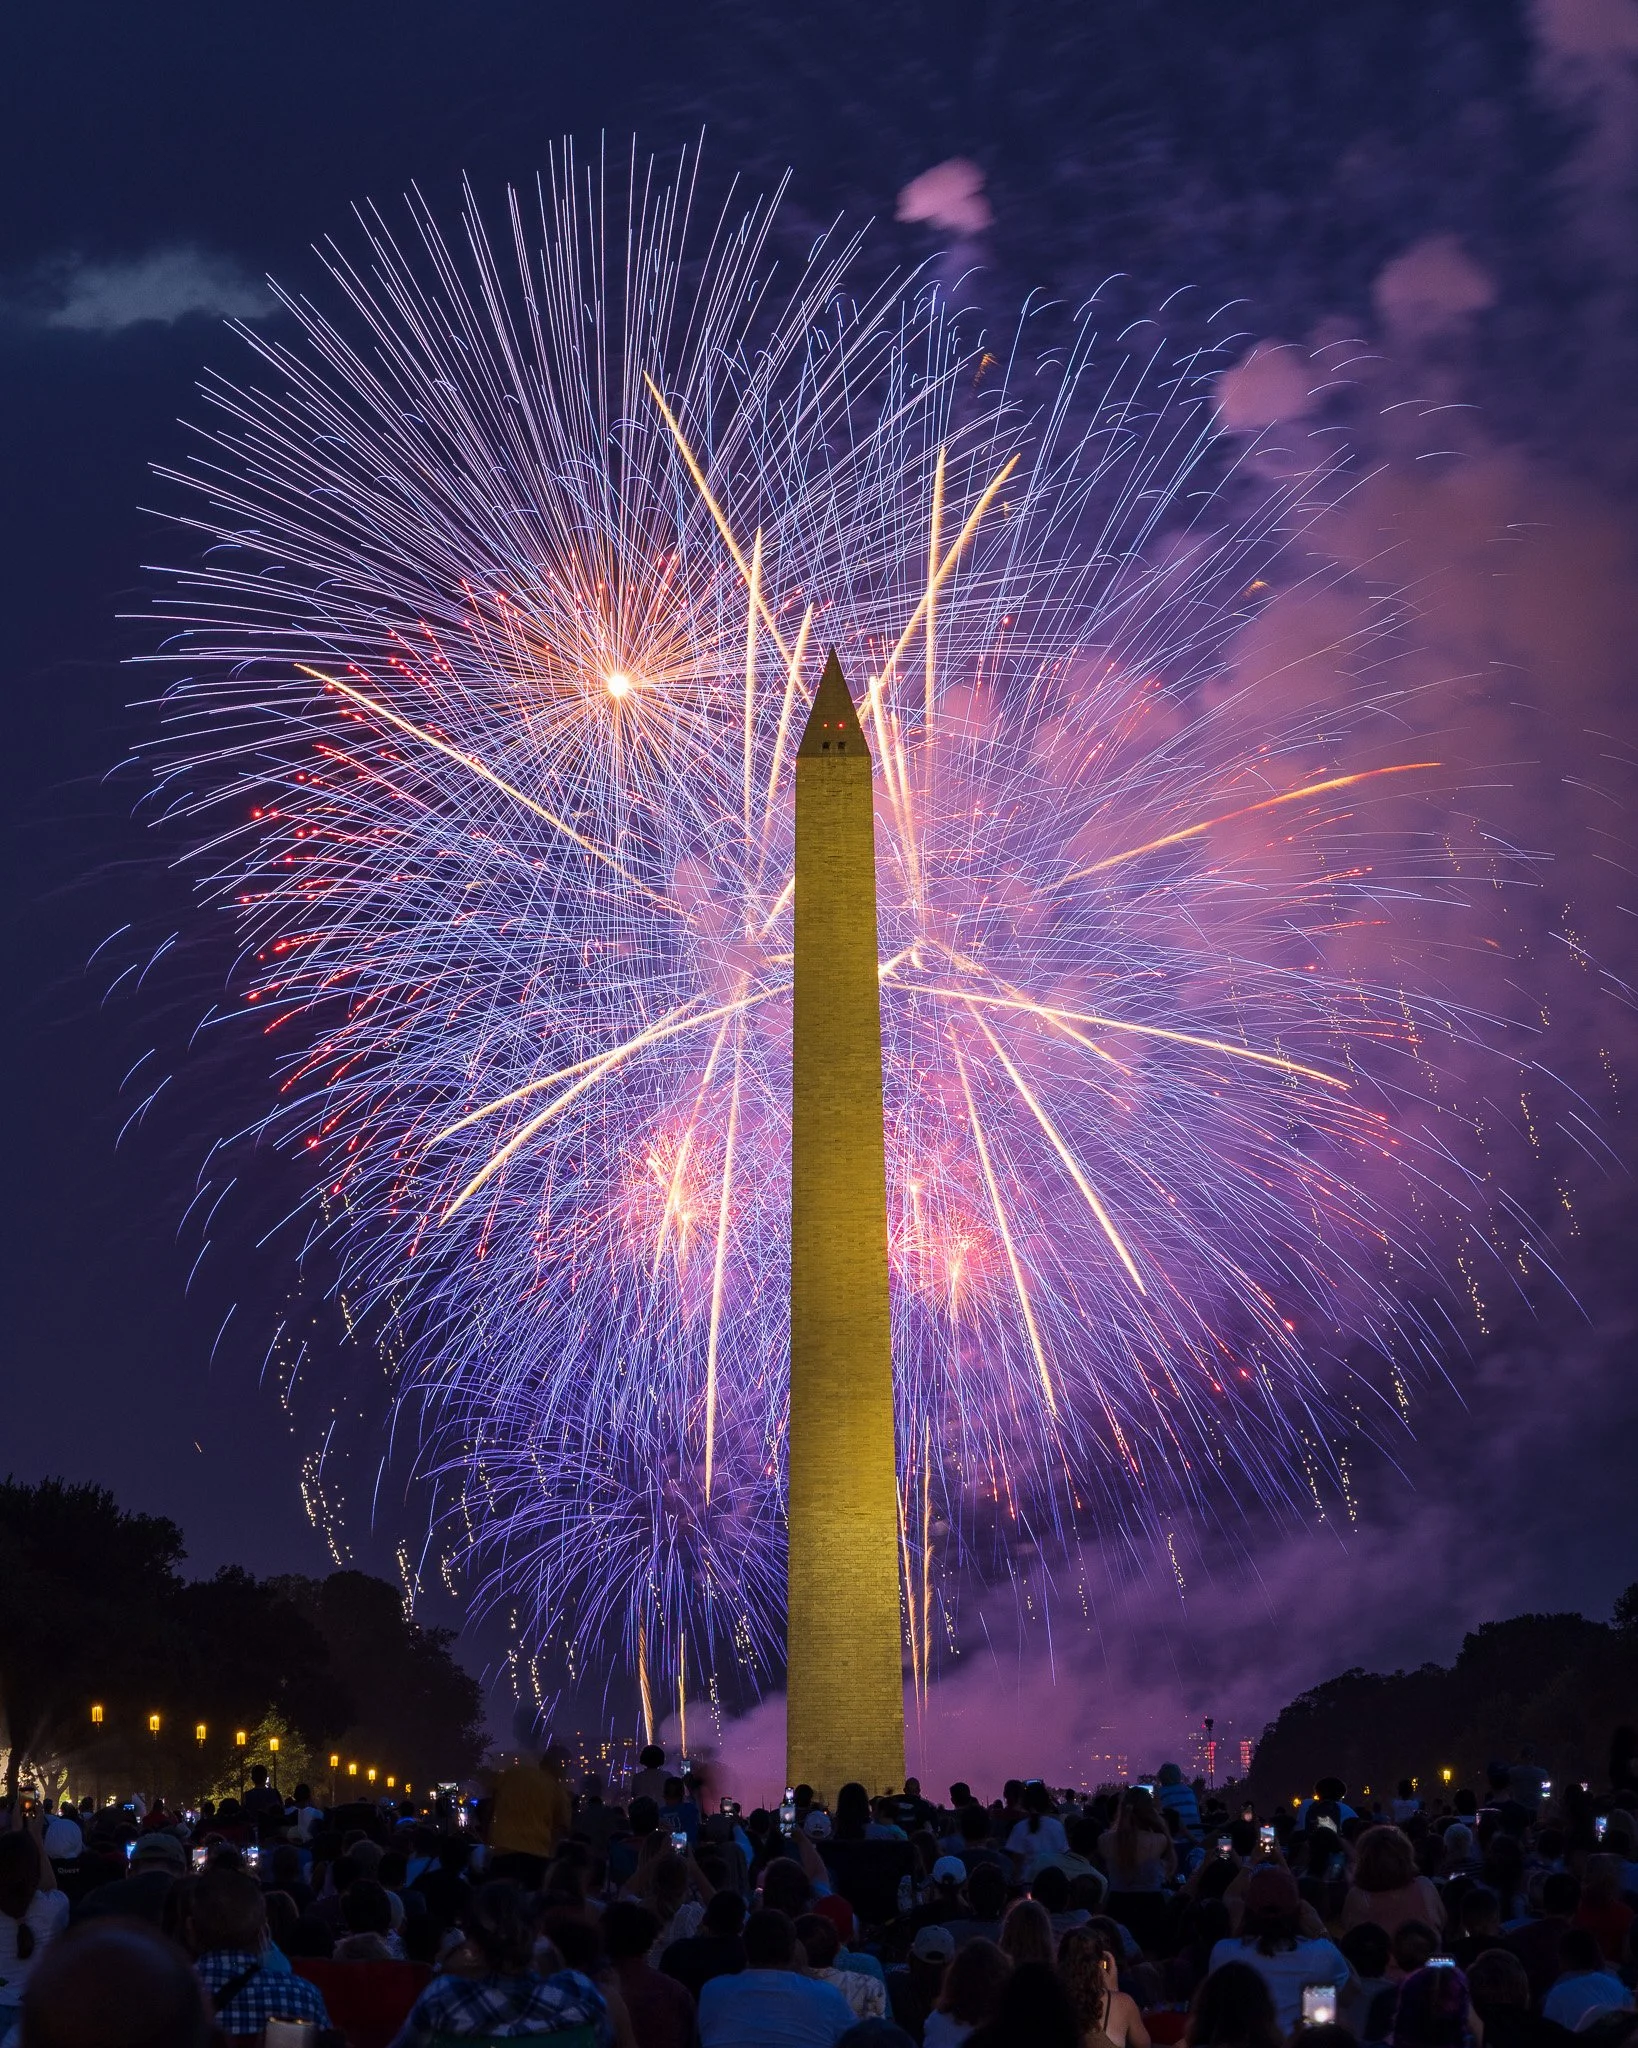
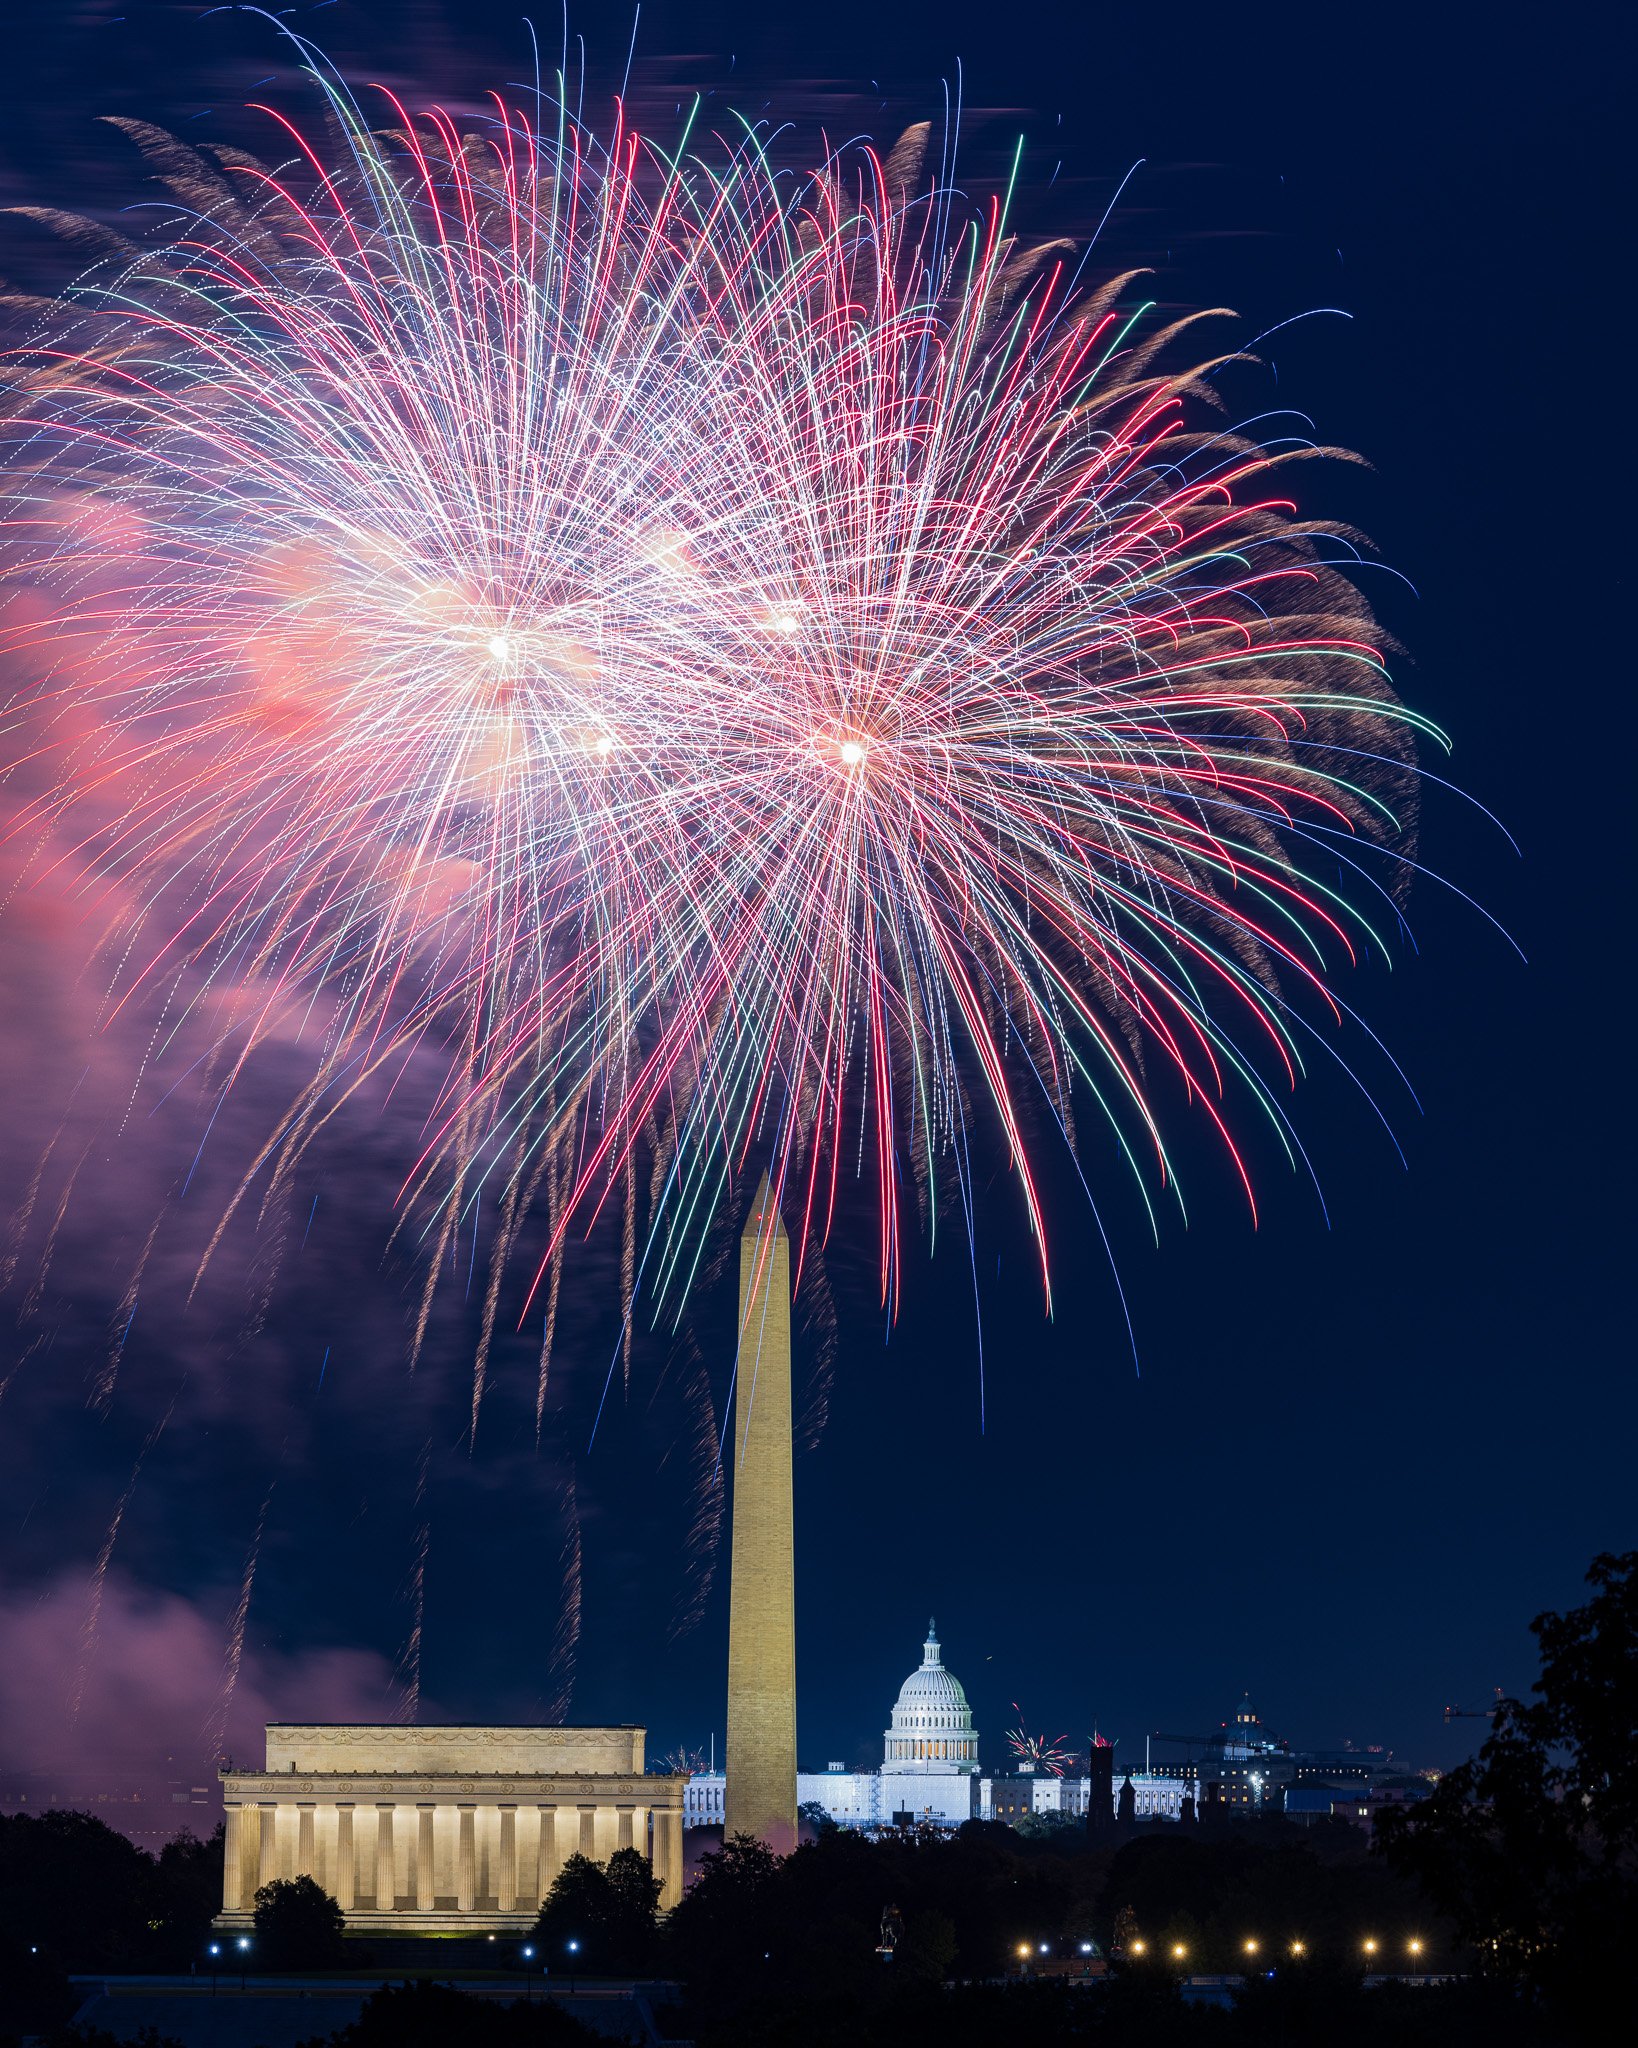
Point a camera straight up at fireworks, and you get fireworks. Just fireworks. No context, no sense of place, nothing that makes the photo yours. The shot that actually gets attention has a foreground.
A skyline, a bridge, a monument, even a crowd silhouette, gives the eye somewhere to land before it travels up into the light. Frame with the rule of thirds in mind: foreground in the bottom third, fireworks filling the upper two-thirds. Shoot horizontal if you want to include a wide skyline, vertical if a single monument or tower is your anchor. Leave headroom. Bursts spread wider than you expect, and cropping a firework mid-frame is a rookie mistake you only make once.
Pro Tip: Scout your location in daylight if you can, or at minimum arrive during blue hour, that stretch of deep blue sky about 20 to 40 minutes after sunset. Shoot a few frames before the show starts so you still have color and detail in the sky instead of pure black. Those blue hour frames, combined with fireworks later, are some of the strongest images you'll walk away with.
Gear: What You Actually Need
DSLR or Mirrorless Kit
A tripod. Non-negotiable. Six-second exposures and handheld shooting do not mix.
A wide to standard zoom, 16 to 35mm or 24 to 70mm, depending on how much foreground you're working with
A remote shutter release or your camera's 2-second timer, so you're not introducing shake by pressing the button
Extra battery. Long exposures and a cold night both drain power fast.
iPhone or Android, don't sit this one out because you left the DSLR at home. Modern phones handle fireworks better than people expect.
Turn off Live Photos and HDR. Both work against you here; HDR especially tends to flatten your blacks and mute the burst colors.
Use Night Mode, but tap to set focus manually on a distant light before the show starts, same principle as a full camera.
Prop the phone against something solid or use a small phone tripod. Even a jacket balled up on a railing works better than handheld.
If your phone shoots ProRAW, use it. It's a setting that captures far more color and light detail than a normal photo, so you have much more room to fix things in editing afterward.
Before the Show: The Ten Minutes That Matter Most
Show up early enough to set your focus, pick your foreground, and take a few test exposures while there's still light in the sky. Once the first burst goes up, you don't want to be fumbling with settings. You want to be watching the sky and adjusting shutter speed based on what you're actually seeing.
Pro Tip: Keep an eye on the finale specifically. It's usually faster, denser, and brighter than everything before it. Drop your shutter speed slightly and be ready for a wall of light instead of individual bursts. This is the moment most people blow out their highlights because they never adjusted for it.
A Quick Word on Sharing the Sky
Fireworks shows draw crowds, and crowds mean tripod legs, elbows, and a lot of people trying to see the same six feet of sky you are. Set up early, keep your footprint small, and be mindful of your screen brightness around people, trying to protect their night vision. Good etiquette is part of getting a good shot. Nobody captures their best frame while arguing with a stranger over sightlines.
Leveling Up: For the More Experienced Shooter
If you've already got the settings above wired into muscle memory, here's where fireworks photography actually gets interesting.
Blend your frames instead of chasing one perfect exposure. The most striking fireworks images you've seen, the ones packed with a dozen overlapping bursts, are rarely one exposure. Shoot a clean series of separate 3 to 6 second exposures throughout the show, then stack the best bursts into a single frame afterward using a lighten blend mode in Photoshop, or a dedicated tool like StarStaX. This is your insurance policy, too. You get to pick your favorite bursts once the show is over instead of committing to your choices in real time.
Carry an ND filter for early evening shows. If the show starts before full dark, you're fighting a sky that's still bright enough to blow out at f/8. A 3 or 6 stop ND filter lets you hold a longer shutter speed without overexposing, so you keep detail in both the sky and the burst instead of picking one.
Watch the smoke. Long shows build up haze fast, especially with no wind. That haze softens contrast and shifts your color temperature warmer as the night goes on. Check your histogram periodically, not just your first few frames, and be ready to adjust exposure or white balance as conditions change mid-show.
Think about focal length as a creative choice, not a technical one. A 24mm lens forces you to include a wide skyline and compresses the relationship between your foreground and the background. A 70mm isolates a single burst and makes it feel massive, but you lose context. Neither is correct. Decide what story you're telling before you pick your lens.
Look for reflections. Water, wet pavement, glass buildings. Shooting from a harbor, a riverbank, or an elevated position that gives you a reflective surface adds a symmetry to the shot that a straight-up view can't touch. It also doubles your color and light in the frame for free.
Go Shoot & Have Fun
You don't need a professional kit or ten years of experience to walk away with a fireworks photo you're proud of. You need a tripod, manual focus, a foreground that means something, and the patience to adjust as the show evolves. That's it. Go find a show near you and put this into practice. Every mistake you make tonight is one you won't make next time, and that's really all this comes down to.
Follow along on Instagram @chasinghippoz for more tips like this, and subscribe to the newsletter for monthly photography breakdowns straight from the field.
Finally—a beginner-friendly photography guide that makes sense.
If you've ever picked up a camera and thought, "Now what?" this is the book for you.
Photography Made Simple is written for adults who are just starting out and want a clear, encouraging, real-world approach to learning photography. Whether you're using a DSLR, mirrorless, or just your smartphone, this guide walks you through the basics—without the jargon or tech overwhelm.
Inside, you'll learn:
The only camera settings you really need to know to get started
How to shoot sharper, more intentional photos using light and composition
Simple tips for portraits, landscapes, travel, and everyday life
What gear you do (and don’t) need
How to create better photos without upgrading your camera
You’ll also get practical exercises, cheat sheets, and tips for organizing and editing your images—plus the confidence to shoot off Auto Mode for good.
This is not a textbook. It’s a friendly guide to seeing the world with fresh eyes—and finally capturing what you see the way you imagine it.
📸 Format: PDF download
Pages: 100+
Perfect for: Beginners, hobbyists, and anyone ready to take better photos without the stress