My Photography & Travel Guide to Big Sur, California
We arrived at Big Sur by helicopter.
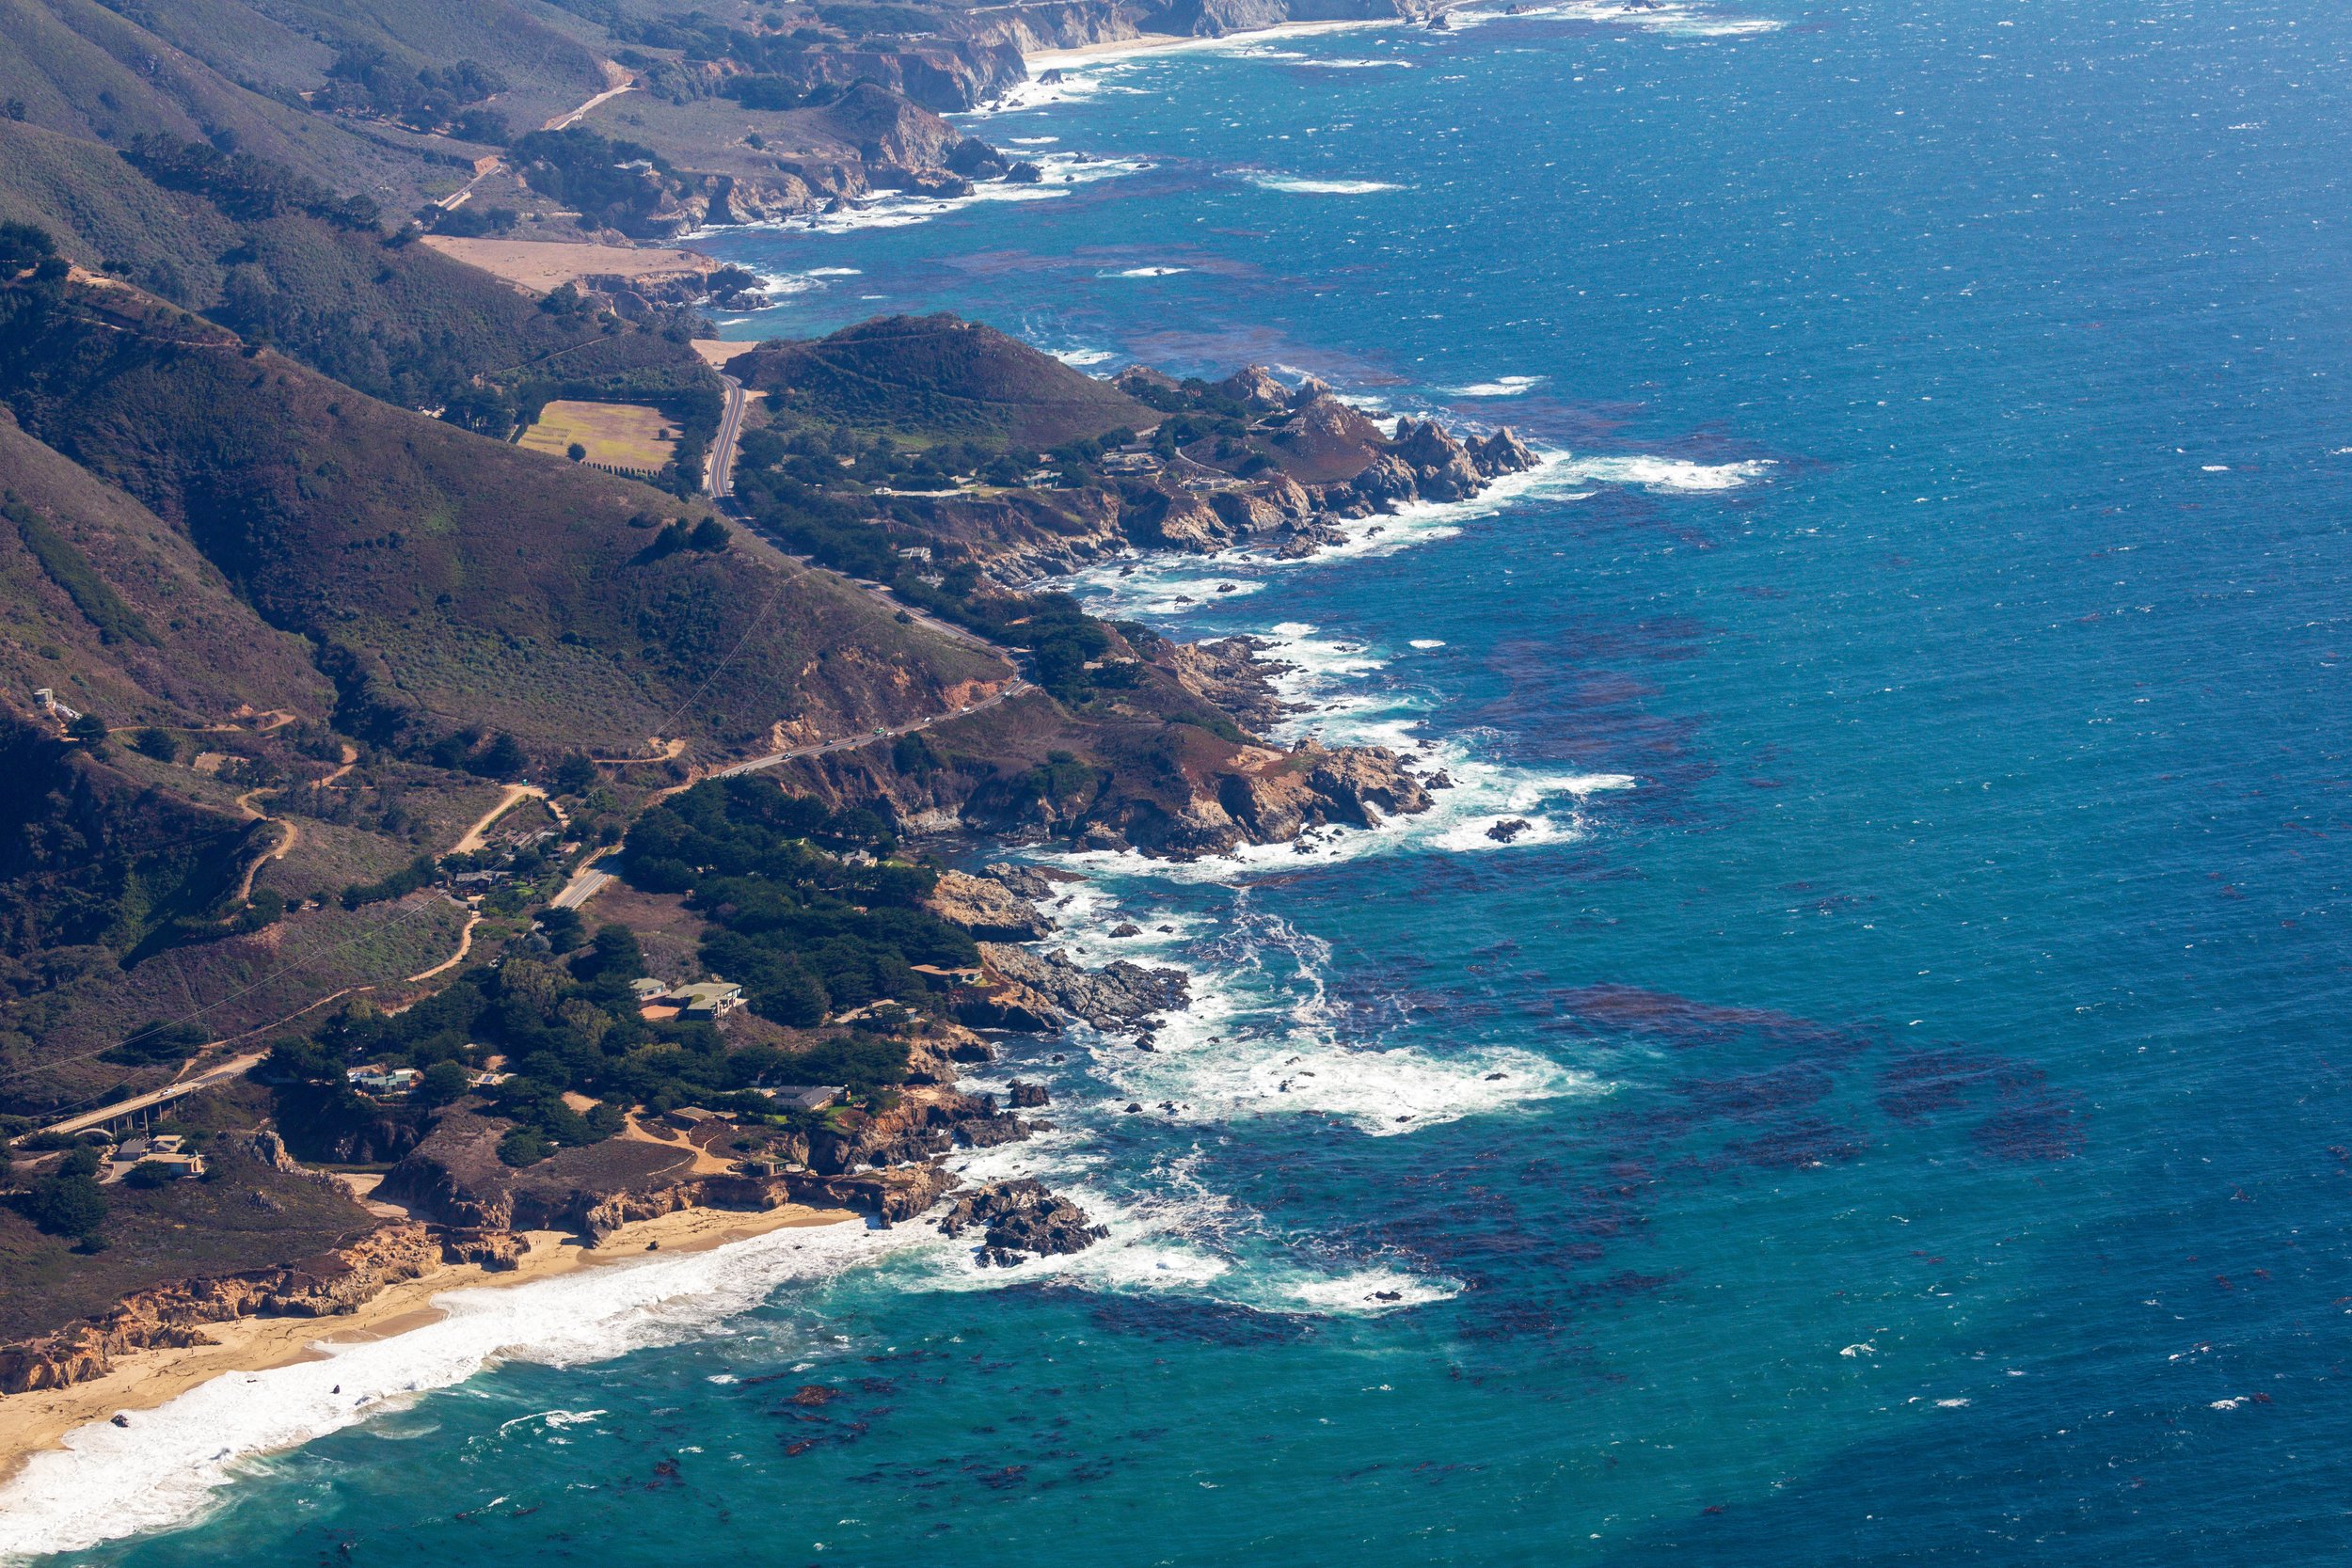
Not because it was on the itinerary. Two weeks before our trip, the Post Ranch Inn sent an email explaining that severe flooding had washed out the bridges on both the north and south ends of Big Sur, making the road inaccessible. They had arranged a solution: guests could park at Monterey Airport and fly to the hotel by helicopter for $100 per person. First time in a helicopter. California coastline below us. Bixby Bridge visible from the air. The Pacific going all the way to the horizon.
I had been dreaming about this trip for years, and none of the planning had included arriving this way.
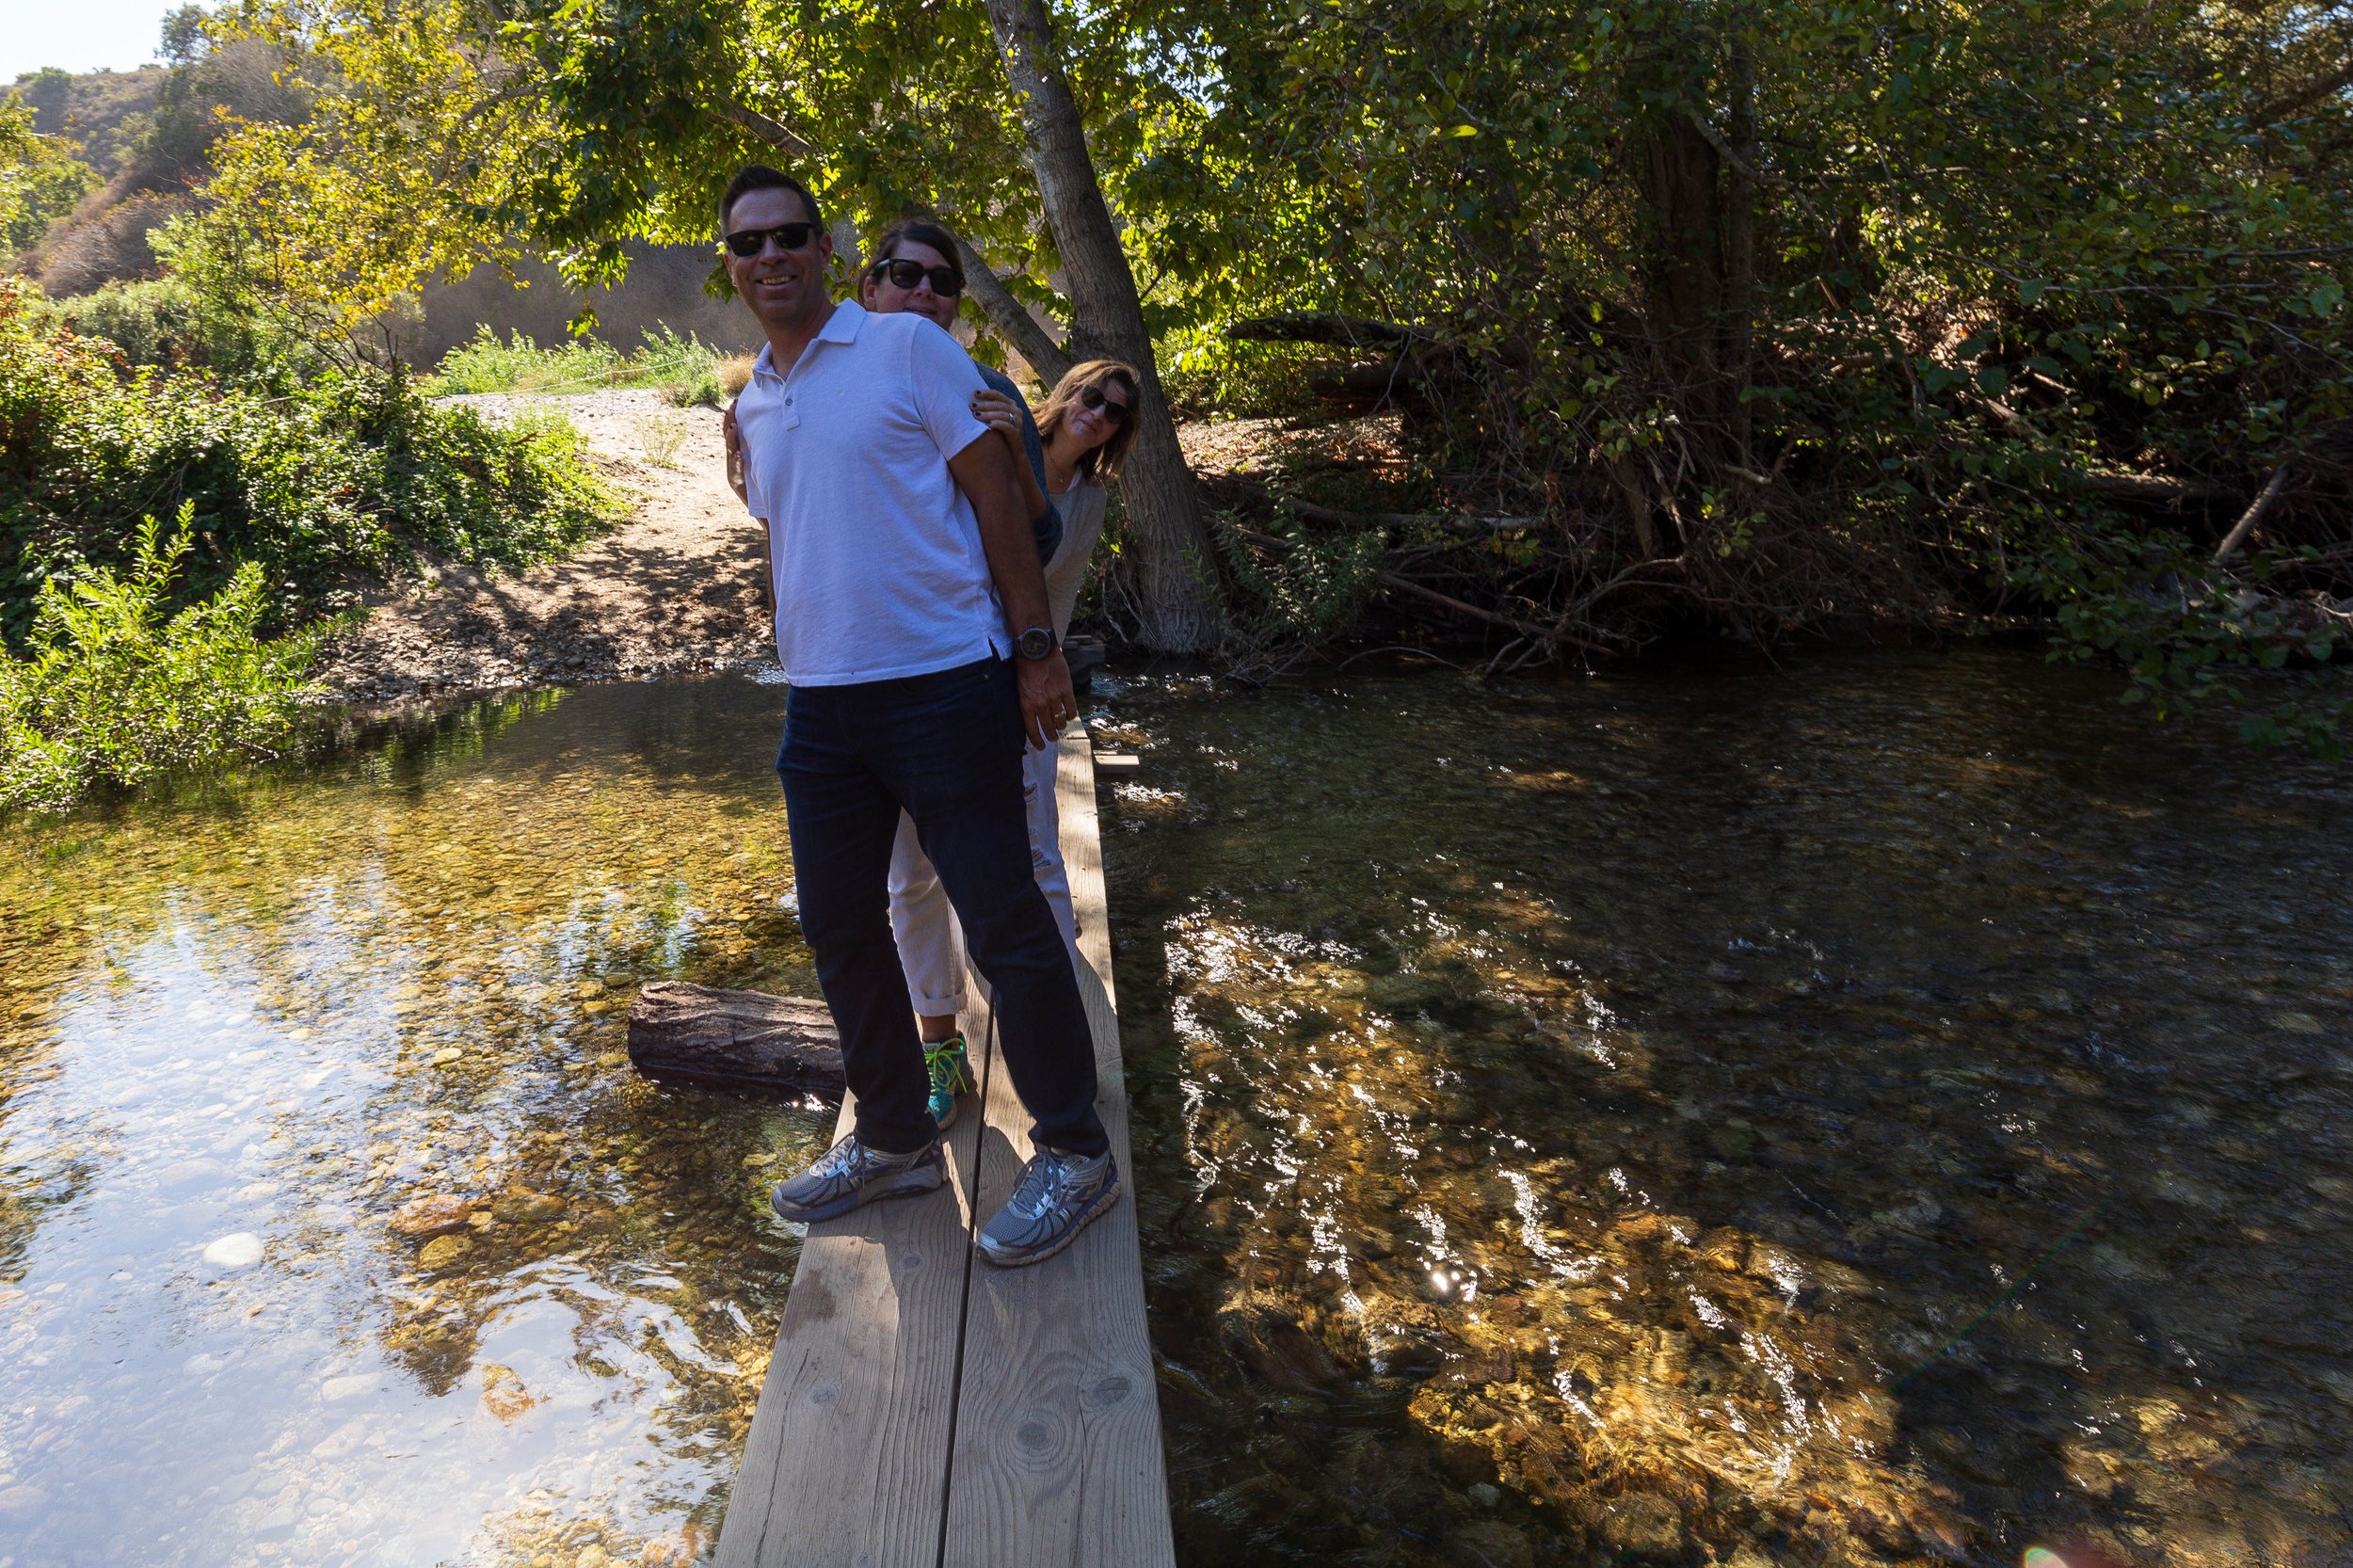
What we found when we landed was something that no amount of money could normally buy. Big Sur was almost entirely to ourselves. The road closures meant virtually no one else could get there. We would drive the coastline and see one other car every twenty to thirty minutes. Every overlook was empty. Every viewpoint was ours. That combination of one of the most dramatic coastlines in the United States and near-total solitude is something that will never happen again in quite the same way.
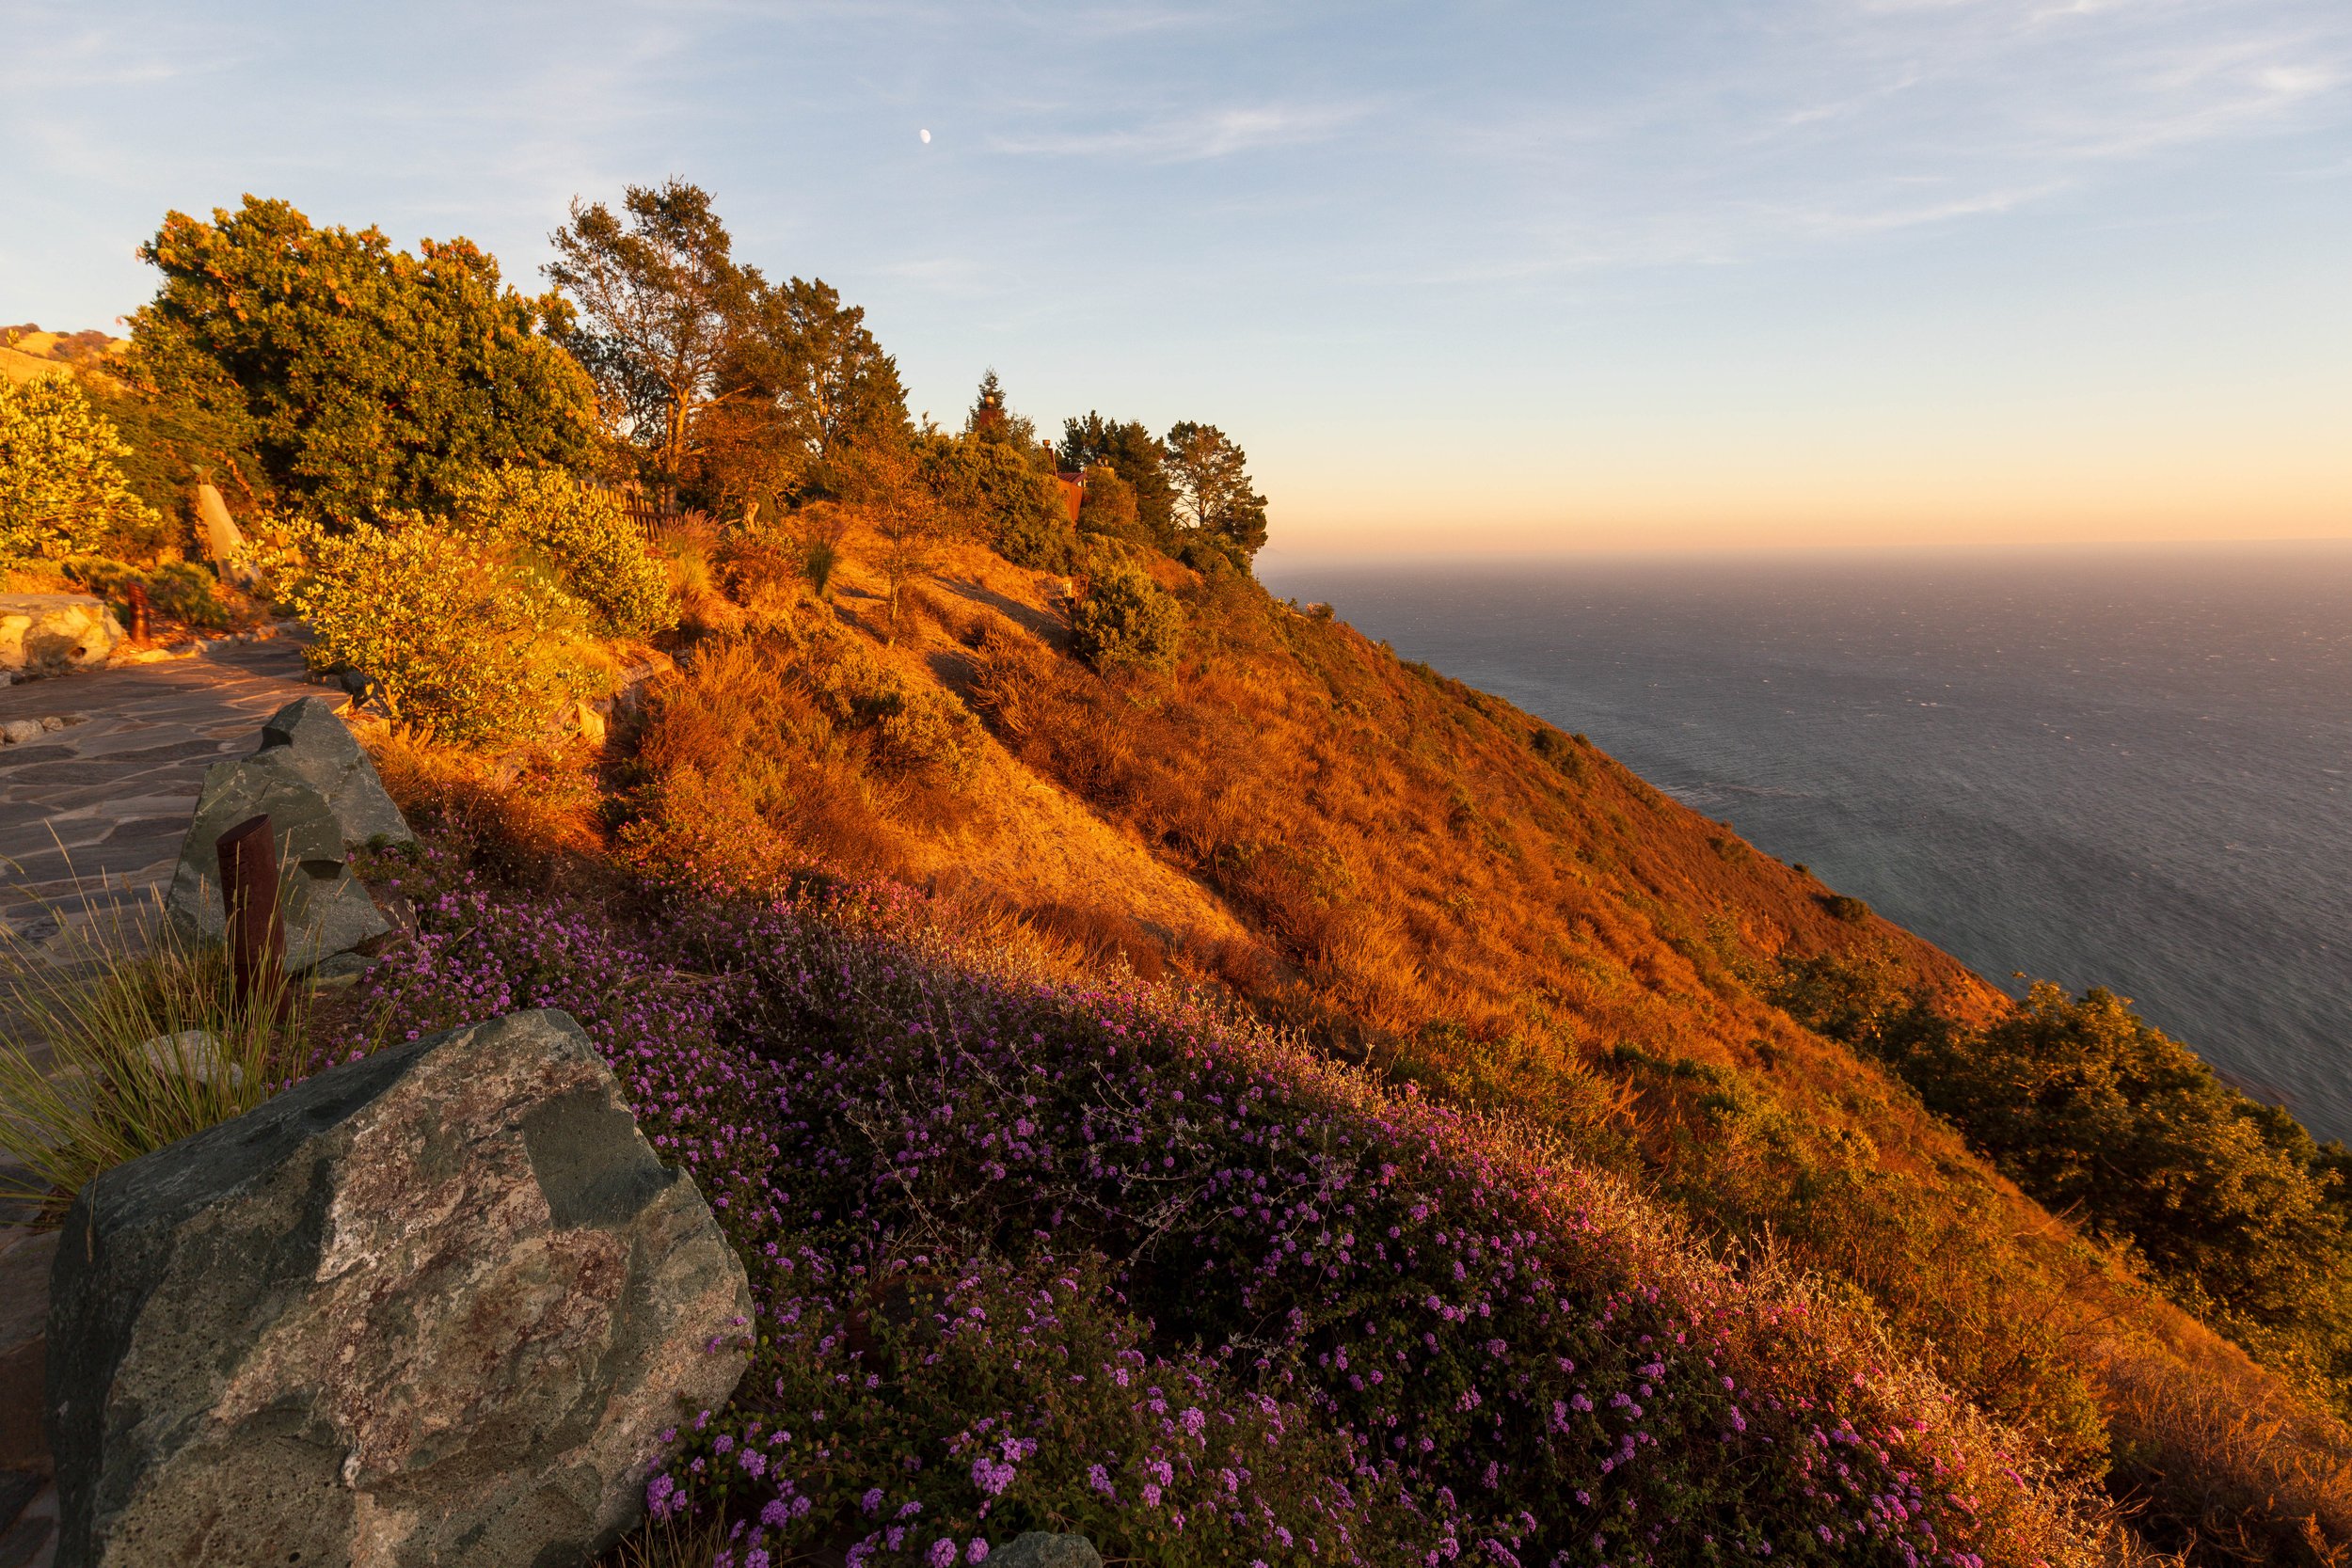
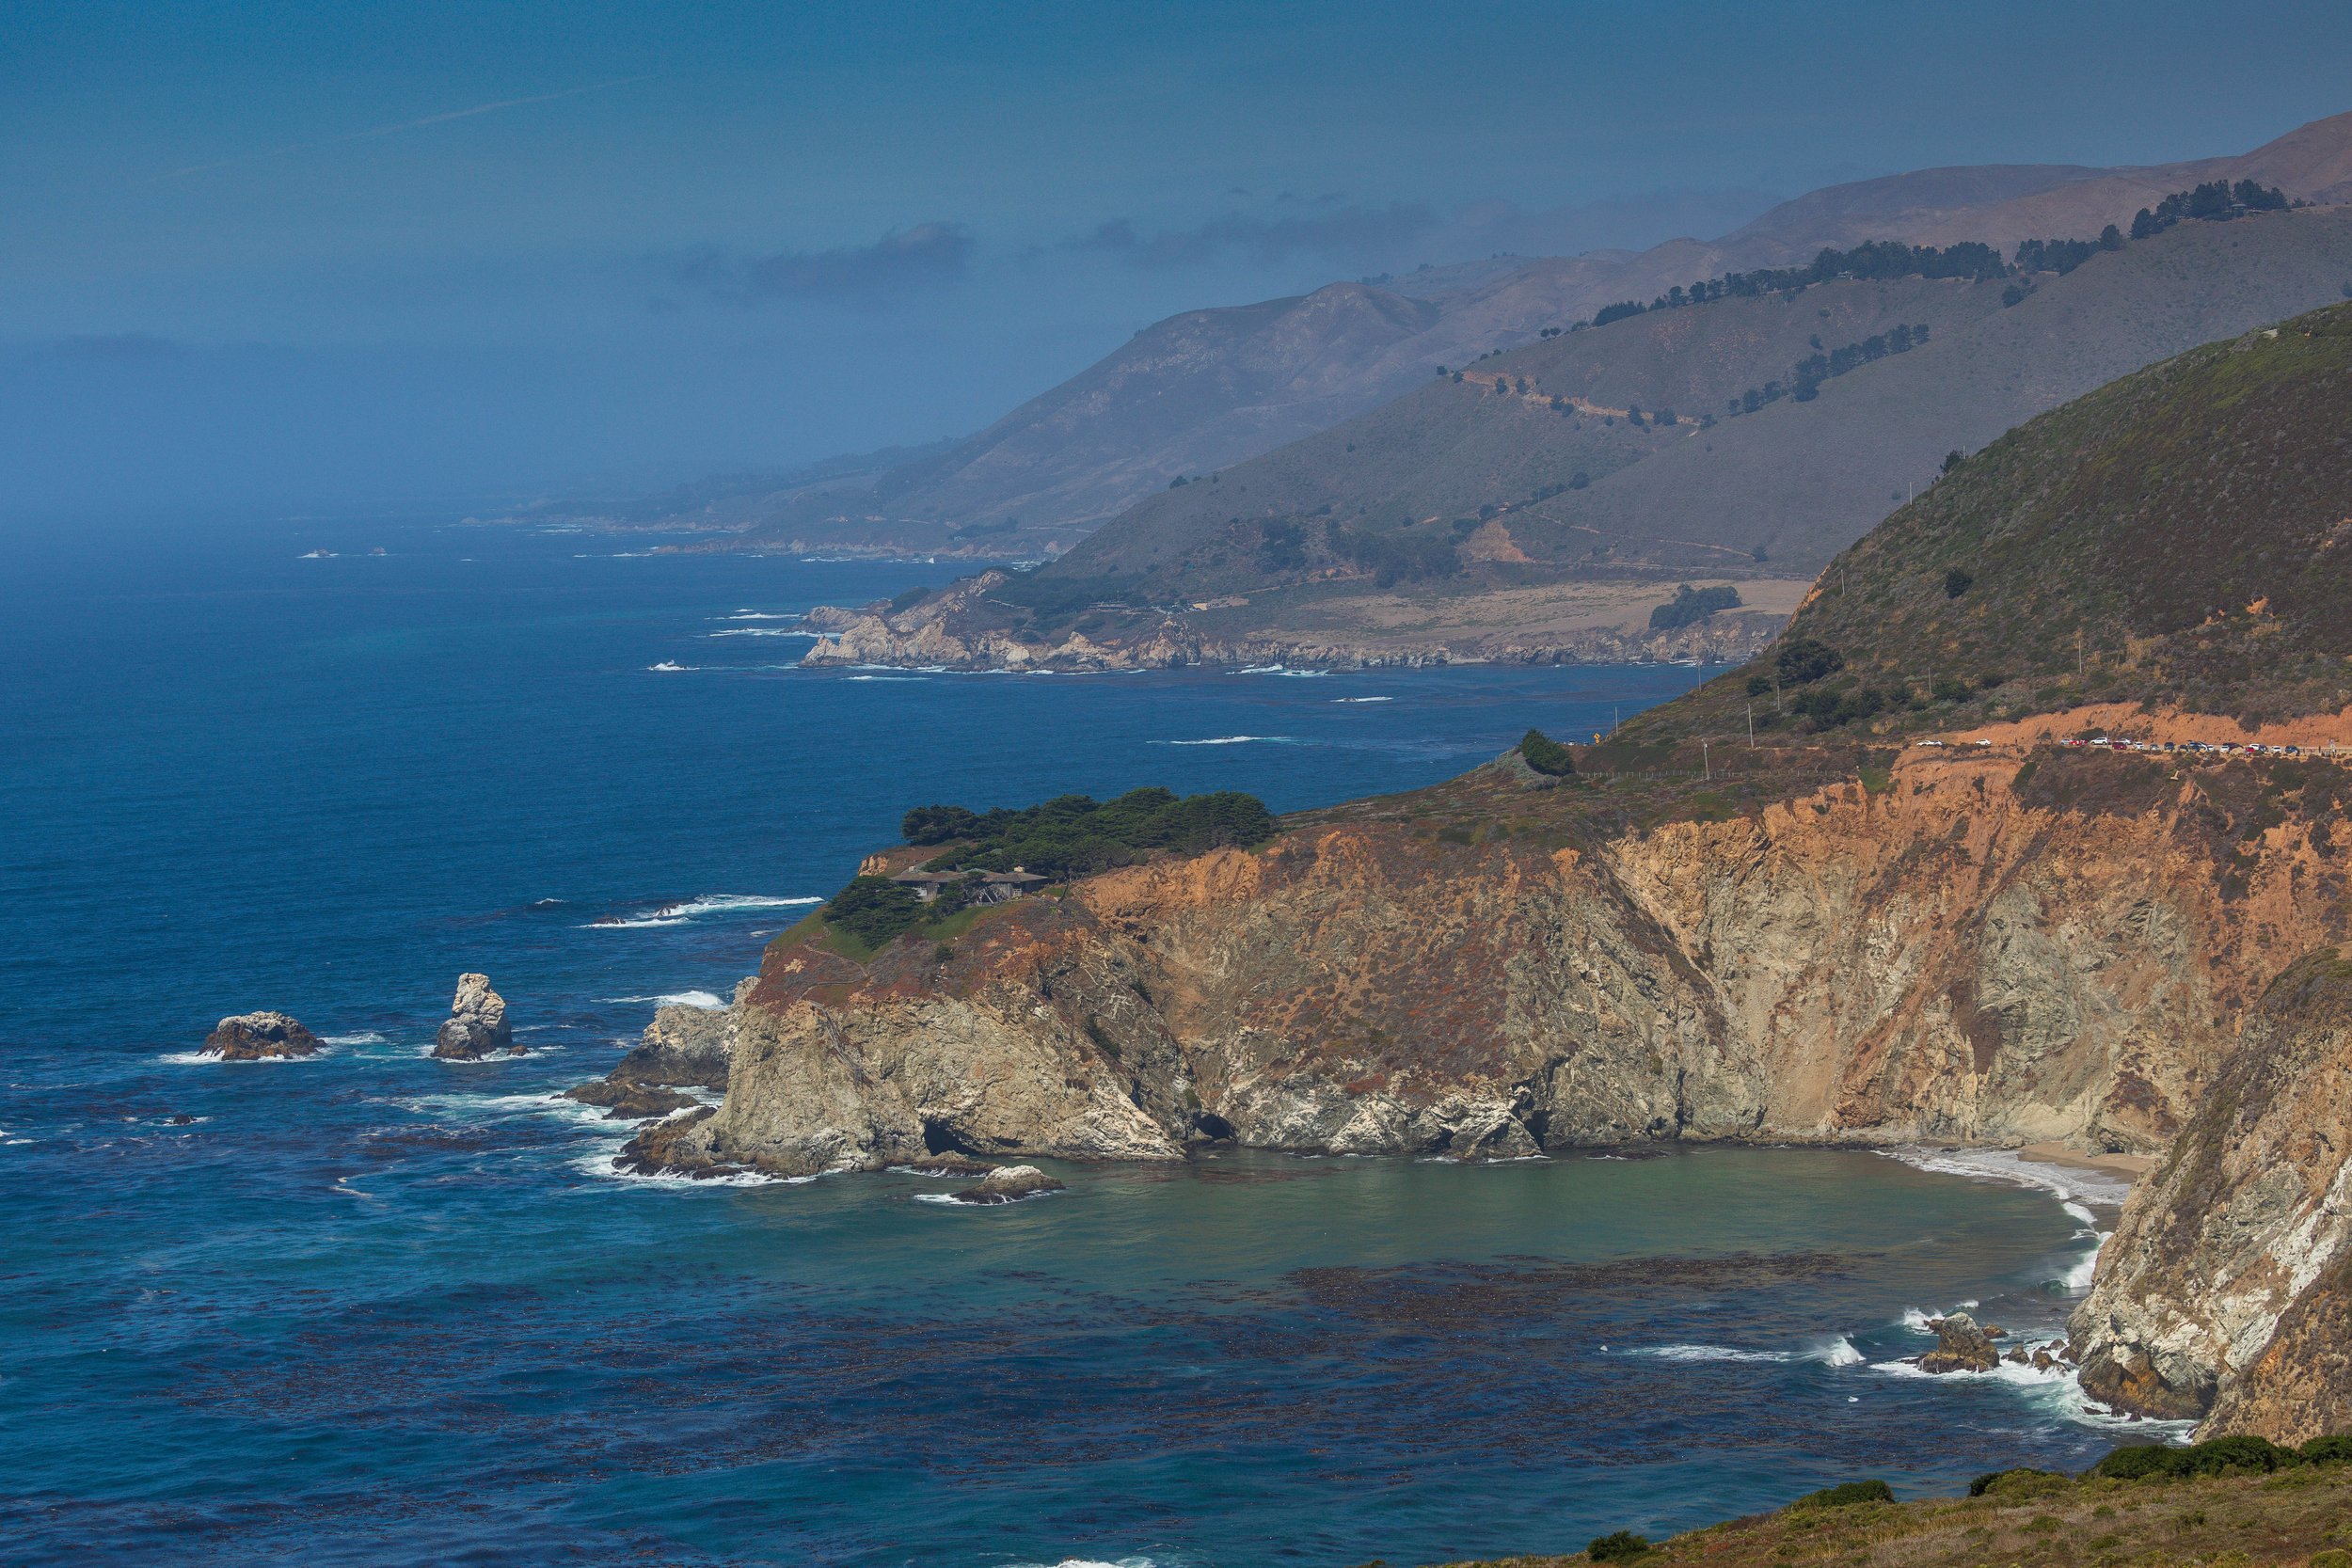
Big Sur is located about two and a half hours south of San Francisco along California State Route 1, also known as Highway 1. The drive along the Pacific coast is part of the experience: the cliffs dropping into the ocean, fog rolling through the headlands, golden light on coastal bluffs, redwood forests tucked just inland. Every turn is a potential composition and every pull-off a reason to stop. Build extra time into the drive. You will need it.

The Post Ranch Inn, sitting on the cliffs above the Pacific, exceeded everything we had read about it. The dining was exceptional and the wine program was as thoughtful and carefully curated as any we have encountered. The views from the rooms and the restaurant are simply some of the finest I have seen from any hotel anywhere. Arriving by helicopter made it feel like something from a film. The hotel itself made sure the experience held up once we landed.

In this Photography Guide to Big Sur, I share what we discovered during those extraordinary days. You will find the best photography locations, practical driving and timing advice, where to stay, and how to make the most of one of the most dramatic coastlines in the world.
When to Visit?
The best time to visit Big Sur is late spring, especially May, and early fall, particularly September and October.
During these months, the weather is generally mild and clear. You avoid the peak summer crowds, hotel rates are often more reasonable, and Highway 1 feels less congested. For photographers, that matters. Fewer cars. Fewer people at overlooks. More freedom to work a composition without feeling rushed.
Late spring often brings fresh green hills and lingering wildflowers. Early fall can offer some of the clearest skies of the year, with stable weather patterns and beautiful golden light.
Summer brings the biggest crowds and a heavier marine layer that can linger well into the afternoon. Winter can deliver dramatic storms and moody skies that are genuinely compelling to photograph, but also brings the highest risk of road closures from landslides. Check Caltrans road conditions at dot.ca.gov before any winter trip.
How To Get To Big Sur?
Most visitors drive along California State Route 1. From San Francisco, the drive takes about three hours without stops. From Los Angeles, expect closer to five hours. Build extra time into either direction. You will want to pull over. A lot.
The coastal drive is the experience. Dramatic cliffs drop into the Pacific. Waves crash against rocky headlands. Fog rolls in and out, changing the mood every few minutes. Treat the drive itself as your first shoot of the trip.
Before you go, check road conditions. Sections of Highway 1 occasionally close due to landslides. A quick check at dot.ca.gov can save you a major detour.


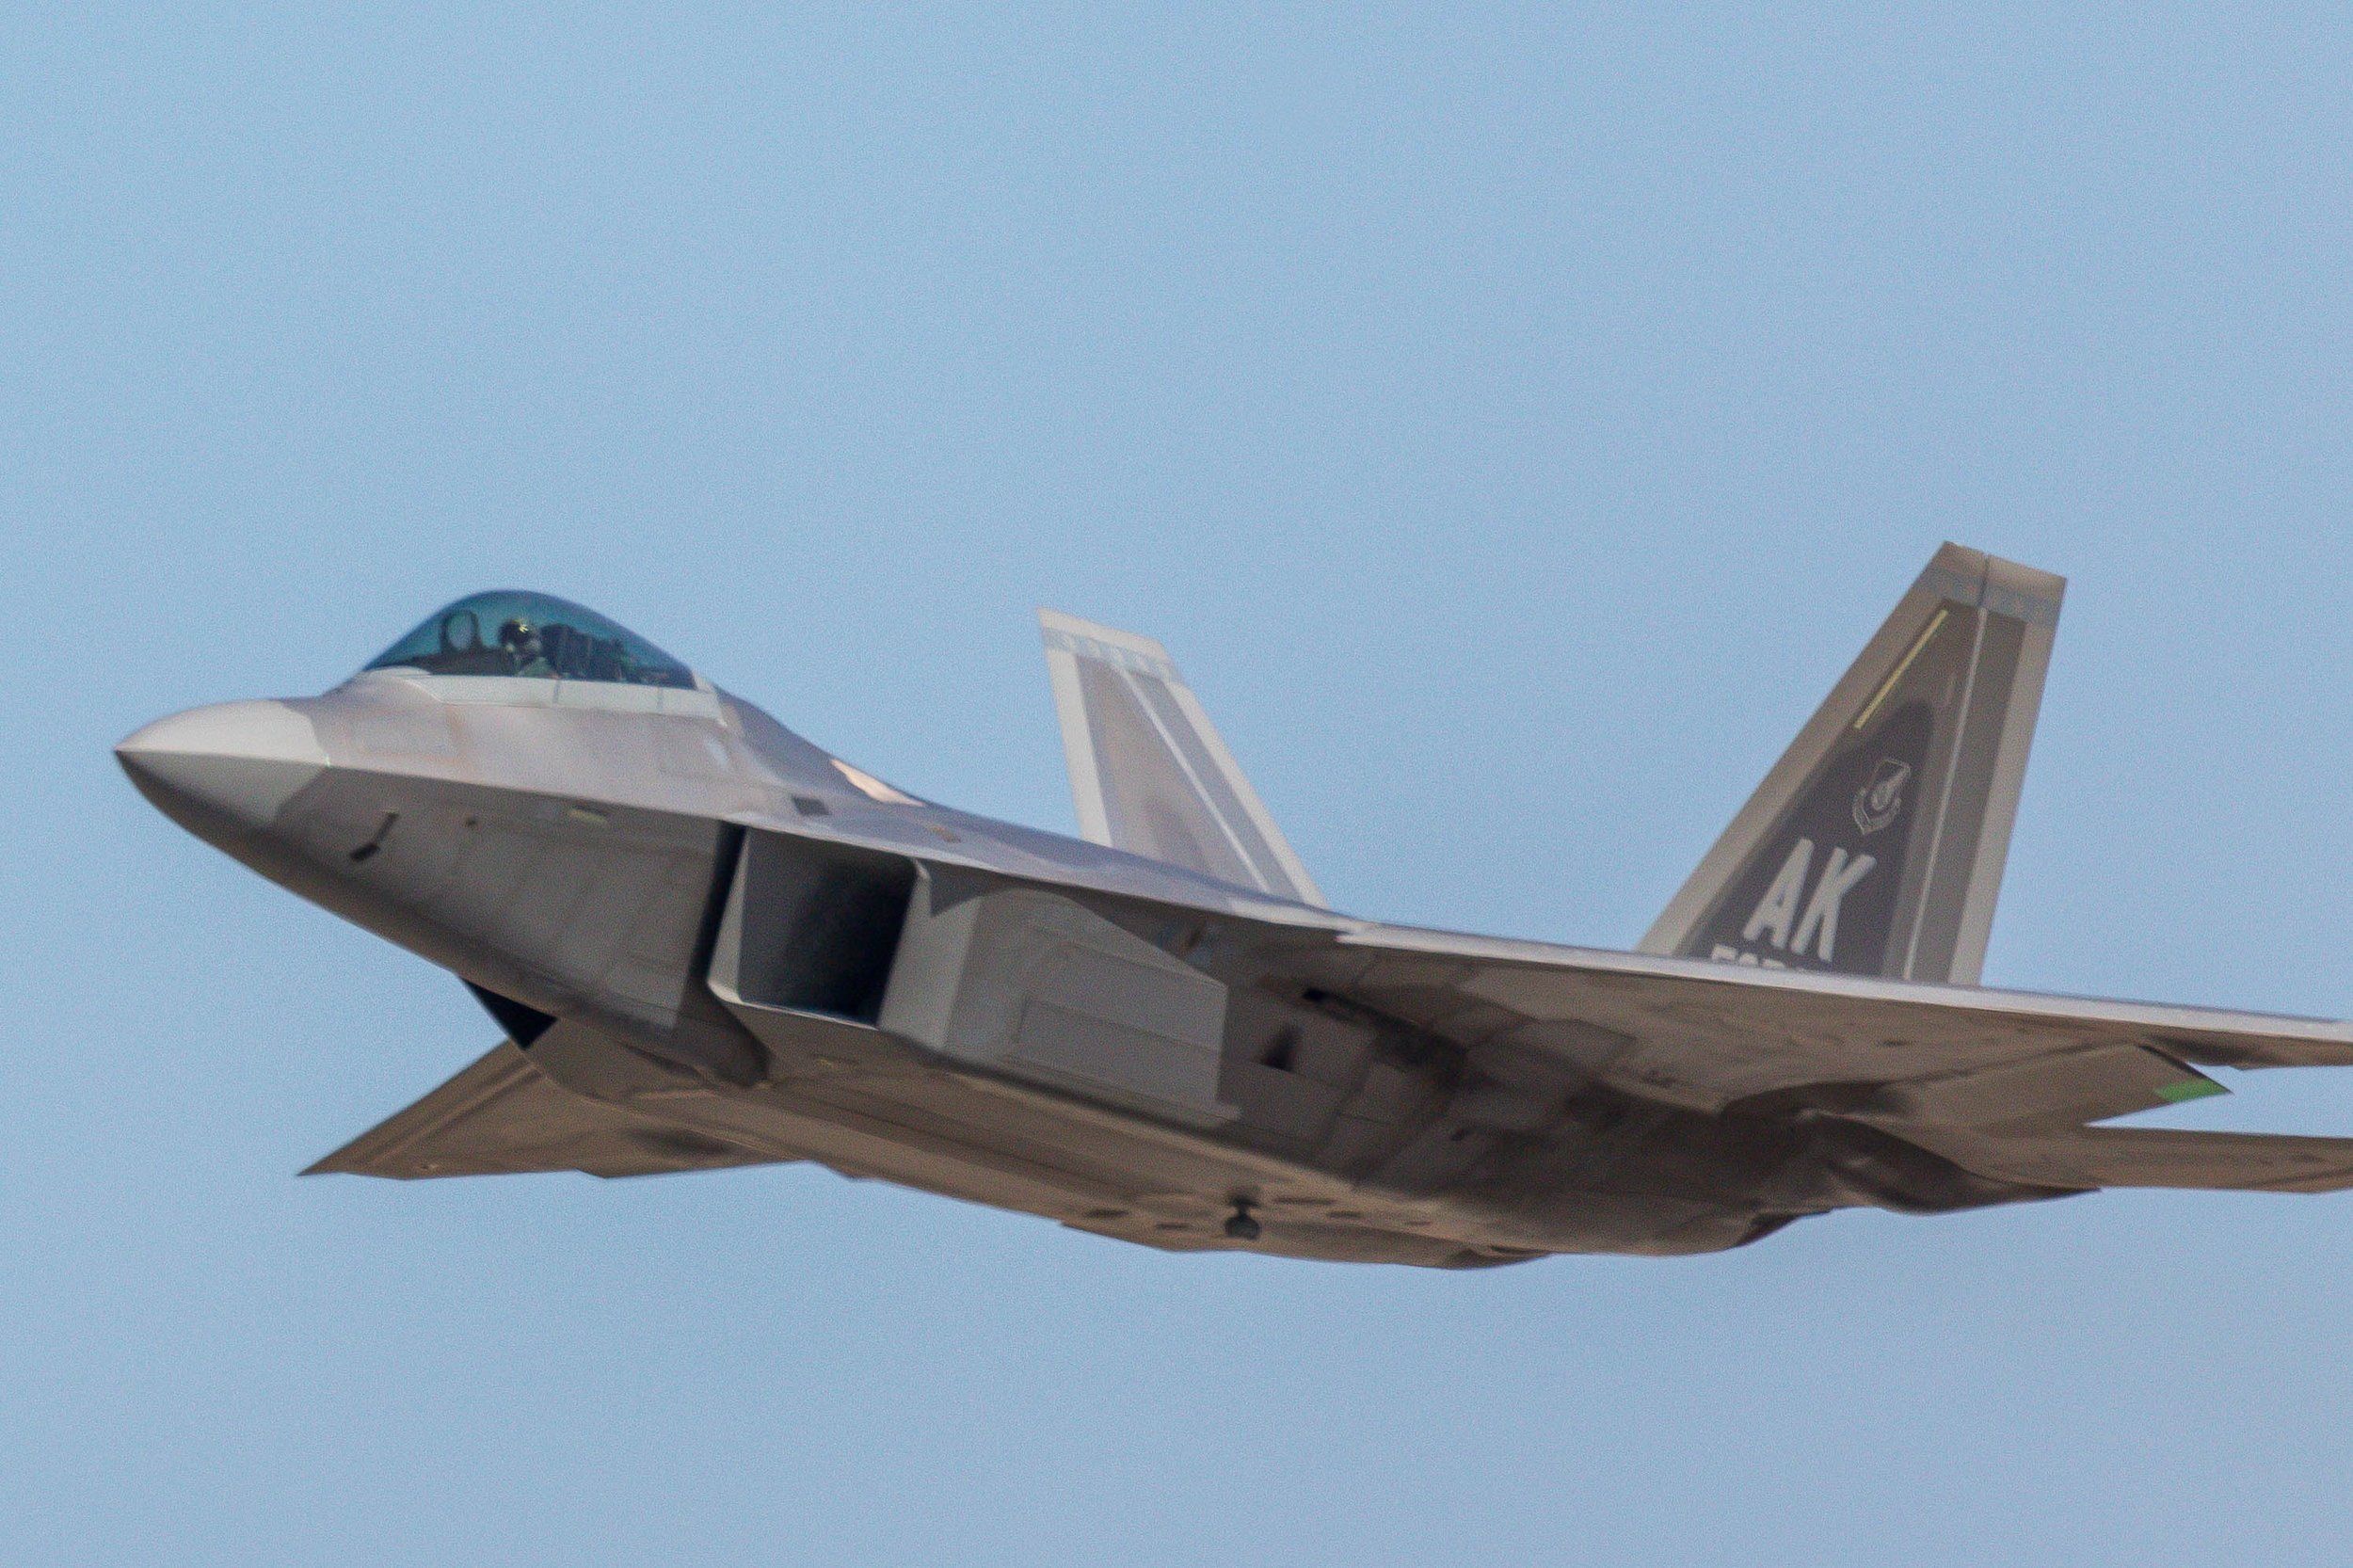
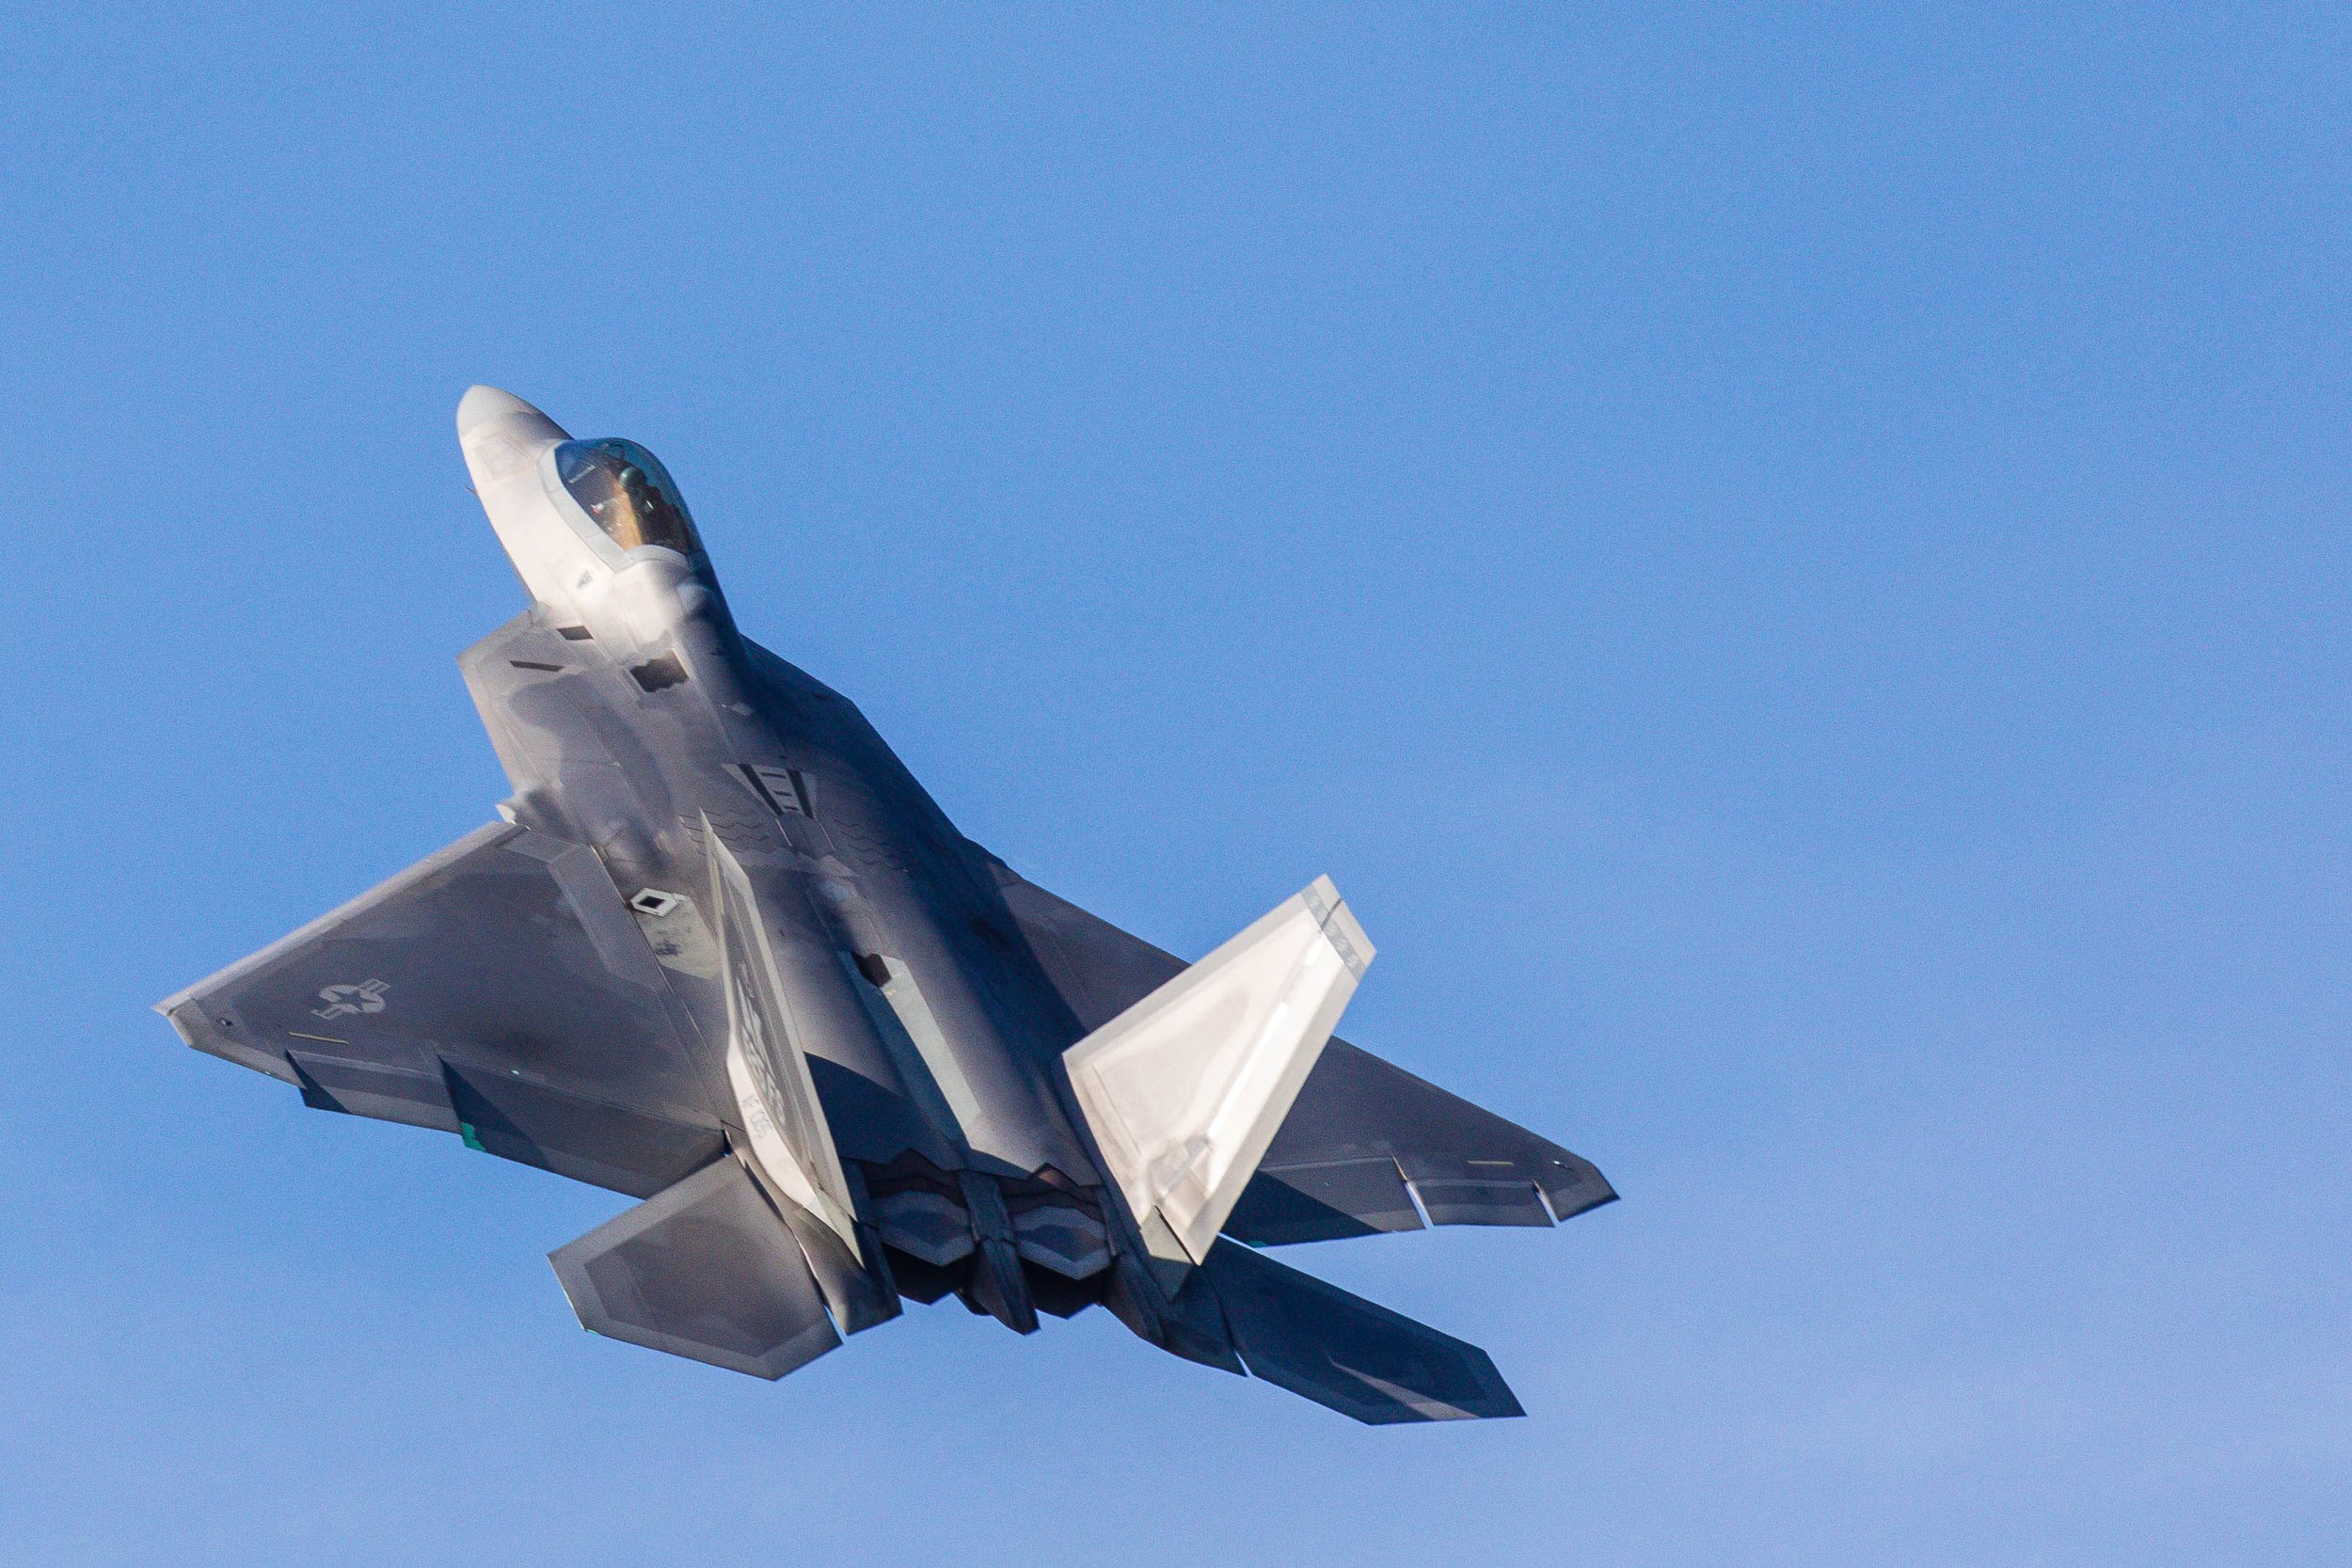
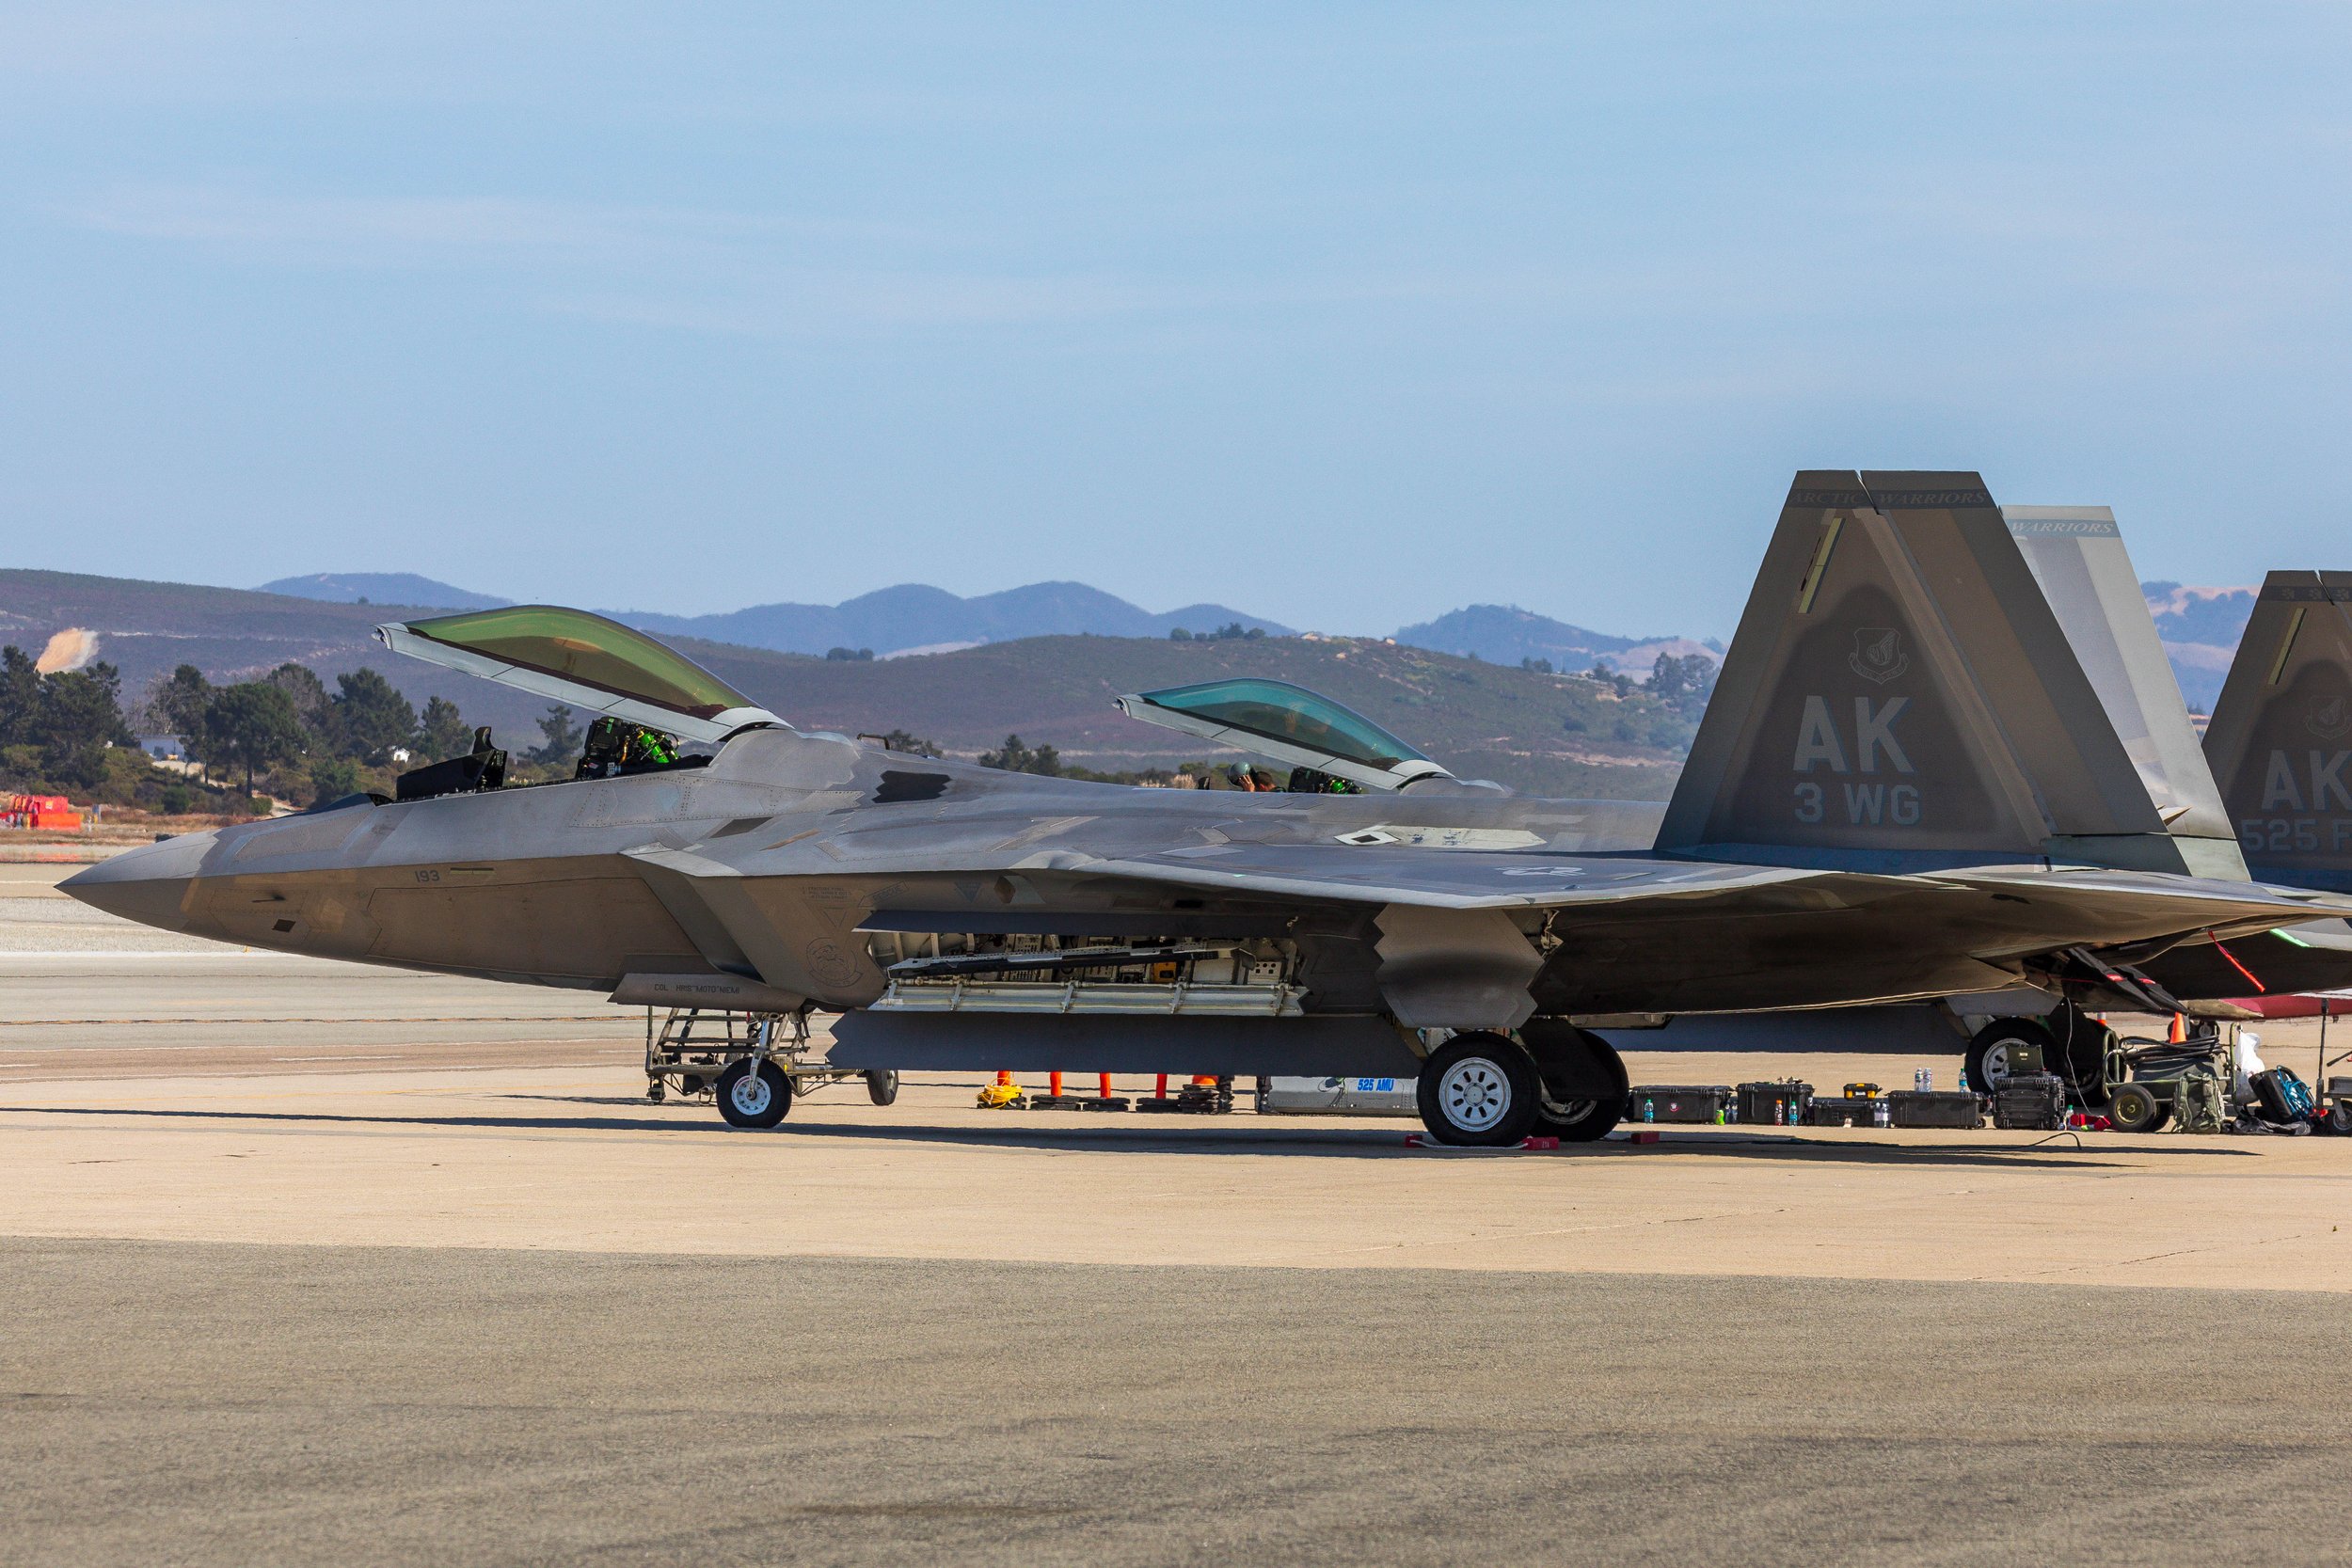
Our own adventure began differently. Two weeks before our visit, the Post Ranch Inn emailed to say that flooding had washed out the bridges on both ends of Big Sur. Their solution: park at Monterey Airport and fly to the hotel by helicopter for $100 per person. It was my first time in a helicopter, and flying down the California coastline with Bixby Bridge visible below us was not a bad way to start a trip. As we walked out to the aircraft on the tarmac, the Air Force had an F-22 parked nearby. I was even able to photograph one taking off. Not a typical pre-trip experience.
How Many Days to Visit
If you want to do Big Sur properly, plan for three to four days.
That gives you enough time to photograph the iconic highlights, explore lesser-known pull-offs, and return to key locations when the light improves. Big Sur is all about timing. Fog rolls in. It clears. Light changes direction. Staying multiple nights gives you the flexibility that landscape photography requires.
A three-day framework that works well: arrive in the afternoon and drive a section of Highway 1 before sunset on day one. Spend day two working the major locations, Bixby Bridge at sunrise, McWay Falls mid-morning, Point Lobos in the afternoon. Use day three for the parks and trails you did not get to, and a final sunset shoot from whichever location delivered the best light the day before.
Whatever you do, give yourself enough time. Big Sur is not a one-night stop.
Getting Around
The best way to explore Big Sur is by car. Public transportation does not exist here in any meaningful sense, and many of the best photography spots are simply pull-offs along Highway 1.
Rideshare services like Uber and Lyft may operate in Carmel and Monterey, but coverage in Big Sur itself is unreliable. Cell service can be spotty in more remote stretches. If photography is your focus, having your own vehicle is non-negotiable. It allows you to chase changing light, return to a location at sunset, or pull over quickly when fog starts rolling through the cliffs.
A rental car gives you the flexibility Big Sur requires.

Restaurants with Incredible views
Best Area to Stay
The best place to base yourself is along the central stretch of Highway 1. Staying in the heart of Big Sur puts you within easy reach of Bixby Creek Bridge for sunrise and McWay Falls for morning light, and reduces the driving time in both directions. Winding coastal roads and frequent pull-offs slow you down more than you expect. Being centrally located means you can return to a location if the light disappoints the first time, or head out again when conditions improve.
Where to Stay
Luxury
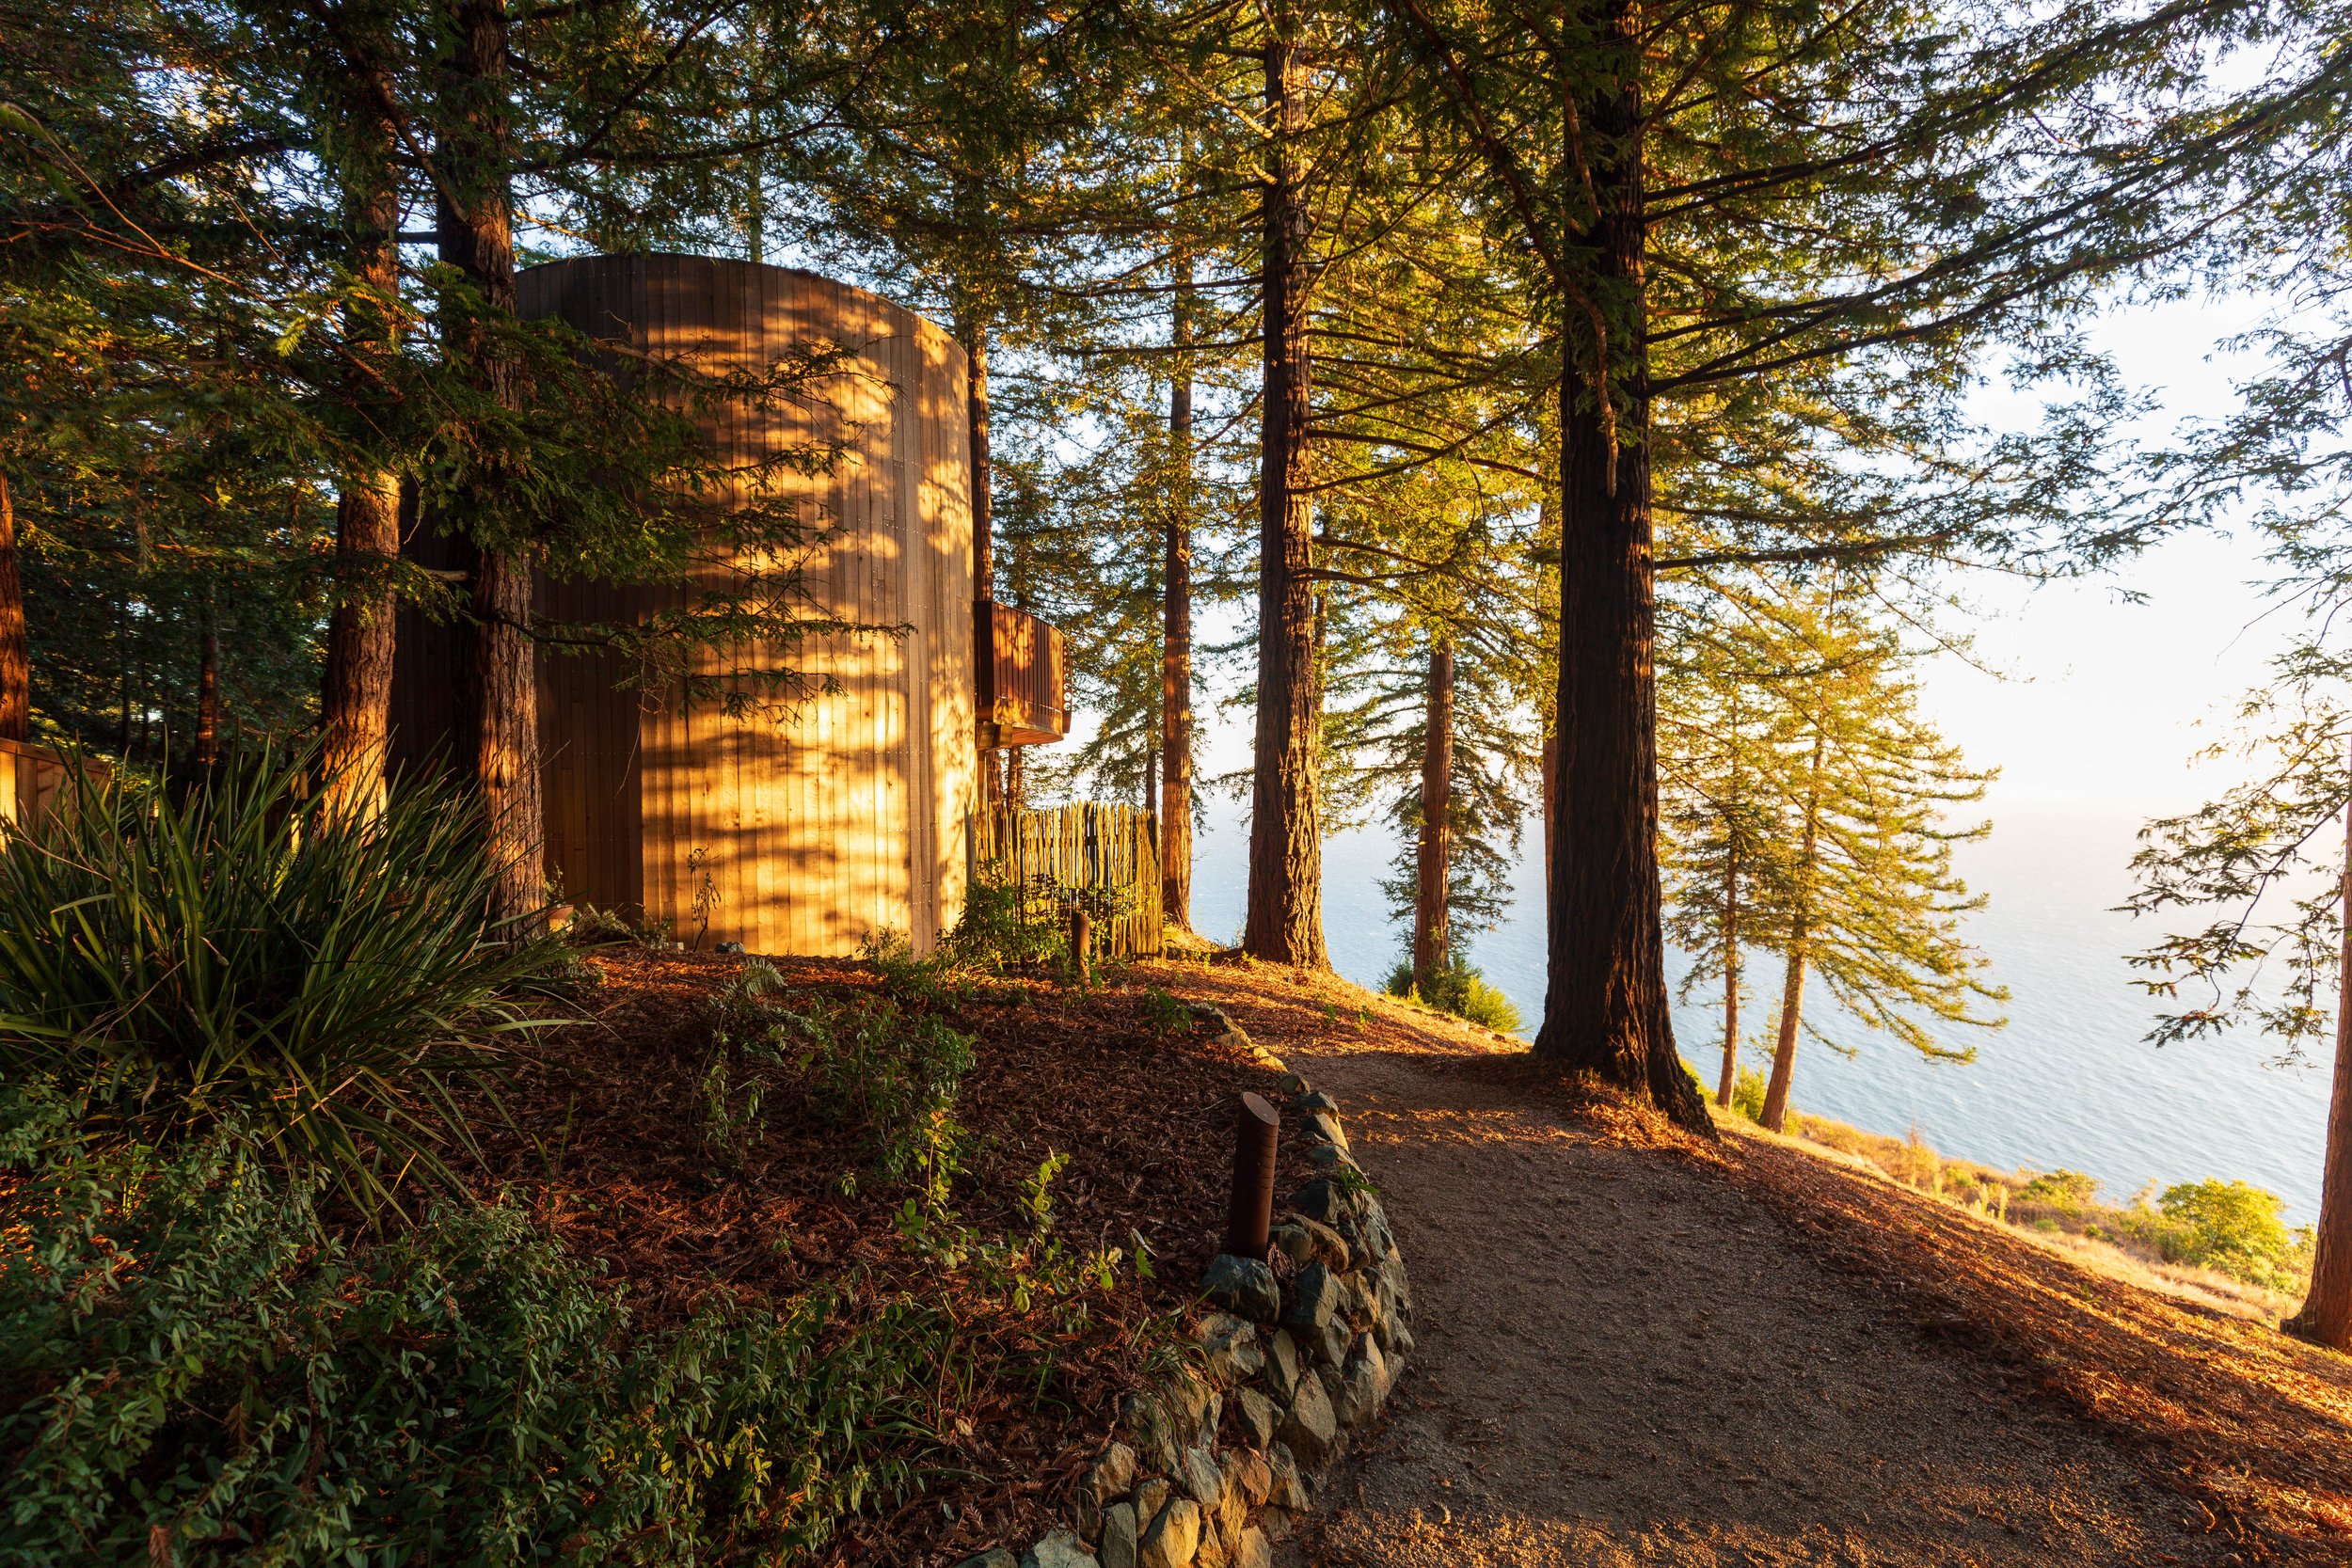
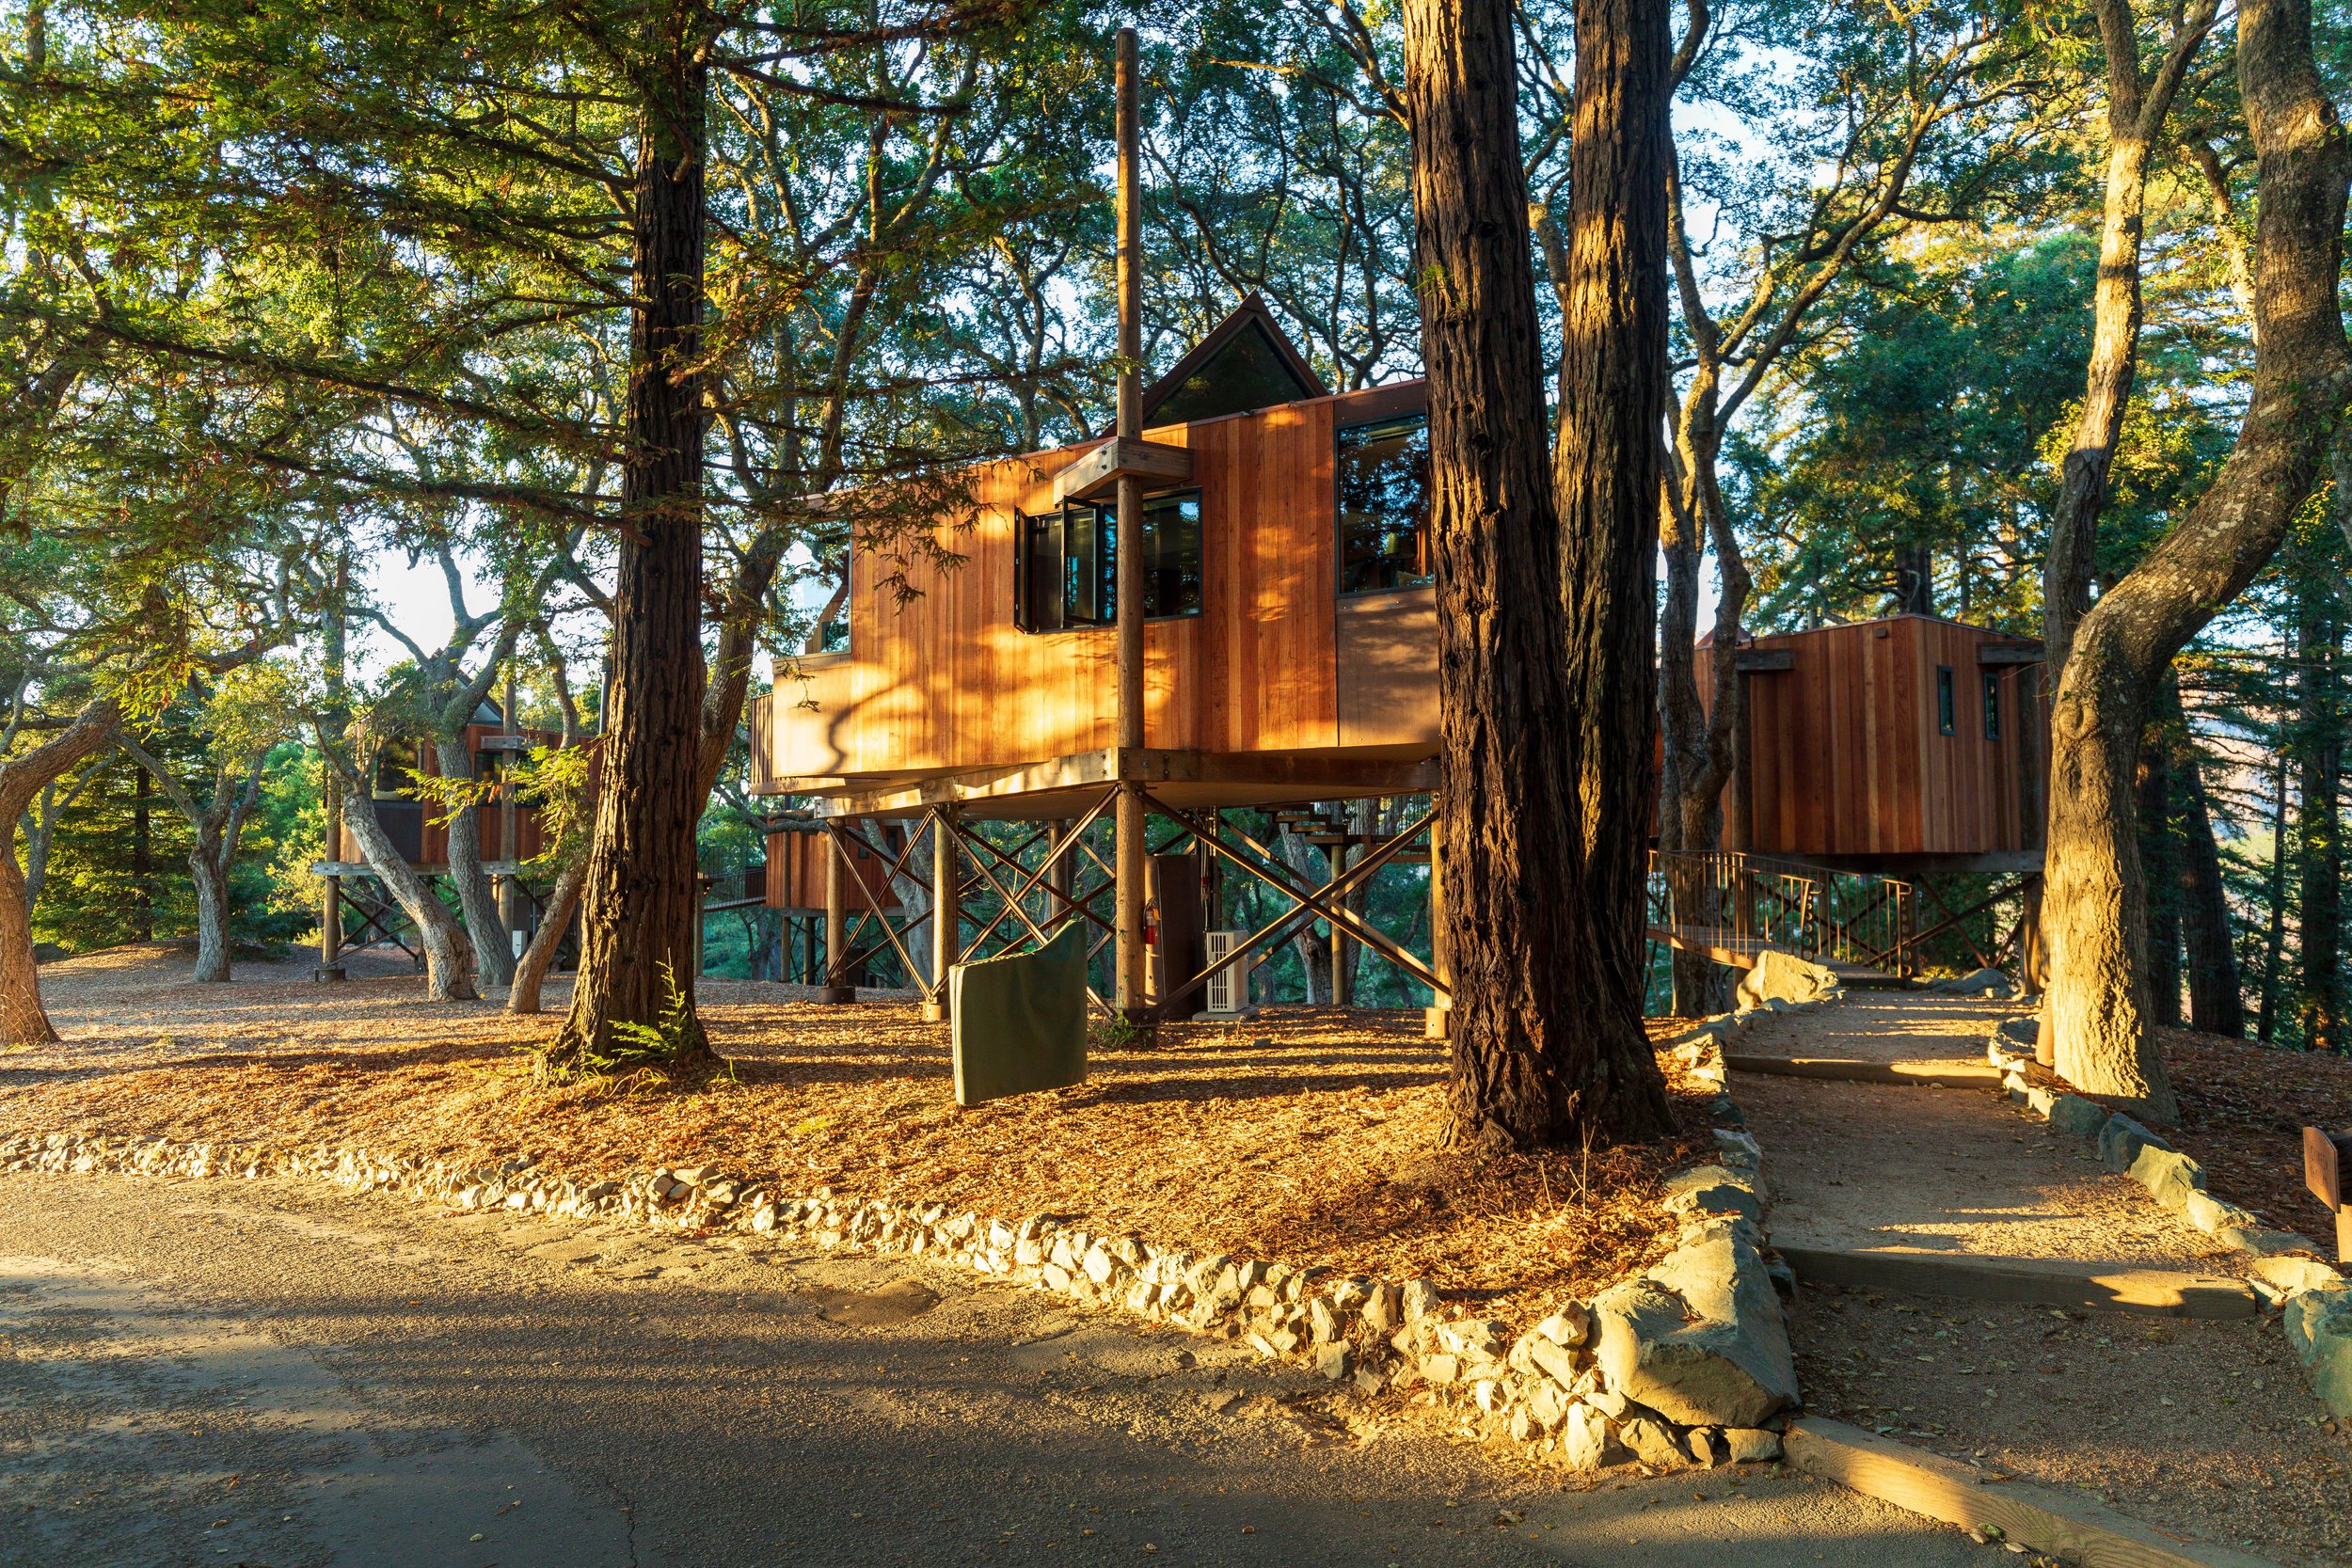
Post Ranch Inn — This is where we stayed, and it exceeded everything we had read about it. The Post Ranch Inn sits on the cliffs above the Pacific in the heart of Big Sur. Every room has views that make you stop whatever you are doing and just stand at the window. The dining is exceptional, the wine program is one of the most thoughtfully curated we have encountered at any hotel anywhere, and the service has the quiet attentiveness of a property that knows exactly what it is doing. Adults only, no children. Reservations required for the restaurant. Book far in advance; this hotel fills up months out. If you want to understand why Big Sur has the reputation it does, stay here.
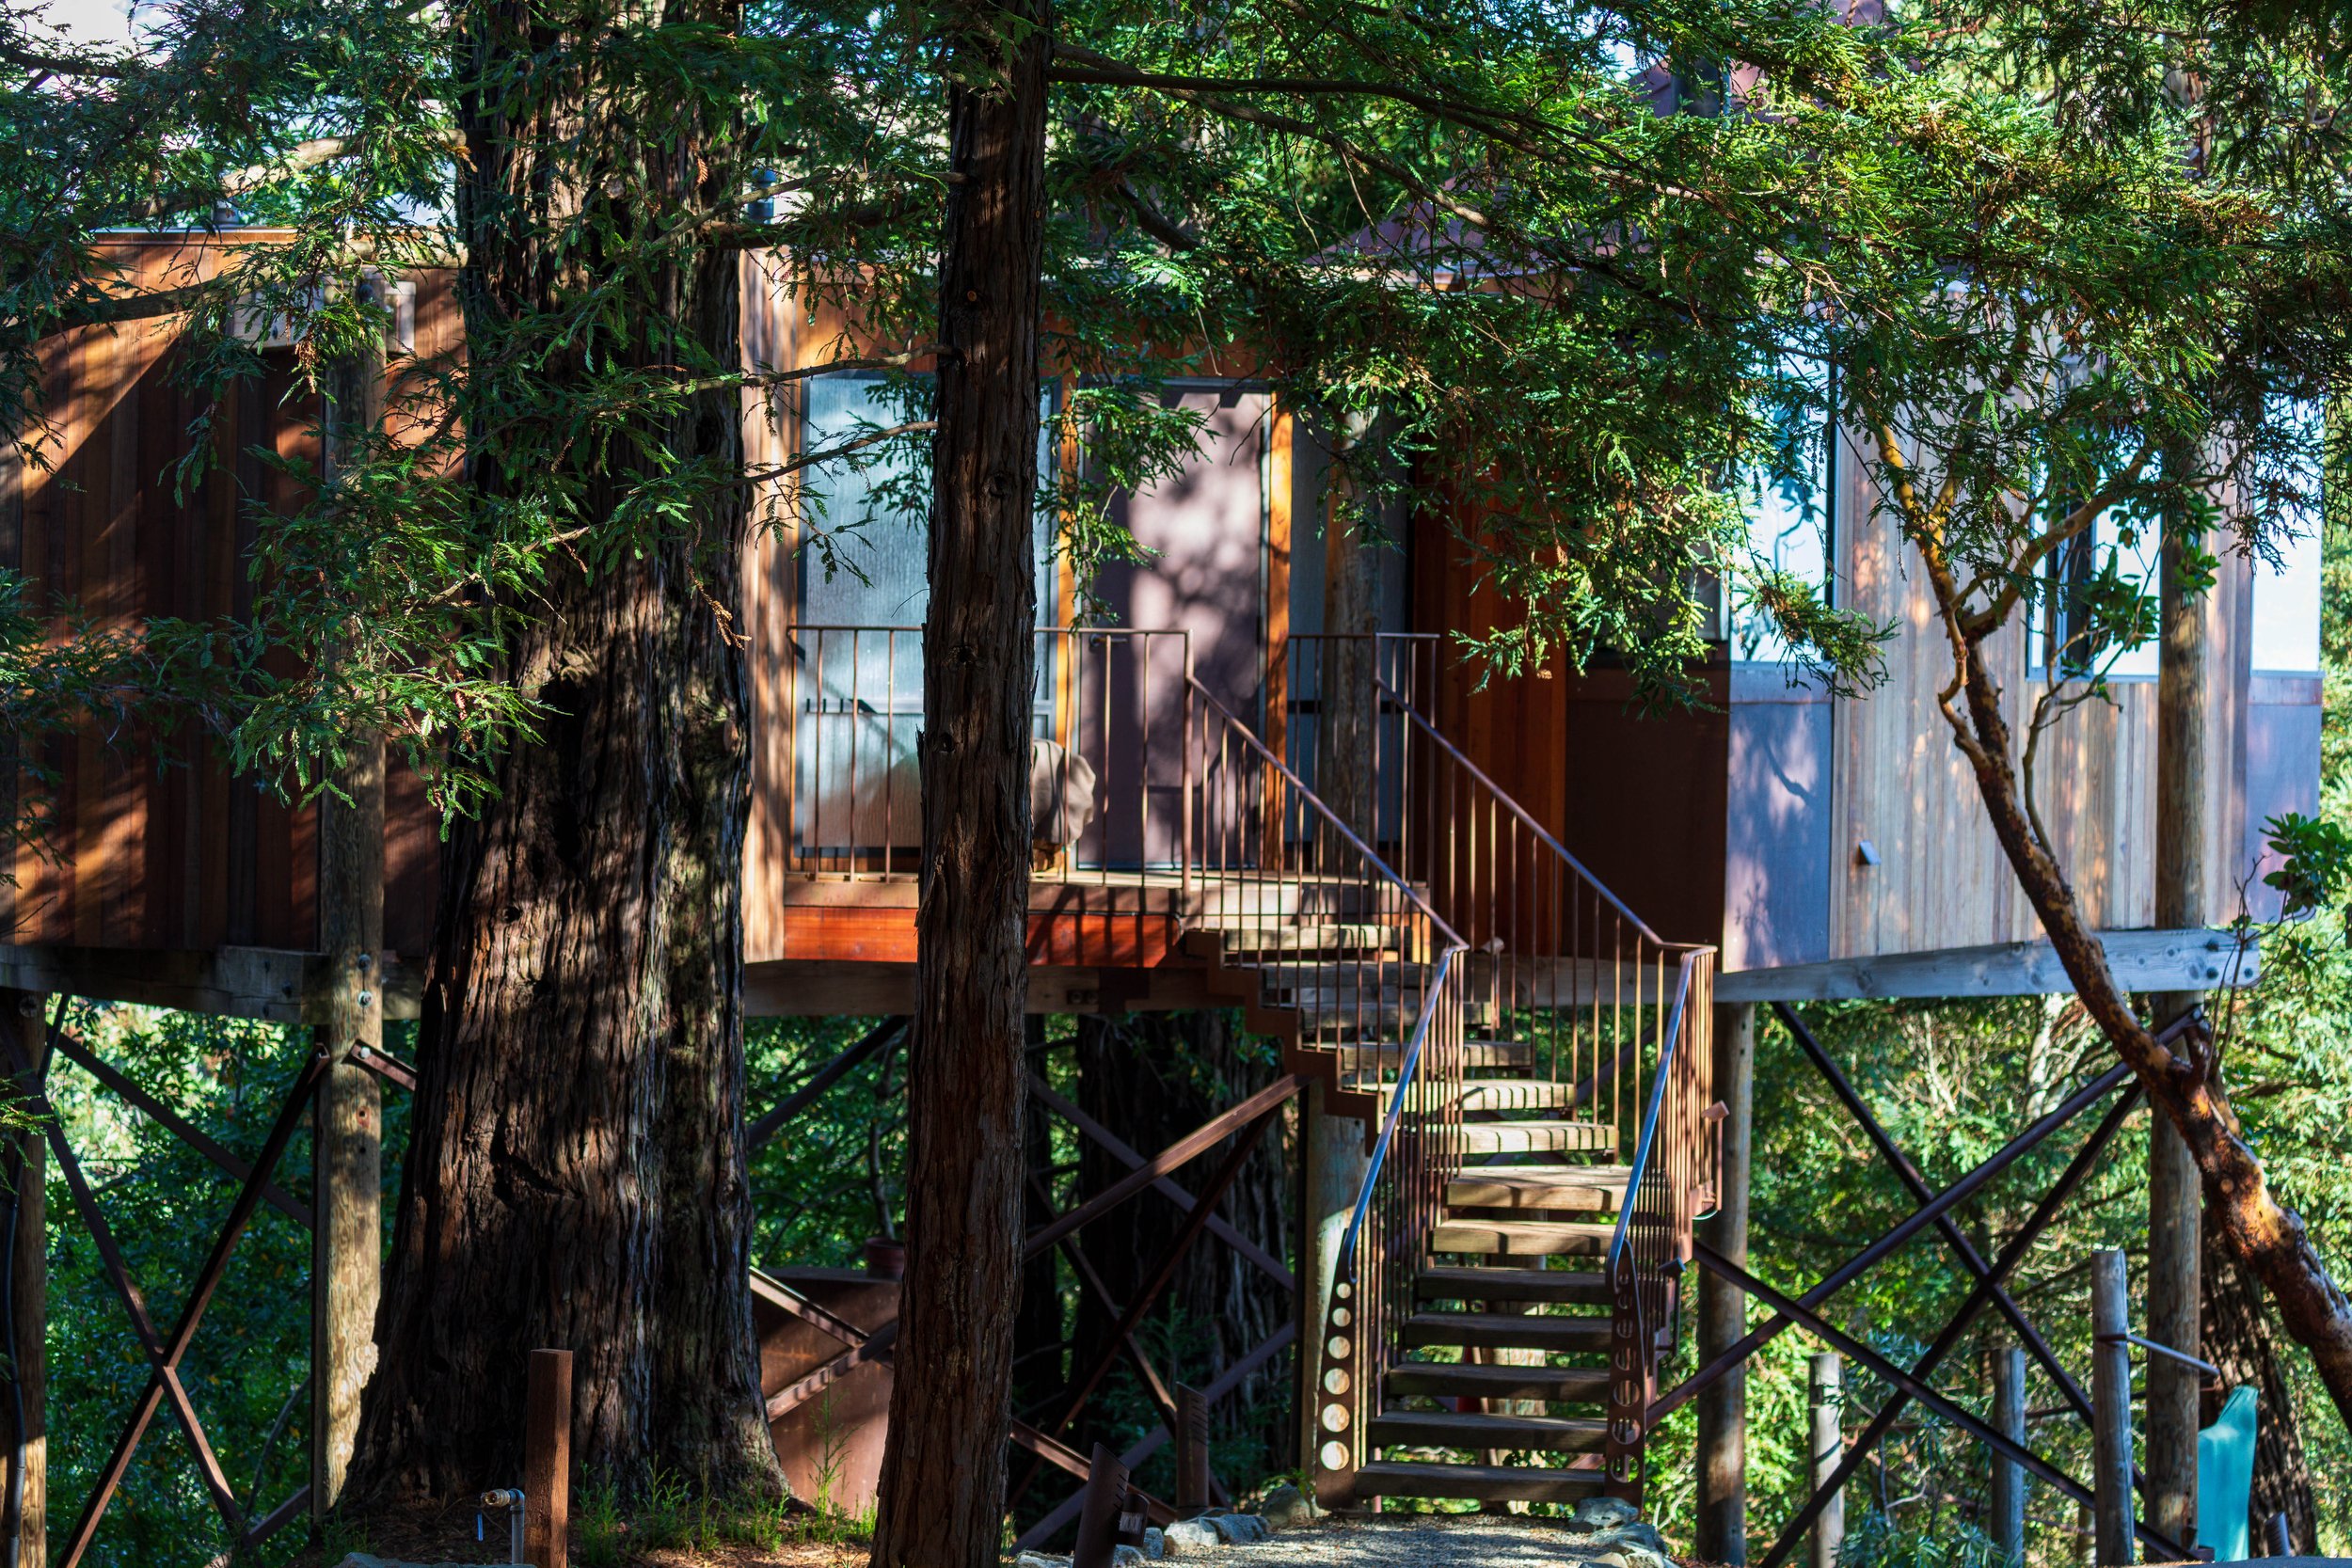
Ventana Big Sur — A full resort property set in the redwoods above the Pacific, with spa, pool, and glamping options alongside standard rooms. The atmosphere is relaxed and the grounds are beautiful. A strong alternative if Post Ranch is full or outside the budget.
Alila Ventana Big Sur — Under the same ownership as Ventana, this adults-only property occupies the upper portion of the Ventana estate with more privacy and more refined finishes. Worth checking if you want the Ventana setting with a quieter experience.
Mid-Range
Big Sur Lodge — Located inside Pfeiffer Big Sur State Park, this lodge offers cabin-style rooms with direct access to the park's hiking trails and the Big Sur River. The setting is exceptional for photographers who want to be in the redwoods rather than on the cliff.
Ripplewood Resort — Cozy cabins set in the redwoods along Highway 1, with a casual, no-fuss atmosphere. The adjacent cafe is one of the better breakfast options in the area.
Deetjen's Big Sur Inn — A historic property with individually decorated rooms and a genuinely distinctive character. The restaurant here is worth a meal even if you are not staying. Book well ahead; Deetjen's has a loyal following and does not have many rooms.
As we approached the hotel via helicopter and were treated to such a unique experience that I will never forget it.

Since most people could not drive into the Big Sur area, there were virtually no visitors. The hotel arranged for guests to be able to borrow one of the 8 cars they had on standby. So we would take drives down the coastline and see 1 car every 20 to 30 minutes. It was just so incredible that there were no words to describe it. Even if I were the richest person on earth, I could never buy this experience.
Where to Eat
Dining in Big Sur is not just about food. It is about atmosphere: ocean views, redwood forests, and sunsets that make you forget what you ordered.
Sierra Mar at Post Ranch Inn — The finest dining in Big Sur by a significant margin. The views from the glass-walled dining room over the Pacific are extraordinary, and the kitchen matches them. Reservation required, and hotel guests get priority. If you can get a table, go.
Nepenthe — Famous for its panoramic ocean views and its Ambrosia Burger. Nepenthe has been a Big Sur institution since 1949, and the terrace at sunset is one of the great casual dining experiences on the California coast.
Big Sur Bakery — Wood-fired pizzas, fresh pastries, and locally sourced dishes in a relaxed setting just off Highway 1. One of the best lunch options in the area.
Ripplewood Cafe — Hearty breakfasts and casual lunches. A reliable stop in the morning before a full day of shooting, with a friendly atmosphere and no pretension.
Cafe Kevah — Brunch with a view, seasonal and fresh. The terrace overlooks the coast and the food is consistently good.
Phoenix Shop and Cafe — A quick stop for coffee and local goods, attached to Nepenthe. Worth a visit for the atmosphere alone.
Photography Gear to Bring
Photographing Big Sur is all about dynamic range, shifting light, and versatility. The coastline can move from bright highlights over the Pacific to deep shadow in redwood groves within minutes. You want gear that can handle that contrast.
Camera Body
A full-frame mirrorless camera, such as the Canon EOS R5 Mark II or Sony A7R V, is ideal.. Strong dynamic range helps preserve detail in both sky and shadows, especially during sunrise and sunset.
Lenses
Wide-angle, 16 to 35mm
Perfect for sweeping landscapes, dramatic foreground compositions, and seascapes. This will likely live on your camera for much of the trip.
Standard zoom, 24 to 70mm
A versatile option for environmental portraits, tighter compositions of cliffs, and flexible framing when you cannot move closer.
Telephoto, 100 to 500mm
Great for isolating distant rock formations, compressing layers of coastline, or capturing wildlife along the cliffs. Big Sur rewards compression.
Accessories
Sturdy tripod
Essential for long exposures, blue hour, and sunset work. Coastal winds can be strong, so stability matters.
Neutral density filters
ND filters allow you to smooth out crashing waves and create that silky water effect along rocky shorelines.
Extra batteries and memory cards
Cold mornings, long days, and heavy shooting can drain batteries faster than expected. Always carry backups.
Big Sur is unpredictable in the best way. Pack smart, stay flexible, and let the light guide you.
Photography Locations
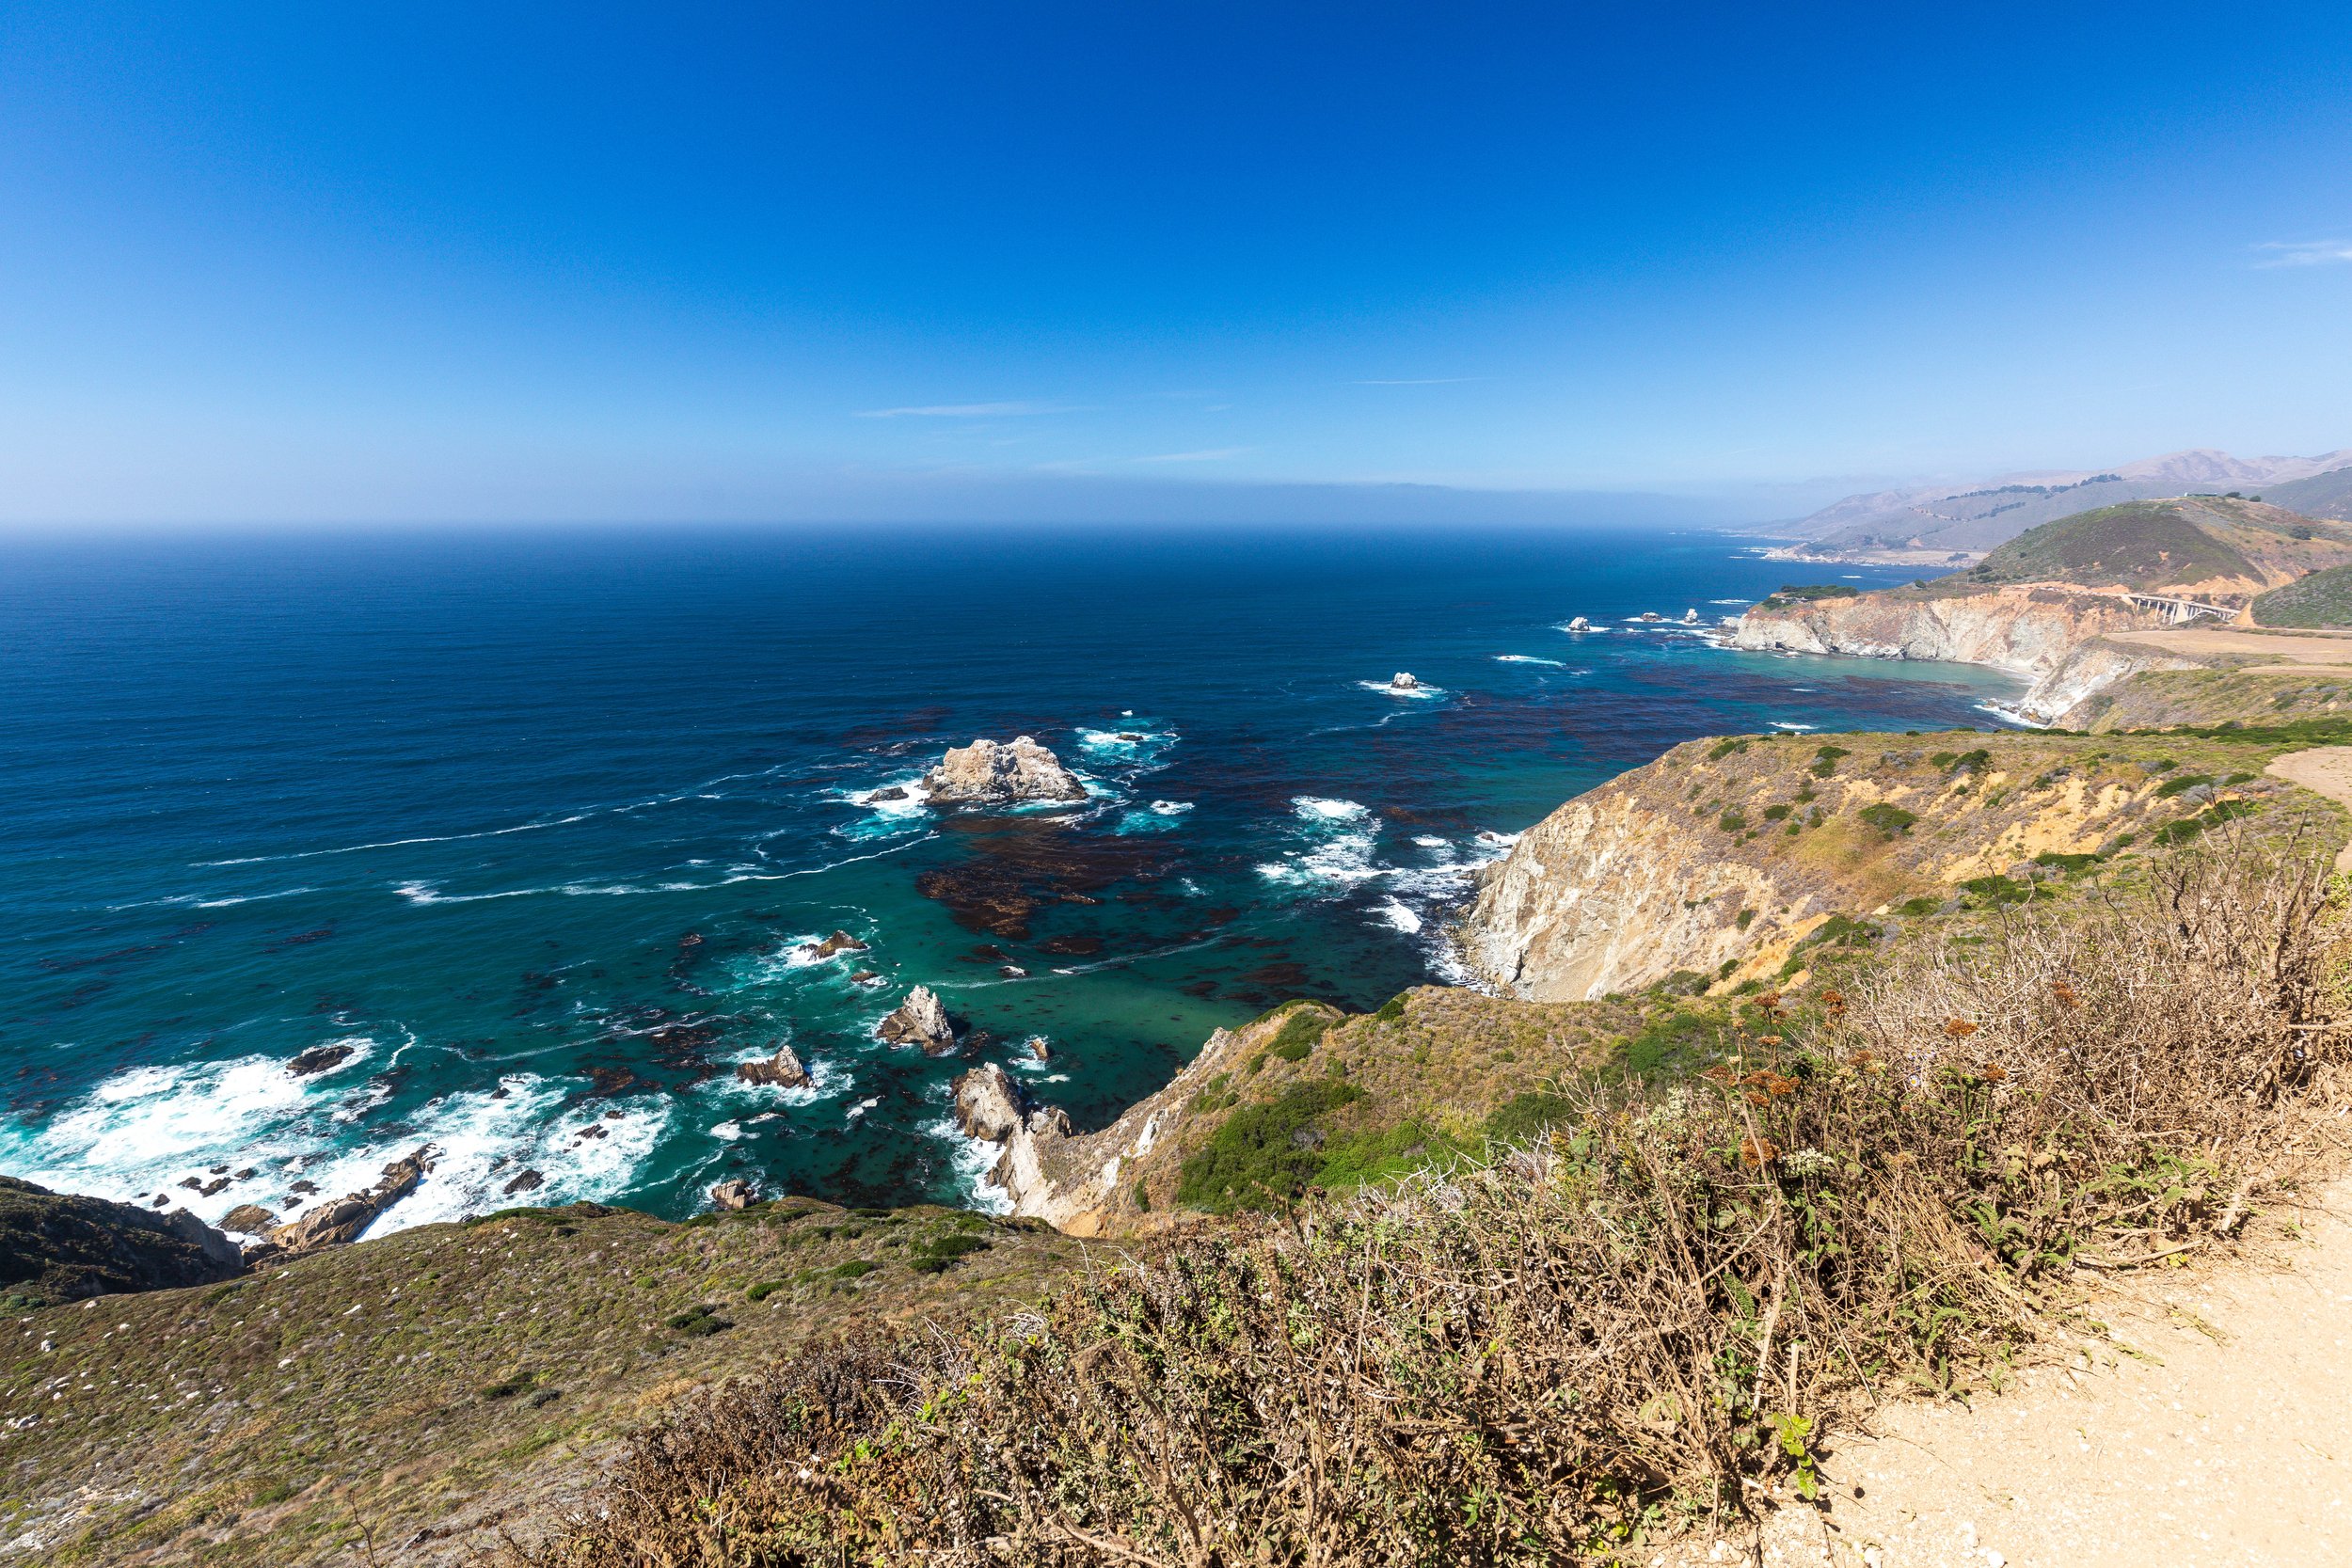
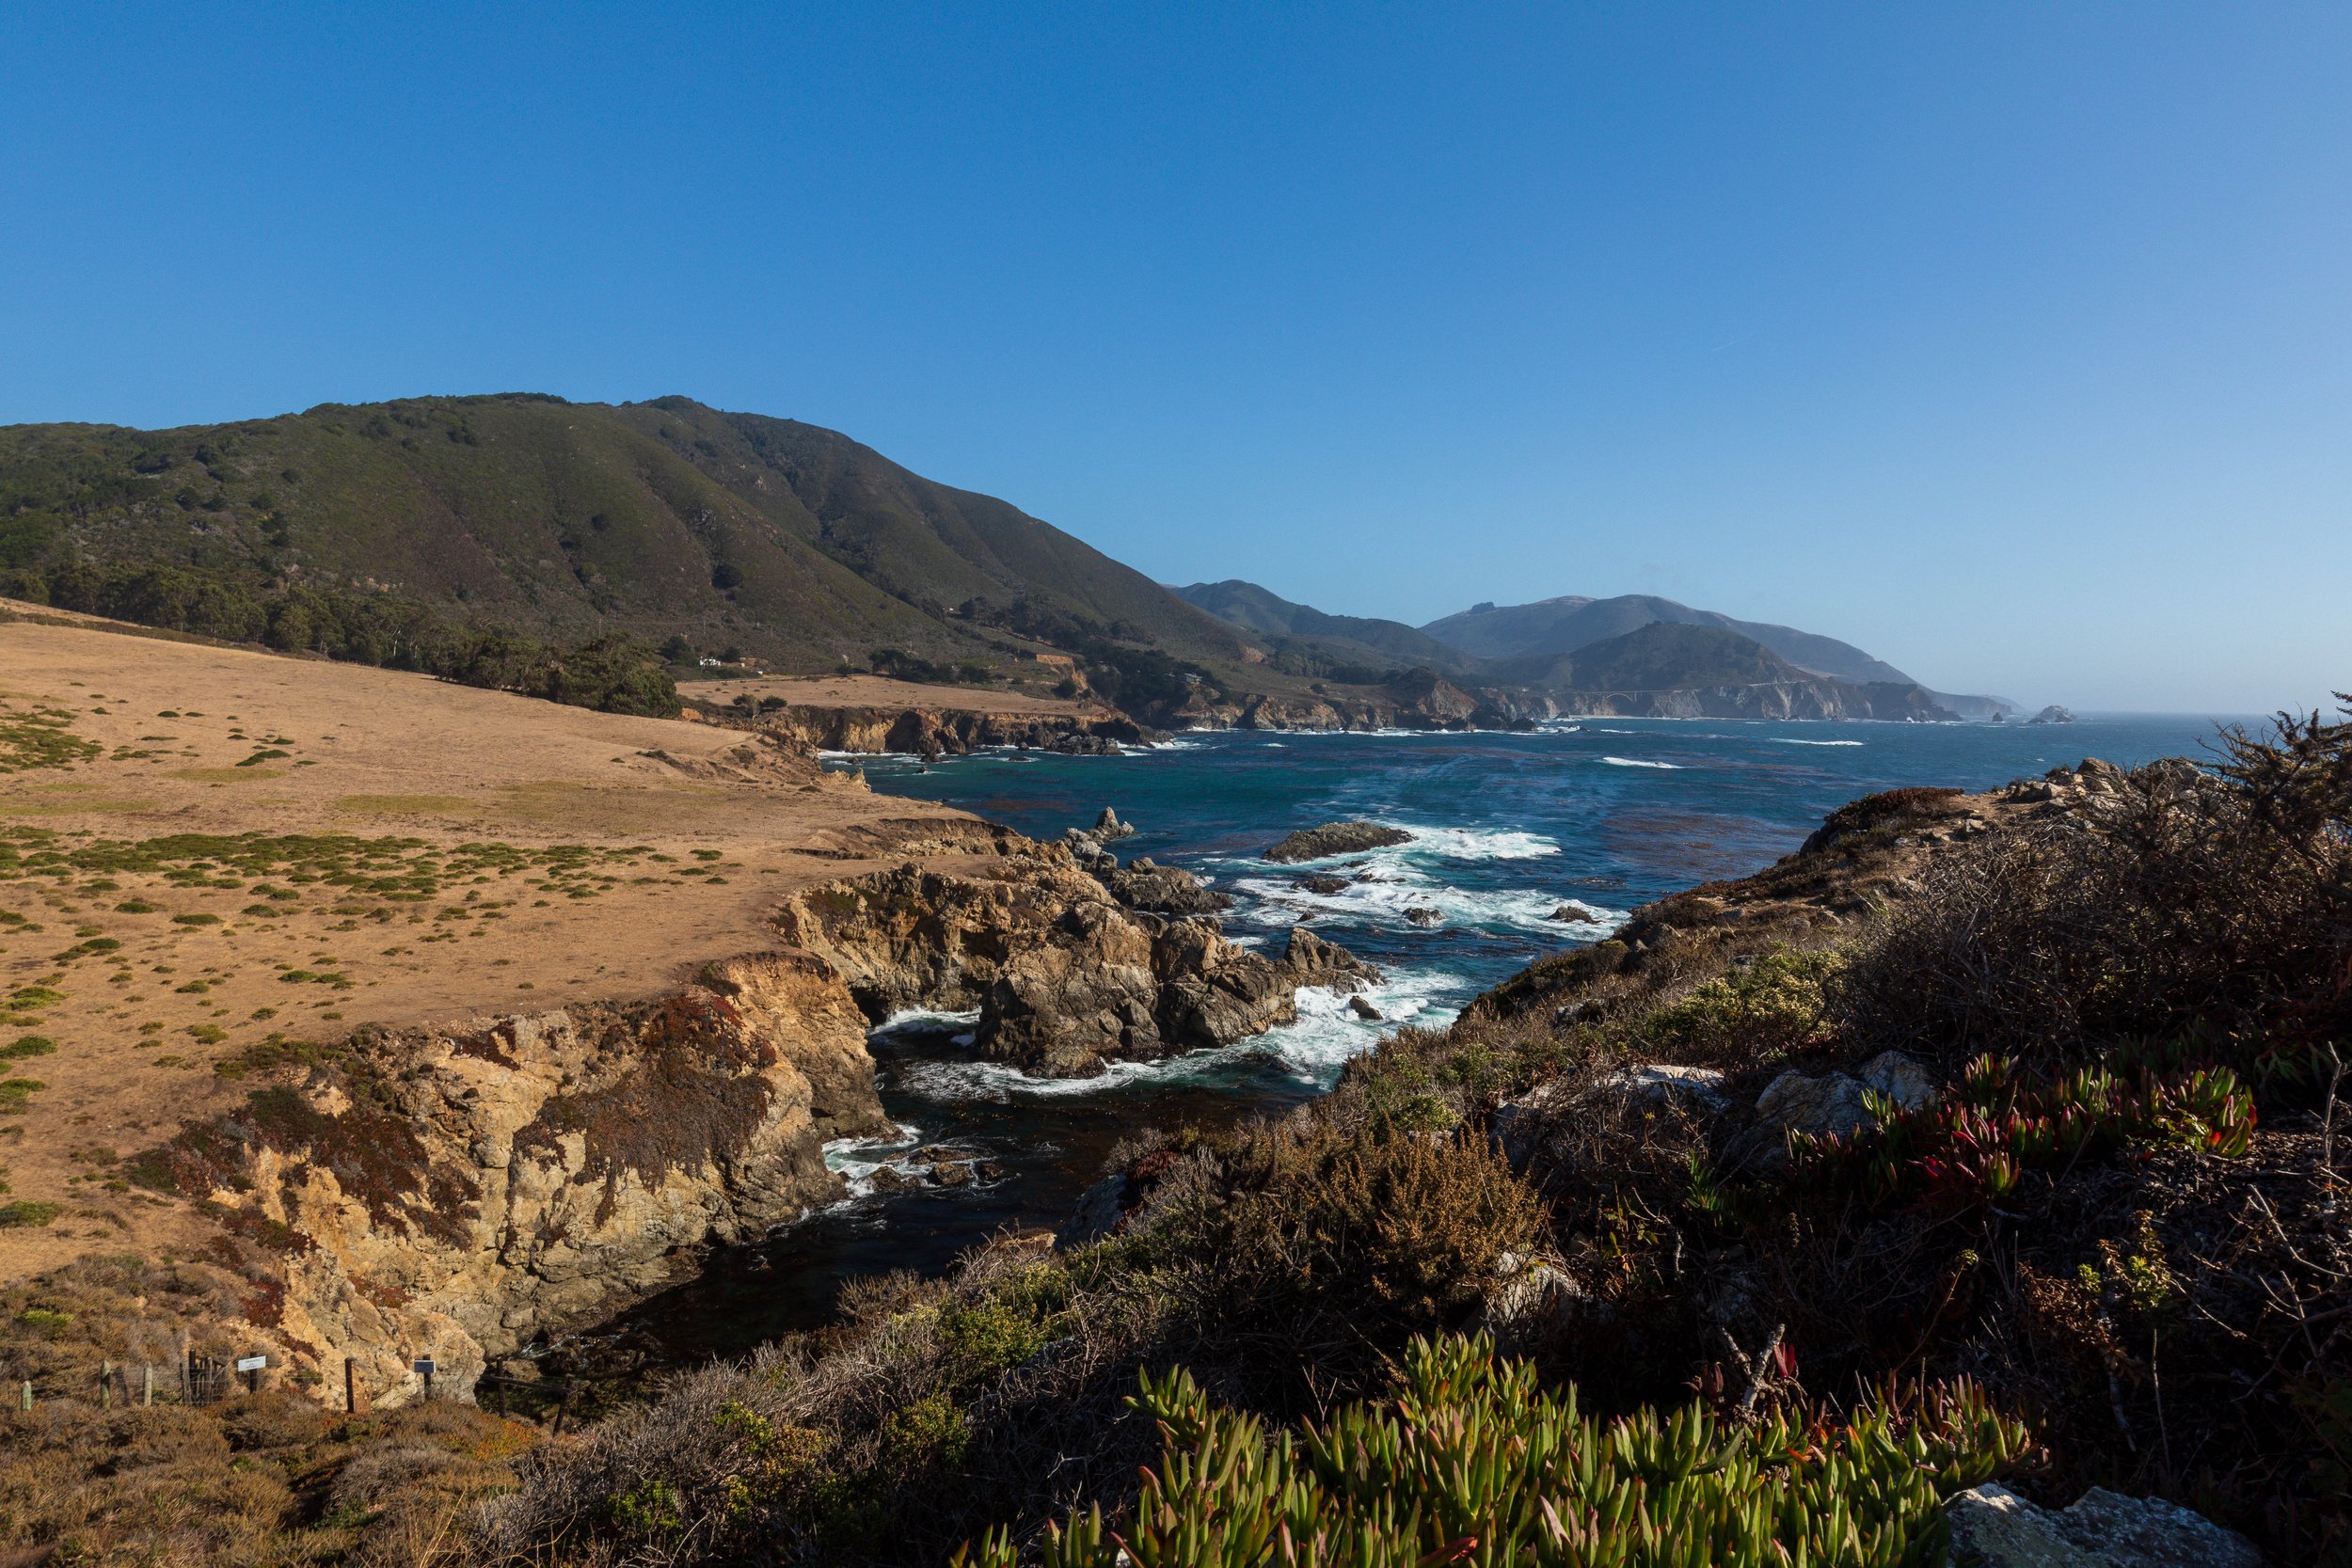
Highway 1 Coastal Drive
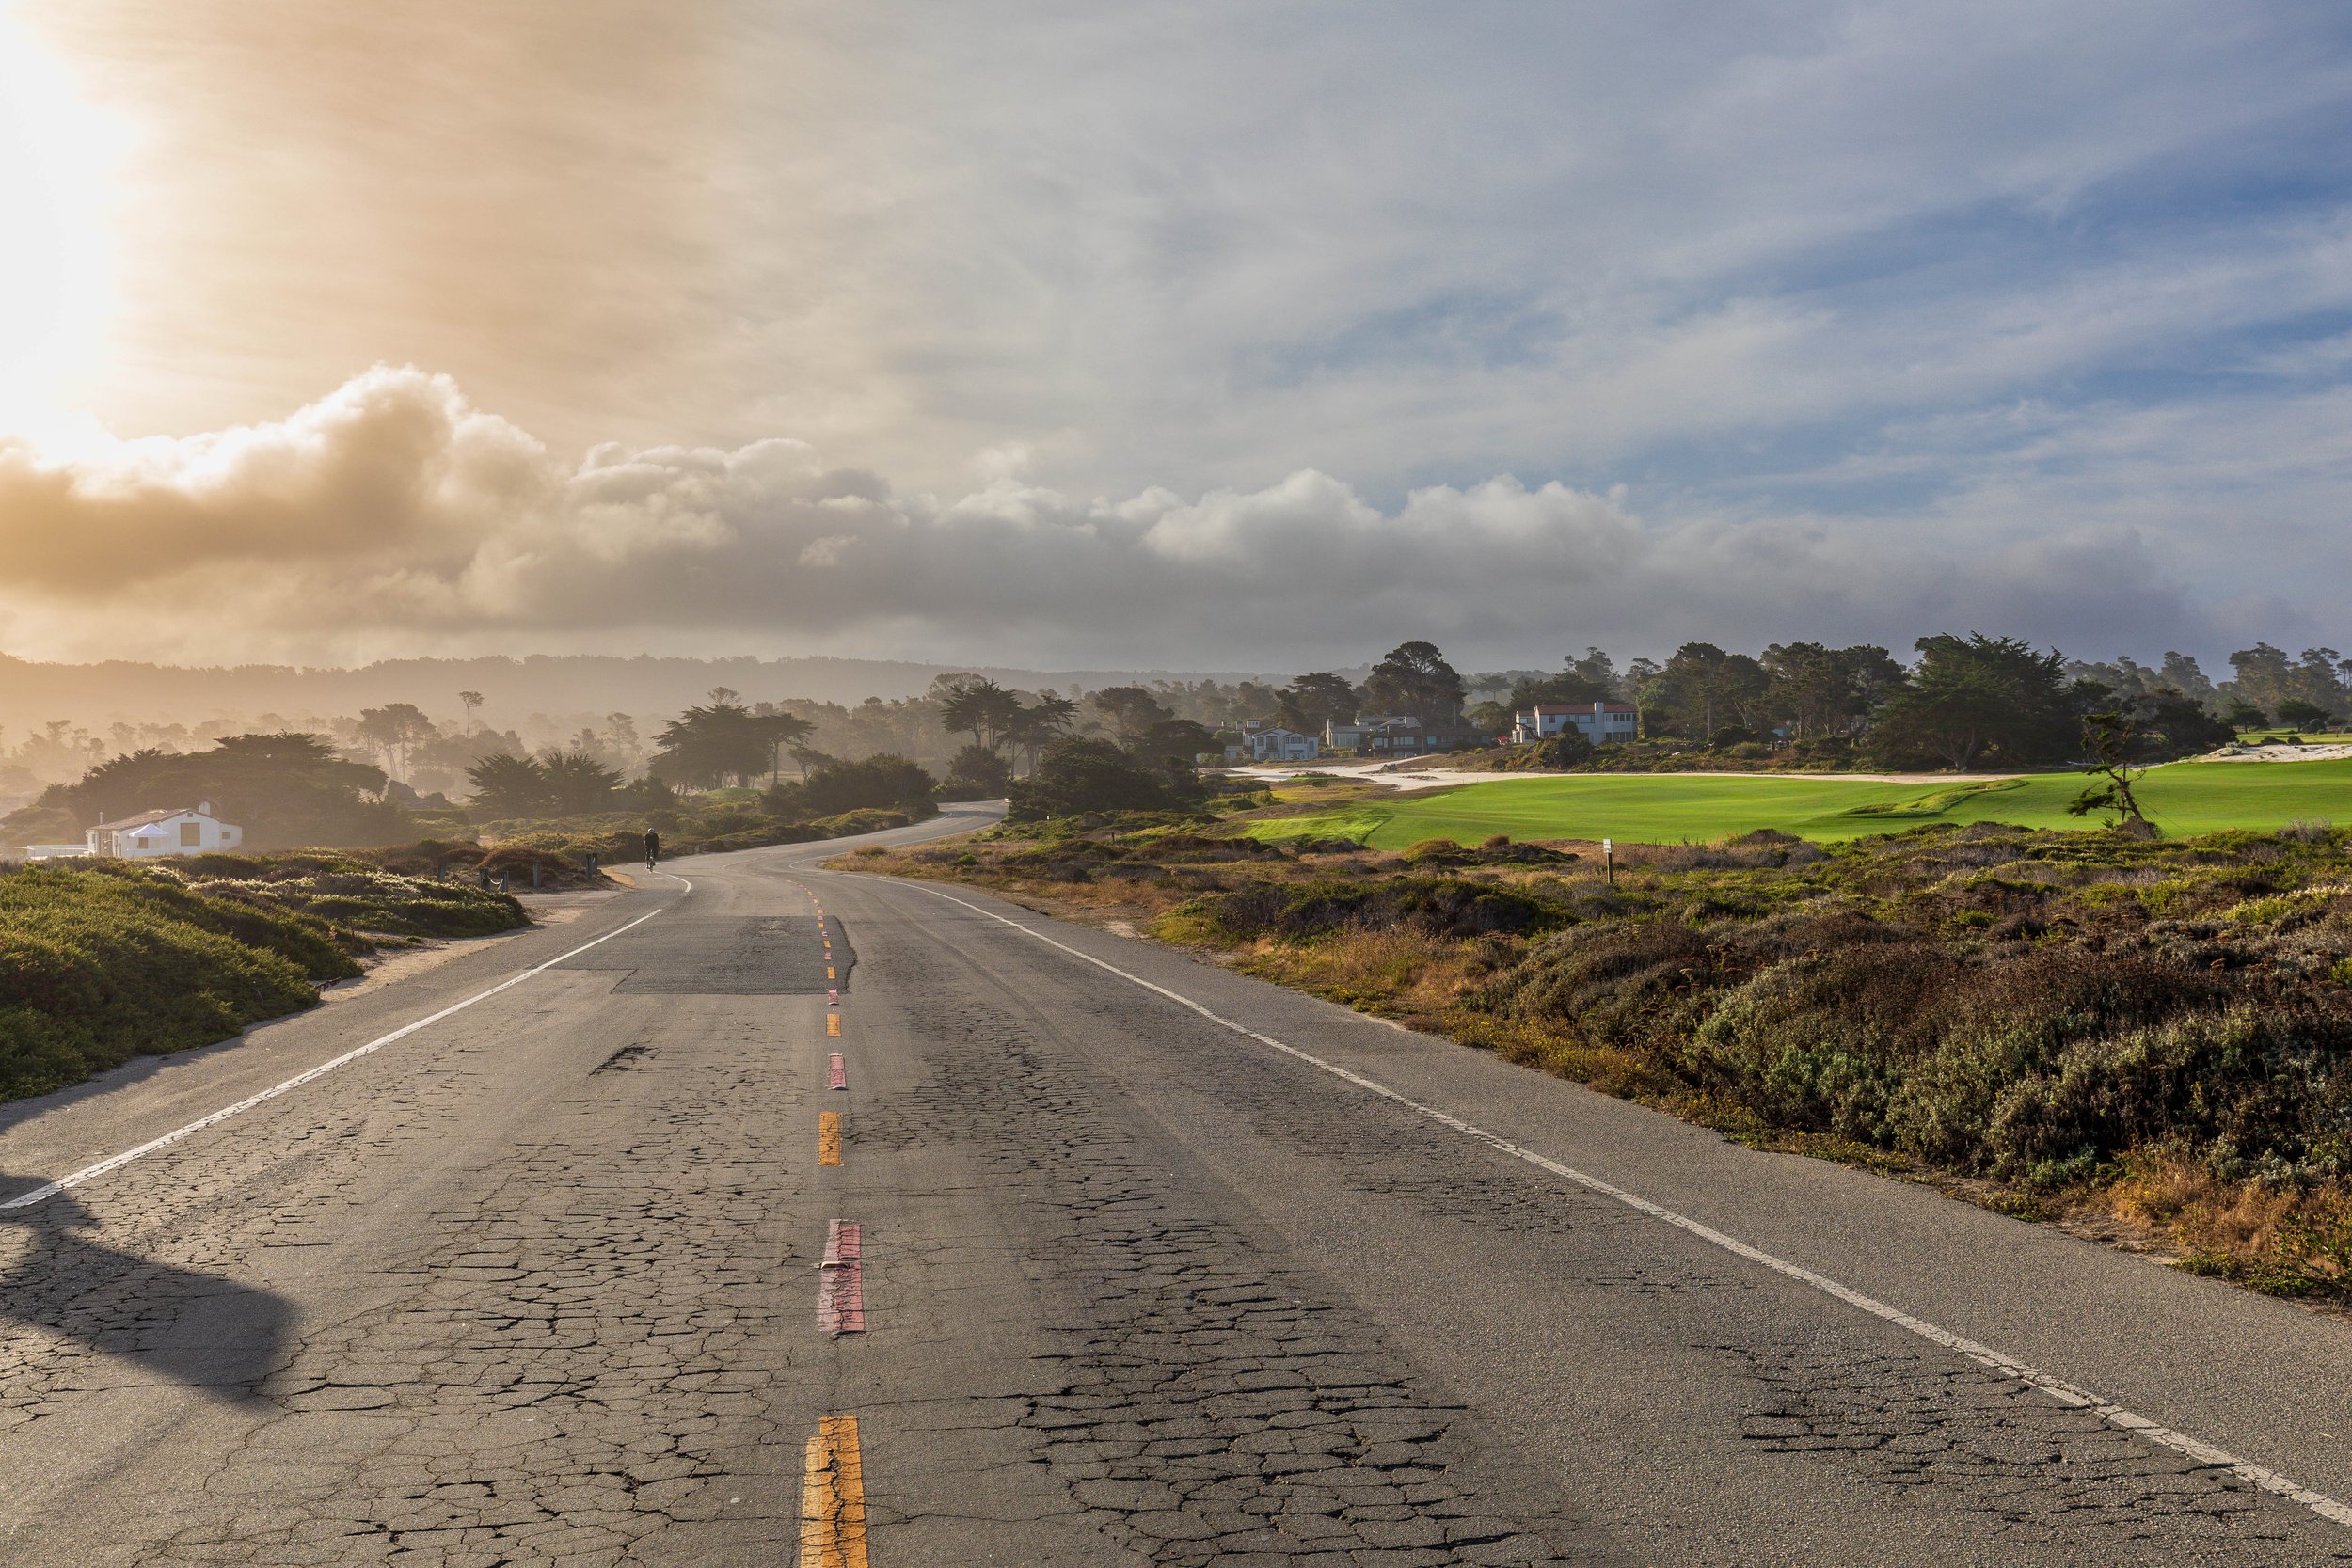
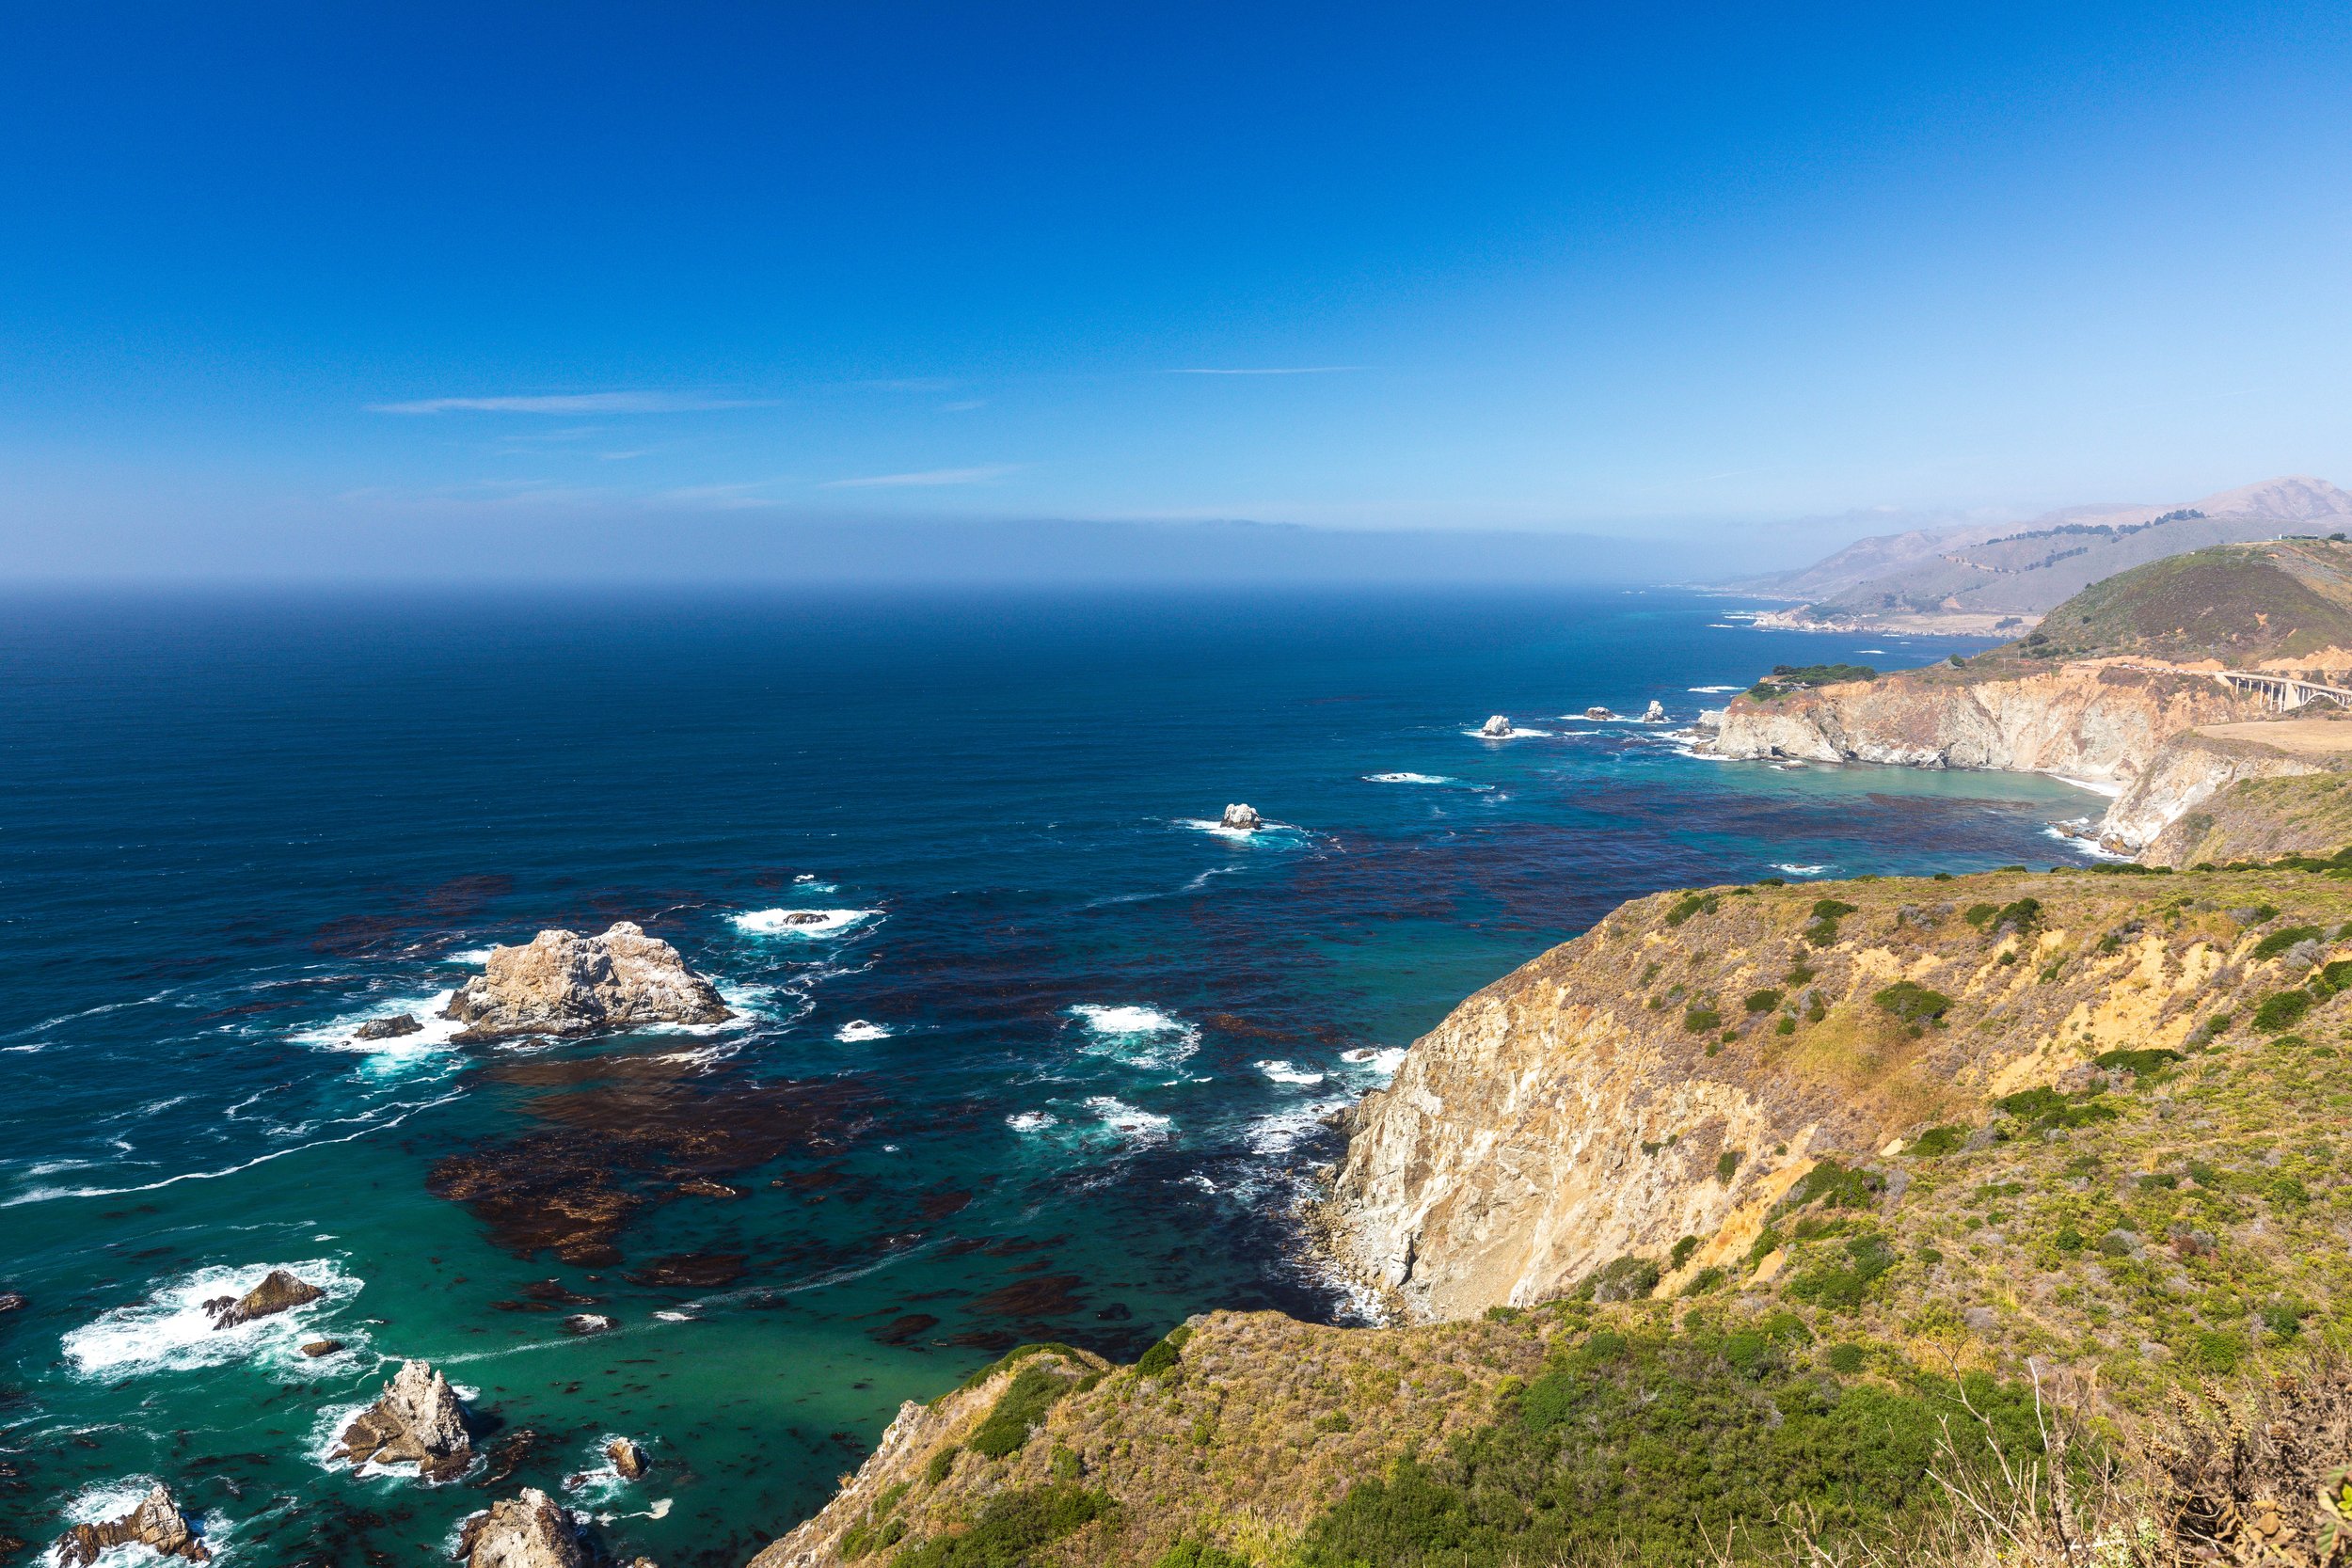
The drive itself is the first photography location, and it deserves to be treated that way. From the moment you turn onto Highway 1 heading south from Carmel, the coastline opens up and does not stop delivering. Cliffs drop straight into the Pacific. Fog rolls through the headlands in slow, deliberate waves. The road curves and climbs and then drops again, and every turn offers a different angle on the same extraordinary landscape.
The best approach is to treat the drive as a shoot, not a commute. Pull over constantly. The unmarked pullouts are often better than the named ones. Light on the water changes fast here, and what looks flat at 10am can turn into something genuinely beautiful thirty minutes later when the fog lifts or the sun drops.
📷 Pro Tip: Keep your camera on the passenger seat and your wide-angle lens mounted, 16 to 35mm. When you see something worth stopping for, pull all the way off the road and give yourself time to work the composition rather than snapping from the car window. The best coastal pull-off light happens in the first two hours after sunrise and the last ninety minutes before sunset, when the low angle catches the cliff faces and turns the water from flat gray to deep blue-green. If fog is rolling through when you wake up, go out anyway. Fog and Highway 1 together are one of the best photographic combinations on the California coast.
Best time: Sunrise and golden hour. Access: Free. Drive north to south from Carmel or south to north from San Luis Obispo along California State Route 1.
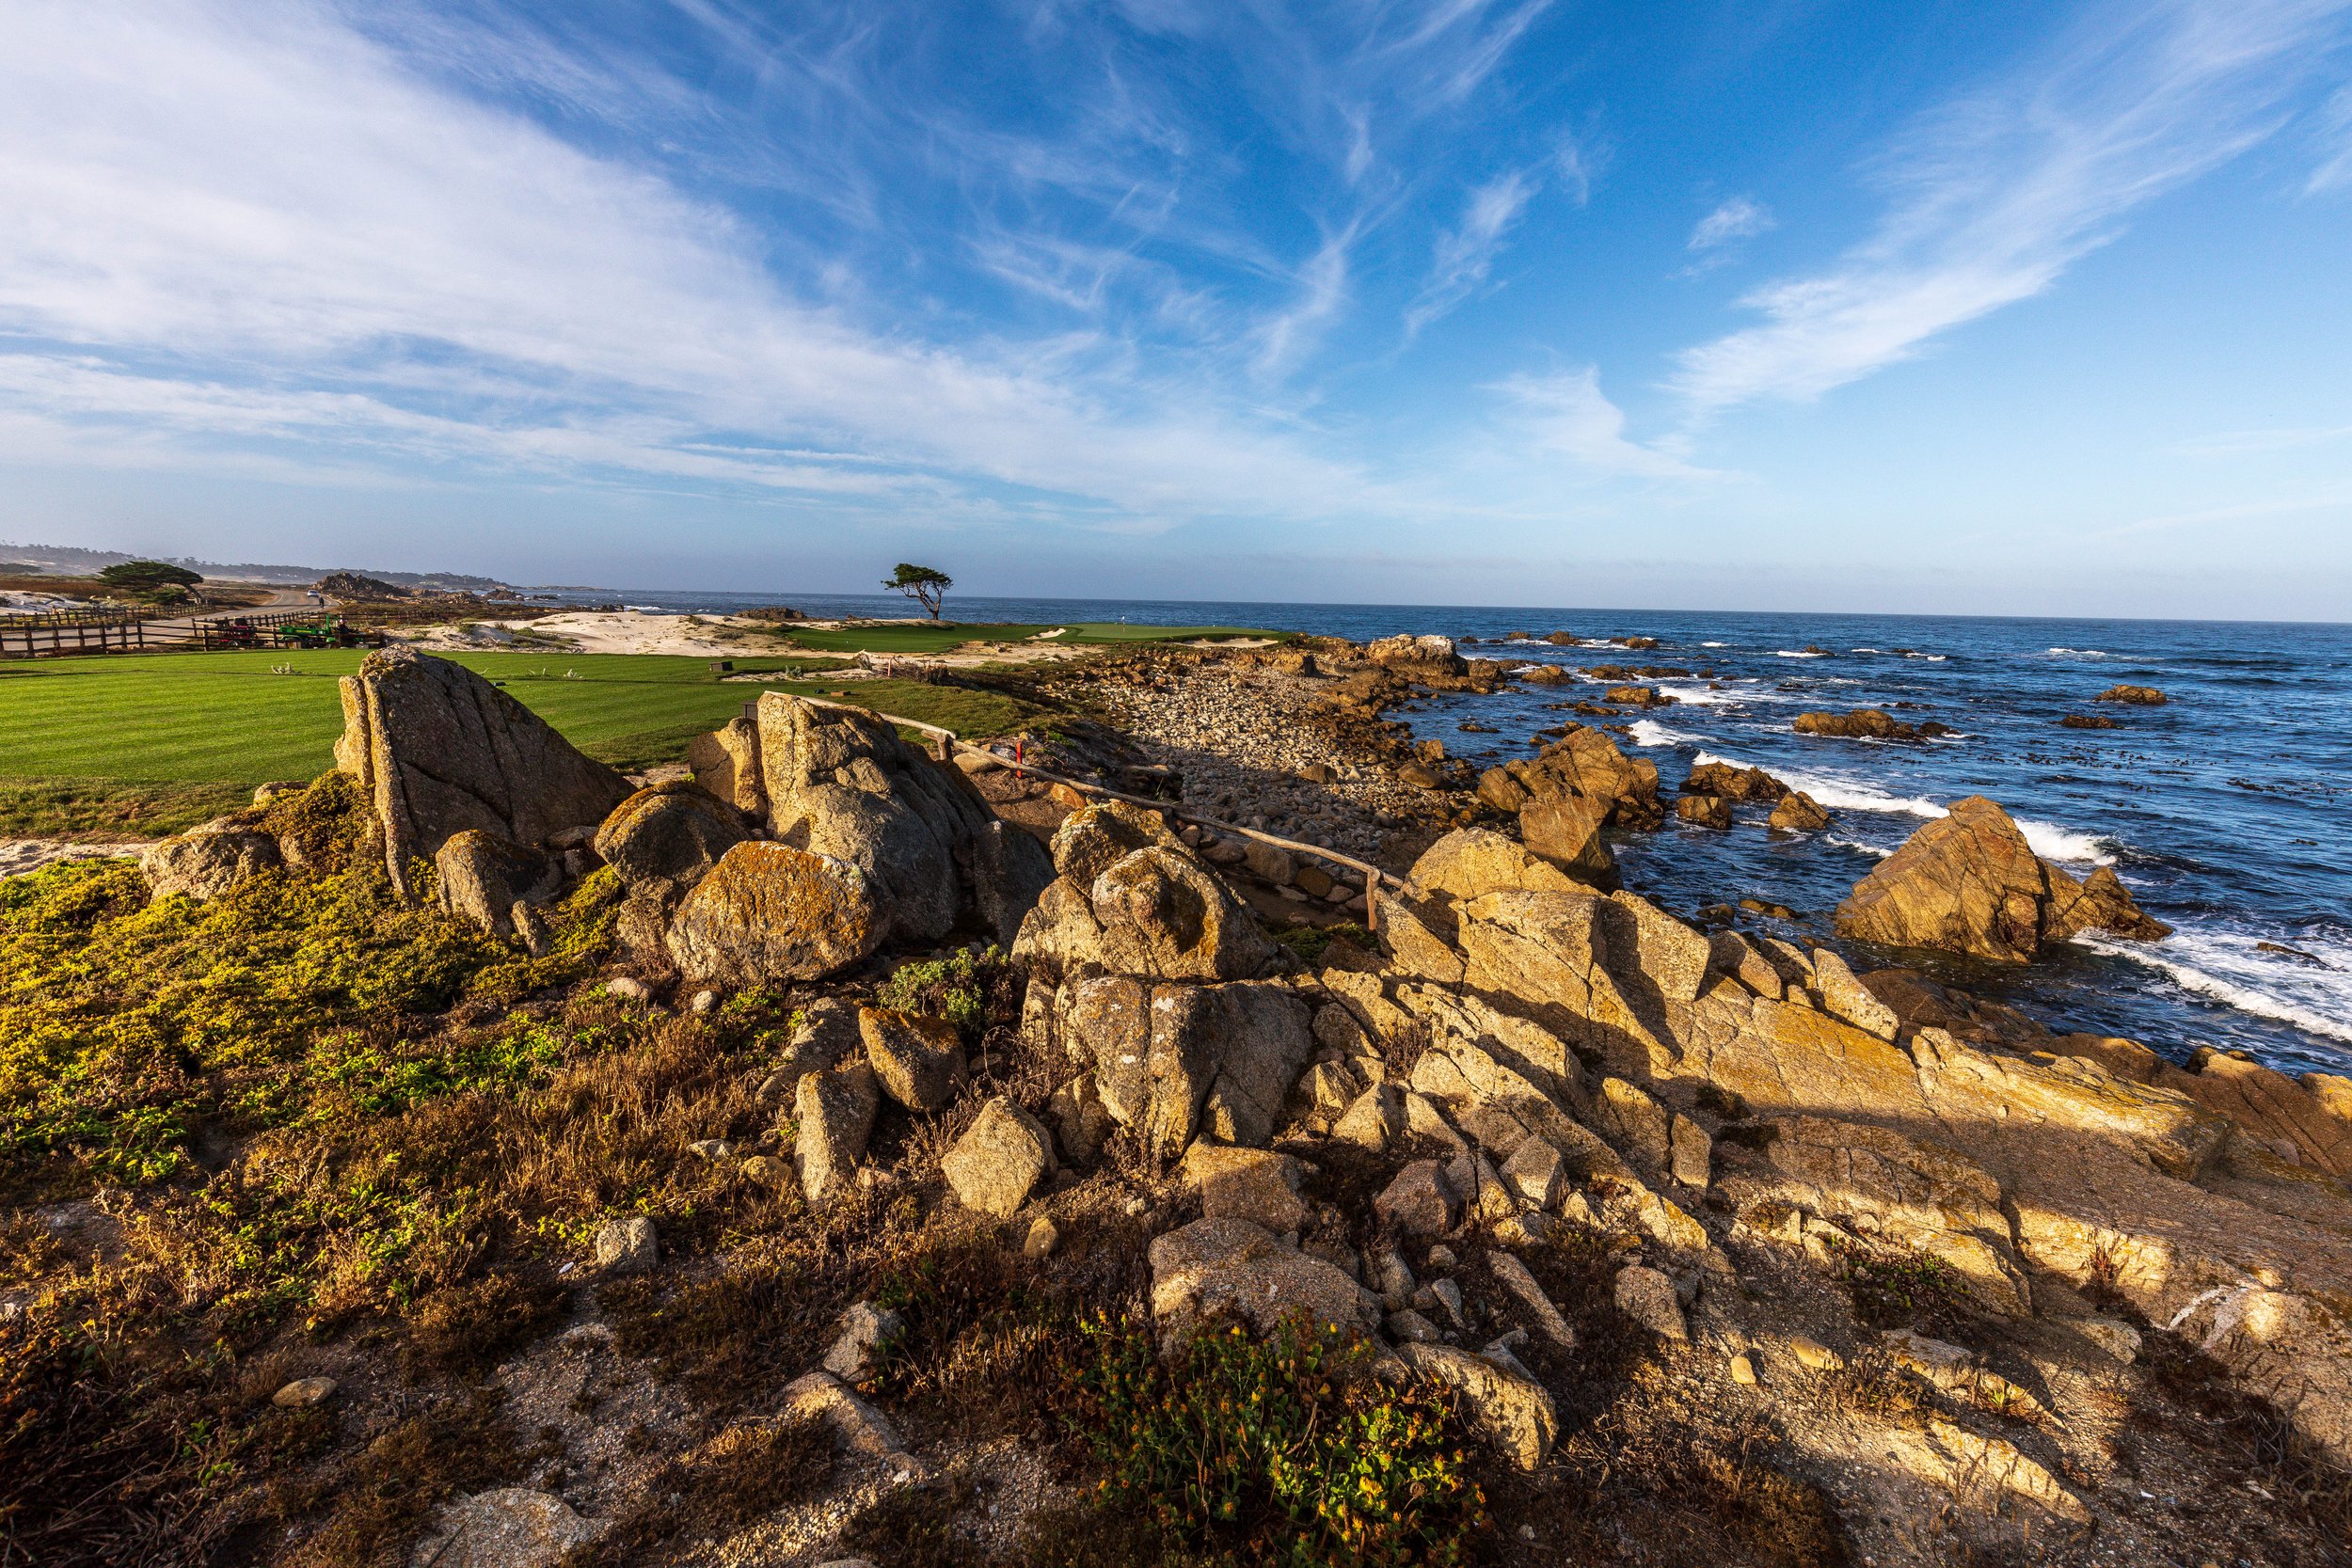
Drive 17-Mile Drive
If you are approaching Big Sur from the north, do not skip 17-Mile Drive. It runs through the Pebble Beach community between Pacific Grove and Carmel, and it is one of the most photogenic coastal drives in California. Famous golf courses, coastal mansions, Monterey cypress groves, and open water views make this a completely different visual experience from the wilder Big Sur coastline to the south.
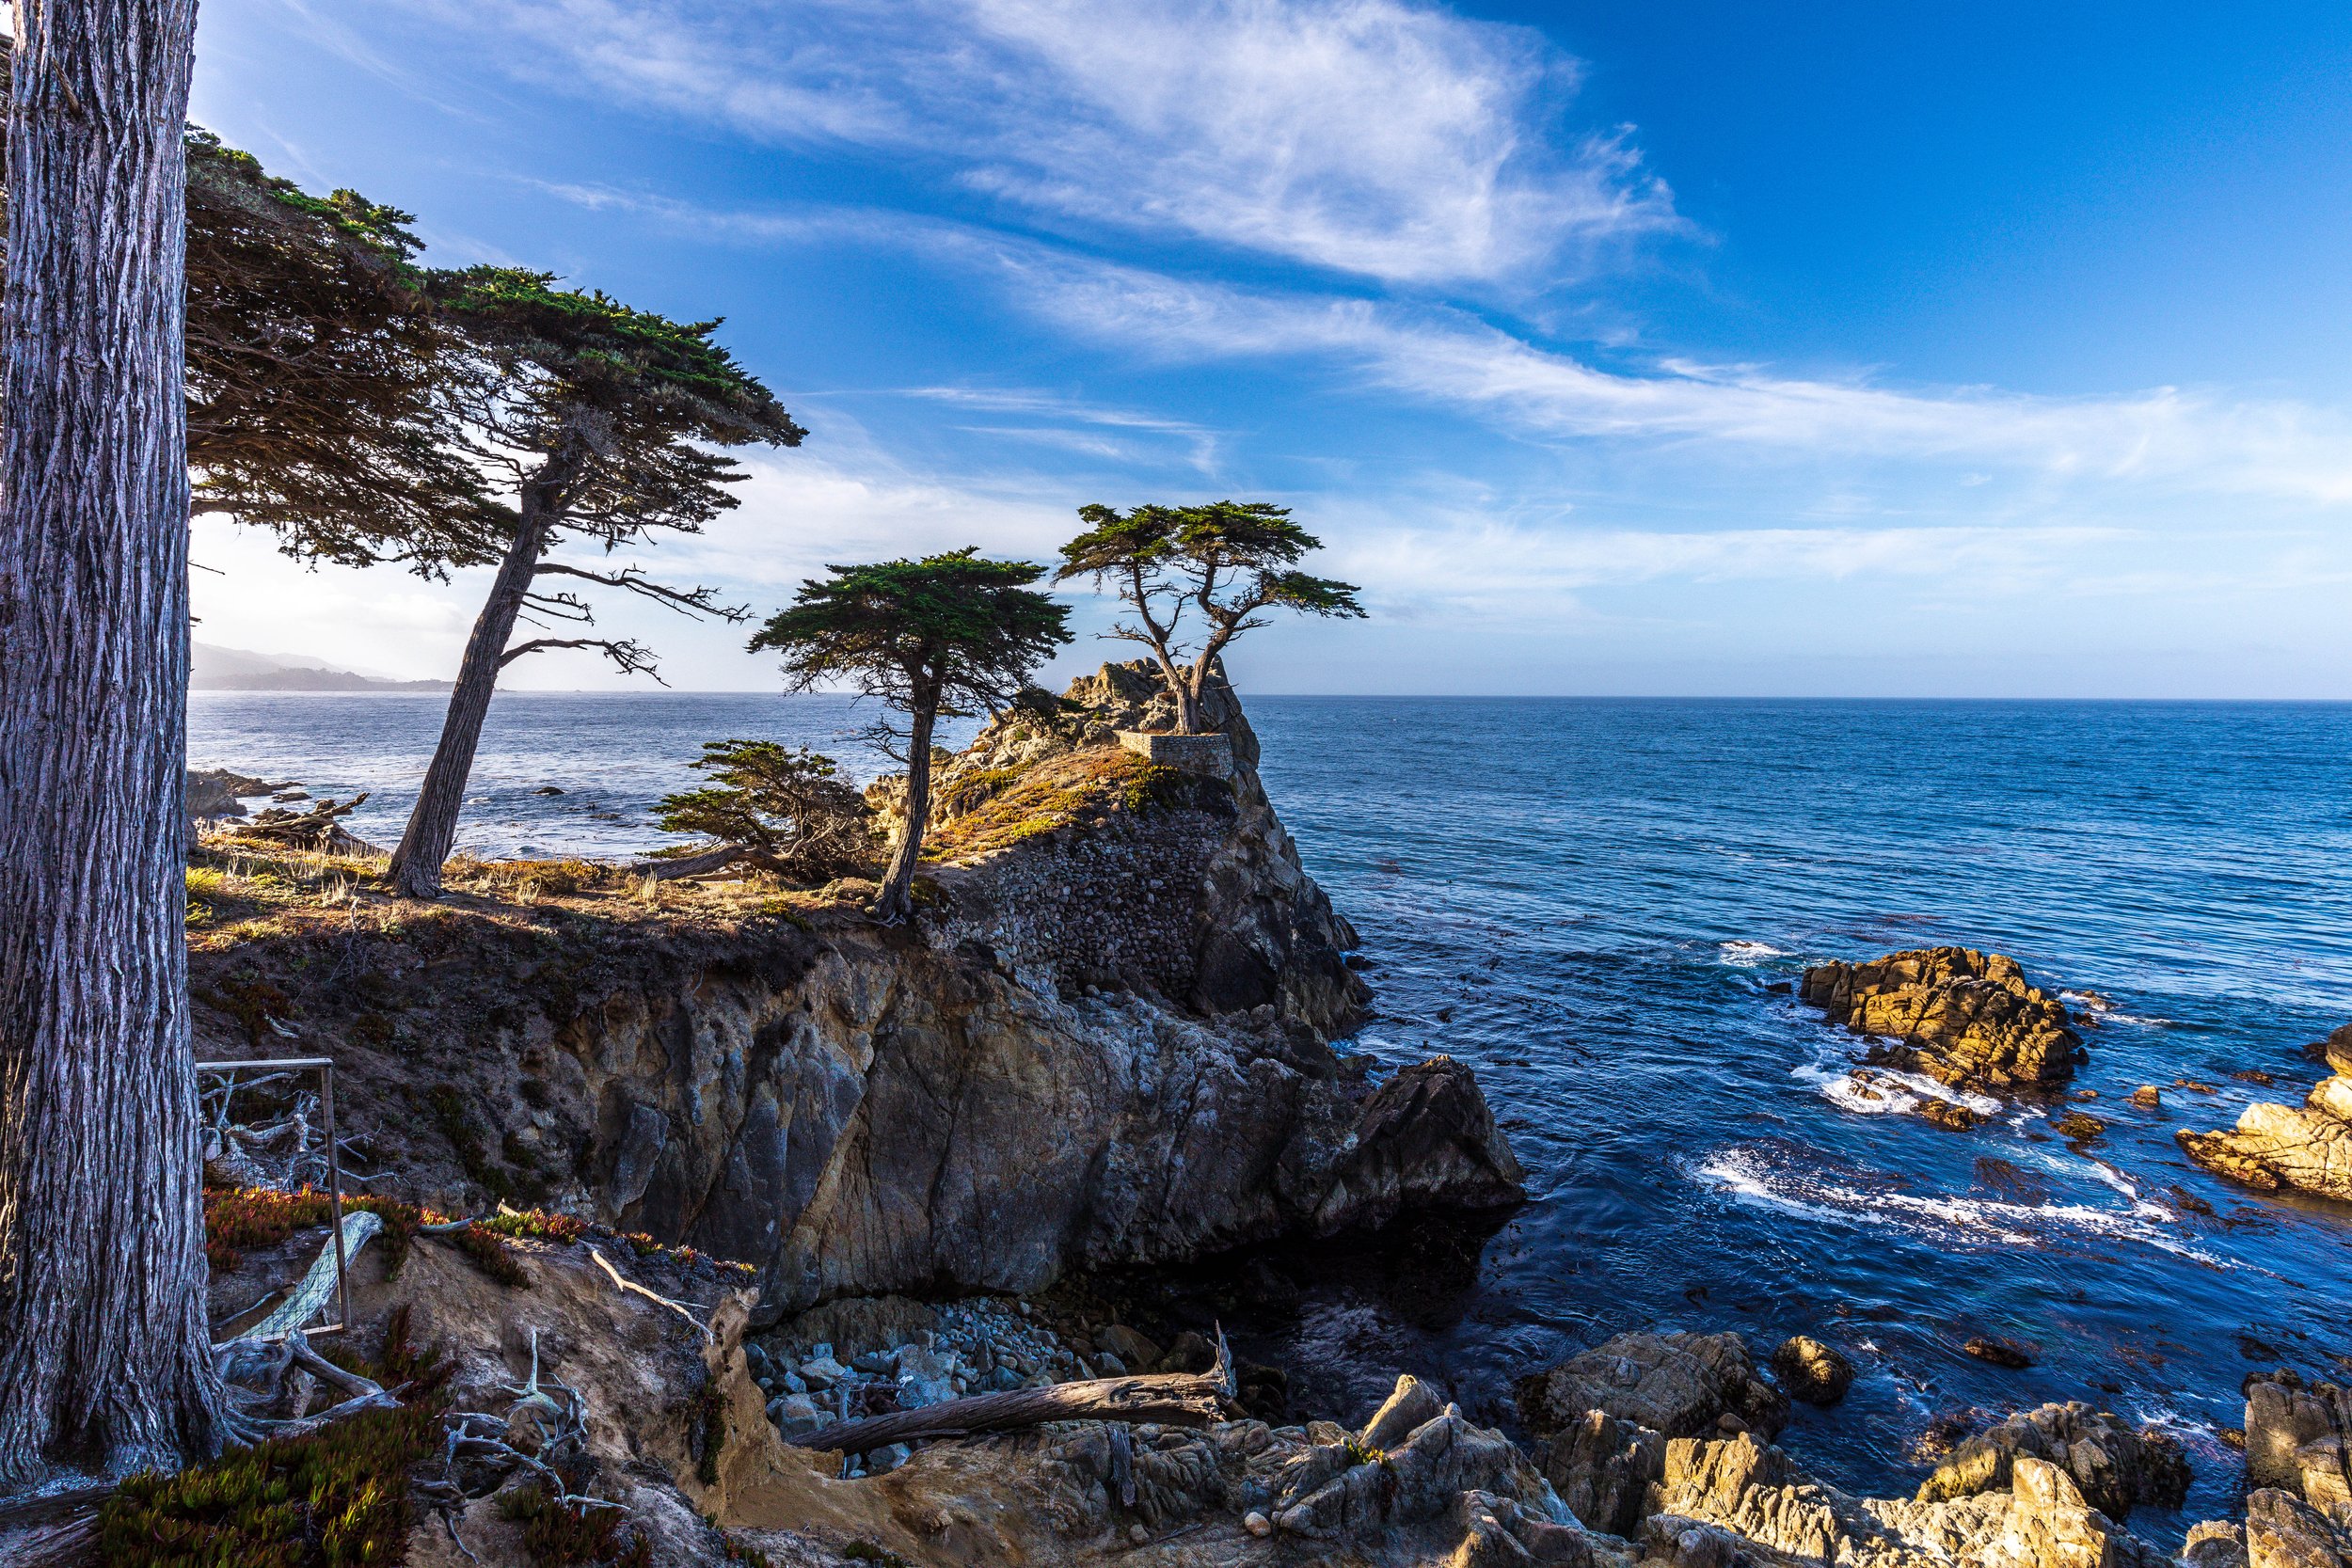
The Lone Cypress is the signature image: a single tree clinging to a granite rock above the Pacific that has been photographed for over a century. Beyond that, the drive offers a series of ocean overlooks, rocky coves, and cypress-lined roads that reward slow, unhurried shooting.
📷 Pro Tip: The Lone Cypress faces west and photographs best in late afternoon when the sun is low and behind you from the east. Use a 70 to 200mm to isolate the tree against the sky and water, cutting out the fence and viewing area in the foreground. For wider environmental shots that include the granite shelf and the ocean, step back and use a 24 to 70mm at f/8 or f/11 for full depth of field. The drive is one-way with designated pull-offs, so plan your stops in advance. Arrive in early morning to shoot the cypress groves and coastal rocks in soft, low light before other visitors arrive. The entrance fee is currently around $12.25 per vehicle, and your ticket covers all the pull-offs along the route.
Best time: Early morning for the cypress groves; late afternoon for the Lone Cypress. Access: Entrance fee required, currently around $12.25 per vehicle. Enter from the Pacific Grove Gate or Carmel Gate off Highway 1.
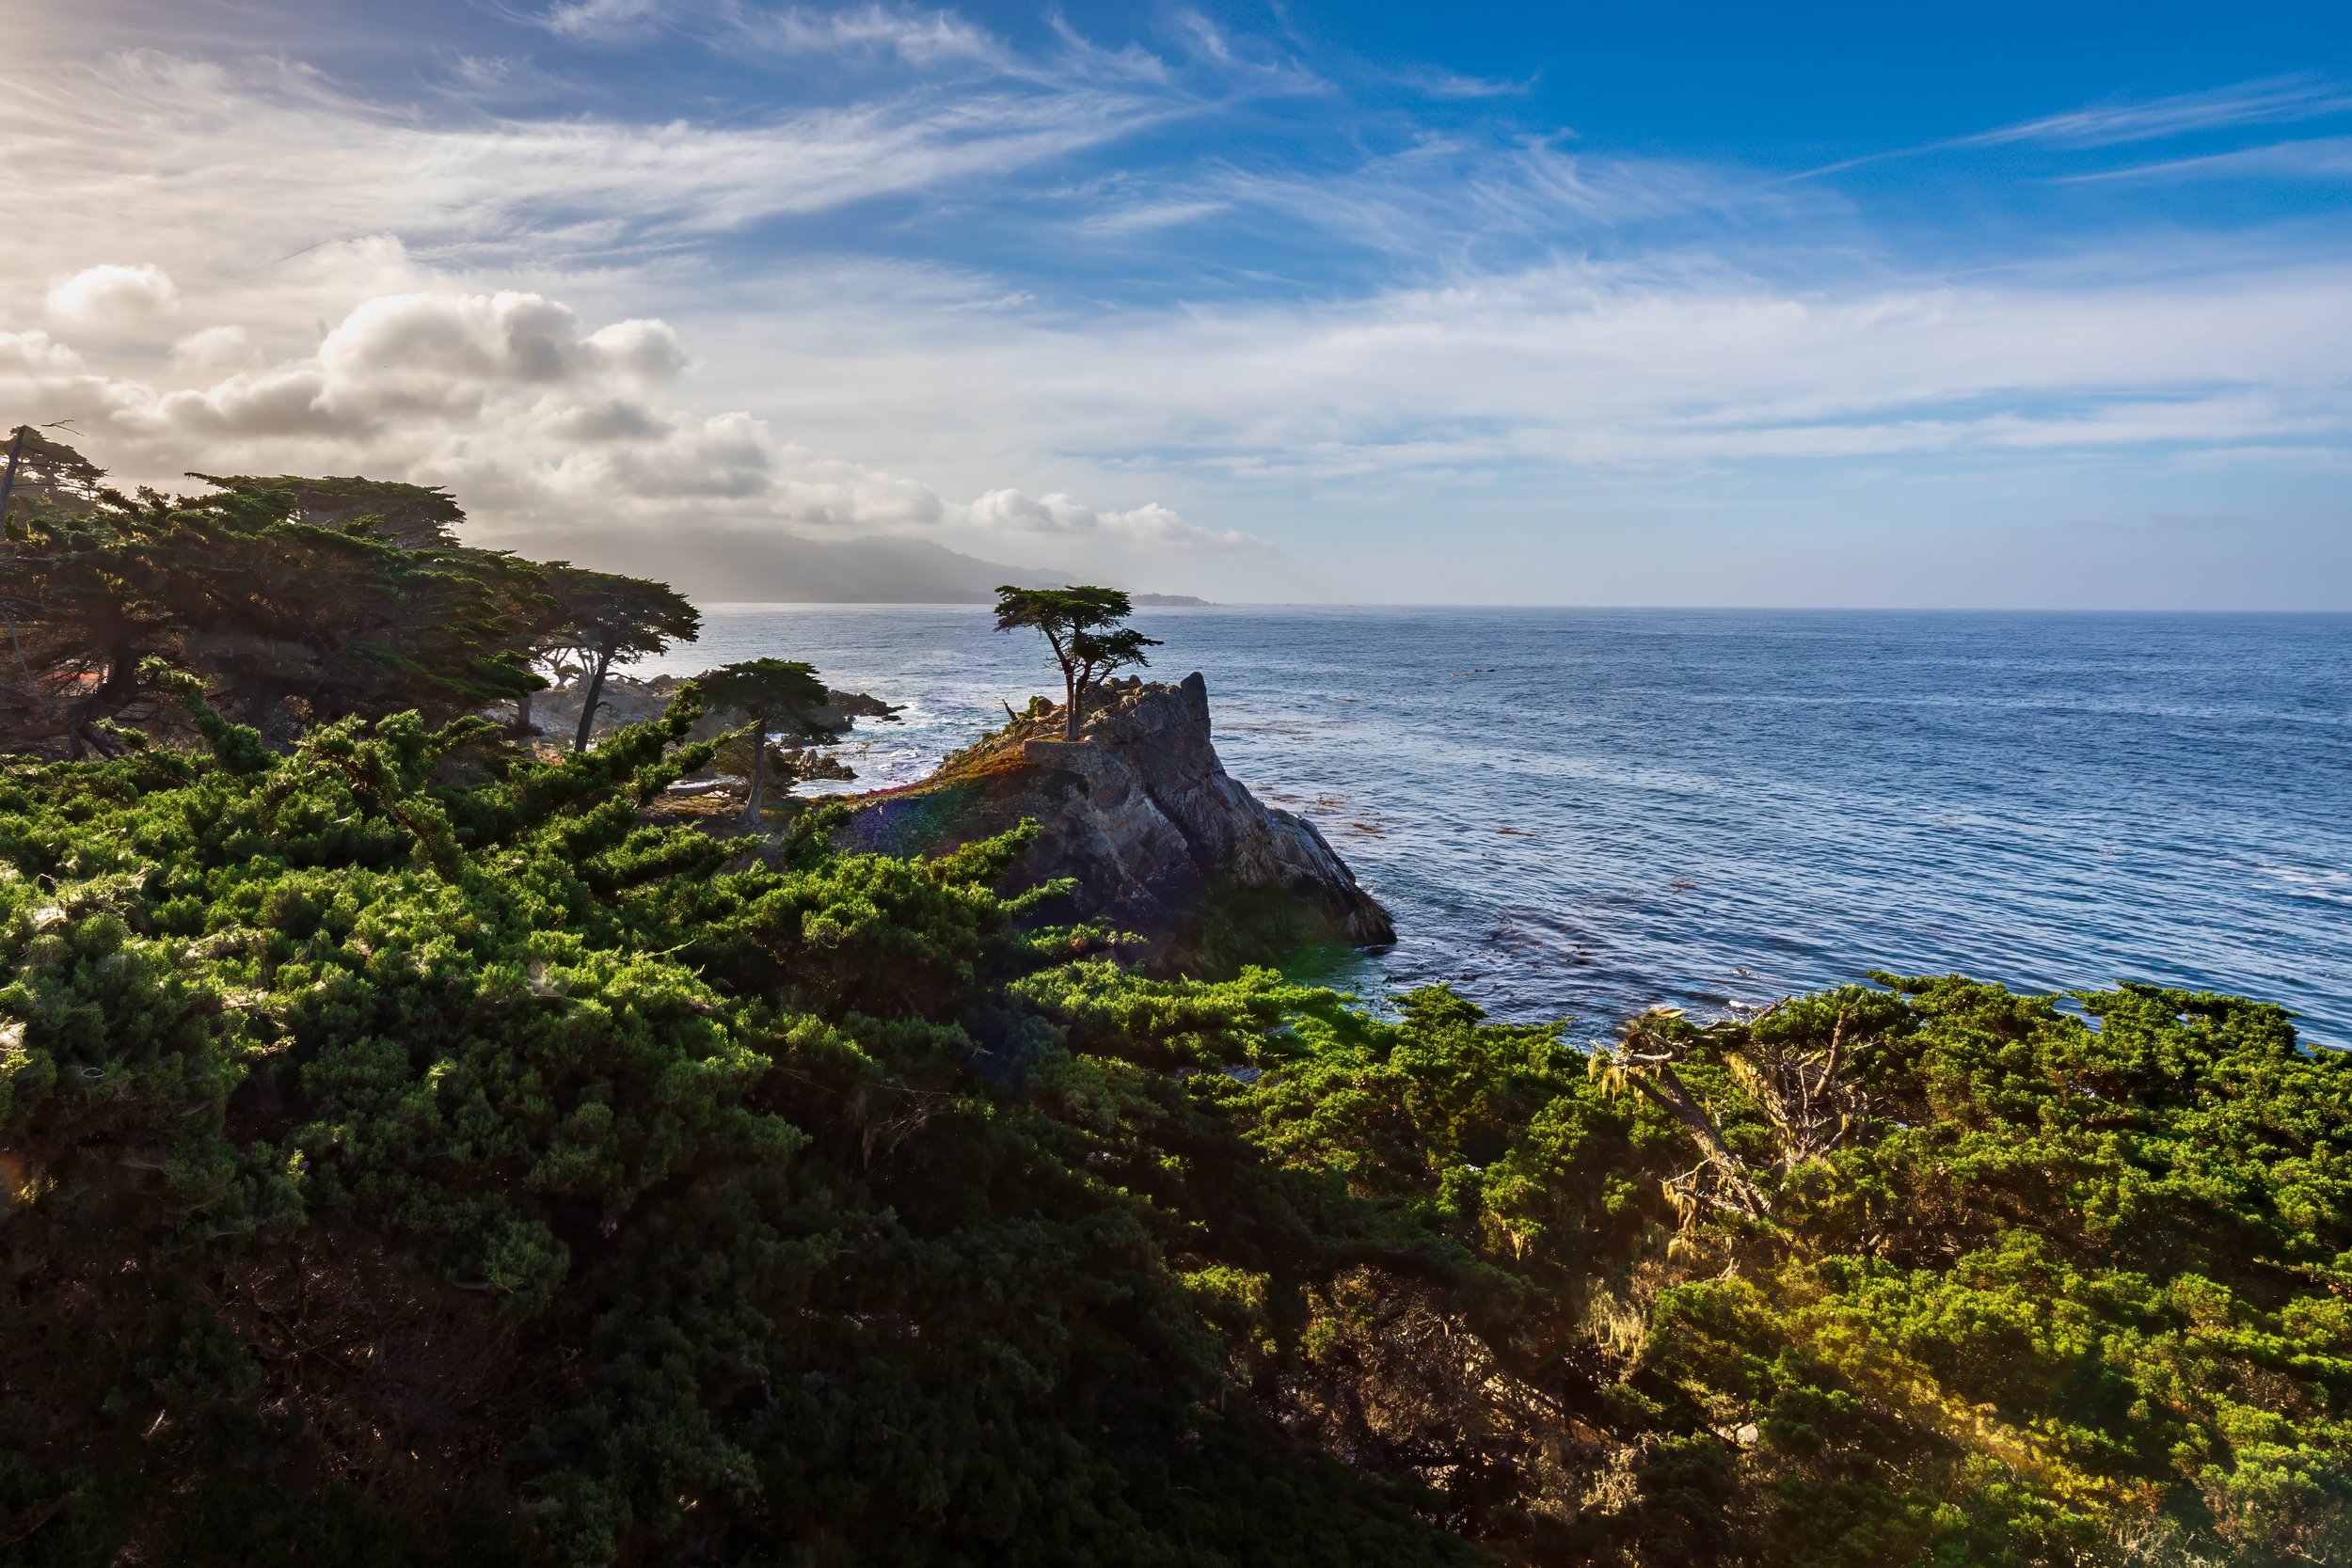
The Lone Cyprus Tree
There are beautiful views of the coast, mansions to marvel over, and nice golf courses. The entrance fee is approximately $12.25 per vehicle as of 2026.
Bixby Creek Bridge
Bixby Creek Bridge is one of the most photographed structures in California, and when you see it in person, you understand exactly why. Built in 1932, the concrete arch spans 714 feet across a steep canyon, with the Pacific stretching to the horizon on the western side. I photographed it from the air during our helicopter arrival, and even from that altitude, the scale of the thing is striking. The canyon drops away sharply below the arch, the water is far below, and the cliffs on both sides are raw and dramatic.
There are two pullouts on Highway 1, one to the north and one to the south. The north pullout is the classic angle; from there, you shoot looking south along the bridge with the ocean behind it. The south pullout gives you a reverse composition and tends to attract fewer people.
📷 Pro Tip: Arrive at least 30 minutes before golden hour. The north pullout fills quickly on clear afternoons and weekend evenings. At sunset, the low western sun hits the arch face directly and turns the concrete warm amber. Shoot wide with a 15 to 35mm lens to capture the full span and the canyon below. For a cleaner foreground, position yourself at the edge of the gravel area rather than directly at the railing. If you want the bridge without any cars on it, arrive before 7am. The south pullout is worth walking to even if you shoot from the north; the reversed angle gives you a completely different composition with the headlands visible behind the arch.
Best time: Sunrise or golden hour before sunset. Access: Free. Both pullouts are directly off Highway 1 with no additional hike required.

From. our Helicopter
McWay Falls, Julia Pfeiffer Burns State Park
McWay Falls is one of those places that photographs exactly as well as you hoped it would. The waterfall drops about 80 feet directly onto a sandy cove, and the beach below is completely inaccessible to visitors. That combination of visual drama and enforced distance makes this a uniquely photogenic spot. The turquoise cove, the granite cliffs, the green headlands above, and the constant motion of the falls create a frame that works in almost any light.
📷 Pro Tip: Use a zoom lens. A 70 to 200mm lets you isolate the falls and the cove without the compression issues you get shooting wide from this distance. Sunrise brings the most direct light onto the falls and the cove, with warm pinks and golds bouncing off the granite walls. Overcast days are genuinely good here too; the soft, flat light keeps detail in both the white water and the surrounding cliffs, and the turquoise color of the cove reads beautifully without harsh shadows. If you want to include the full frame of the cove and headlands, use your 24 to 70mm and position yourself at the first overlook platform. For iPhone photographers, use the 3x telephoto lens to bring the falls closer without losing sharpness.
Best time: Sunrise or overcast midday. Access: Day-use fee, currently around $10 to $12 per vehicle. Parking at Julia Pfeiffer Burns State Park off Highway 1.
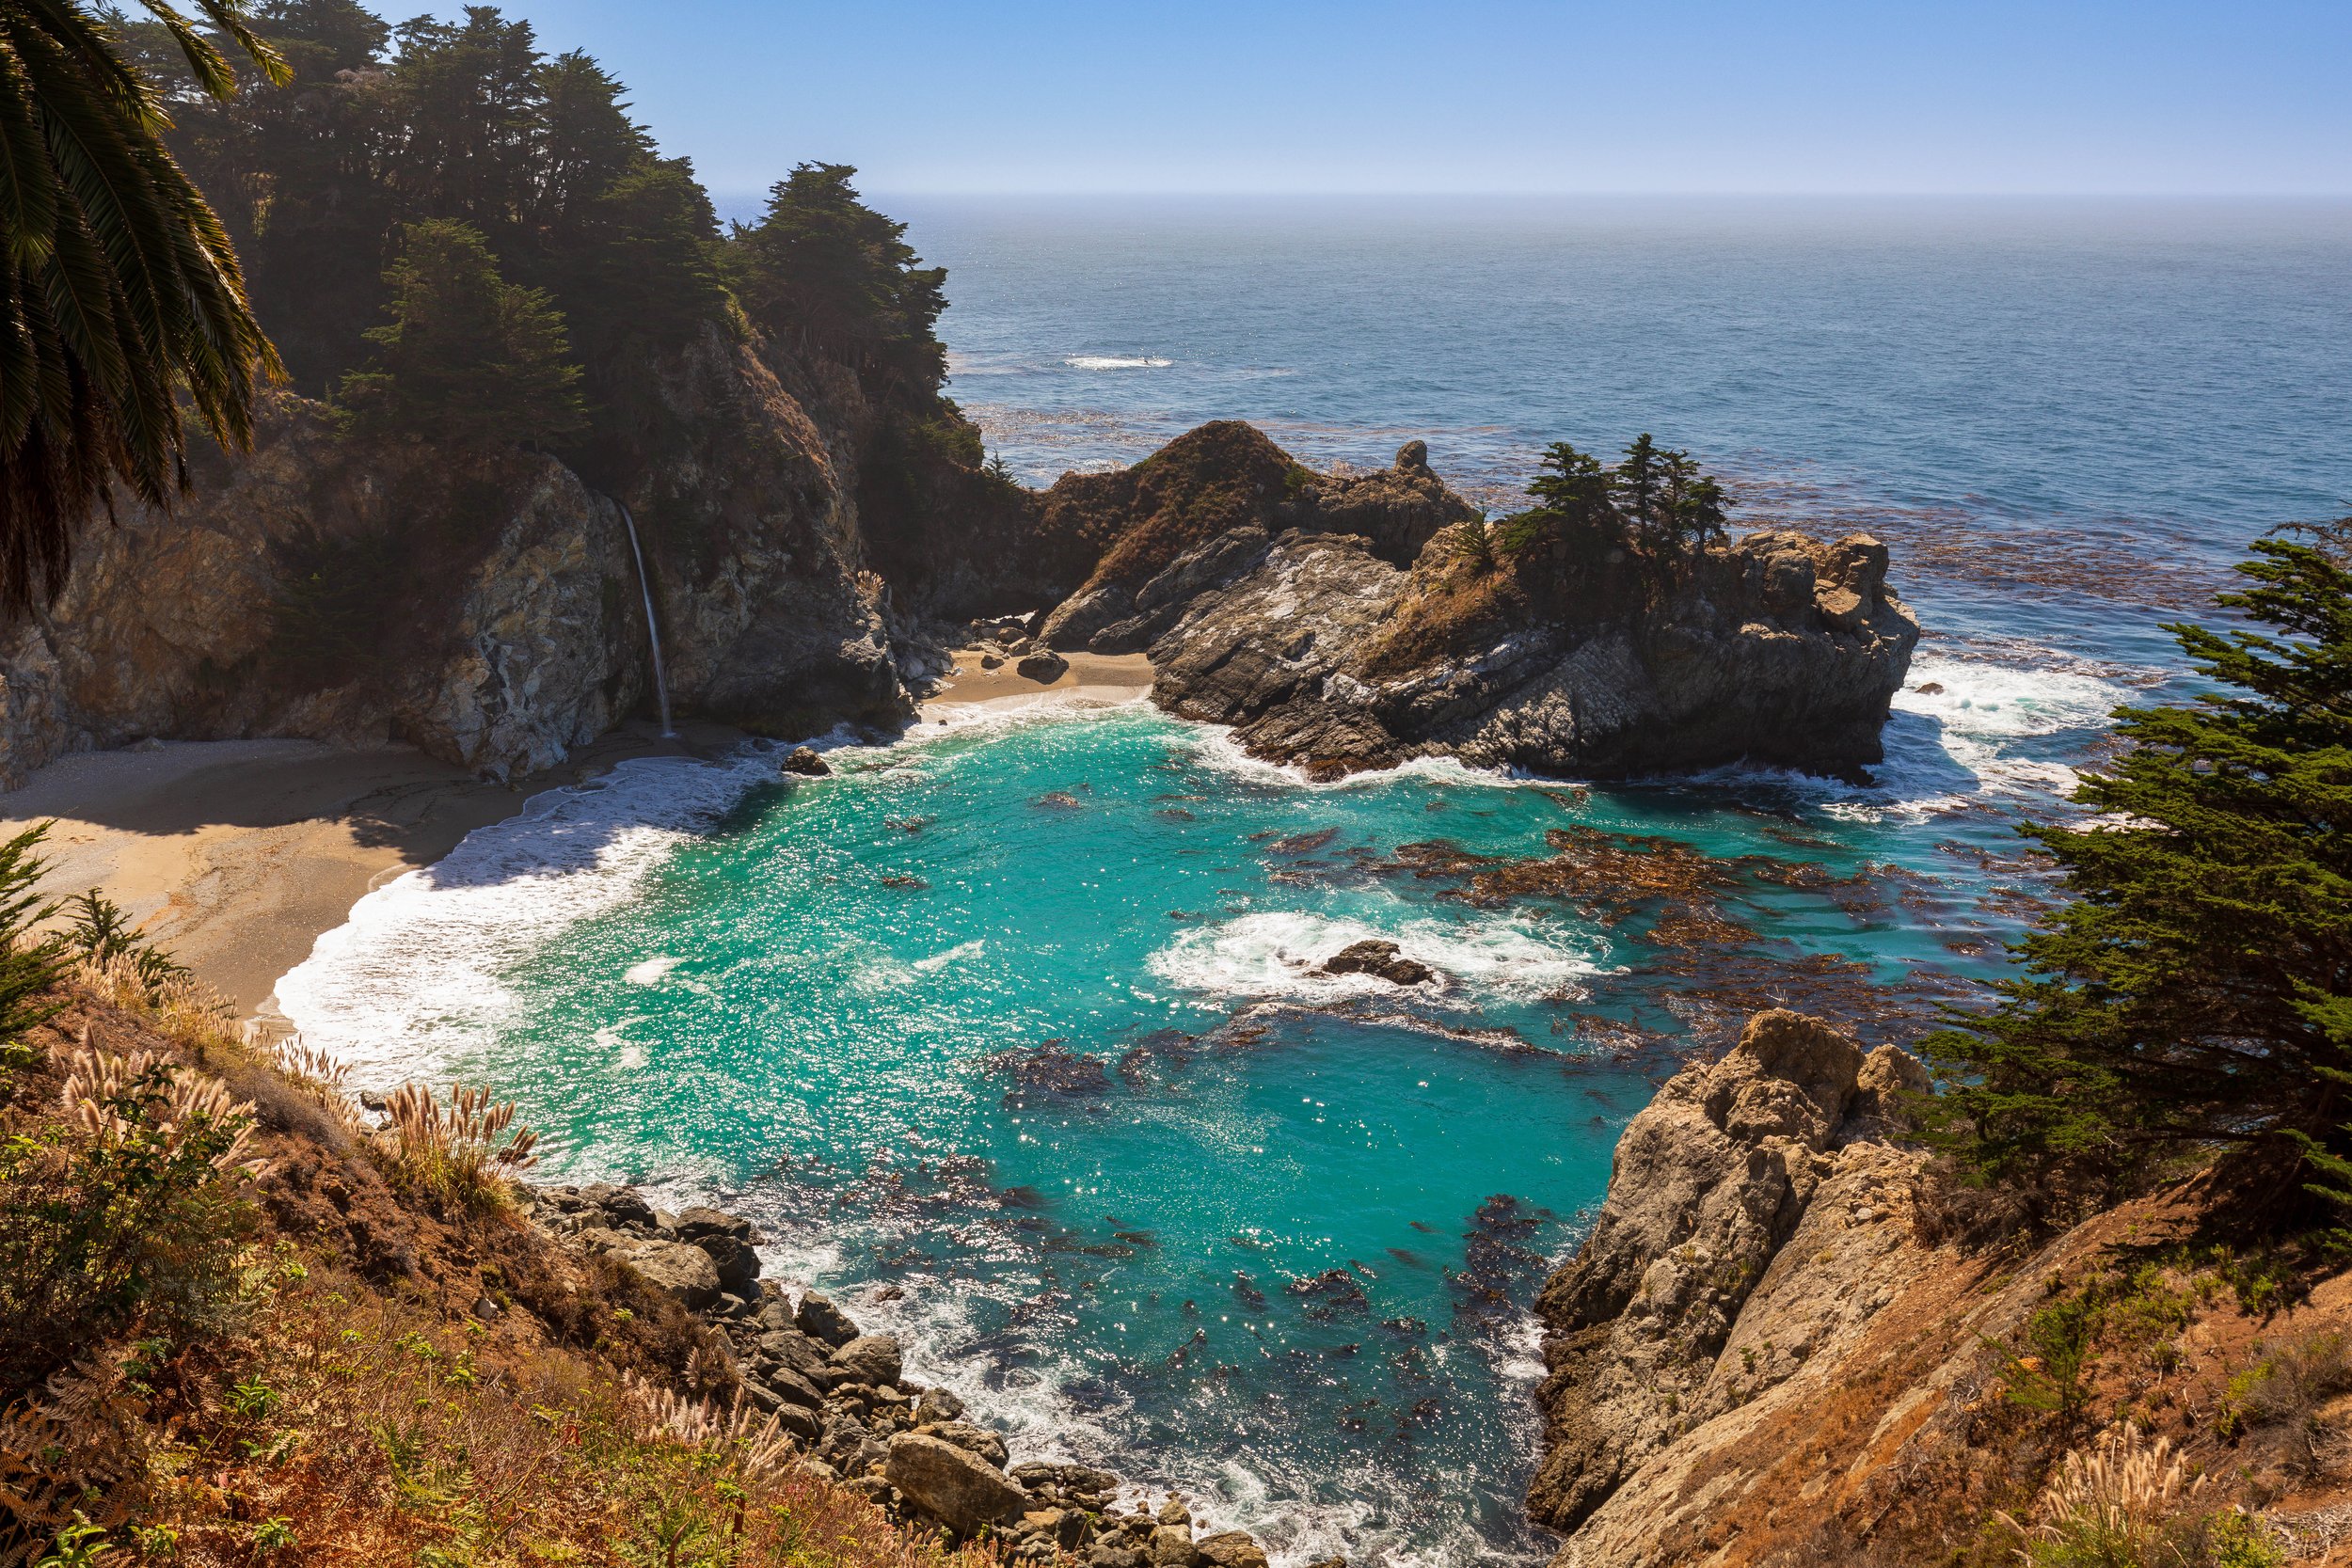
The overlook trail is a short, flat half-mile walk from the parking area. You will get several vantage points along the trail. The beach itself is closed to the public, which is part of what keeps the scene so clean and uncluttered.
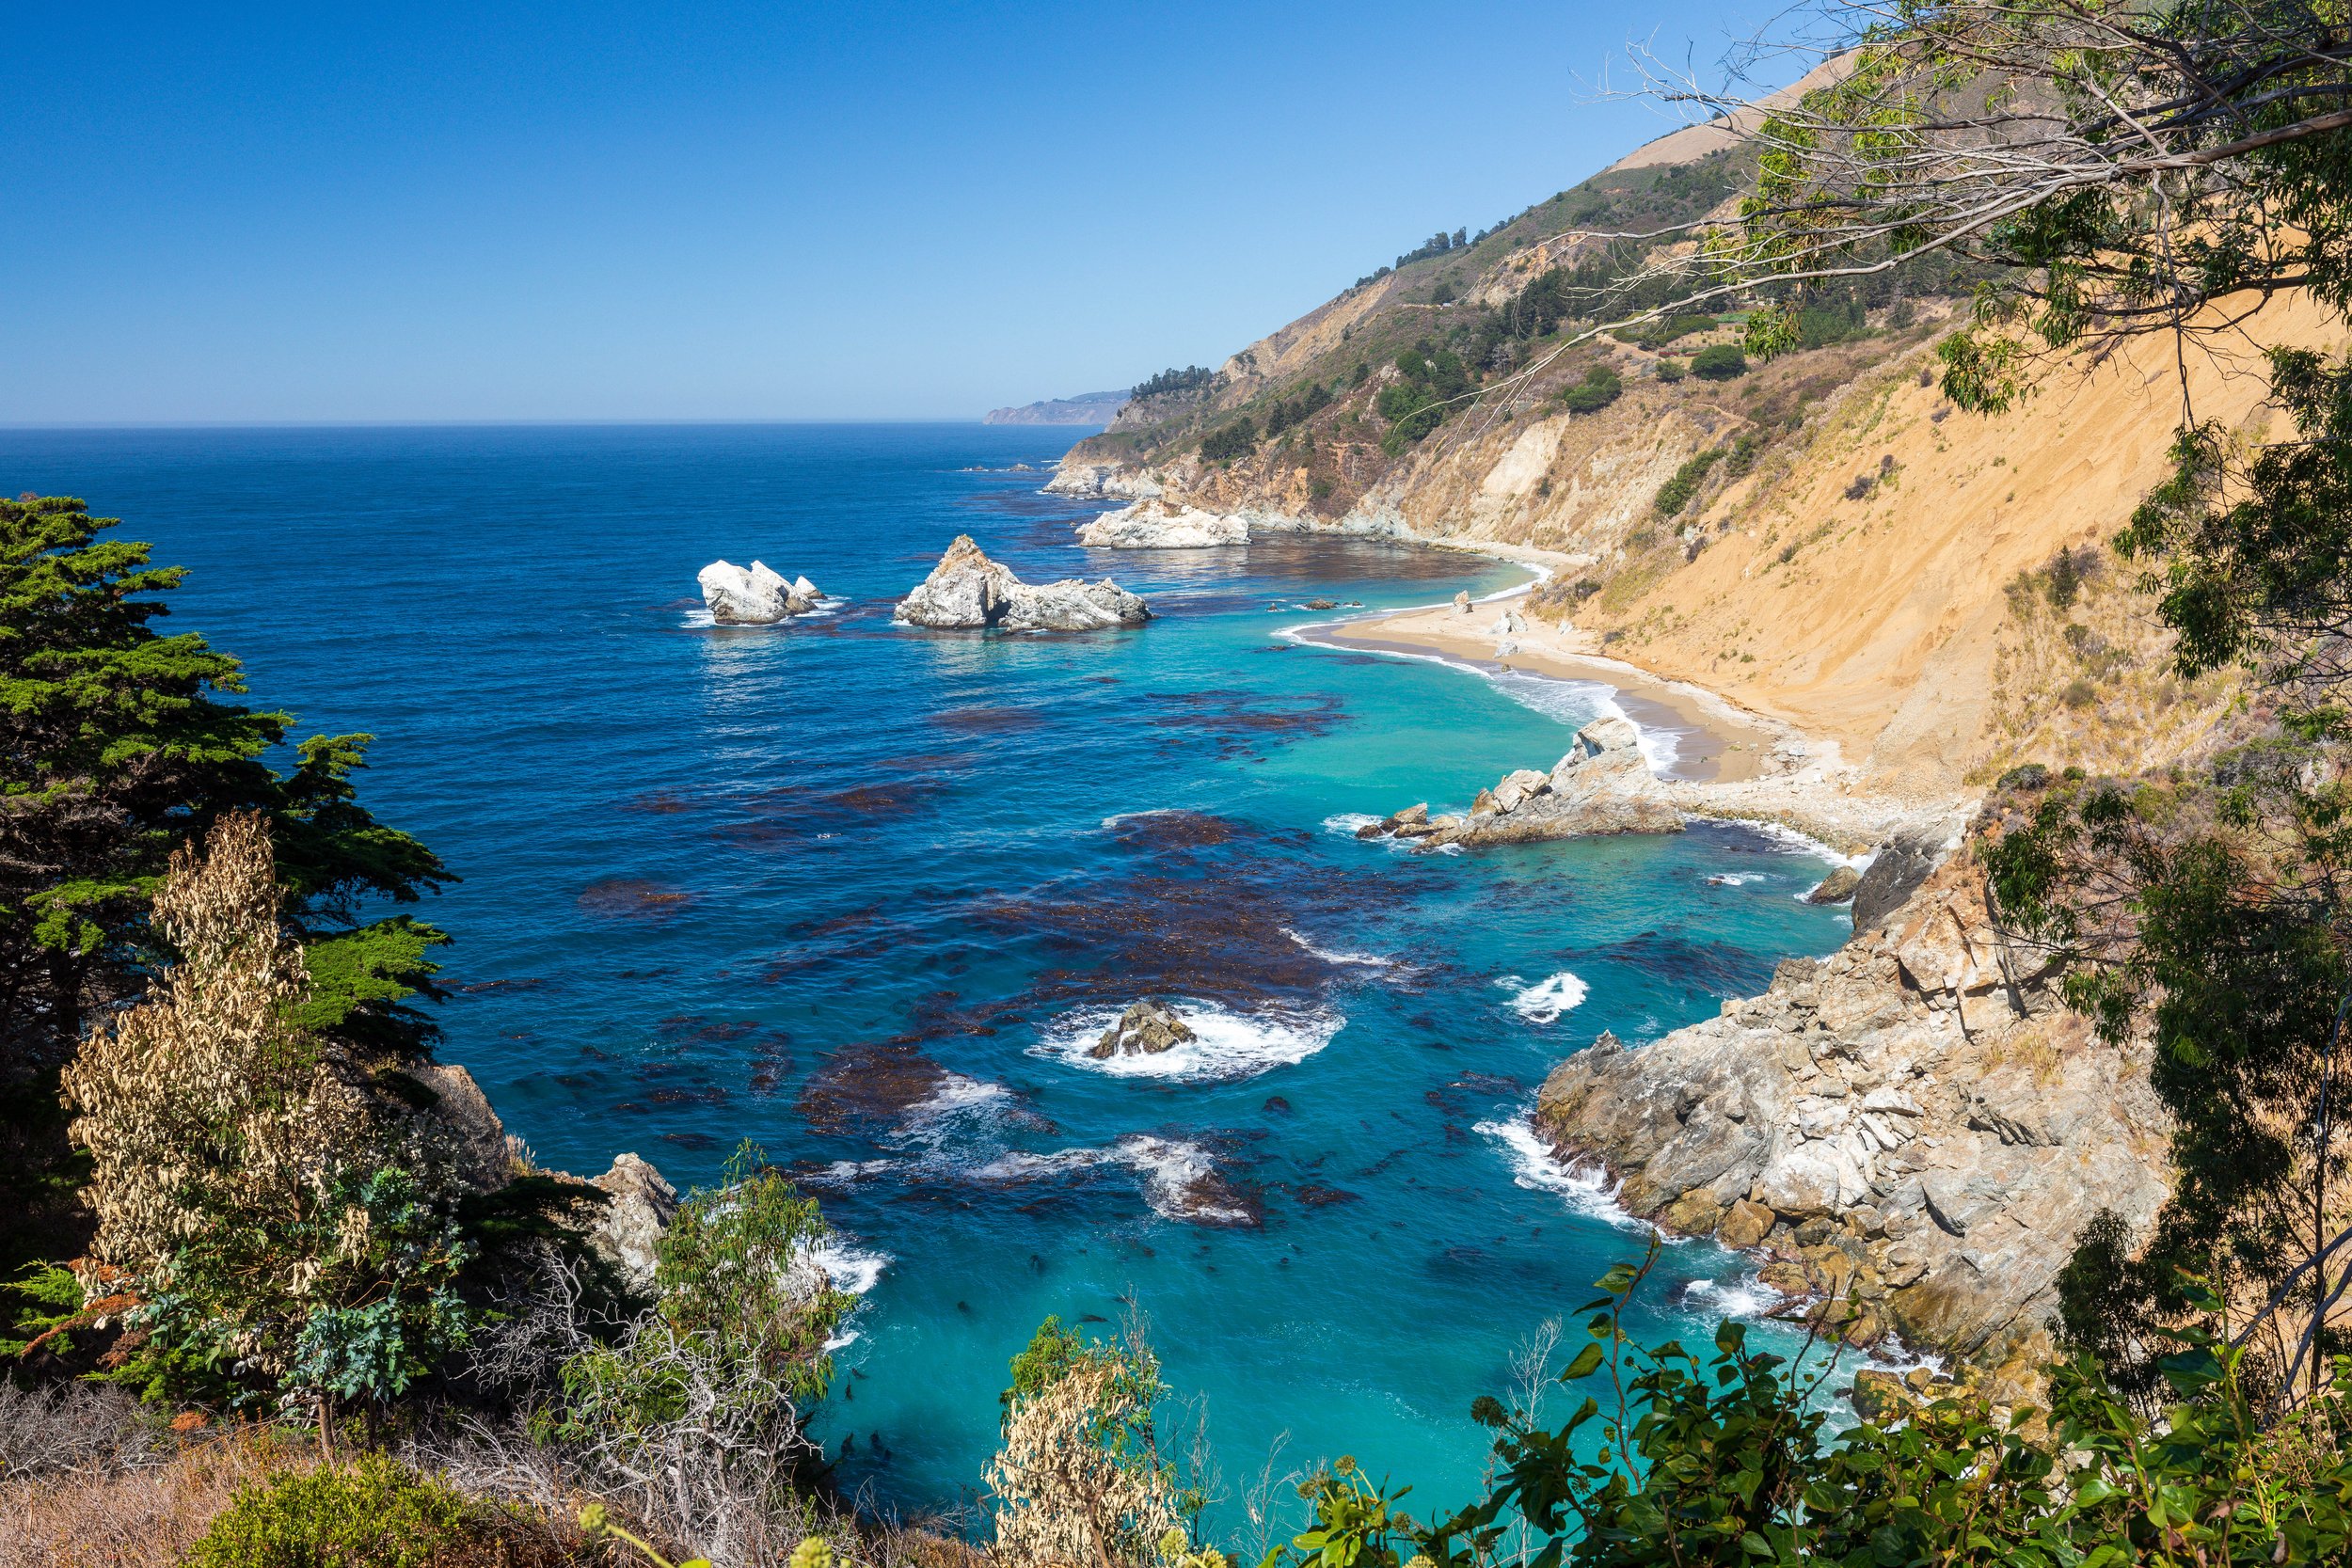
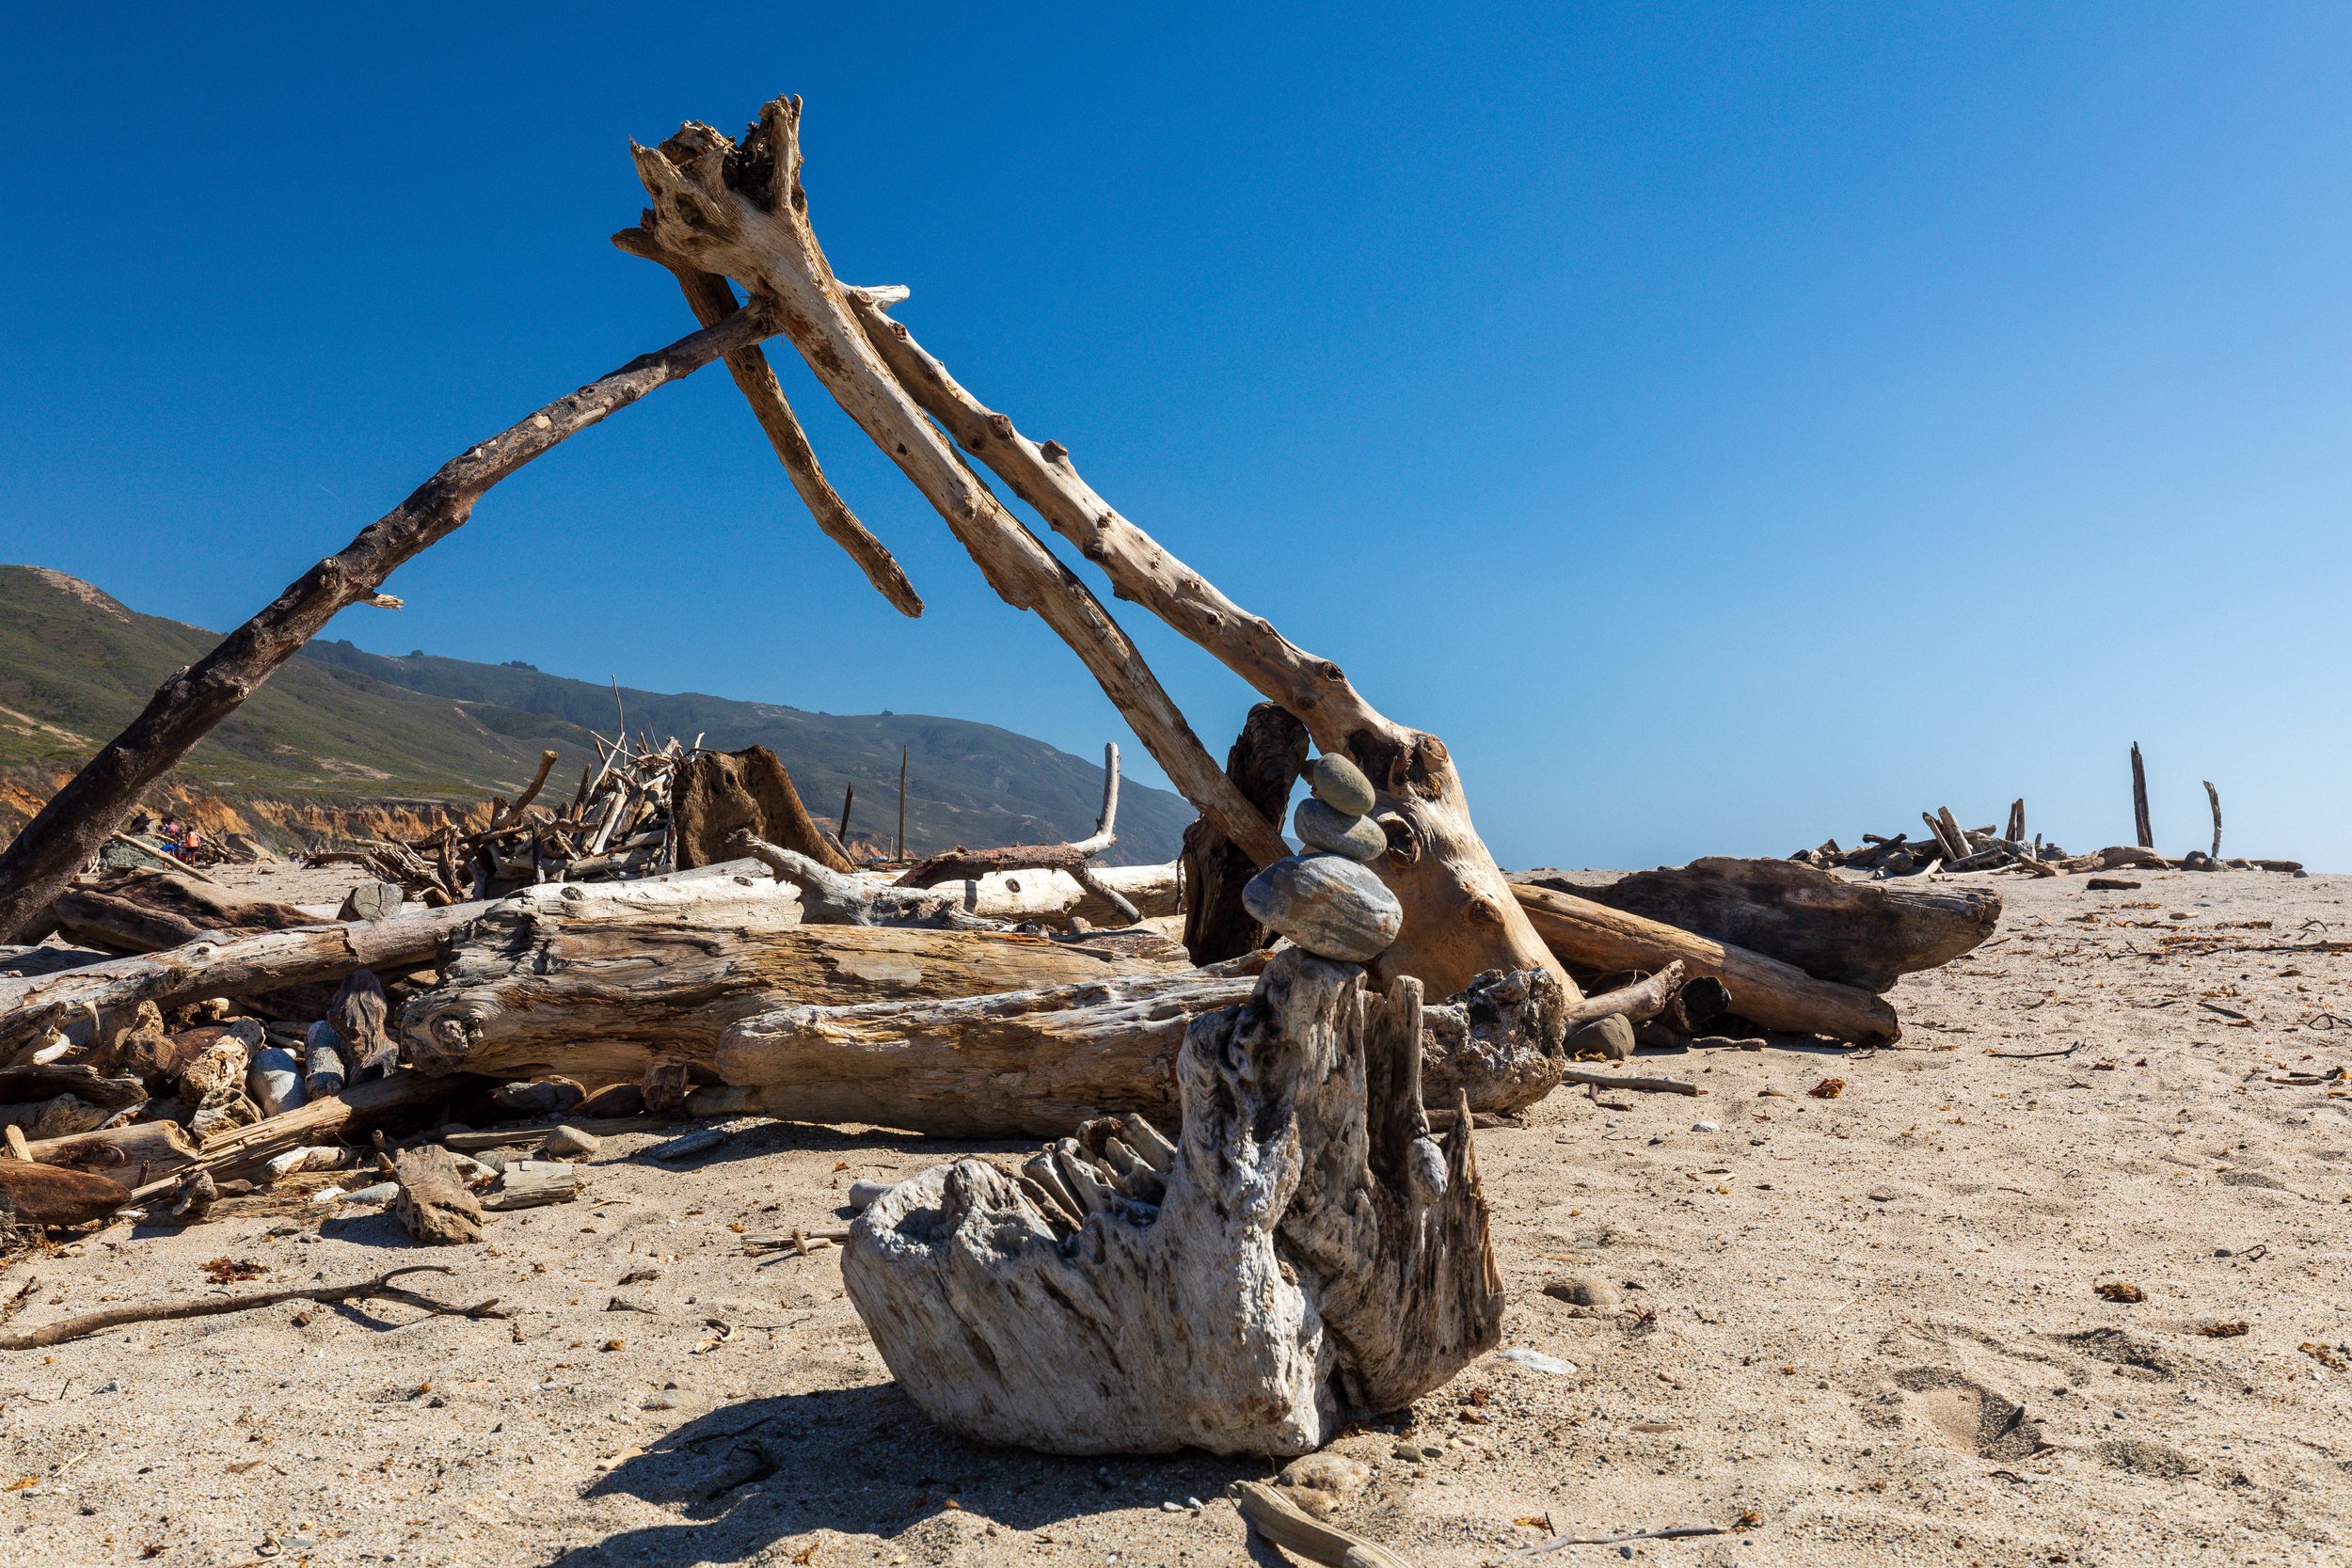
Andrew Molera State Park
Andrew Molera is the most underrated photography stop in Big Sur. It is less developed than the other state parks, which means fewer crowds and more open, unobstructed coastline. The Bluffs Trail runs along the clifftops above the ocean with wide, sweeping views in both directions. The Creamery Meadow Trail crosses the Big Sur River and leads to a beach that very few people bother to walk to.
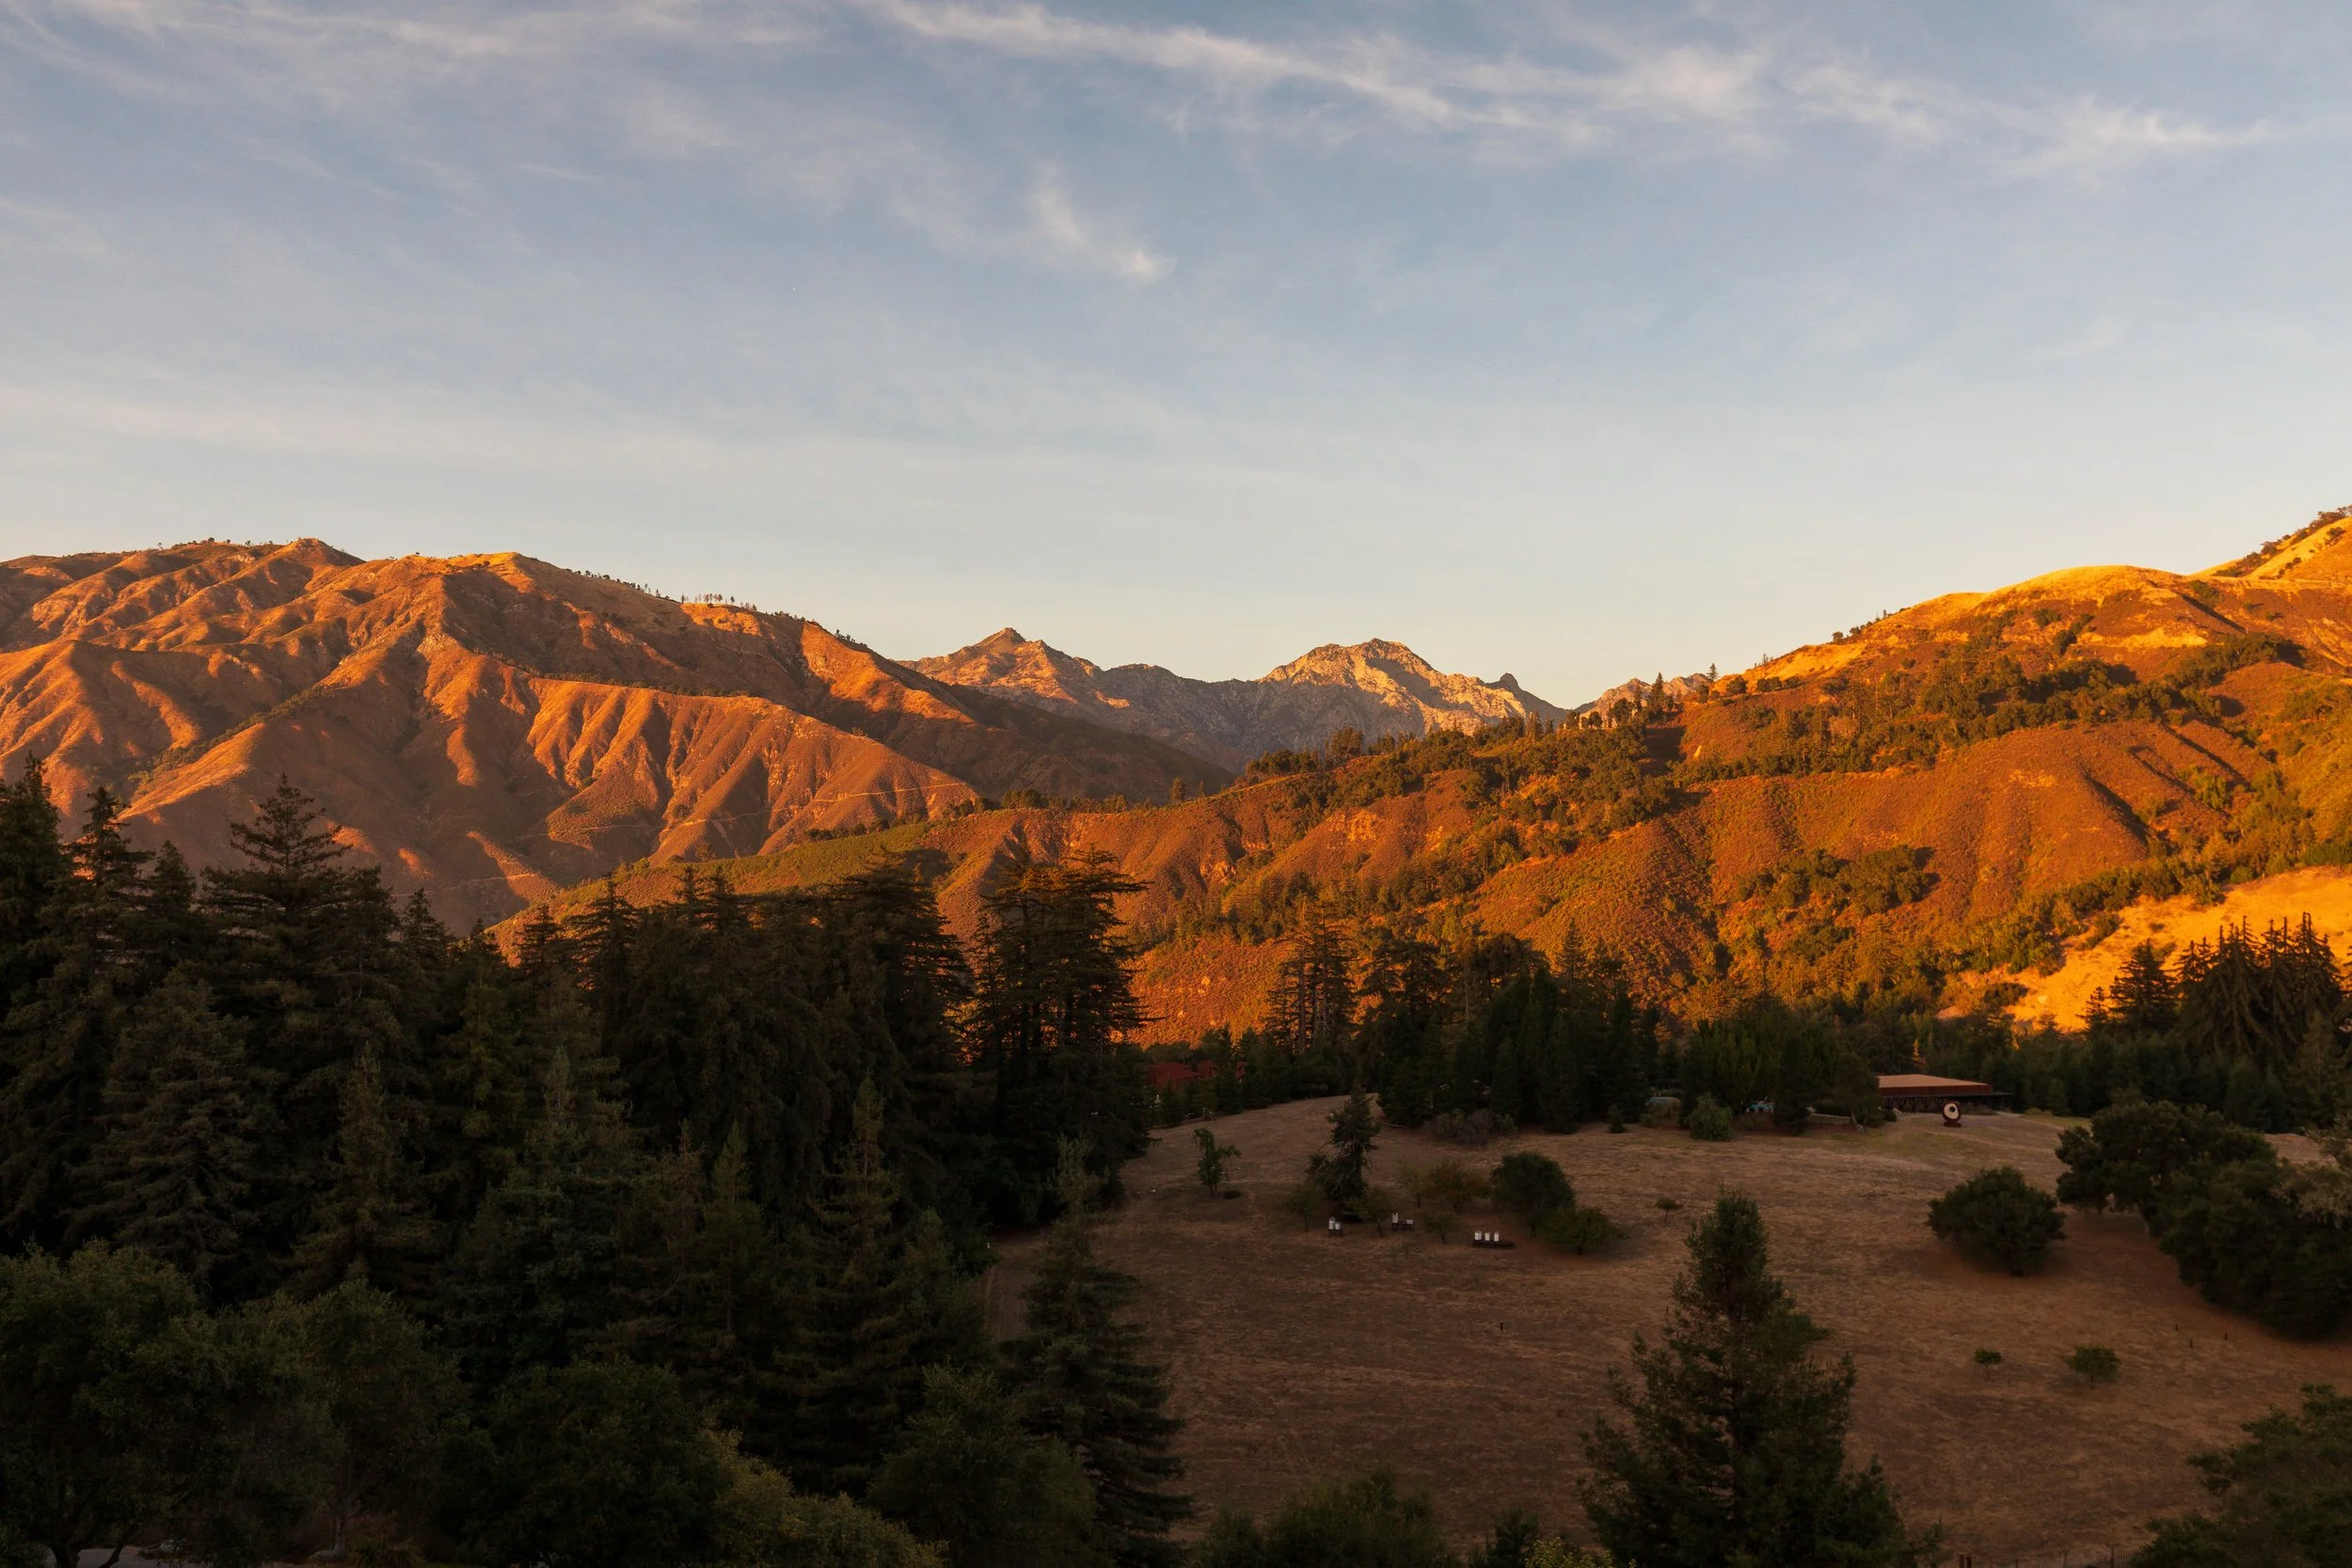
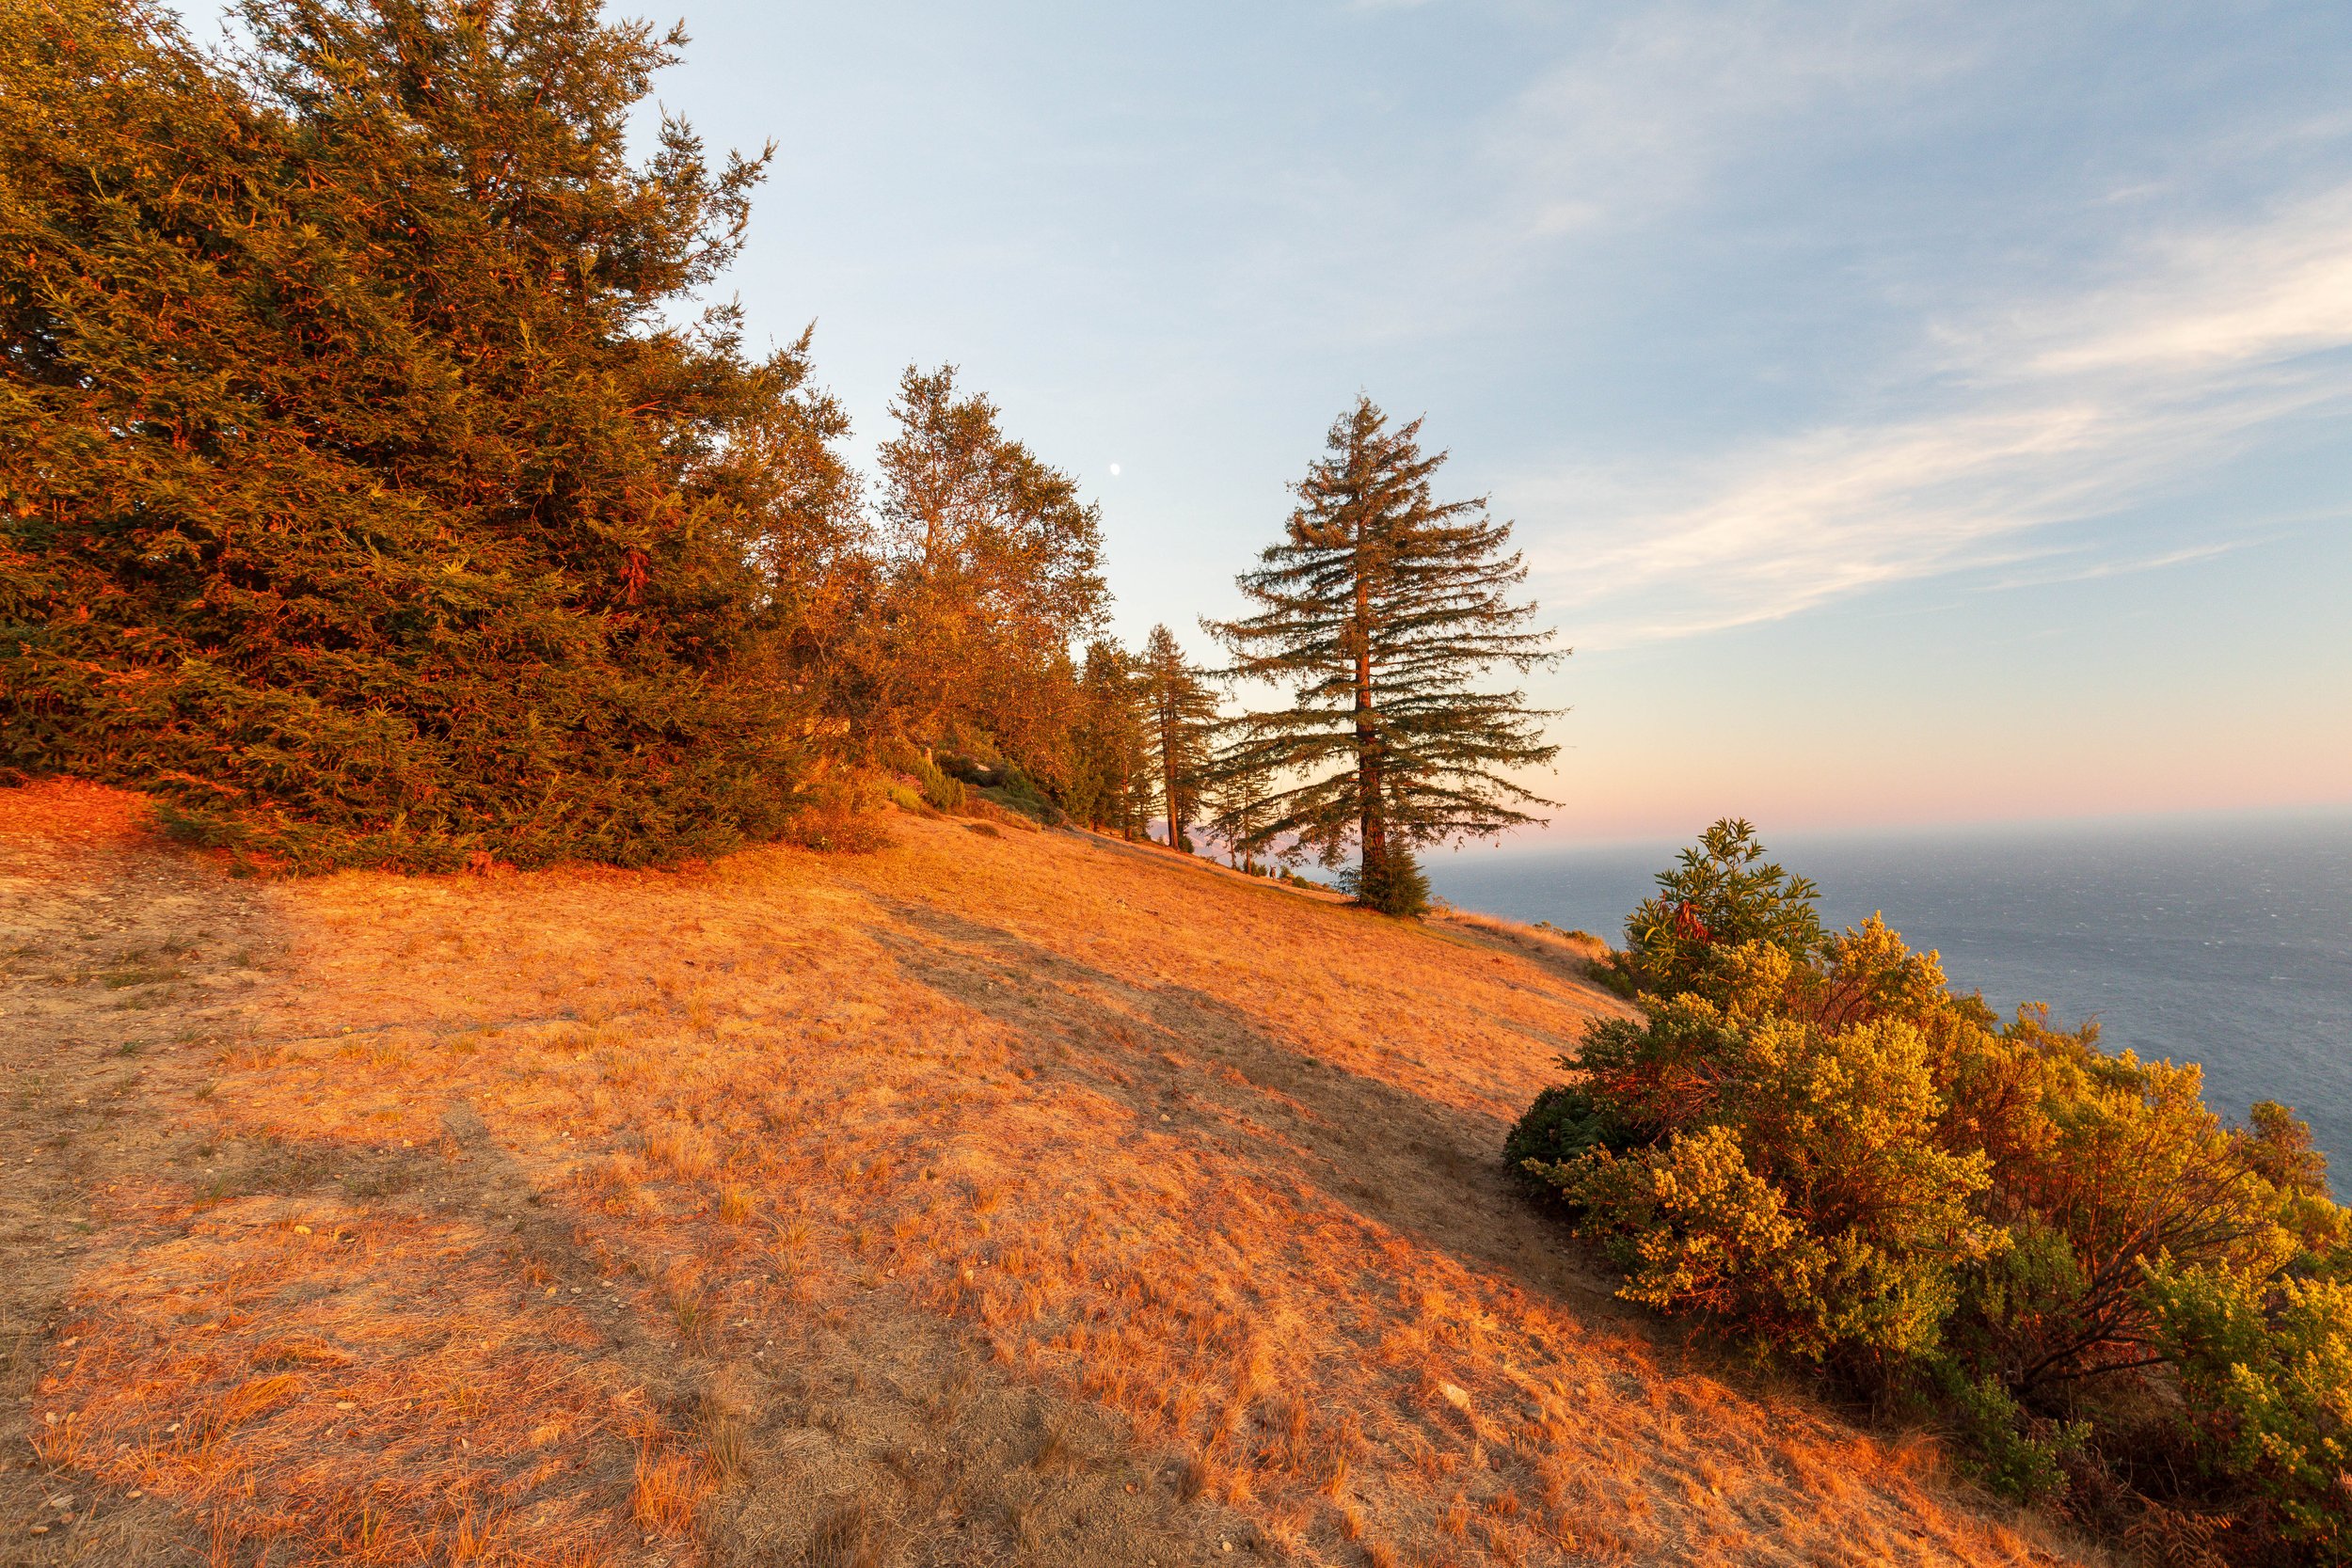
What makes Andrew Molera worth your time as a photographer is the combination of terrain. Within a short walk you can shoot coastal cliffs, open meadow, river mouth, and beach, all with the Santa Lucia Mountains rising behind you to the east. The light in the meadow at golden hour is exceptional.
📷 Pro Tip: Take the Bluffs Trail first thing in the morning. The trail runs roughly north to south along the clifftops, and early light from the east catches the cliffs and the grasses along the edge in warm, directional light. Use a 24 to 70mm for wide coastal views and switch to a 70 to 200mm to compress the layers of headlands receding into the distance. The river mouth at the beach is a strong compositional element; at low tide, the water spreads across the sand in thin sheets that reflect the sky. For the meadow, shoot looking east in the late afternoon when the mountains behind are lit and the foreground grasses go golden.
Best time: Early morning on the bluffs; late afternoon in the meadow. Access: Parking fee required. Entrance off Highway 1 approximately 4 miles north of the Big Sur village area.
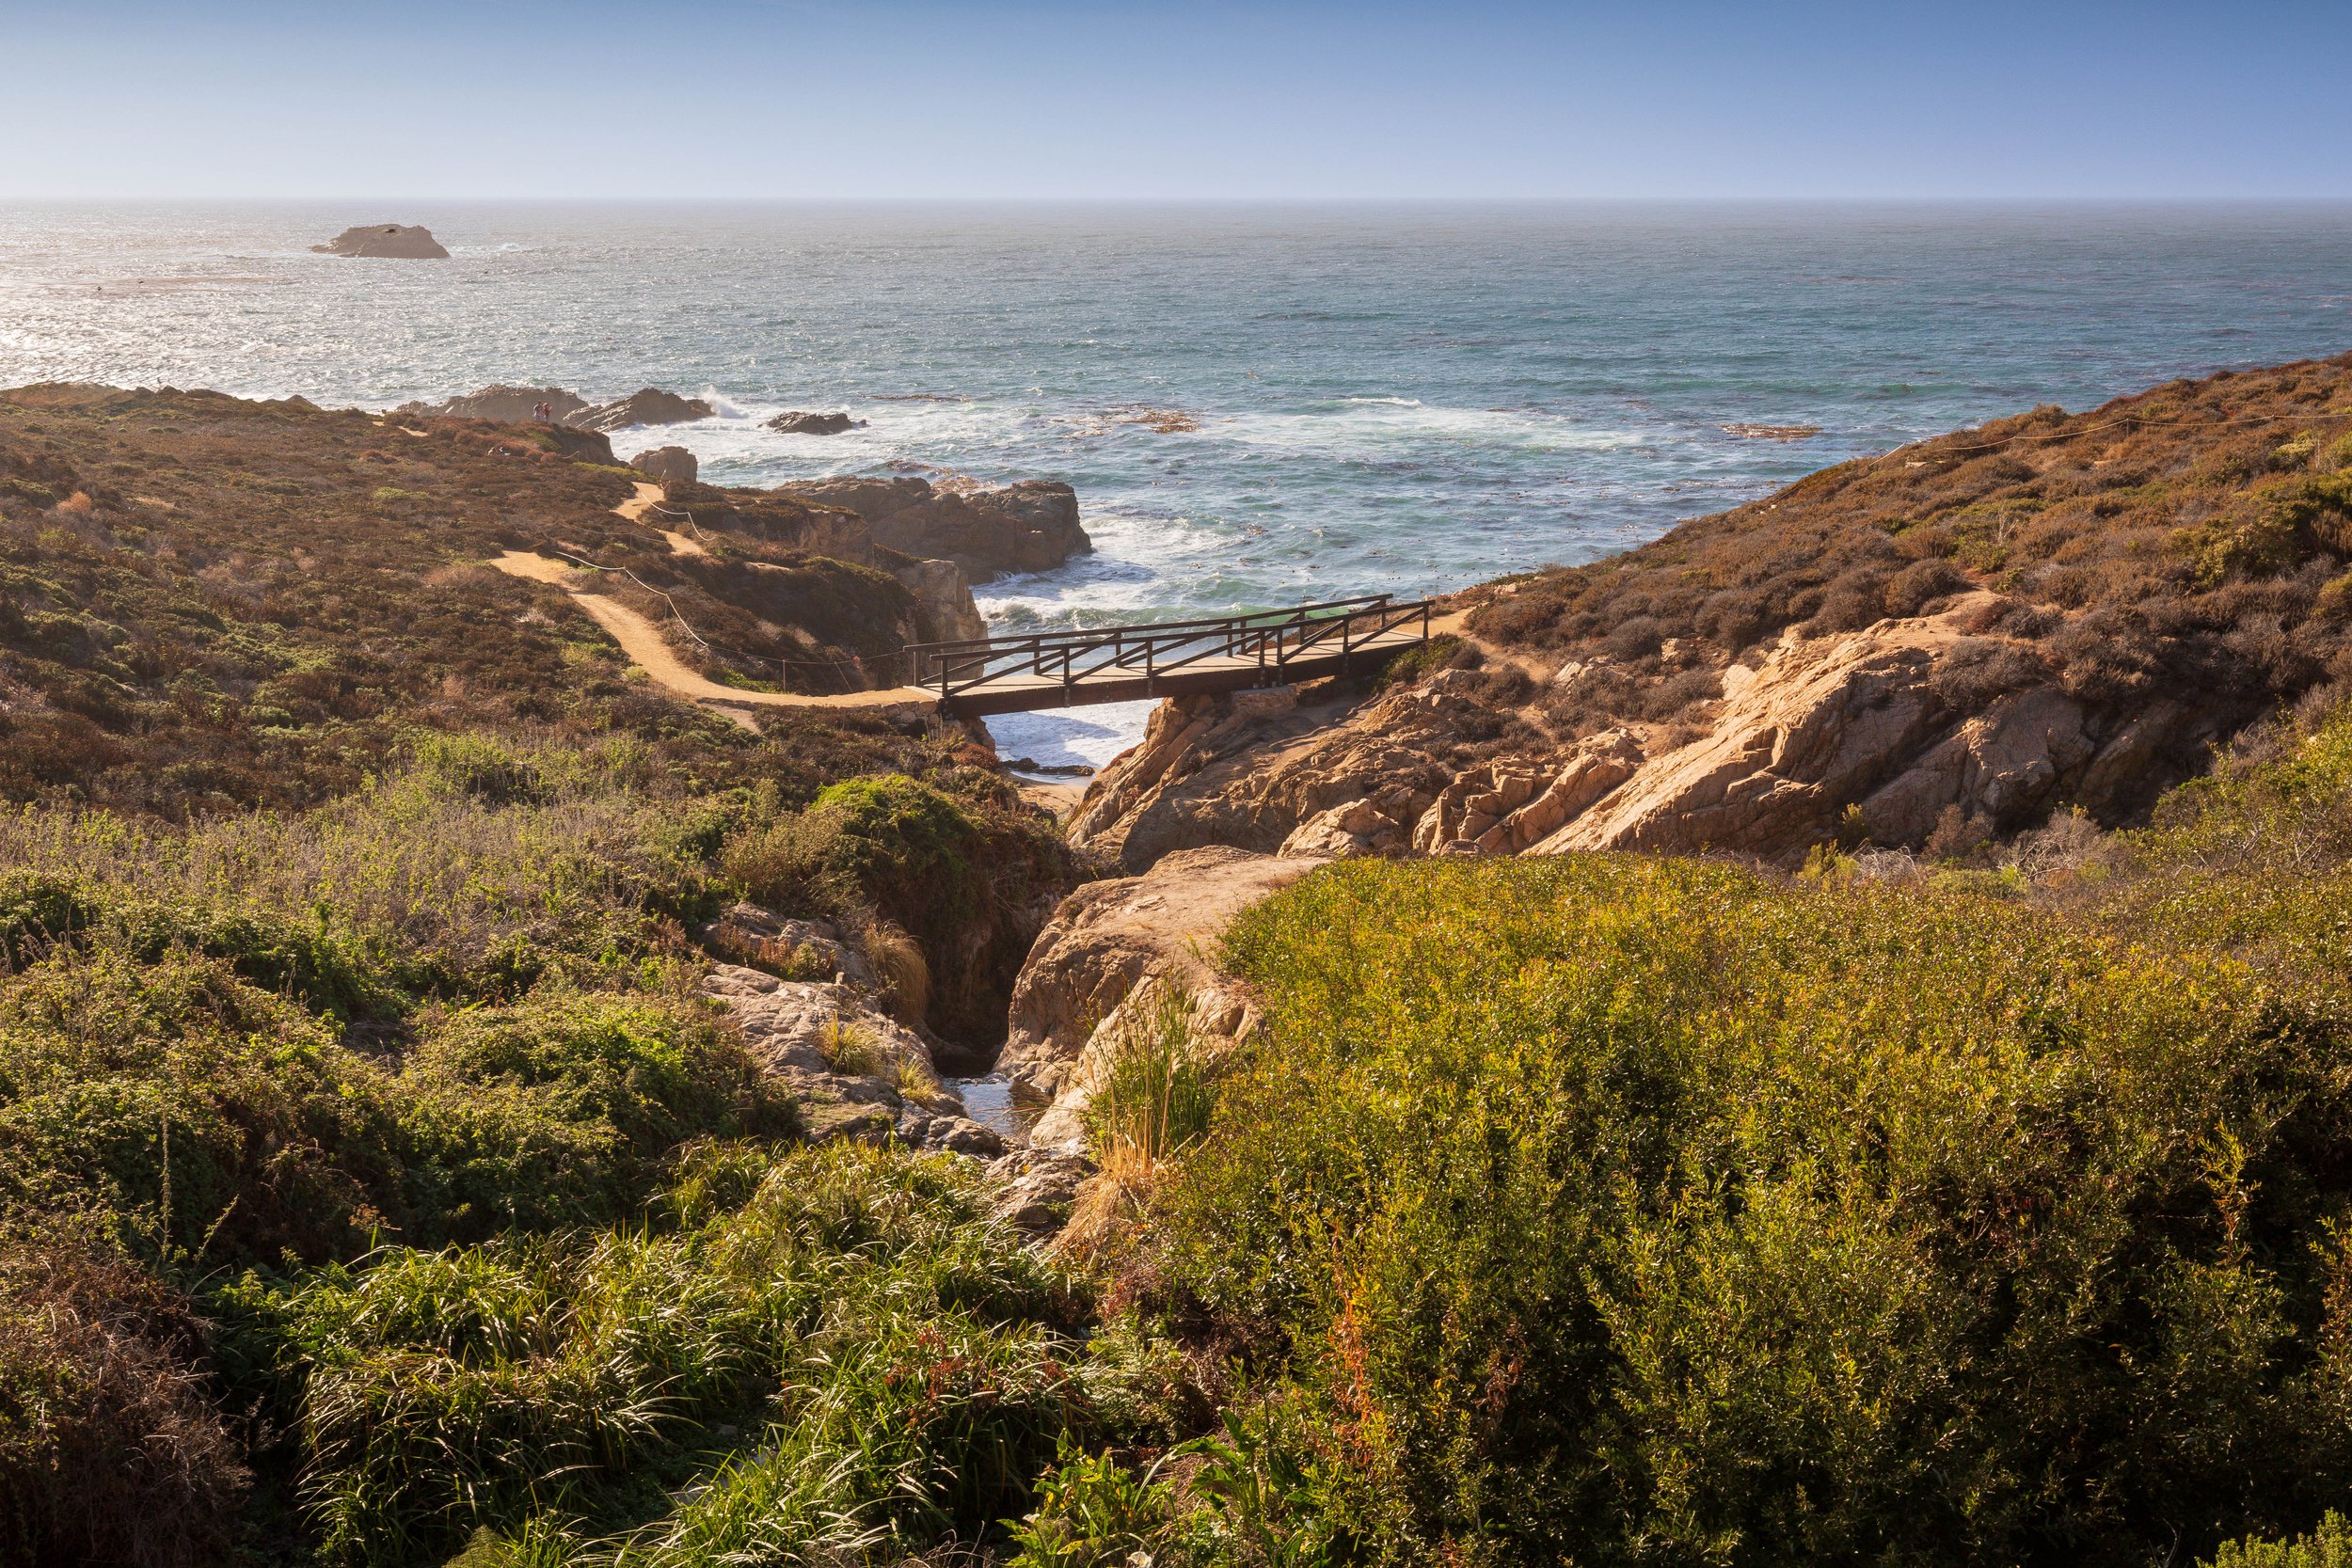
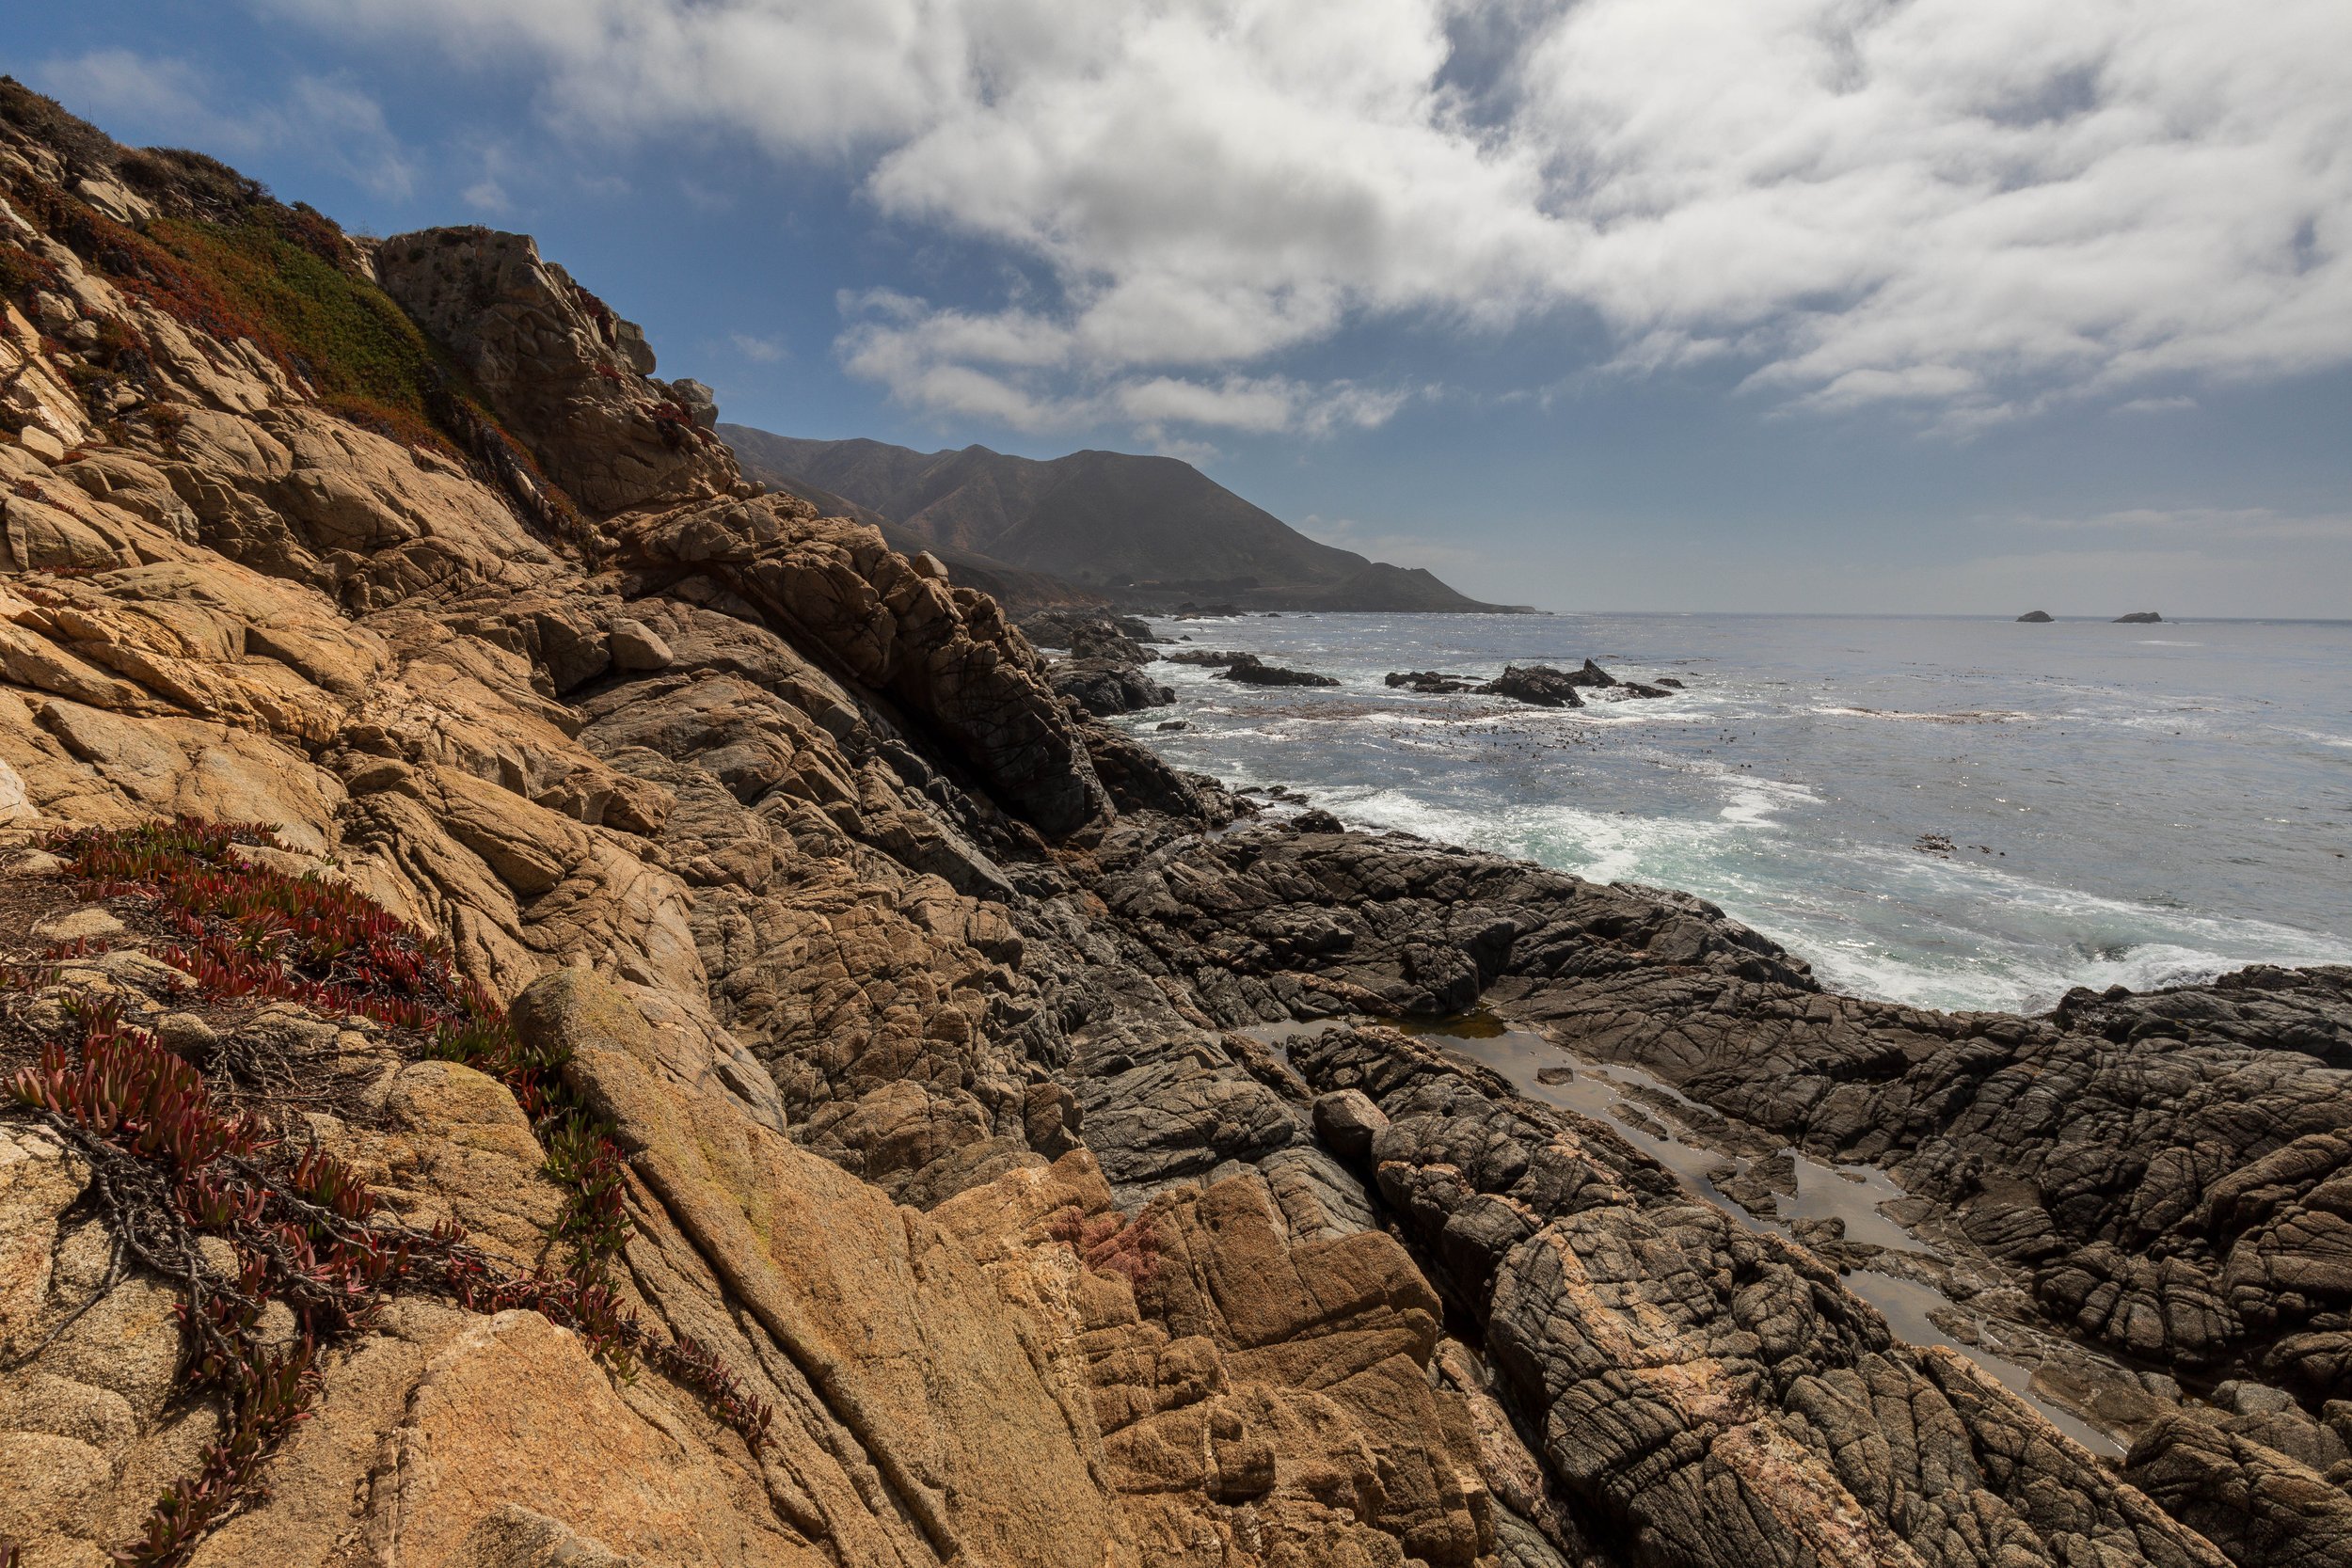
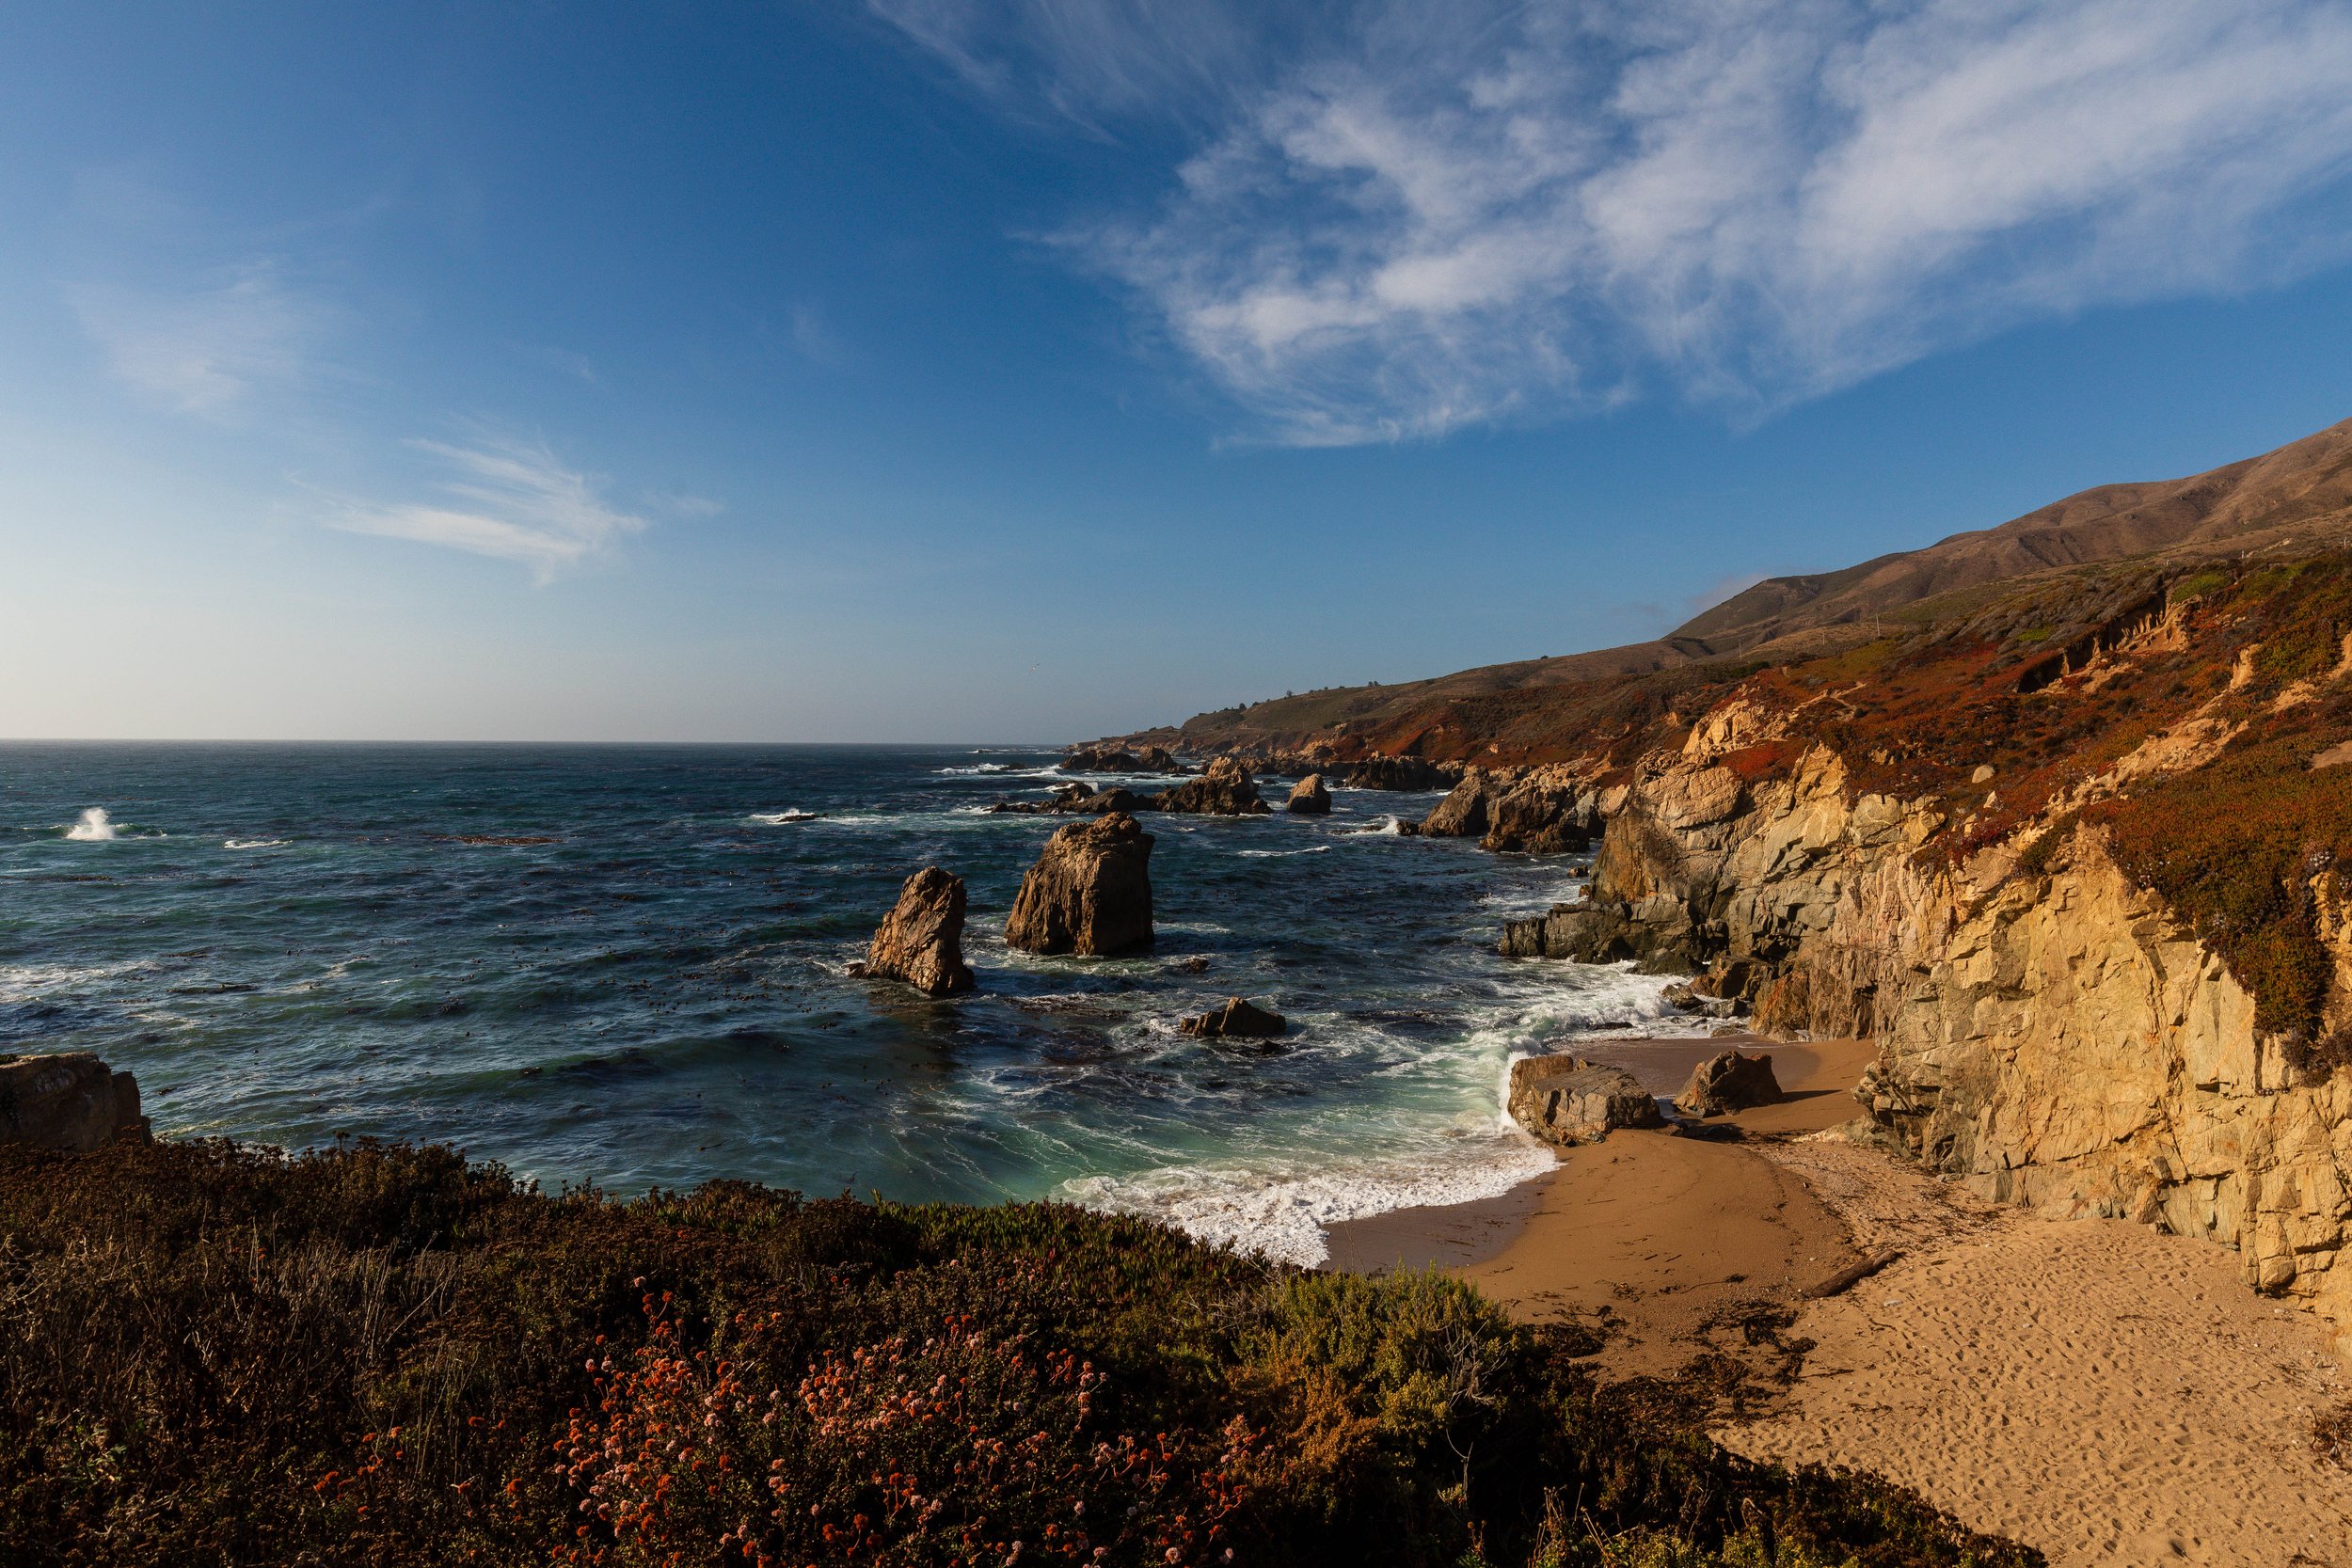
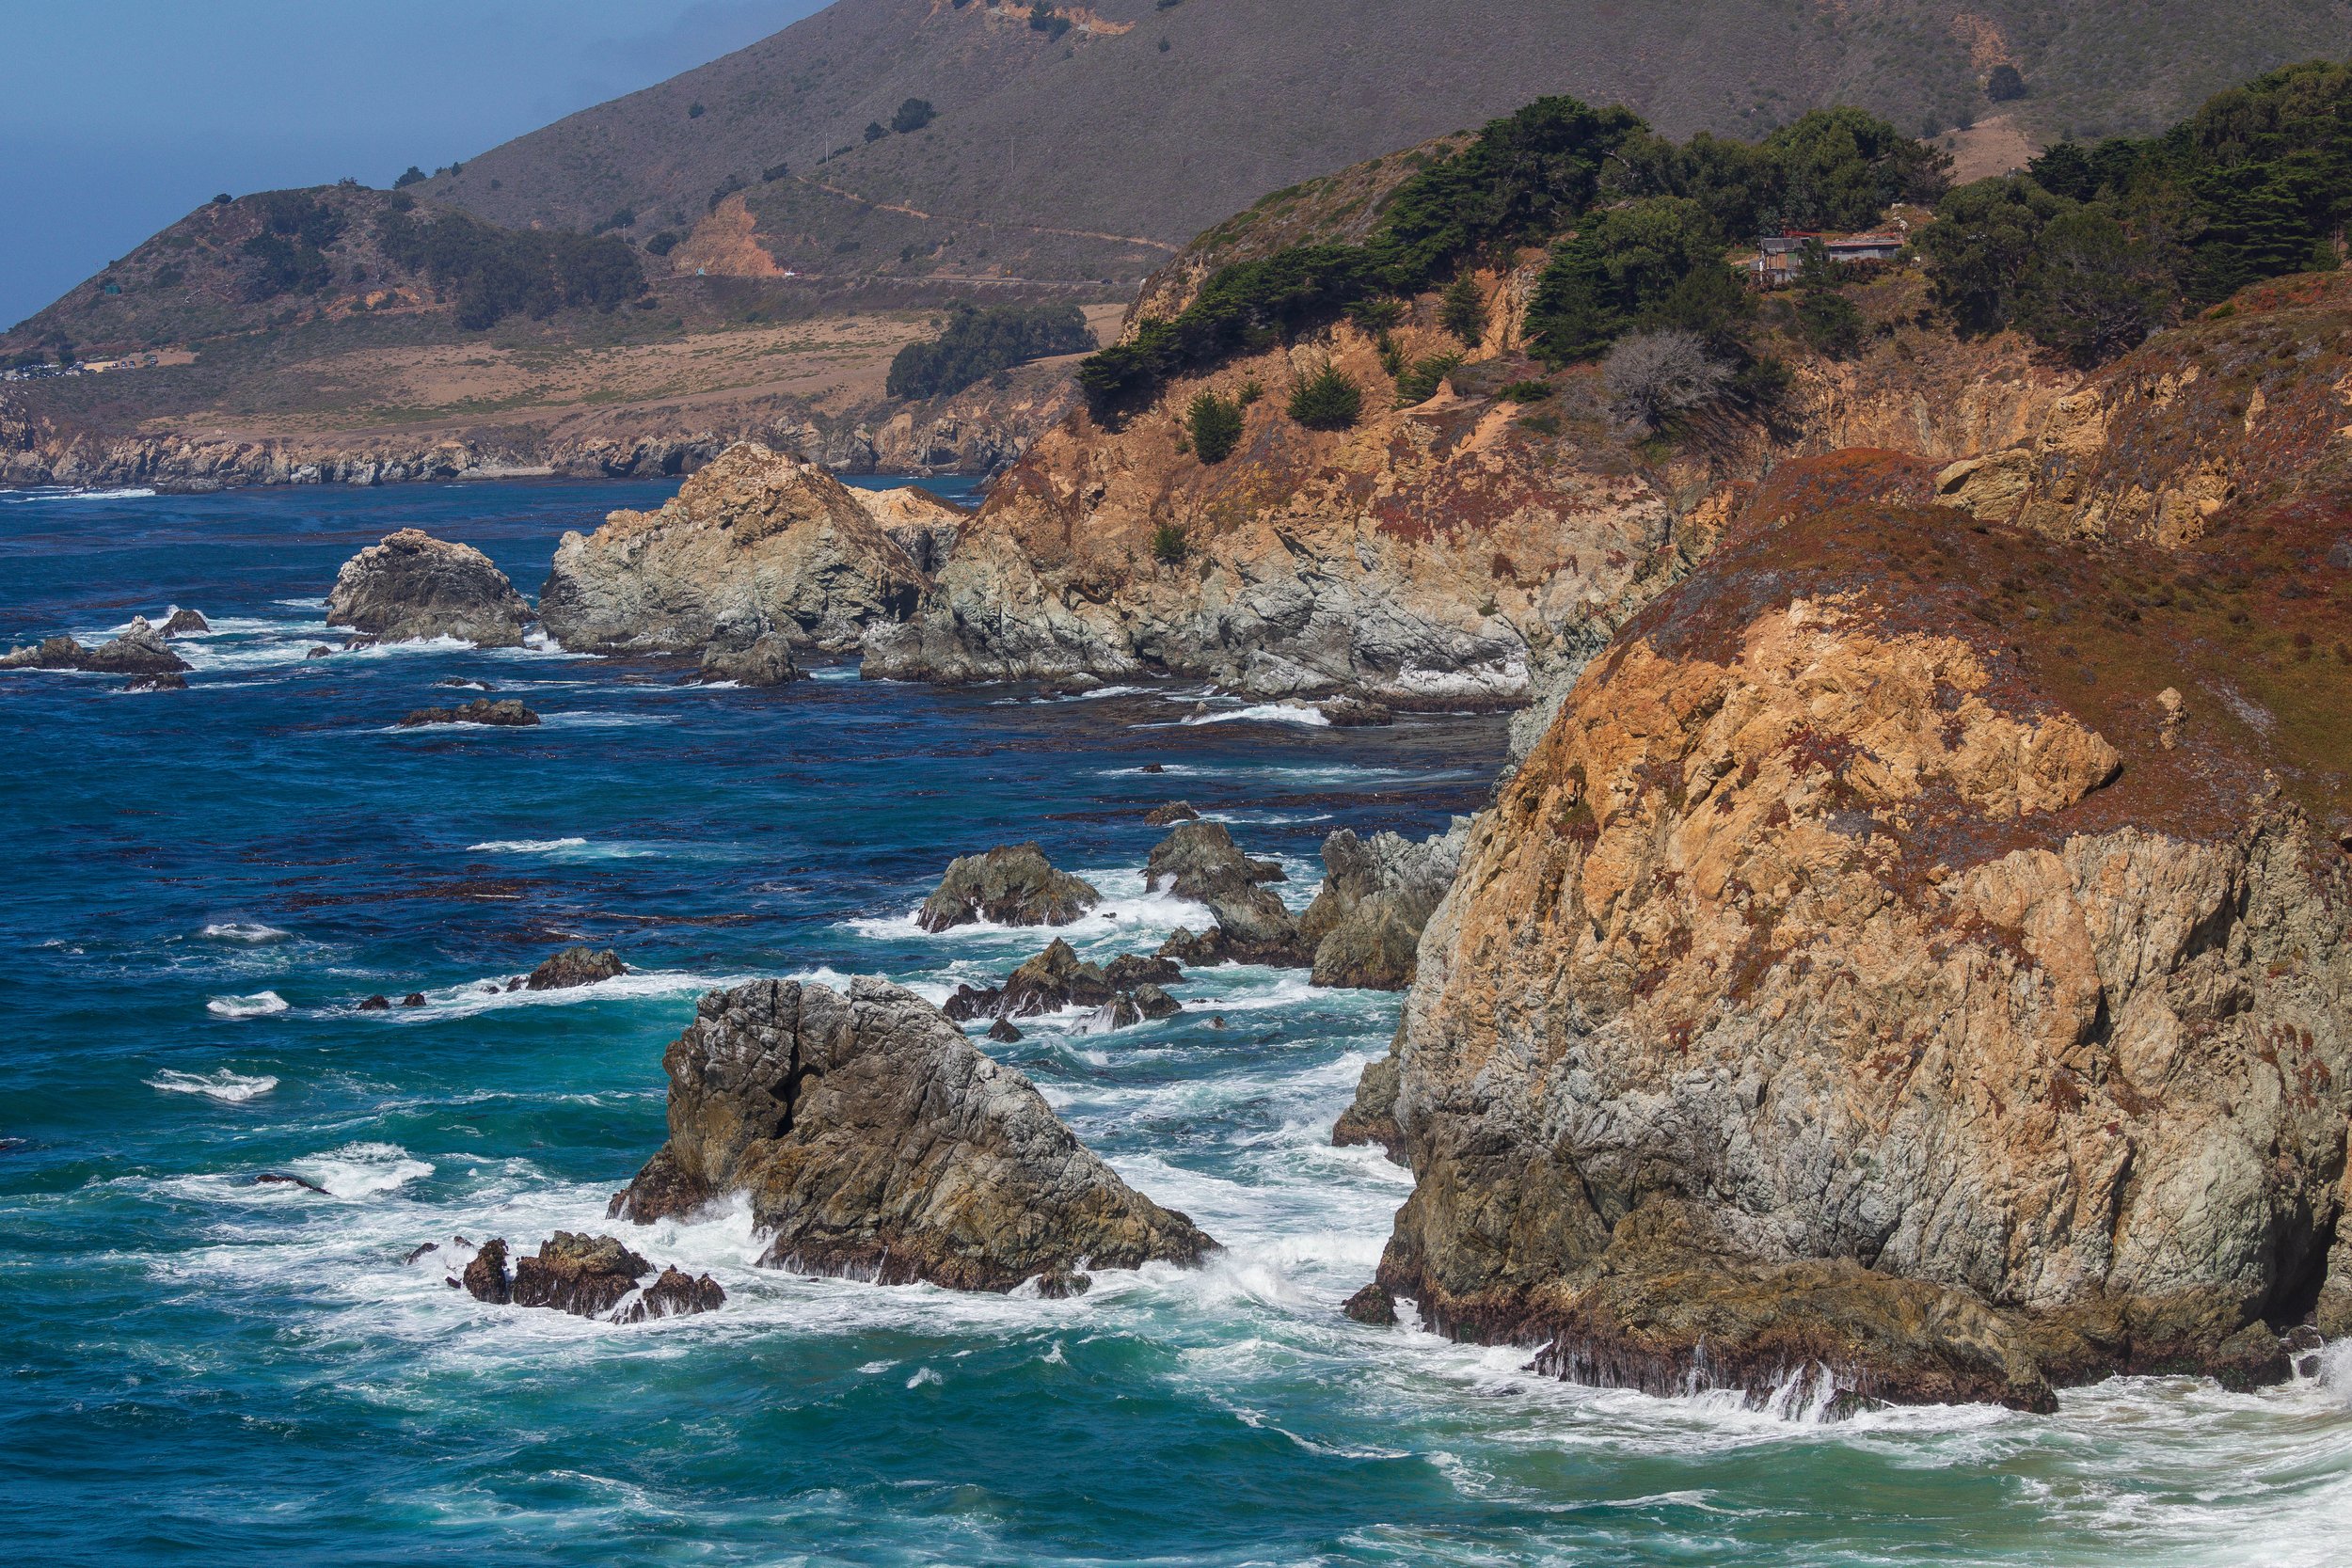
Garrapata State Park
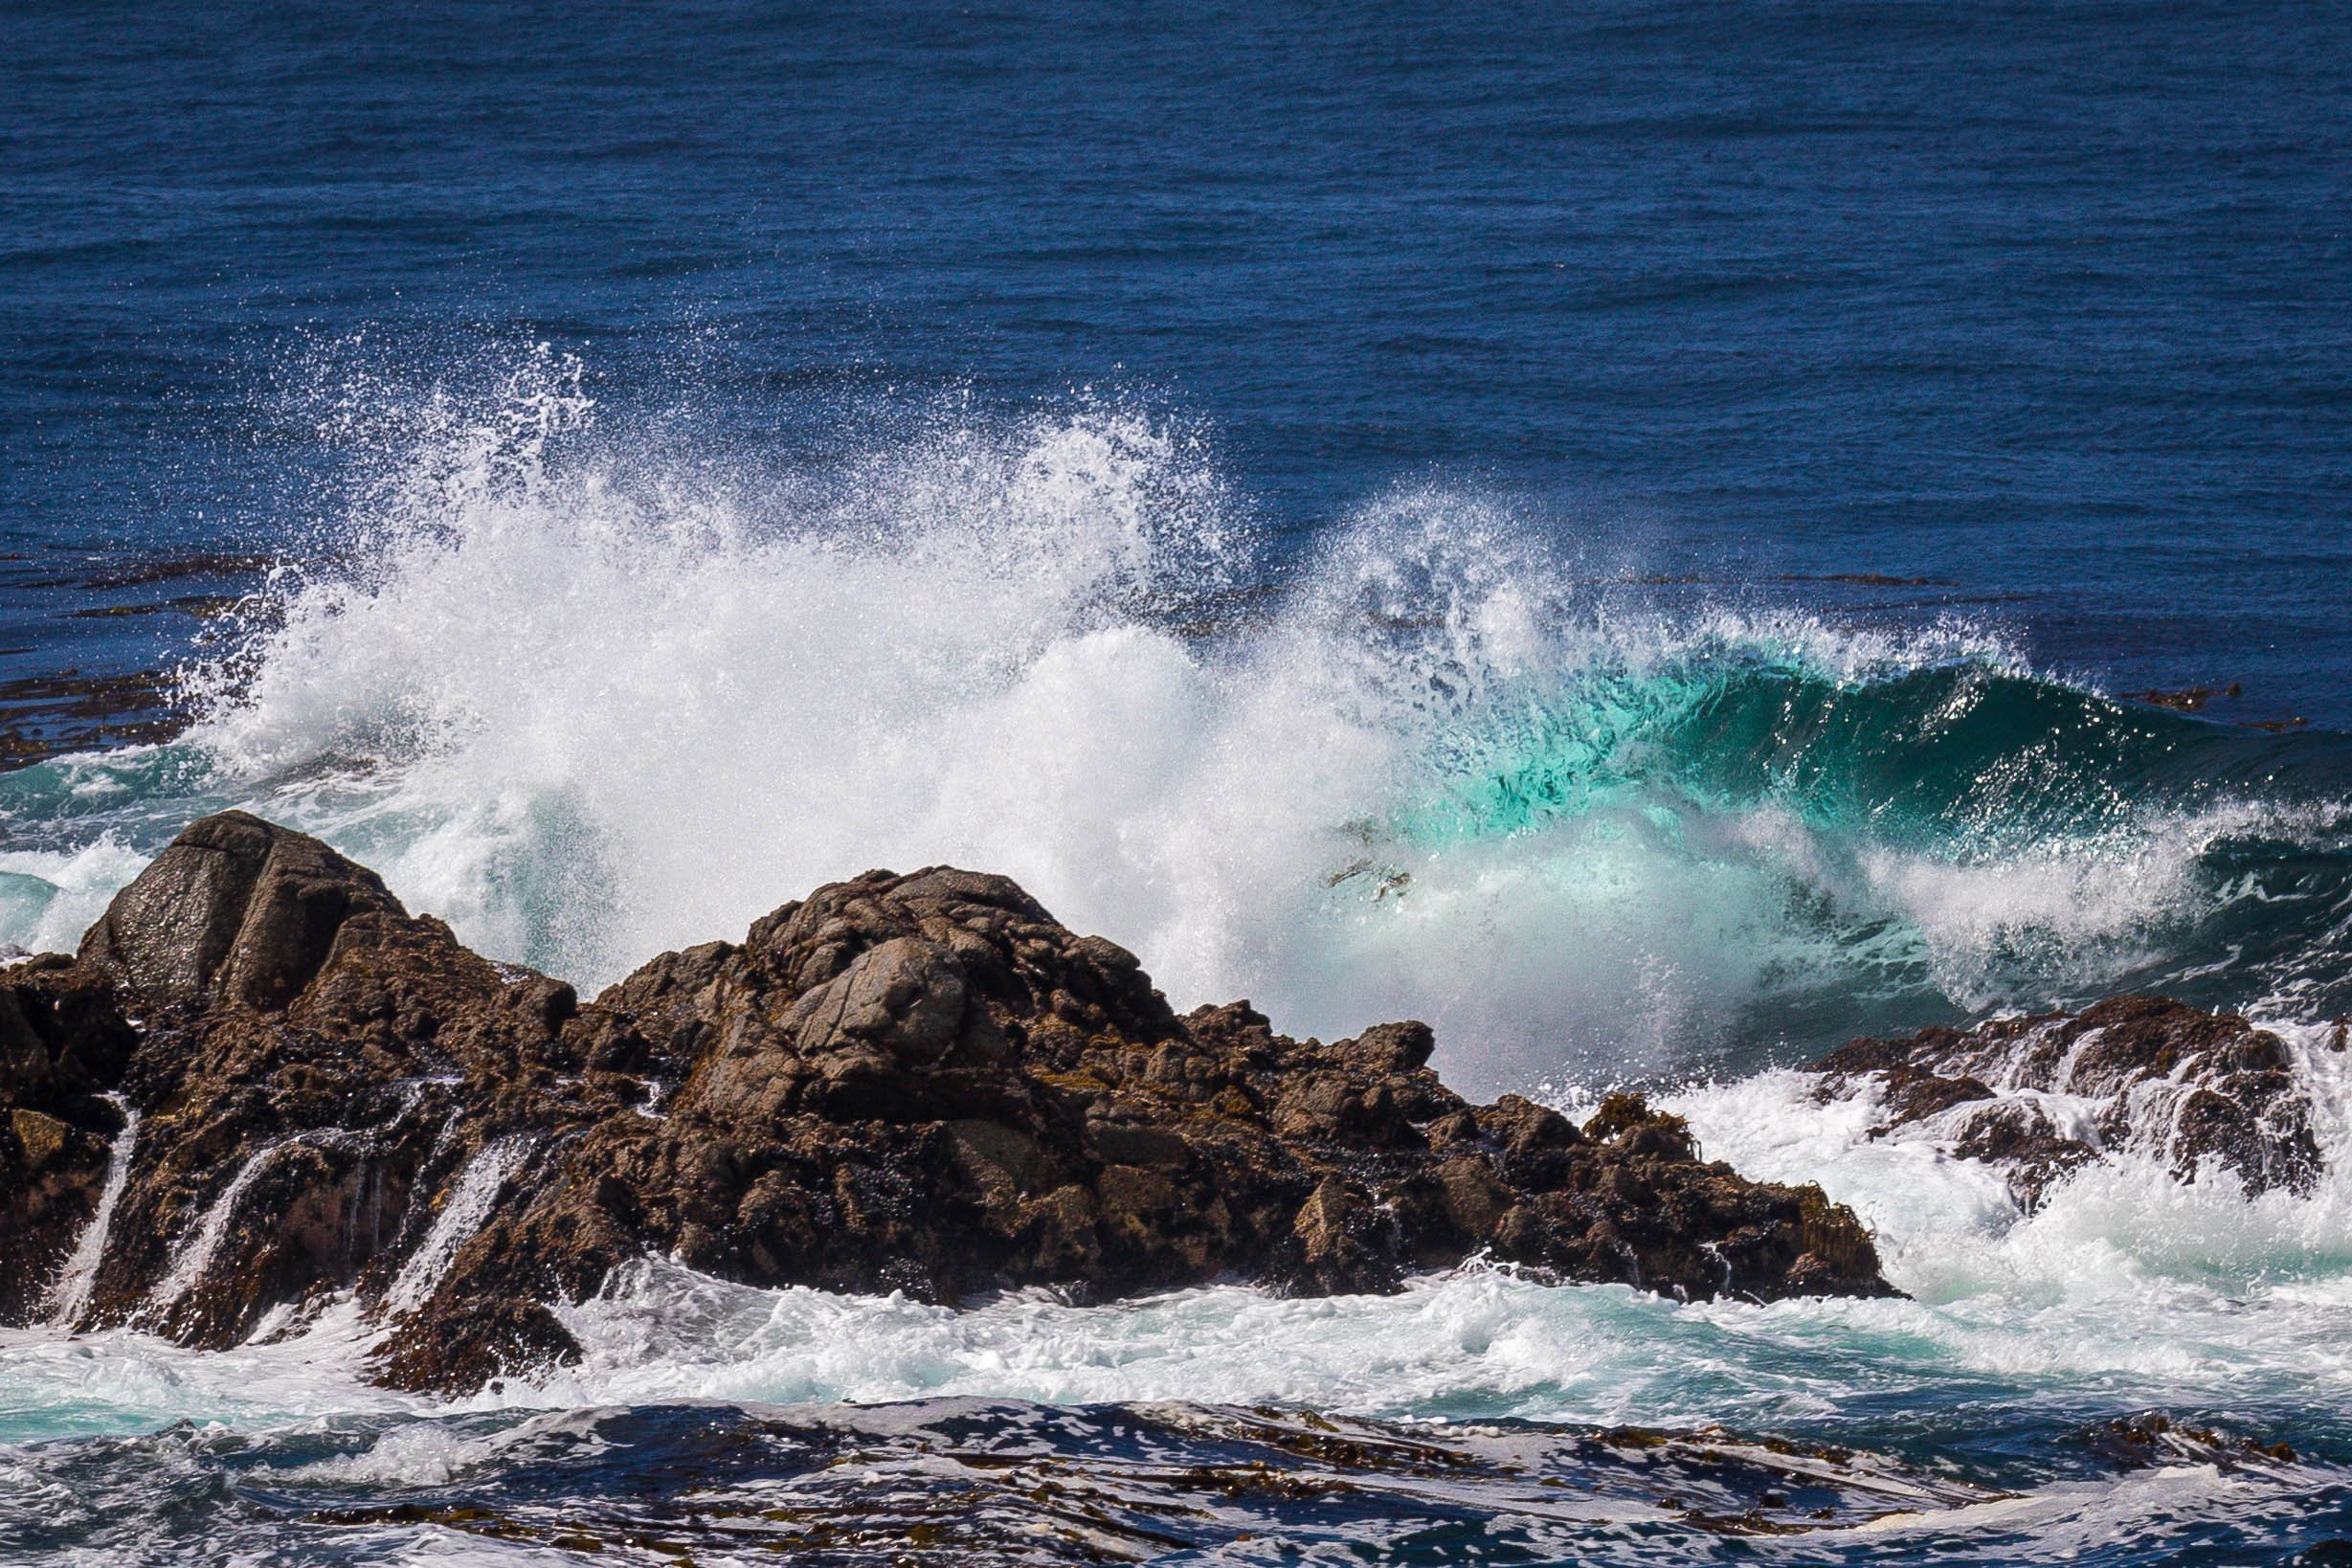
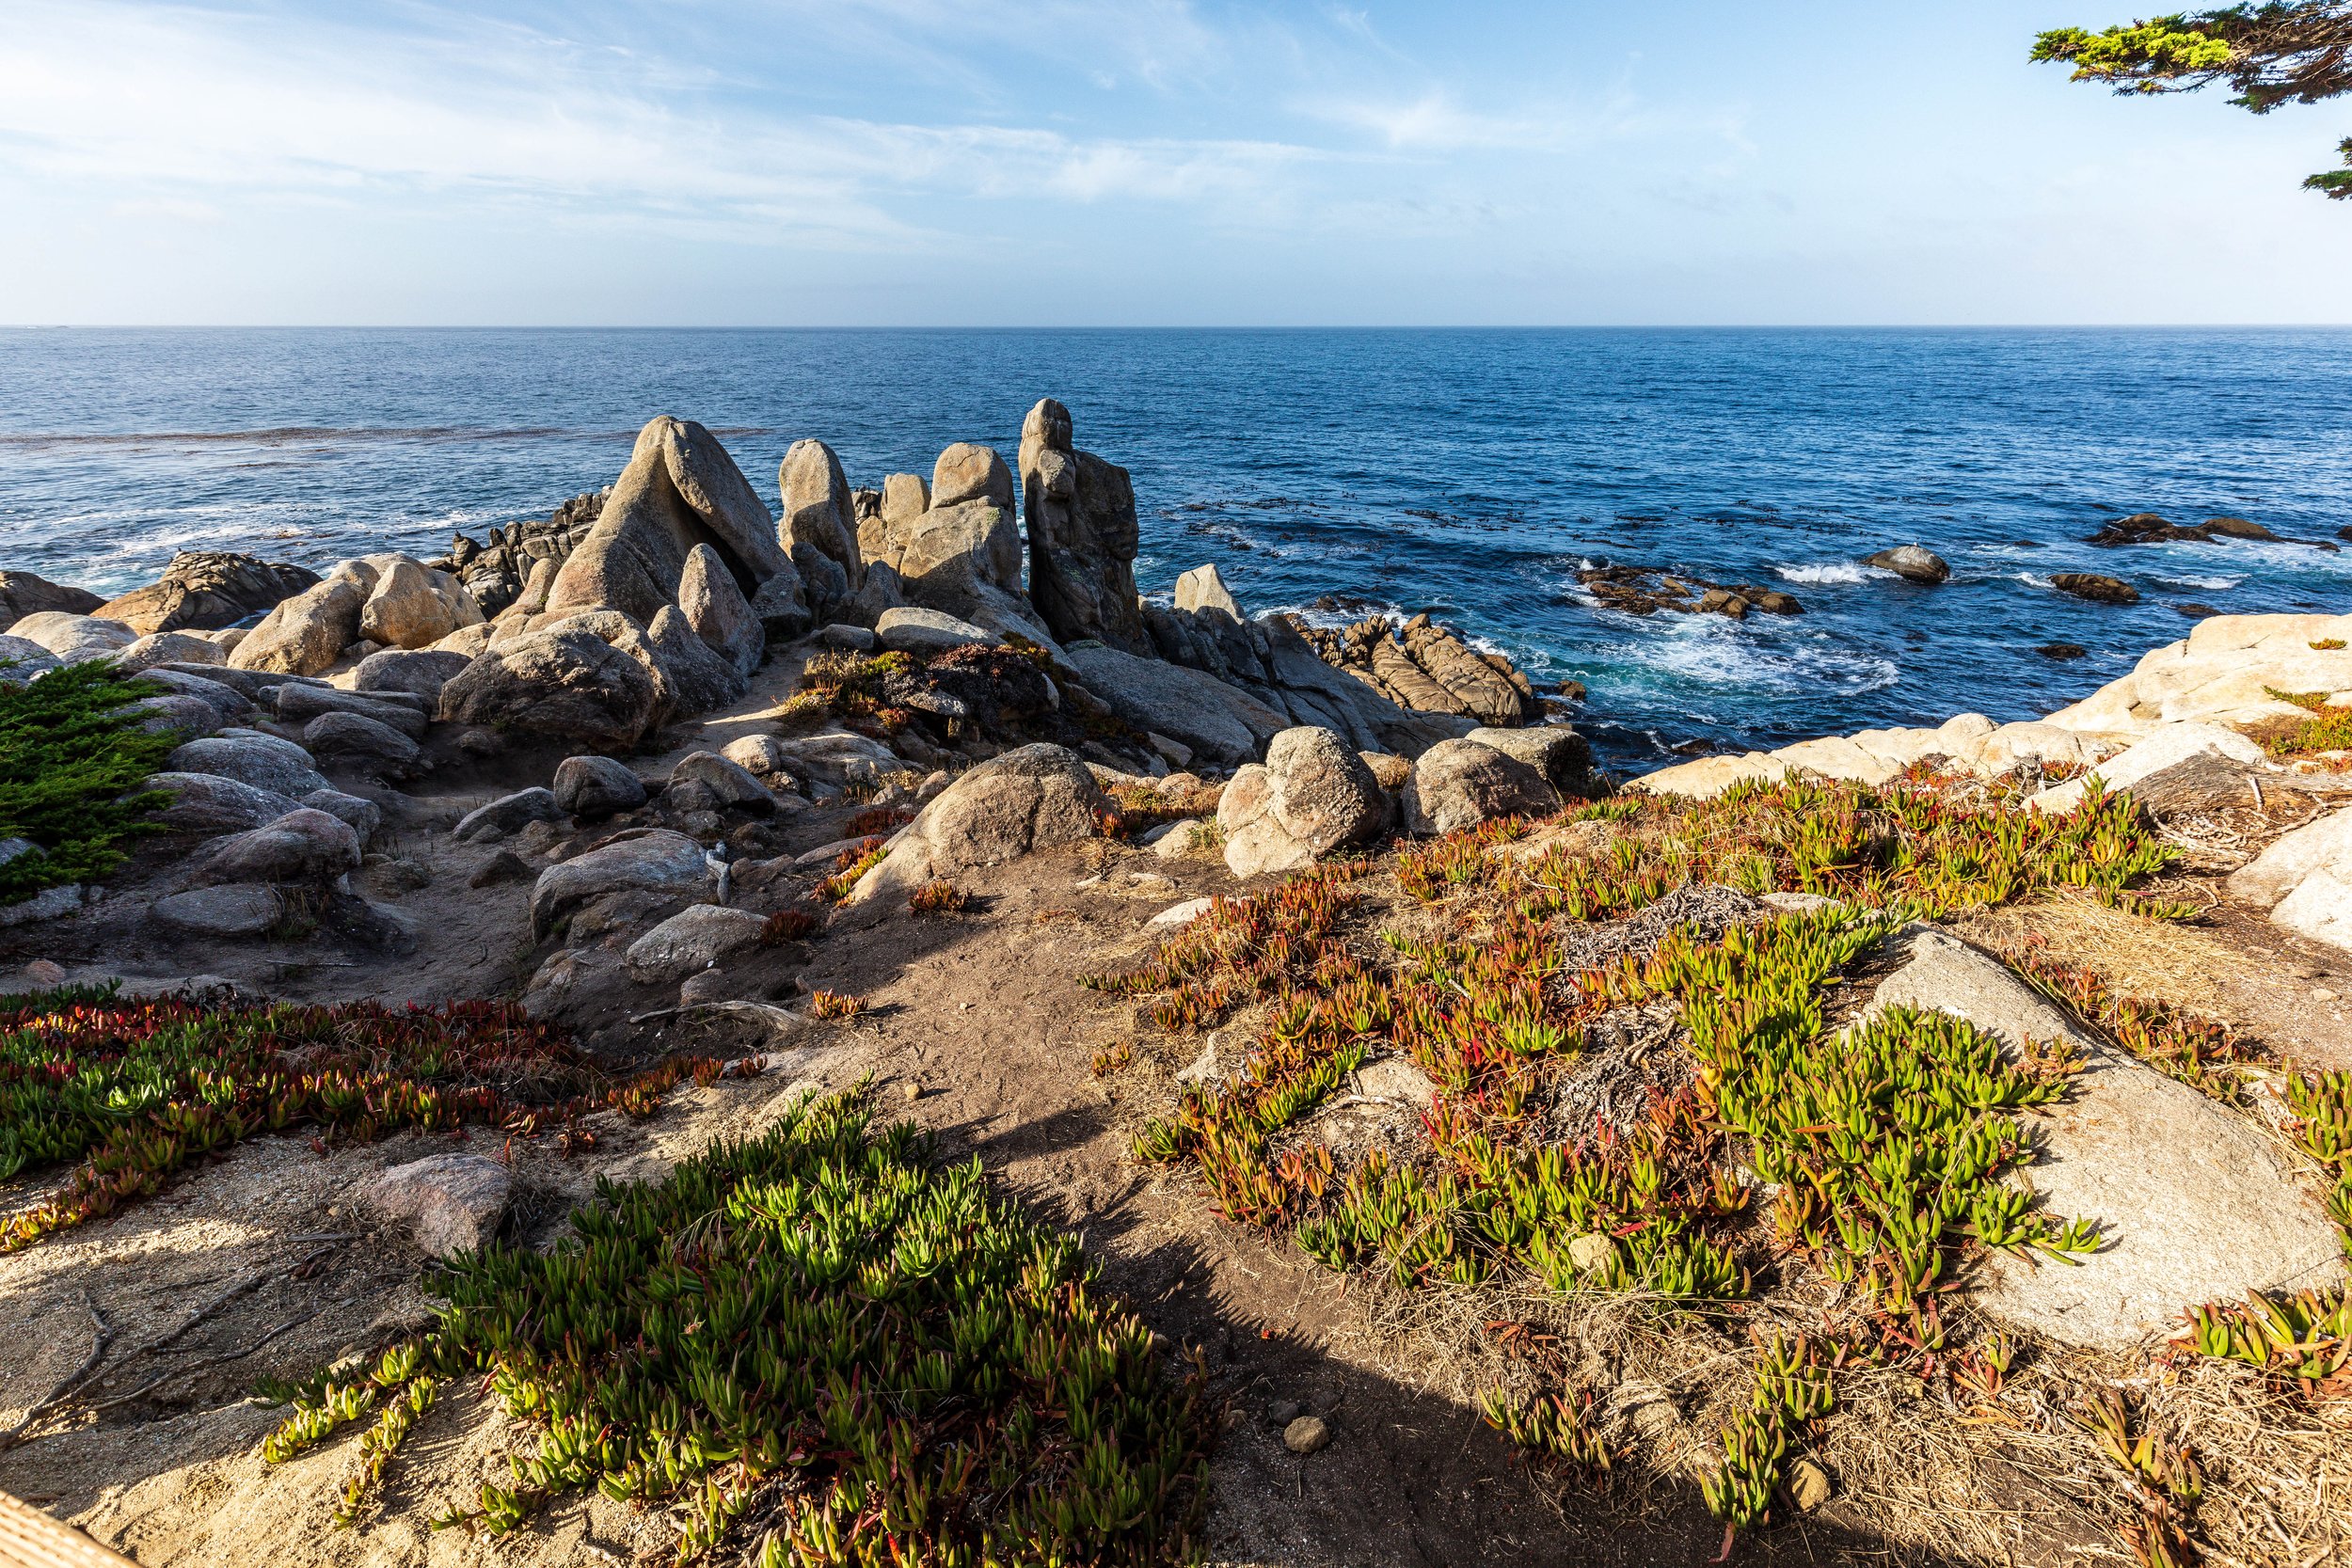
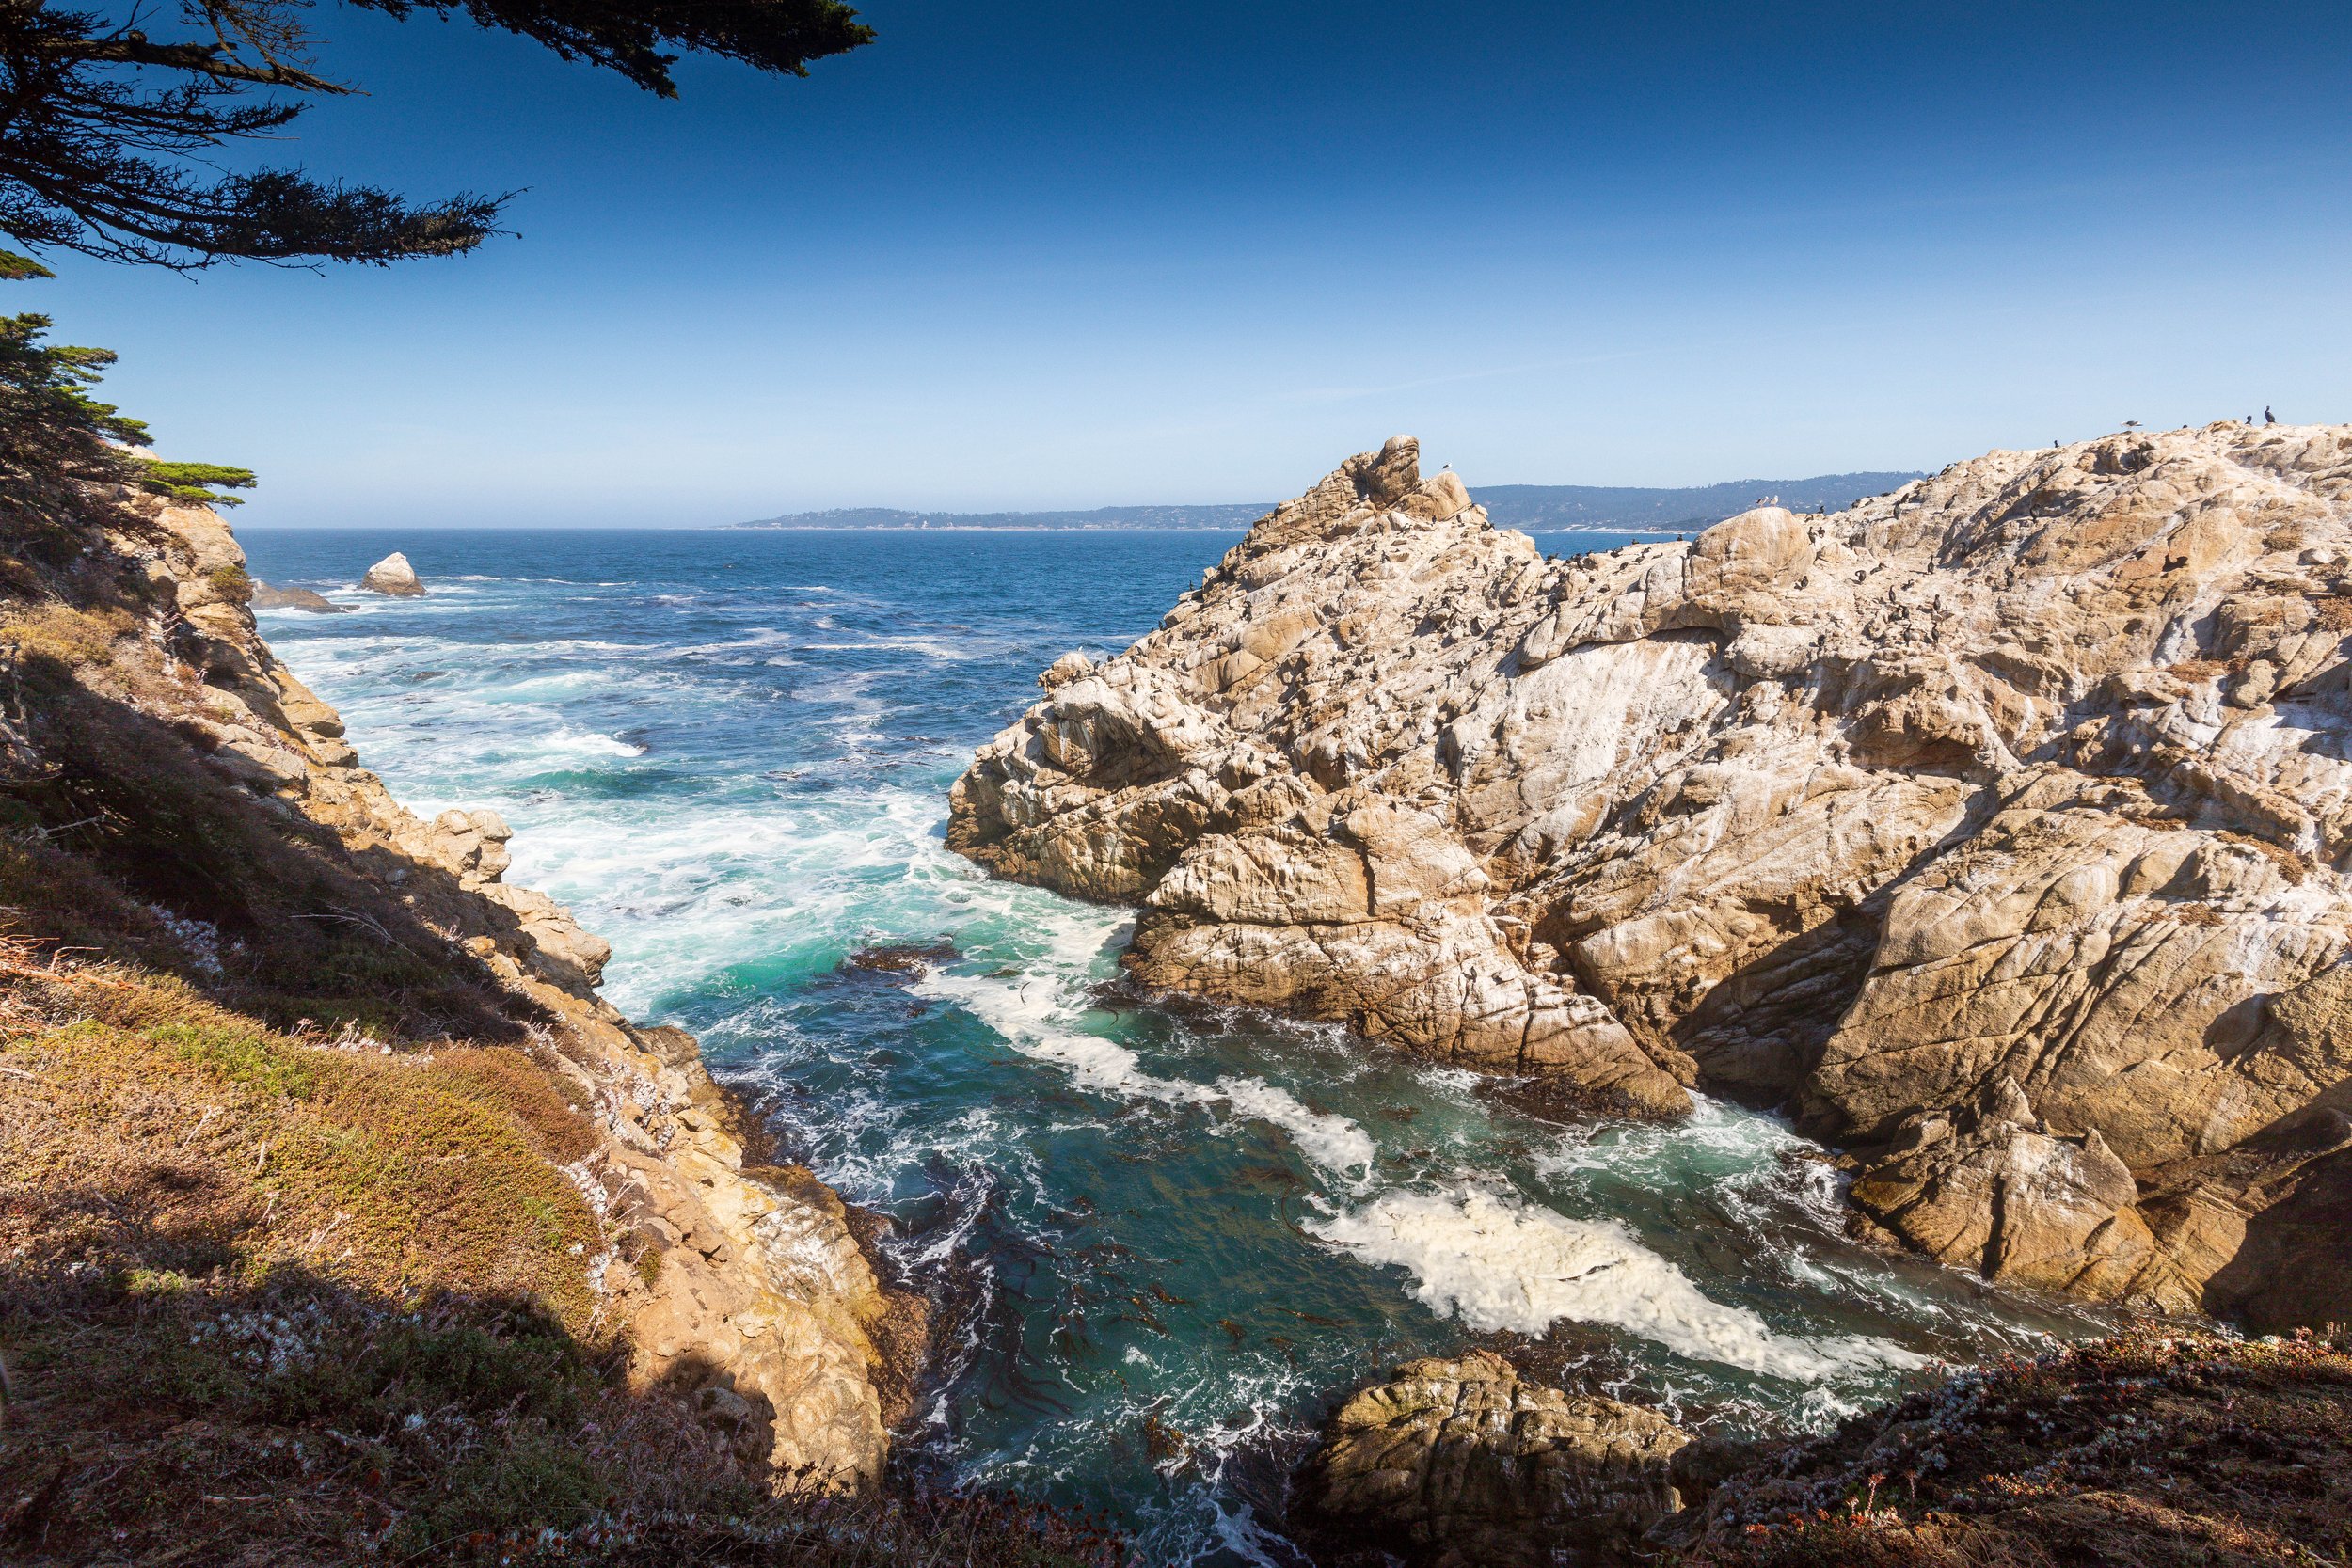
Garrapata is Big Sur's least-marked secret. There are no large signs on Highway 1, no visitor center, and no obvious entrance. What there is, if you know where to look, is a series of unmarked pullouts along the highway that lead to trails through wildflowers and low coastal scrub with unobstructed views of the Pacific. The Soberanes Point area offers some of the best combination of tide pool access, wave-battered headlands, and sweeping coastal views in the entire region.
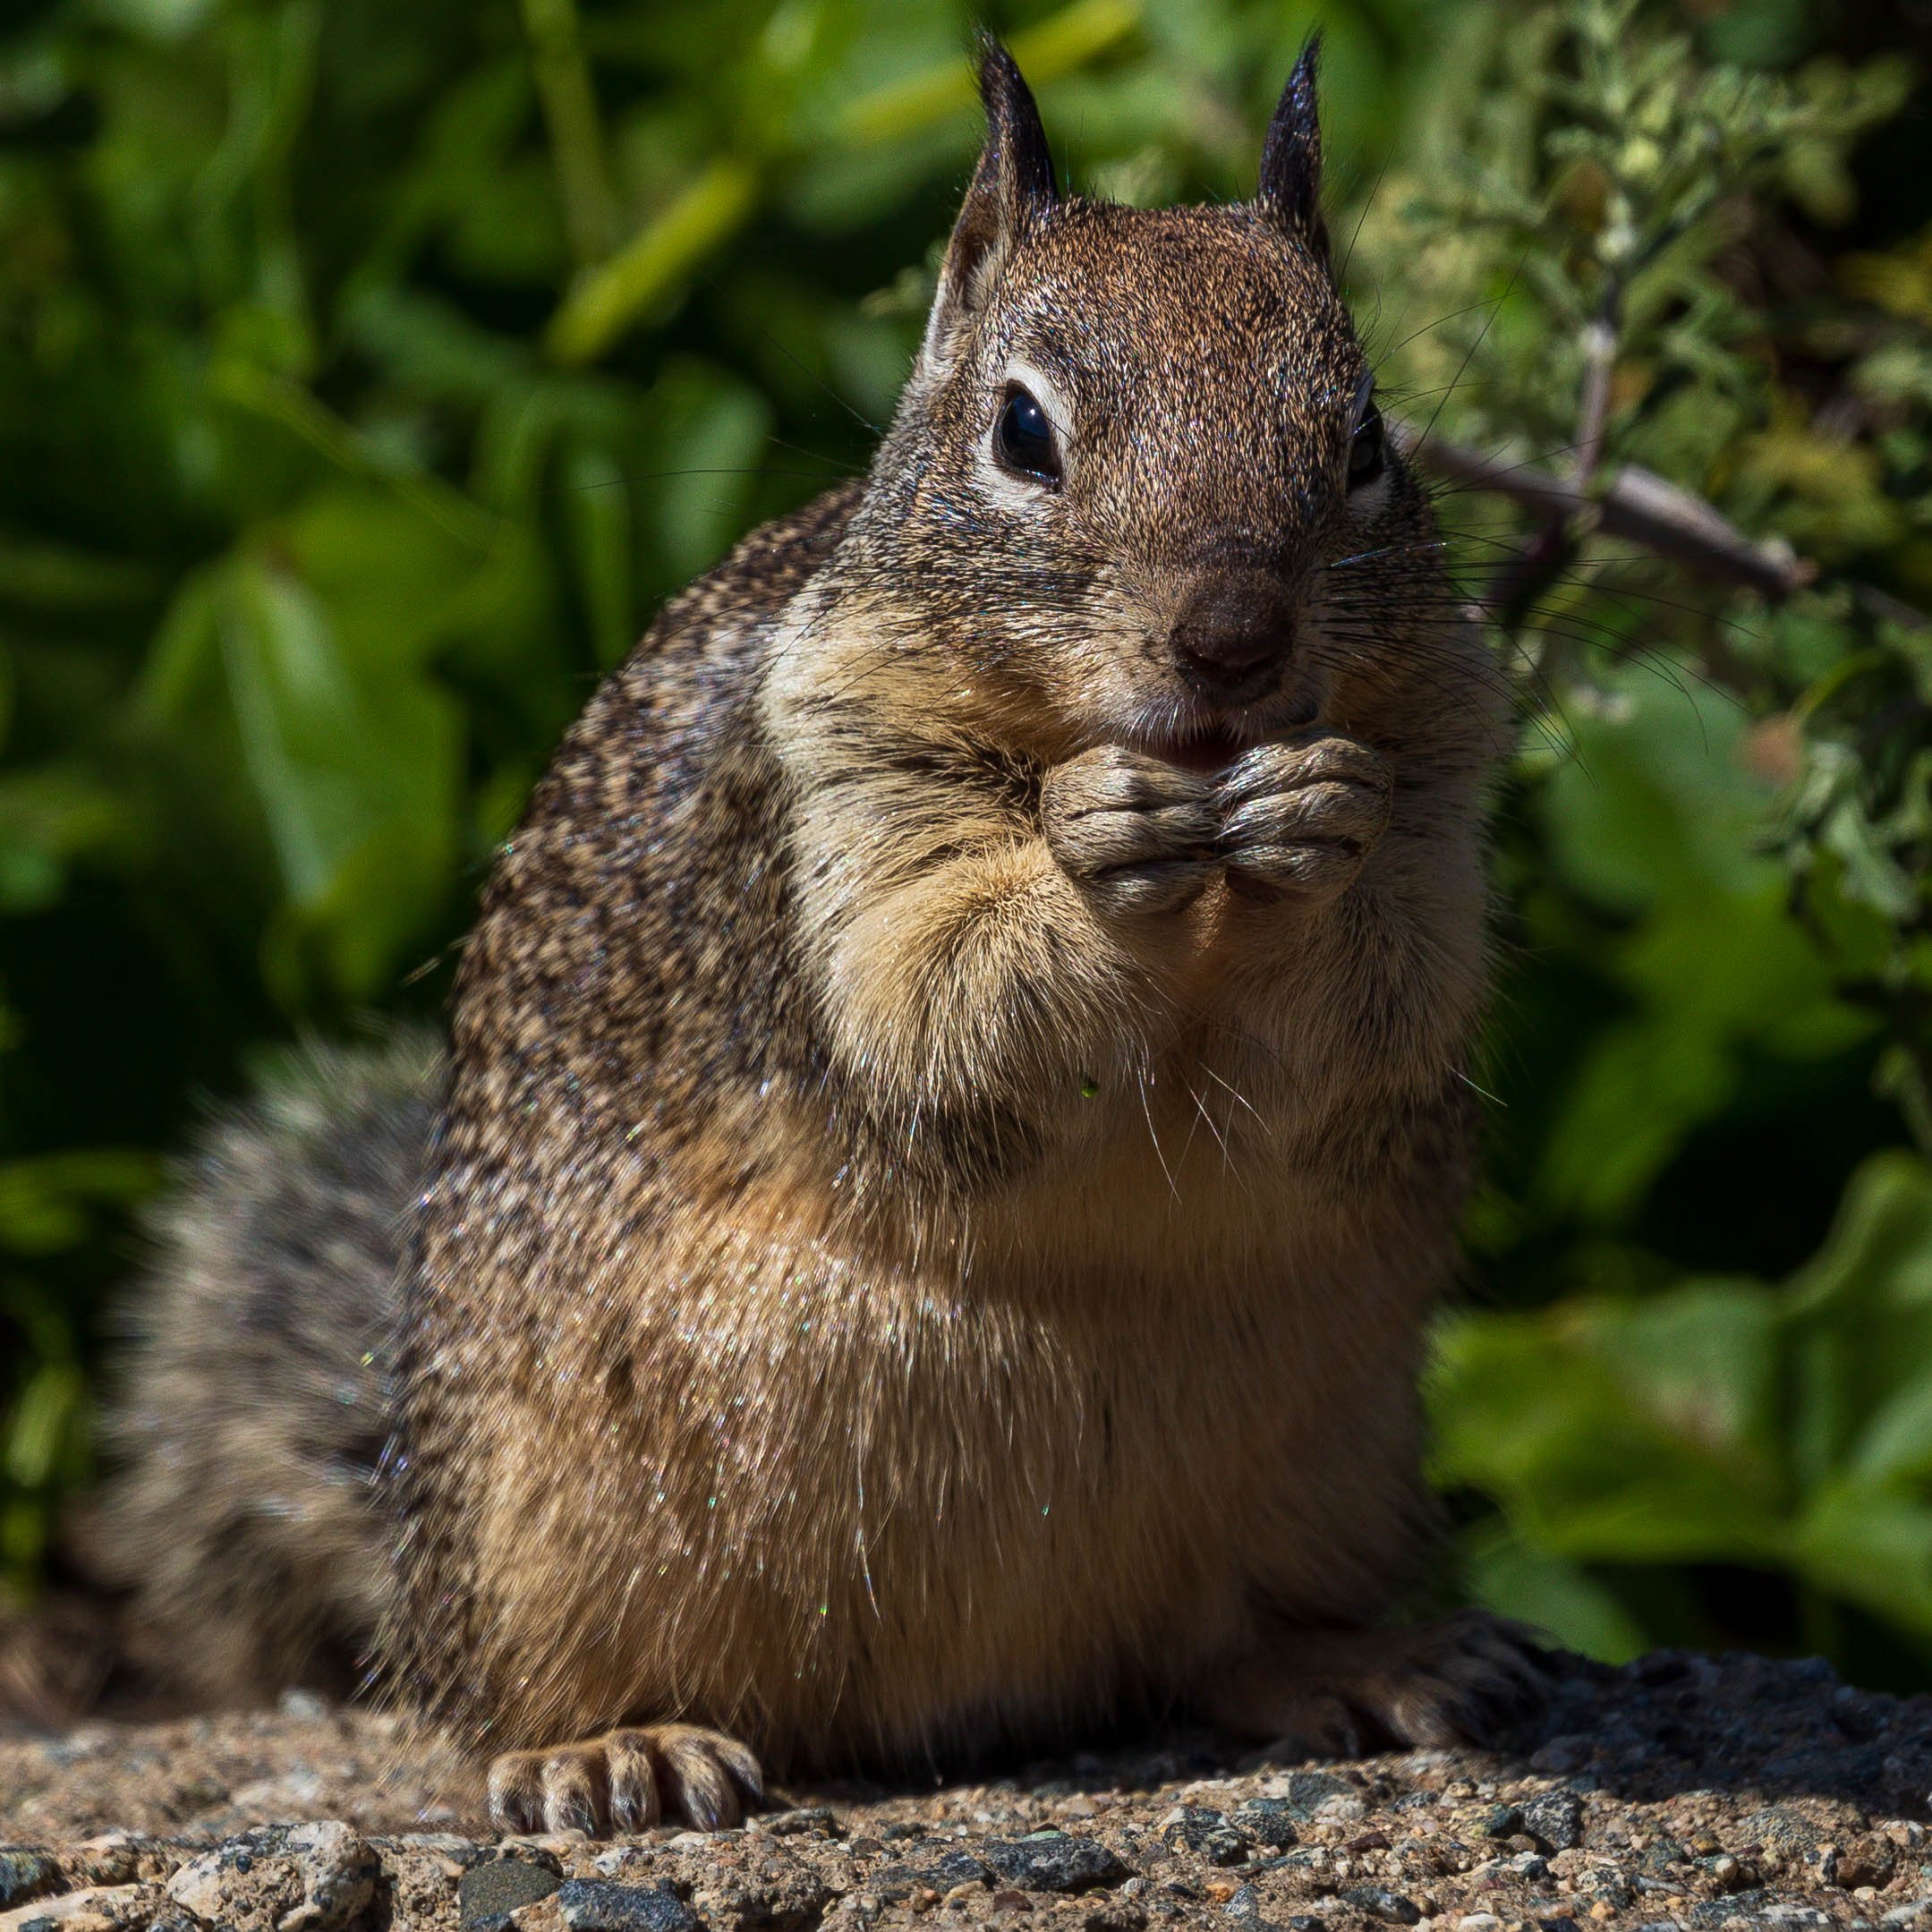
The lack of infrastructure keeps the crowds thin and the landscape feeling genuinely wild. You can walk to the rocky shore and find sea otters, harbor seals, and brown pelicans working the kelp beds just offshore.
📷 Pro Tip: Park at one of the roadside pullouts between the highway gate markers 13 and 19 on the north end of Garrapata. Walk west toward the ocean through the low coastal scrub. At the headlands, a 70 to 200mm lens lets you work the wildlife and wave action from a safe distance. For wide coastal views, your 15 to 35mm captures the full sweep of the cliffs. Low tide reveals the tide pools, which are excellent subjects in their own right; shoot close with a 24 to 70mm at f/11 for full depth of field through the anemones and barnacles. Wildflowers bloom in March through May along the trail approaches, which adds a strong foreground element to coastal compositions.
Best time: Low tide for tide pools; spring for wildflowers; dawn for soft light and fewer visitors. Access: Free. Unmarked pullouts on Highway 1 between Carmel and Big Sur.

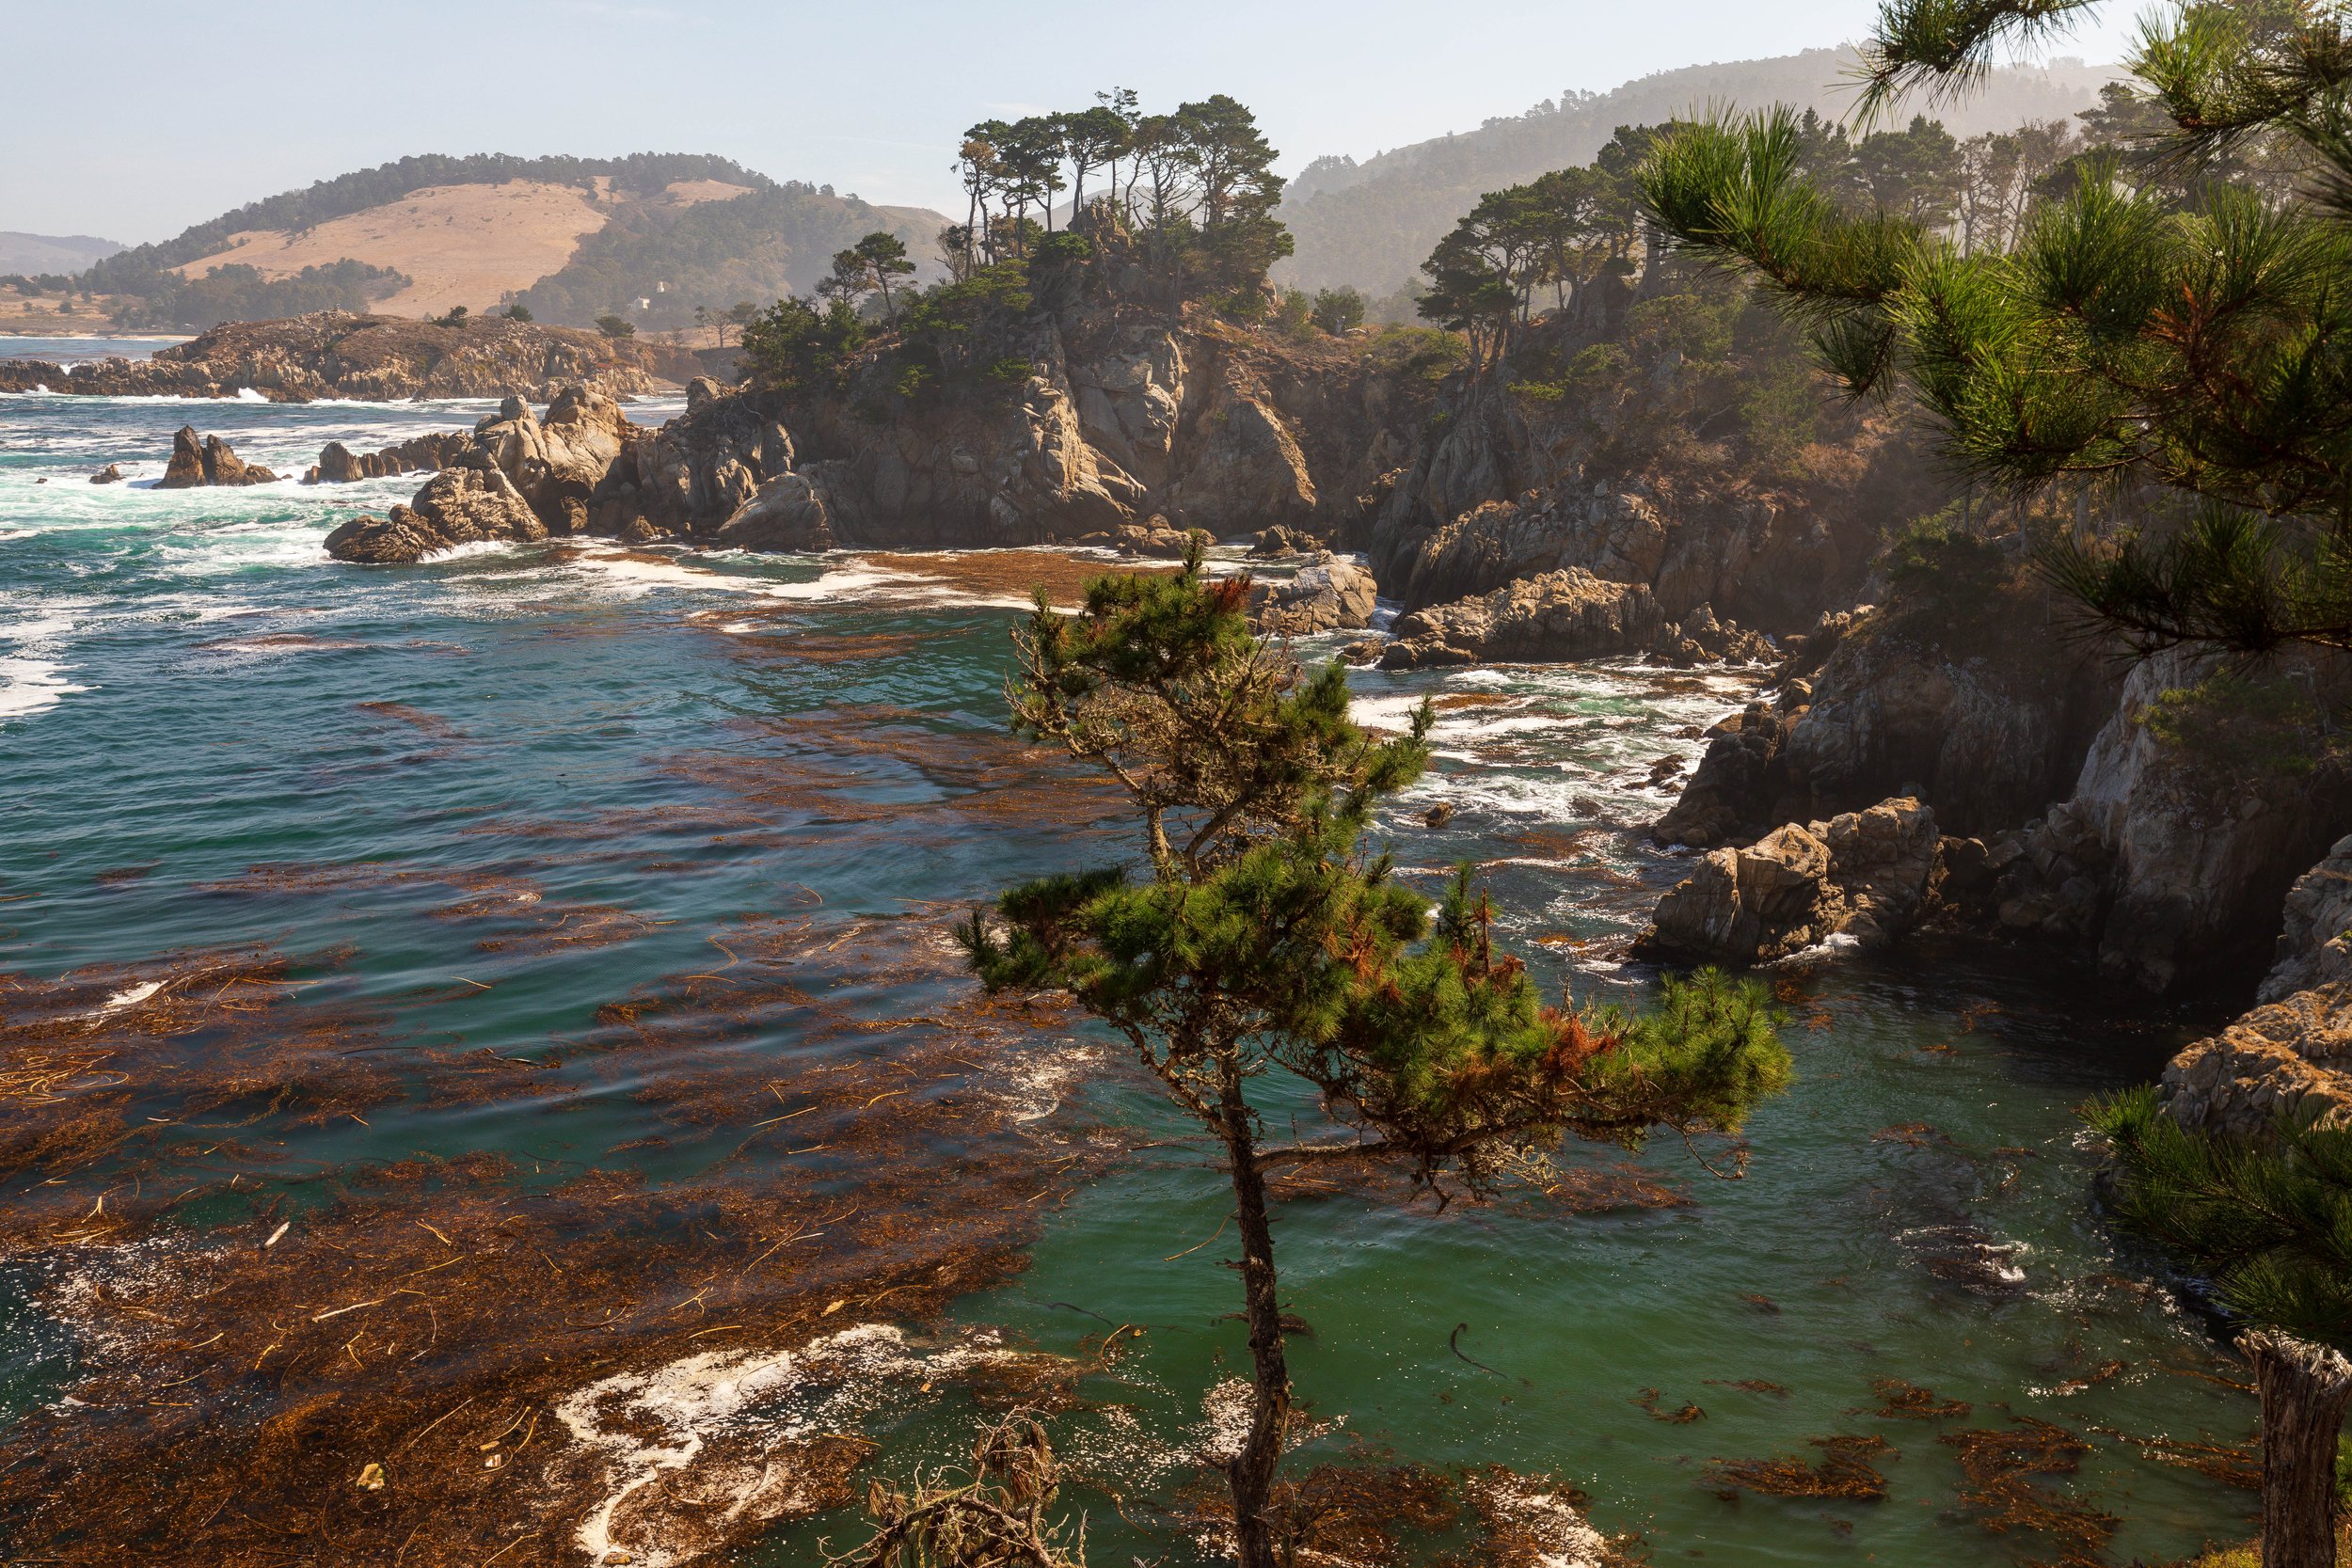
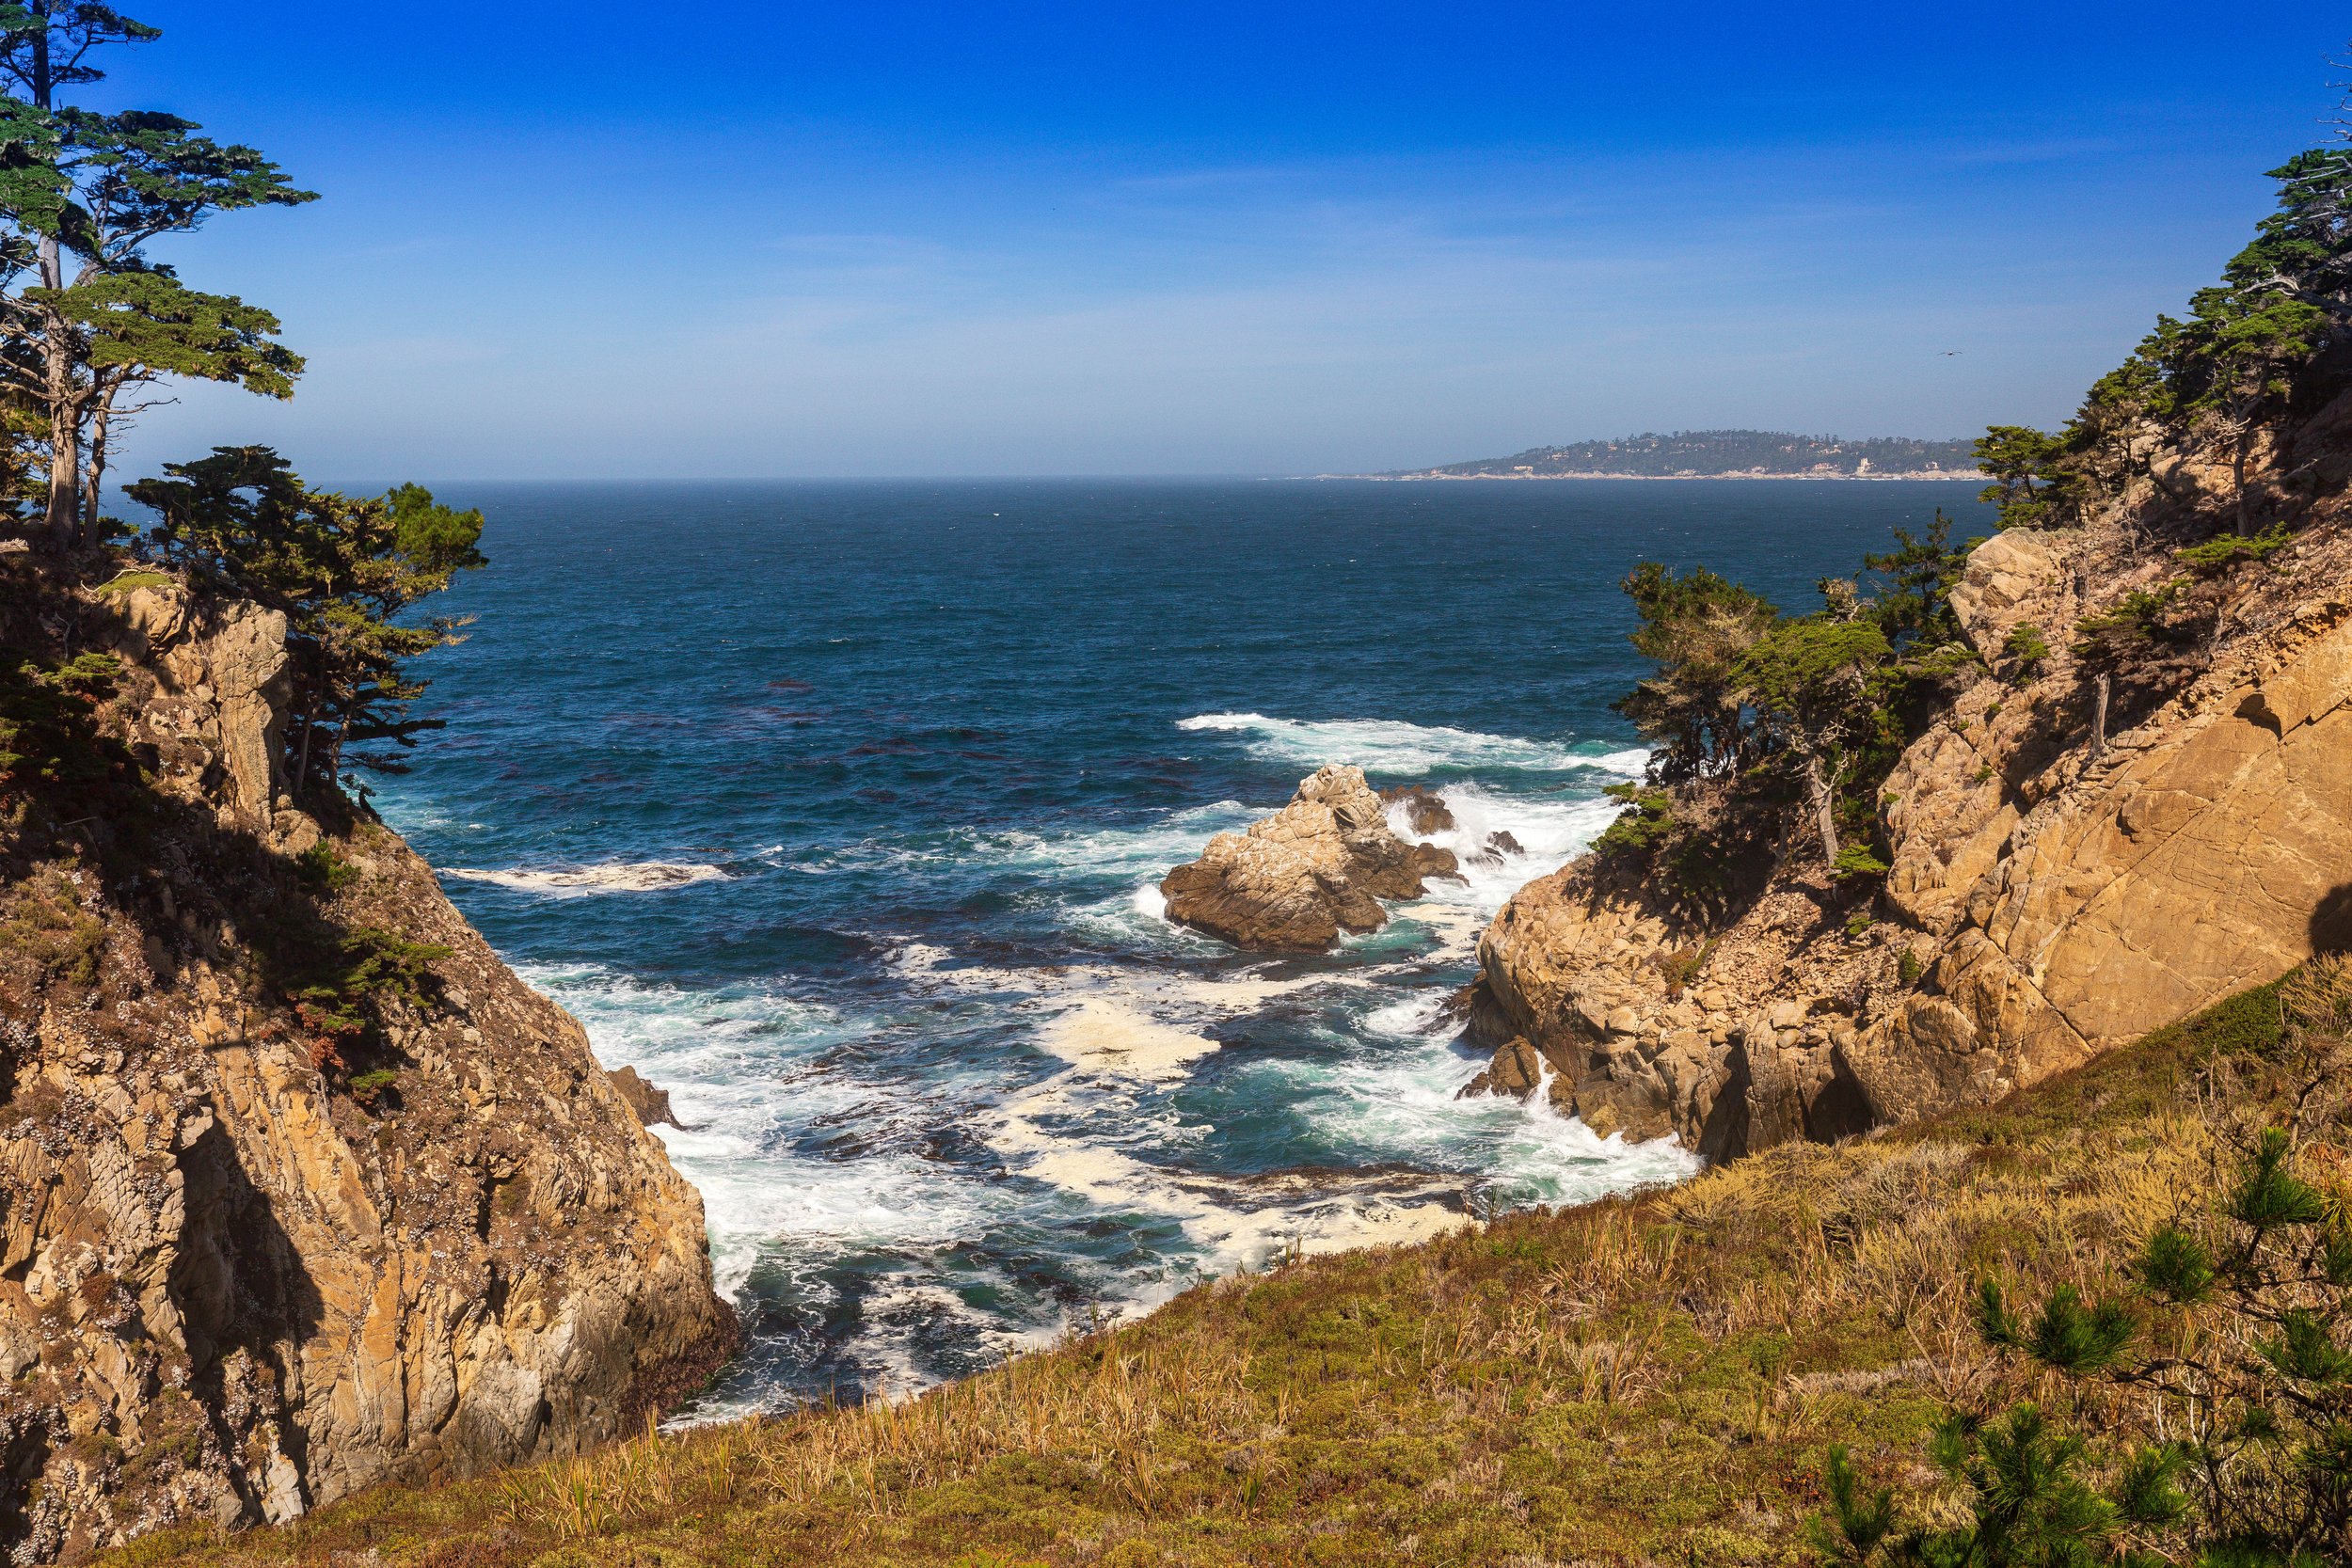
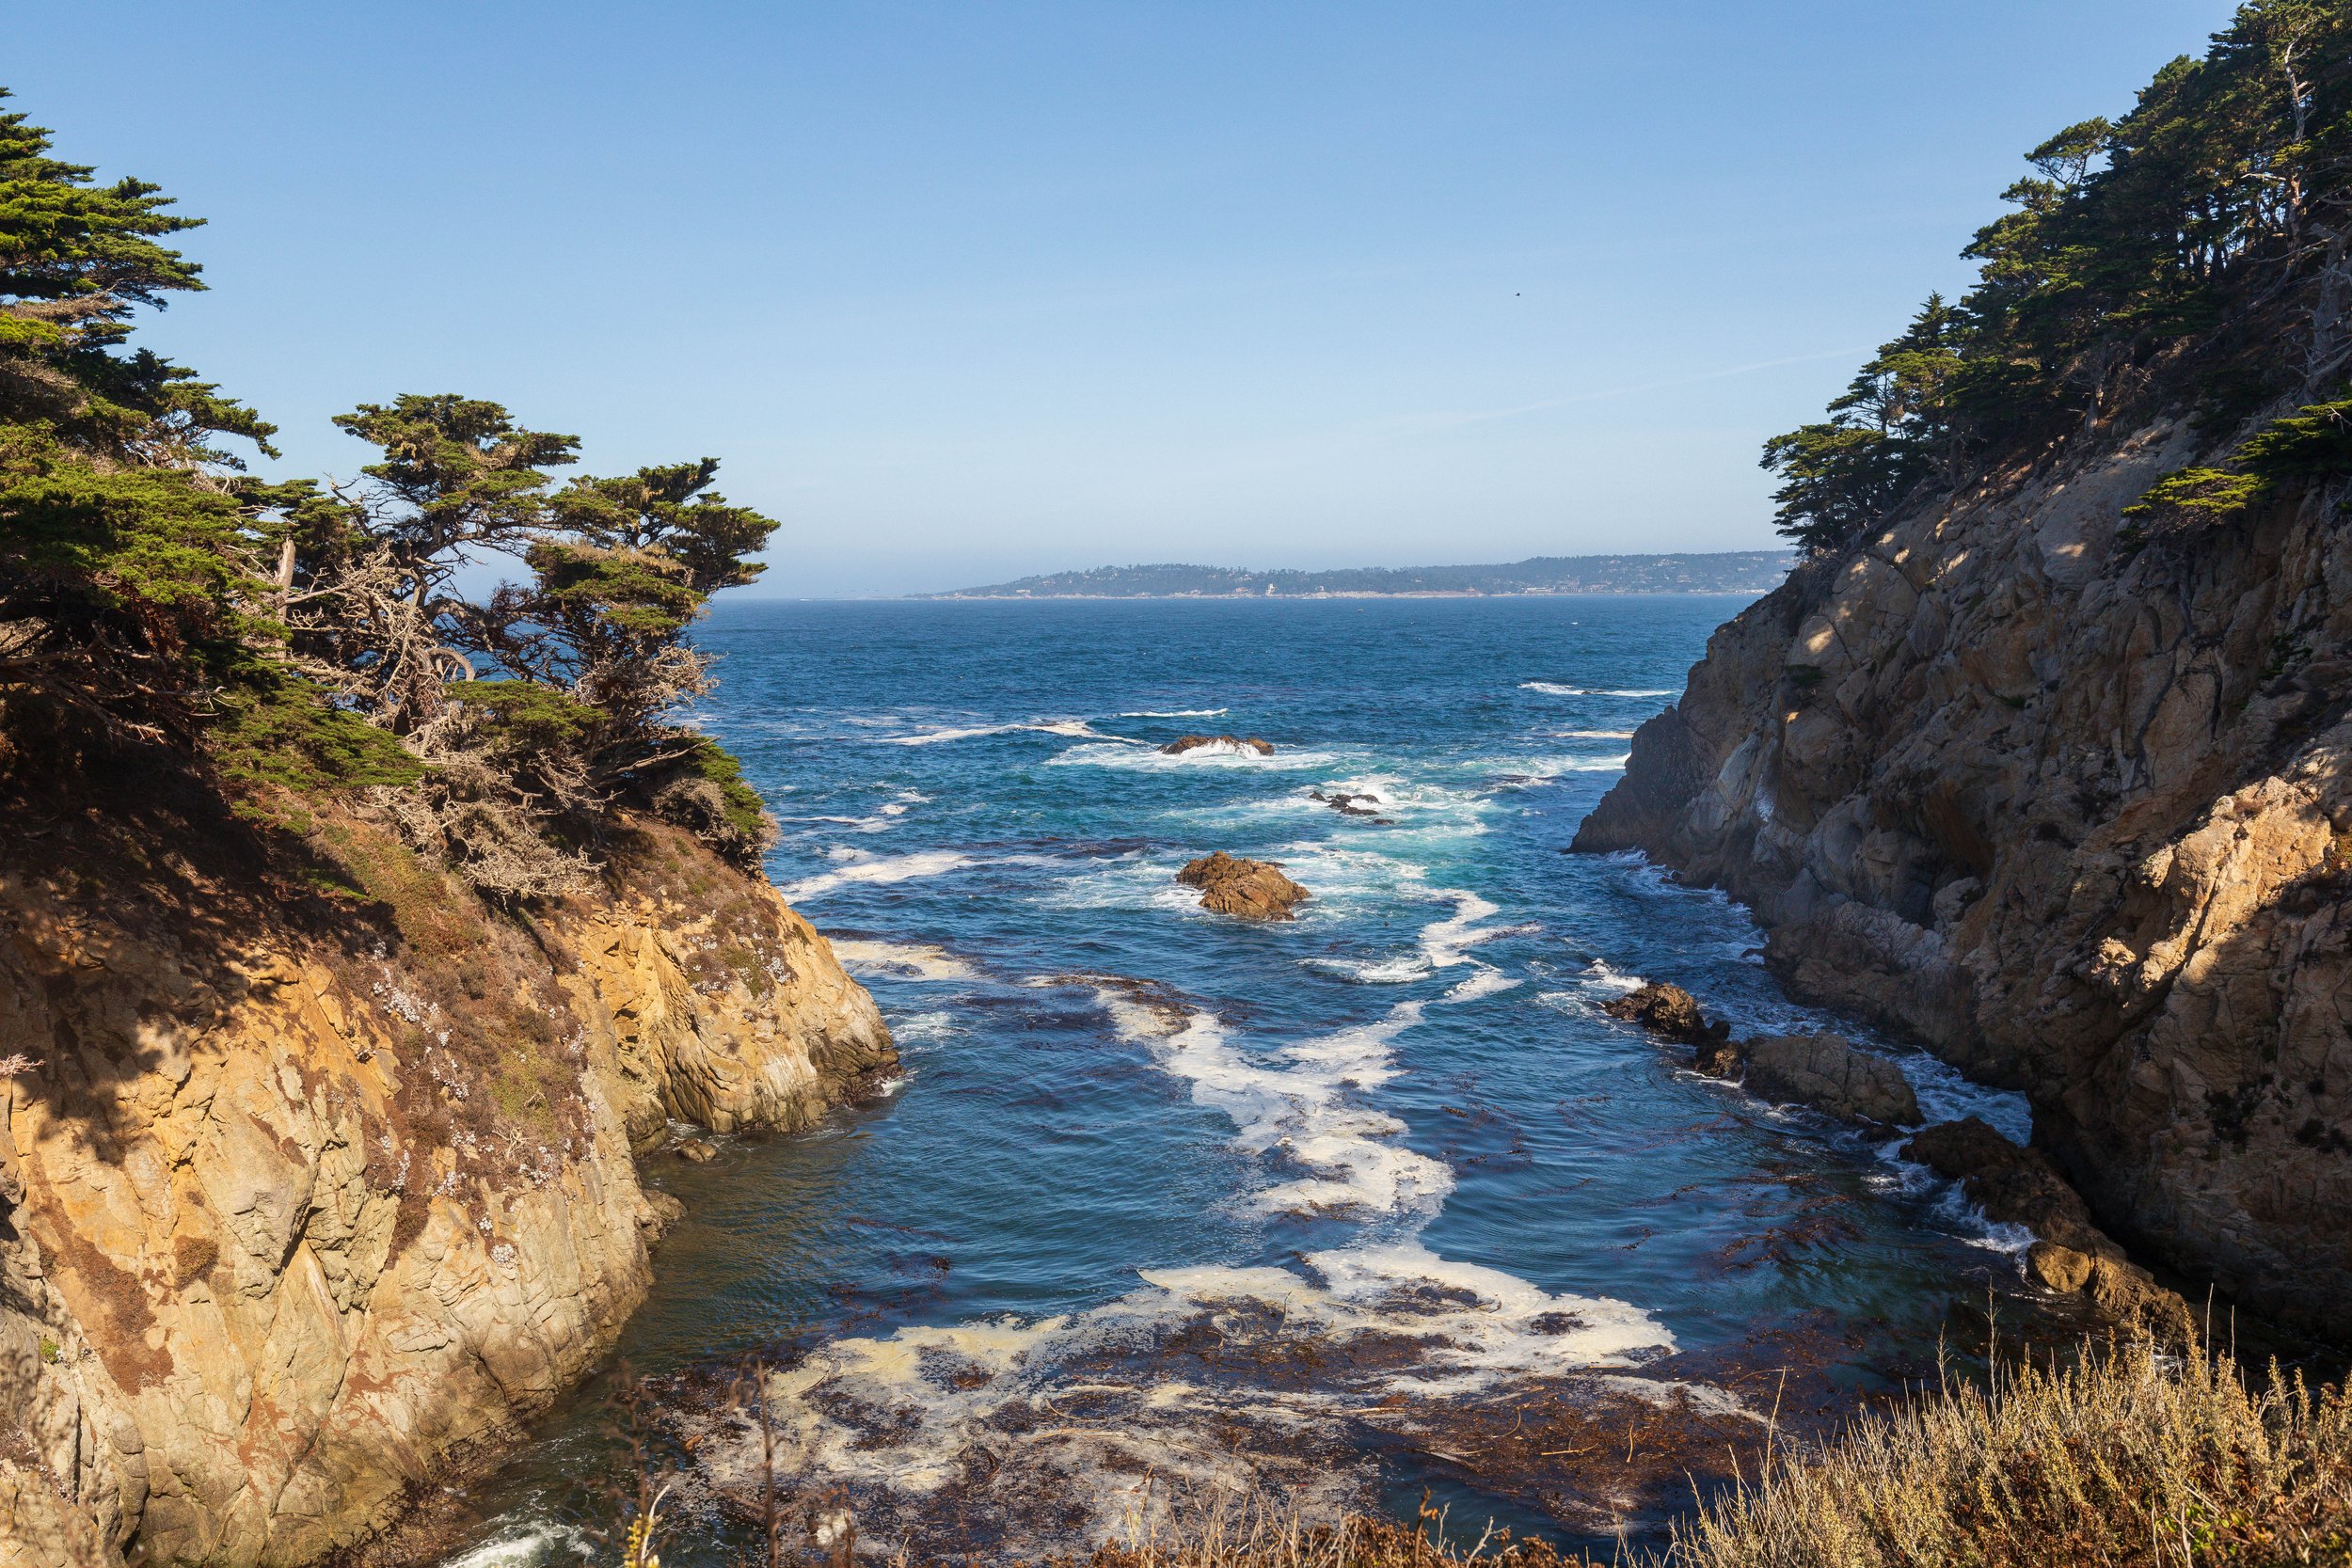
Point Lobos State Natural Reserve
Point Lobos sits just south of Carmel and is one of the most photographically rich small parks anywhere on the California coast. Marine terraces, sheltered coves, tide pools, ancient cypress groves, and open ocean views are all within easy walking distance of the parking area. The Cypress Grove Trail winds through one of only two remaining natural stands of Monterey cypress in the world, and the Old Veteran tree at the end of the trail is one of the most dramatic single-subject compositions in the region.
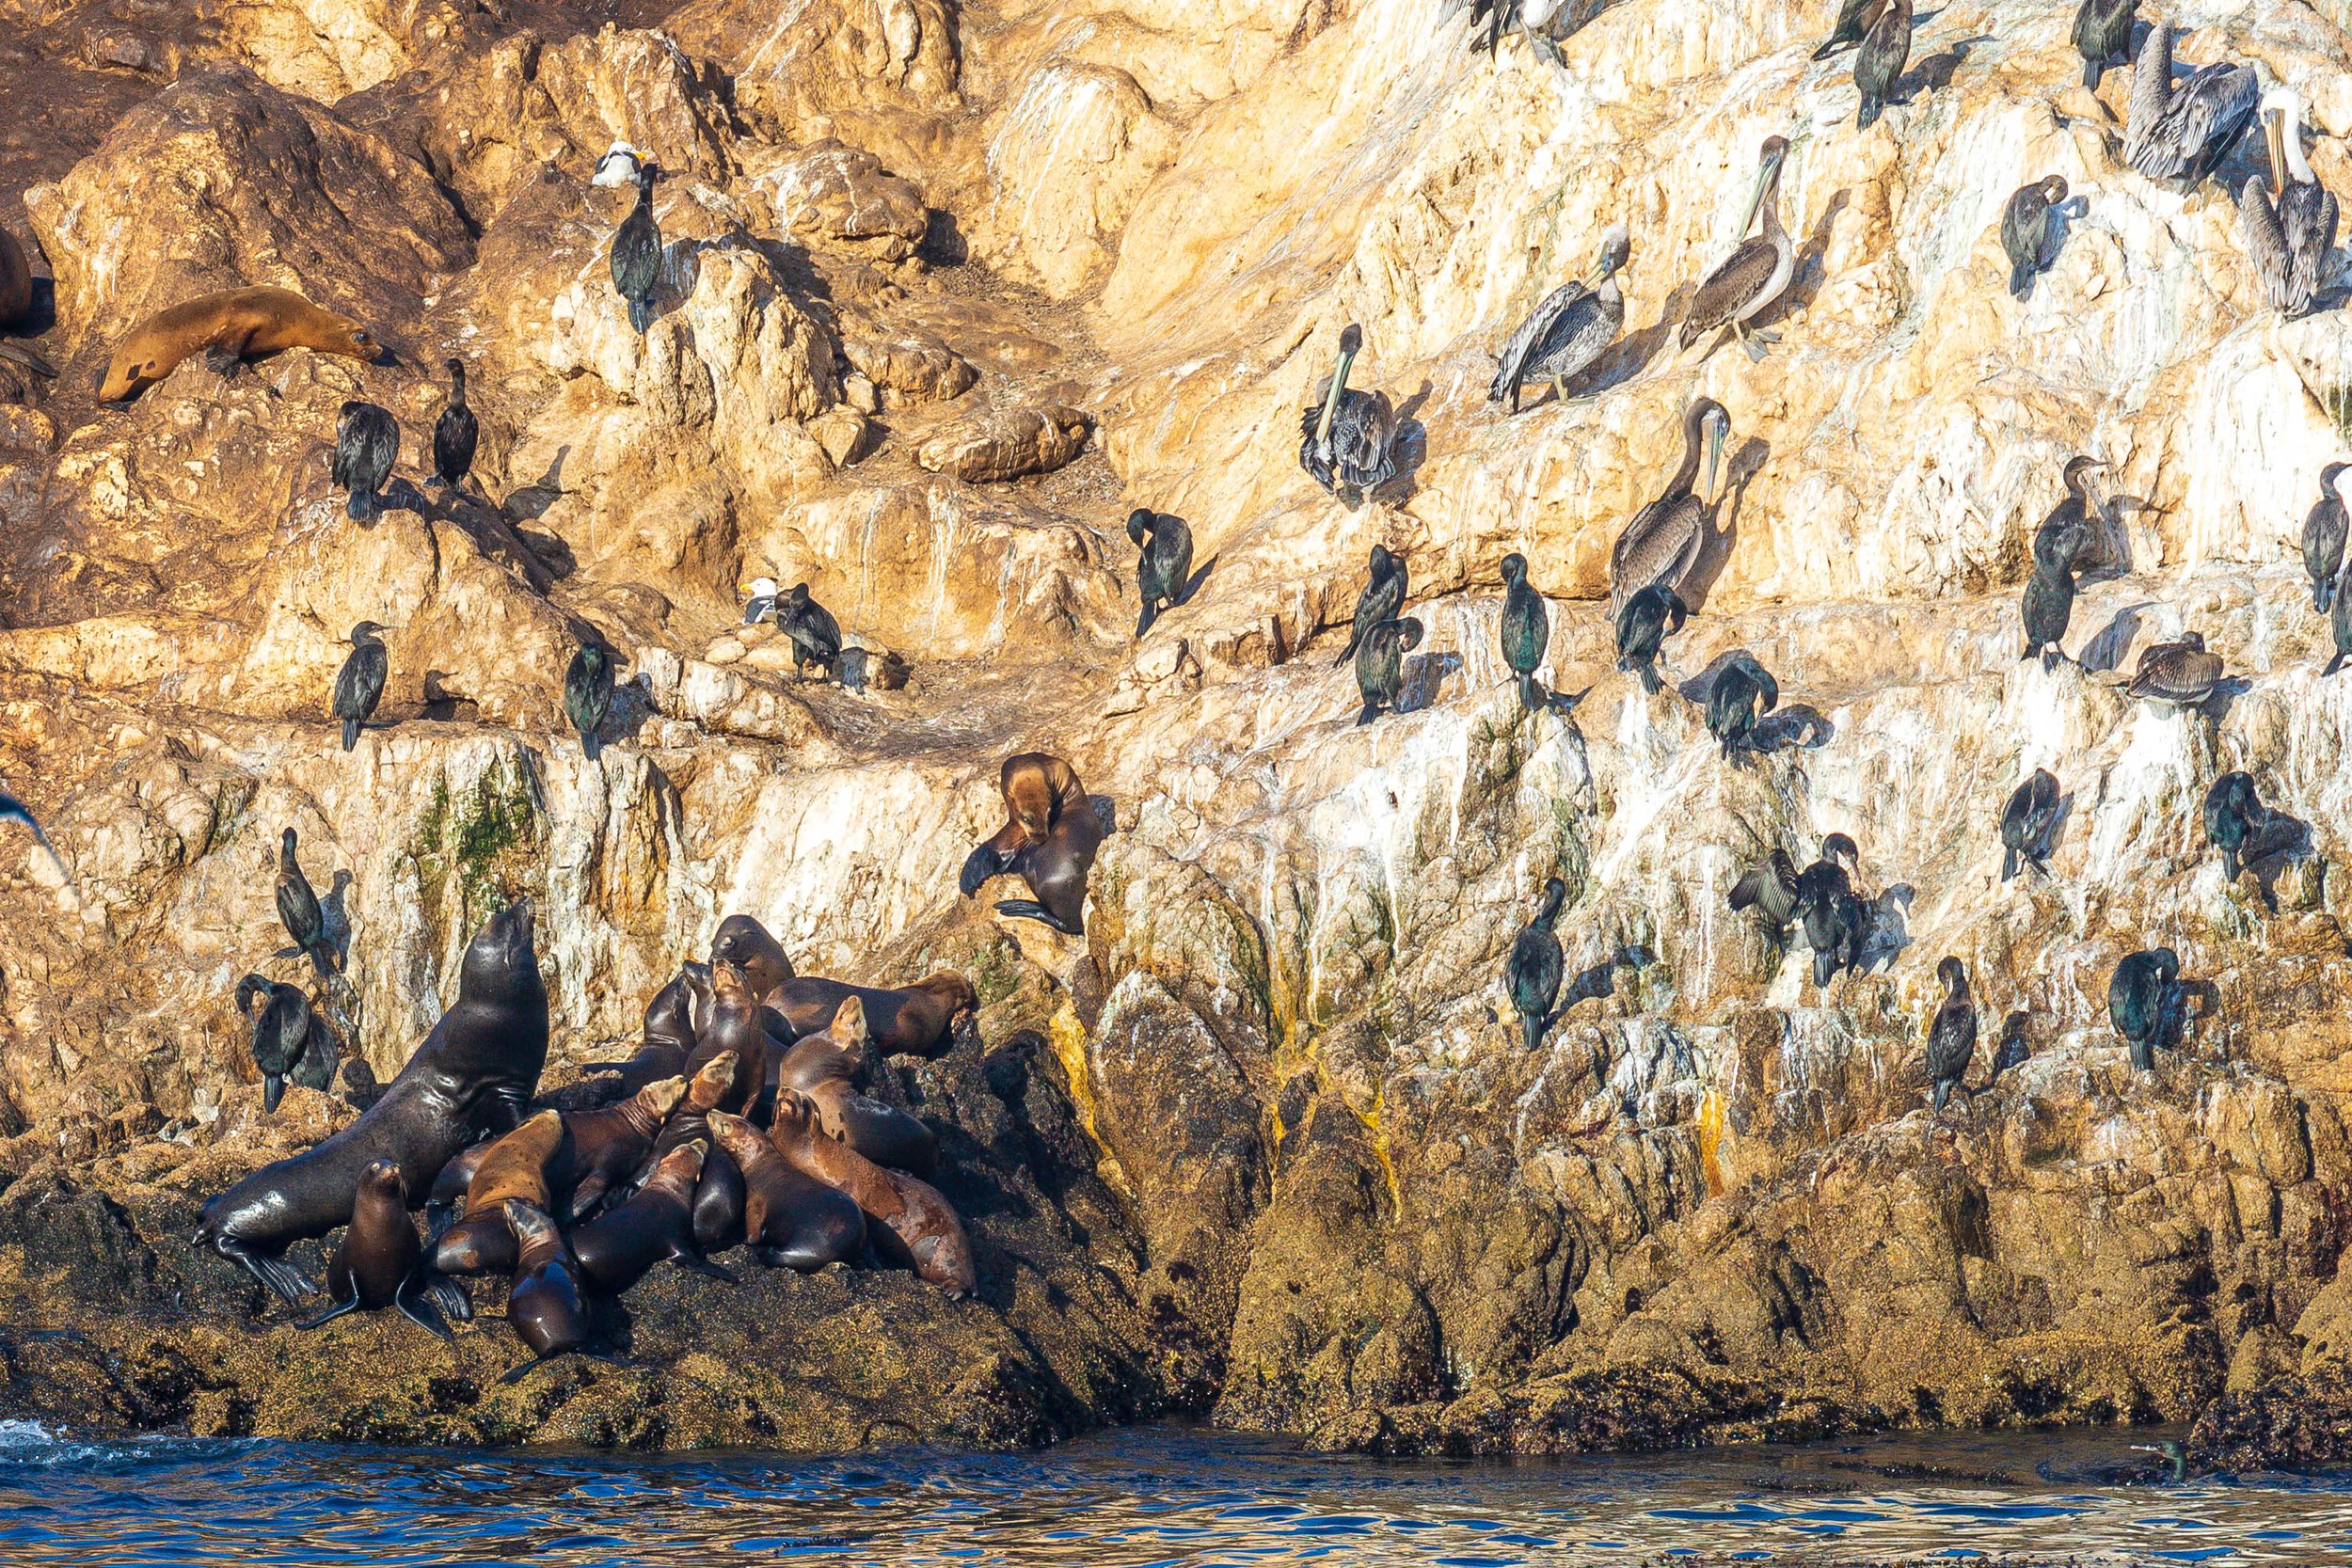
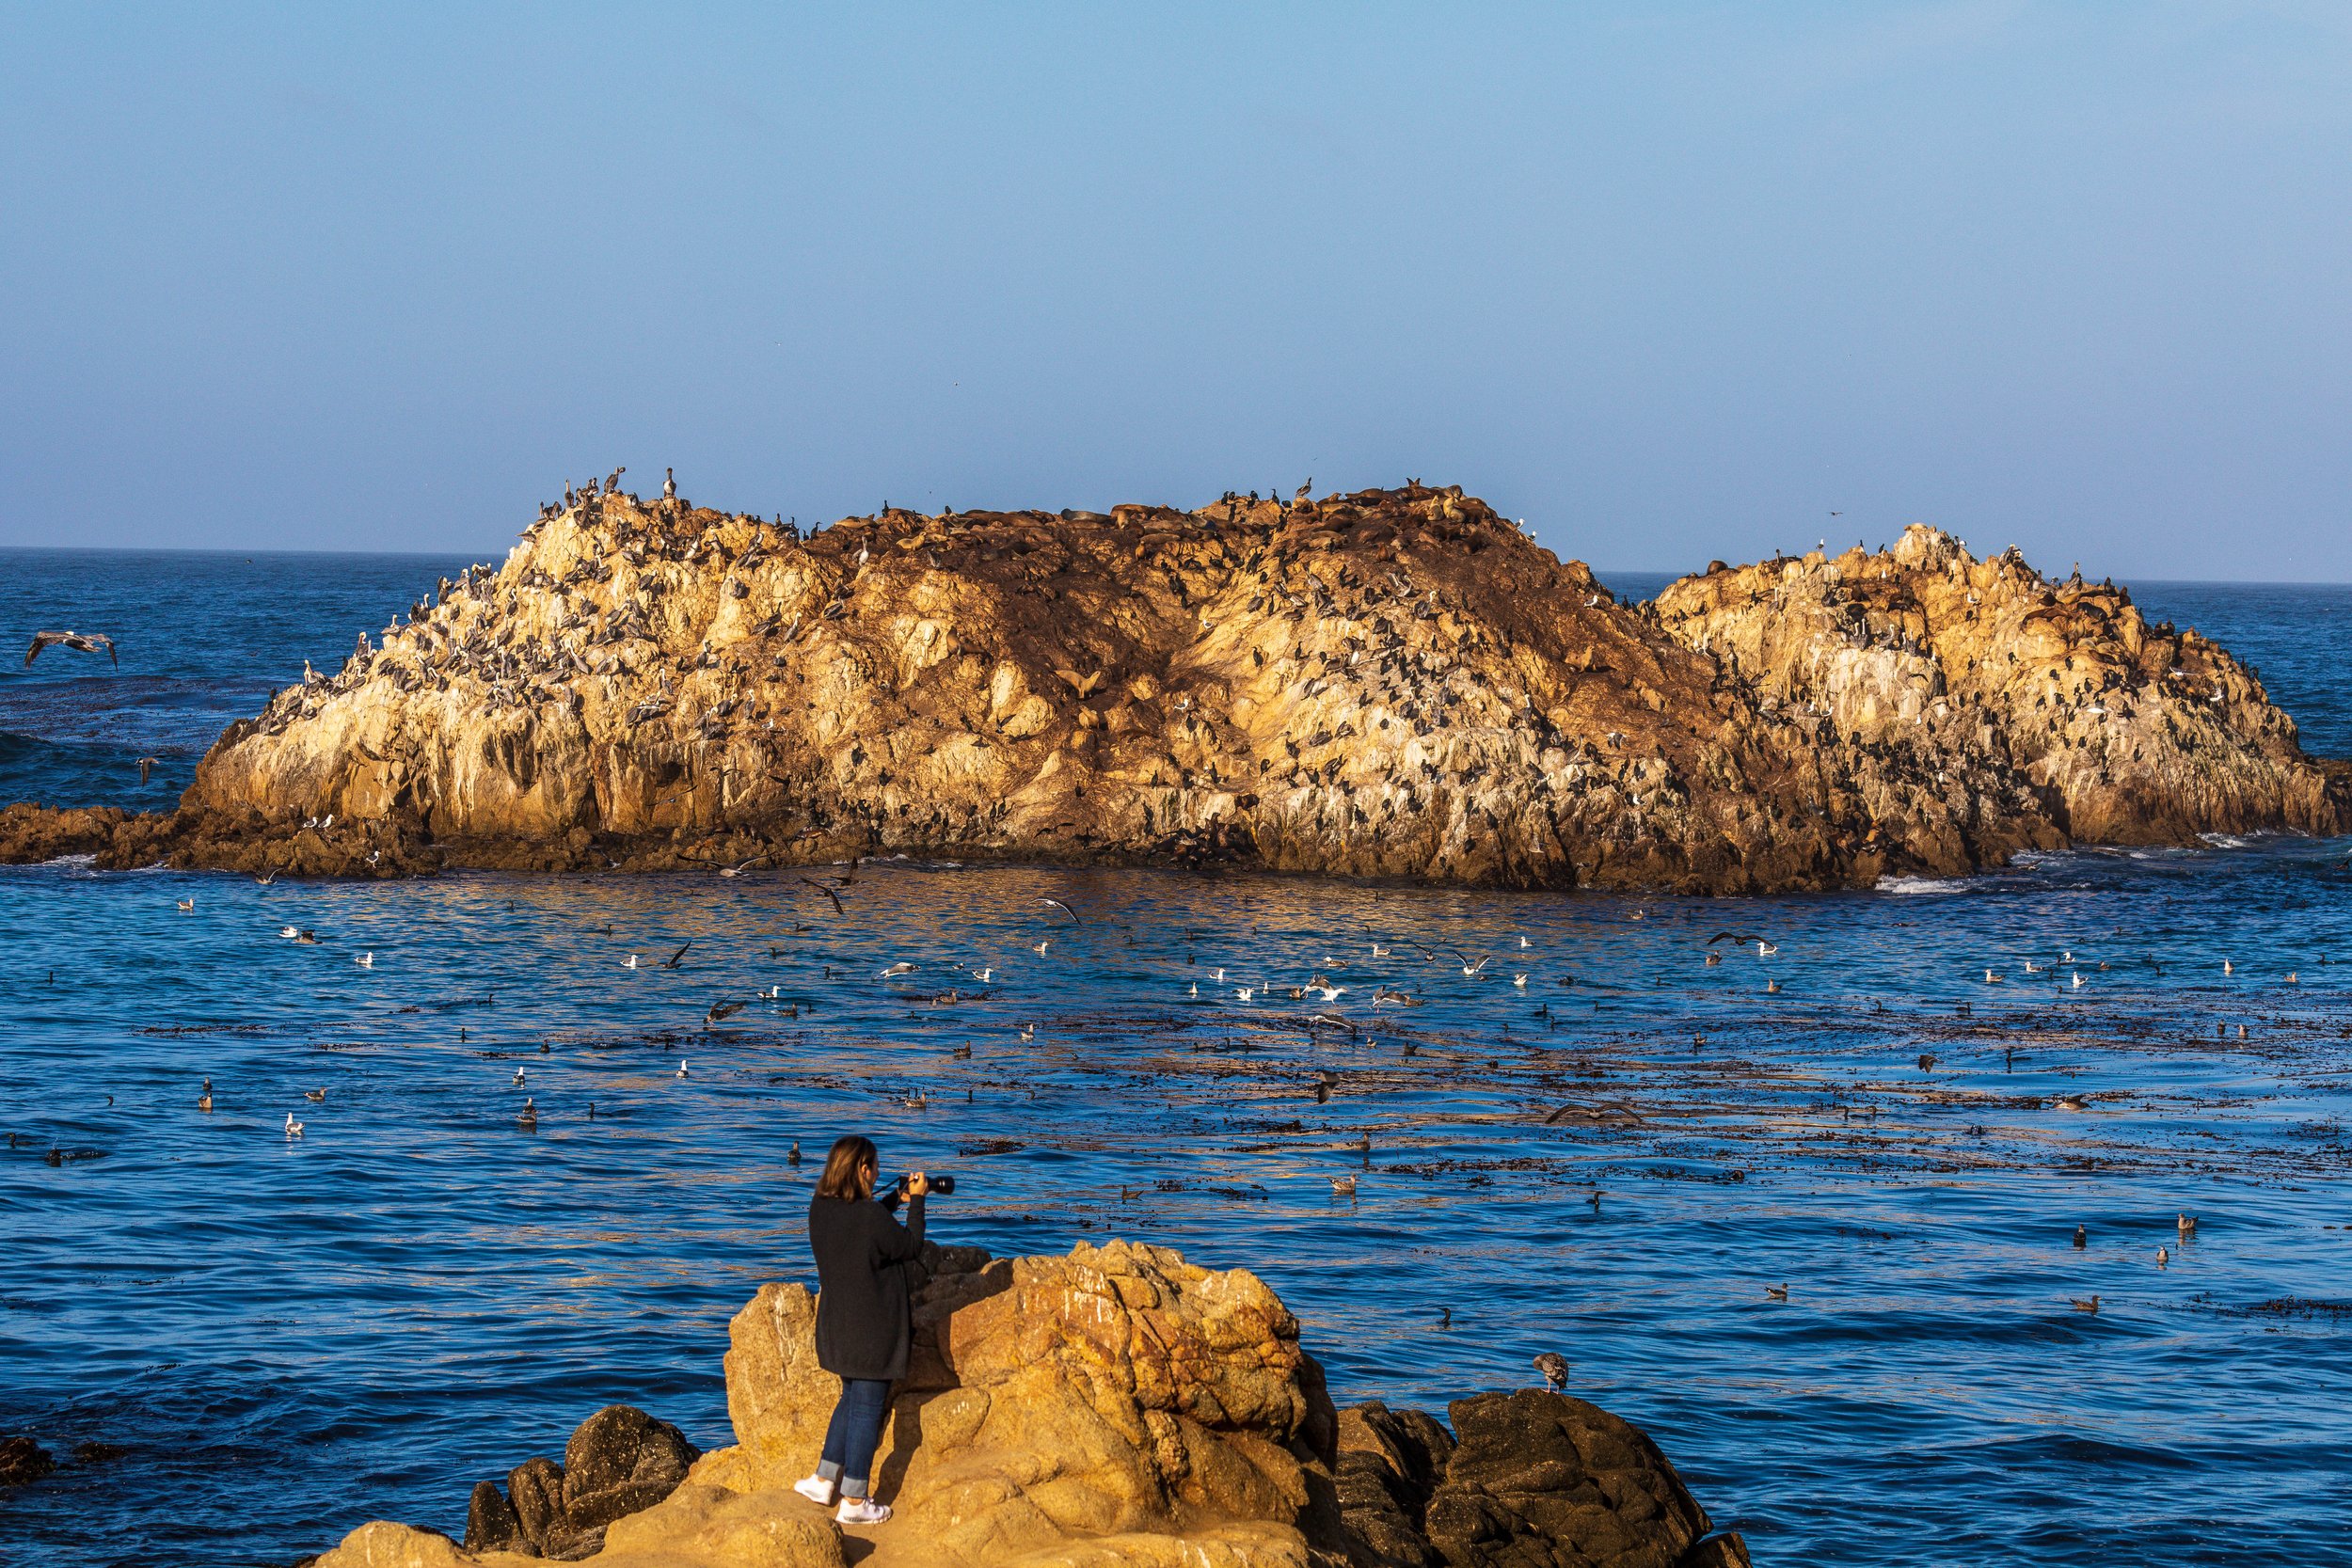
Wildlife is consistent here. Sea lions haul out on the rocks at Sea Lion Point. Sea otters float in the kelp at China Cove. Brown pelicans and cormorants work the water along the bluffs. On a good morning, you can photograph all of them within two hours.
📷 Pro Tip: Arrive at opening time, currently 8am, to have the cypress groves and coves to yourself before tour groups arrive. The Cypress Grove Trail photographs best in soft morning light when the fog is still sitting in the trees and the backlight from the east catches the gnarled branches. Use a 24 to 70mm for the grove compositions and a 70 to 200mm for wildlife at the coves. China Cove is one of the most beautifully composed small beaches on the coast: turquoise water, white sand, and granite walls framing it on three sides. Shoot it from the clifftop overlook with a wide lens at around 24mm for the full effect.
Best time: Opening time in the morning; overcast days for soft light in the cypress groves. Access: Day-use fee required. Located on Highway 1 approximately 3 miles south of Carmel. Reservations may be required on peak weekends; check the California State Parks website before you go.
Pfeiffer Beach
Pfeiffer Beach is the most photographically diverse location in Big Sur. The sand here is purple in places, stained by manganese garnet deposits washing down from the hills, and the offshore rock formations include a natural arch large enough to frame the setting sun for a few weeks around the winter solstice. That combination of unusual color, dramatic rock formations, and consistent wave action makes this one of the most rewarding beaches to photograph on the California coast.
Access requires turning off Highway 1 onto Sycamore Canyon Road, a two-lane road marked only by a small brown sign. You will pay a day-use fee at a kiosk near the beach entrance.
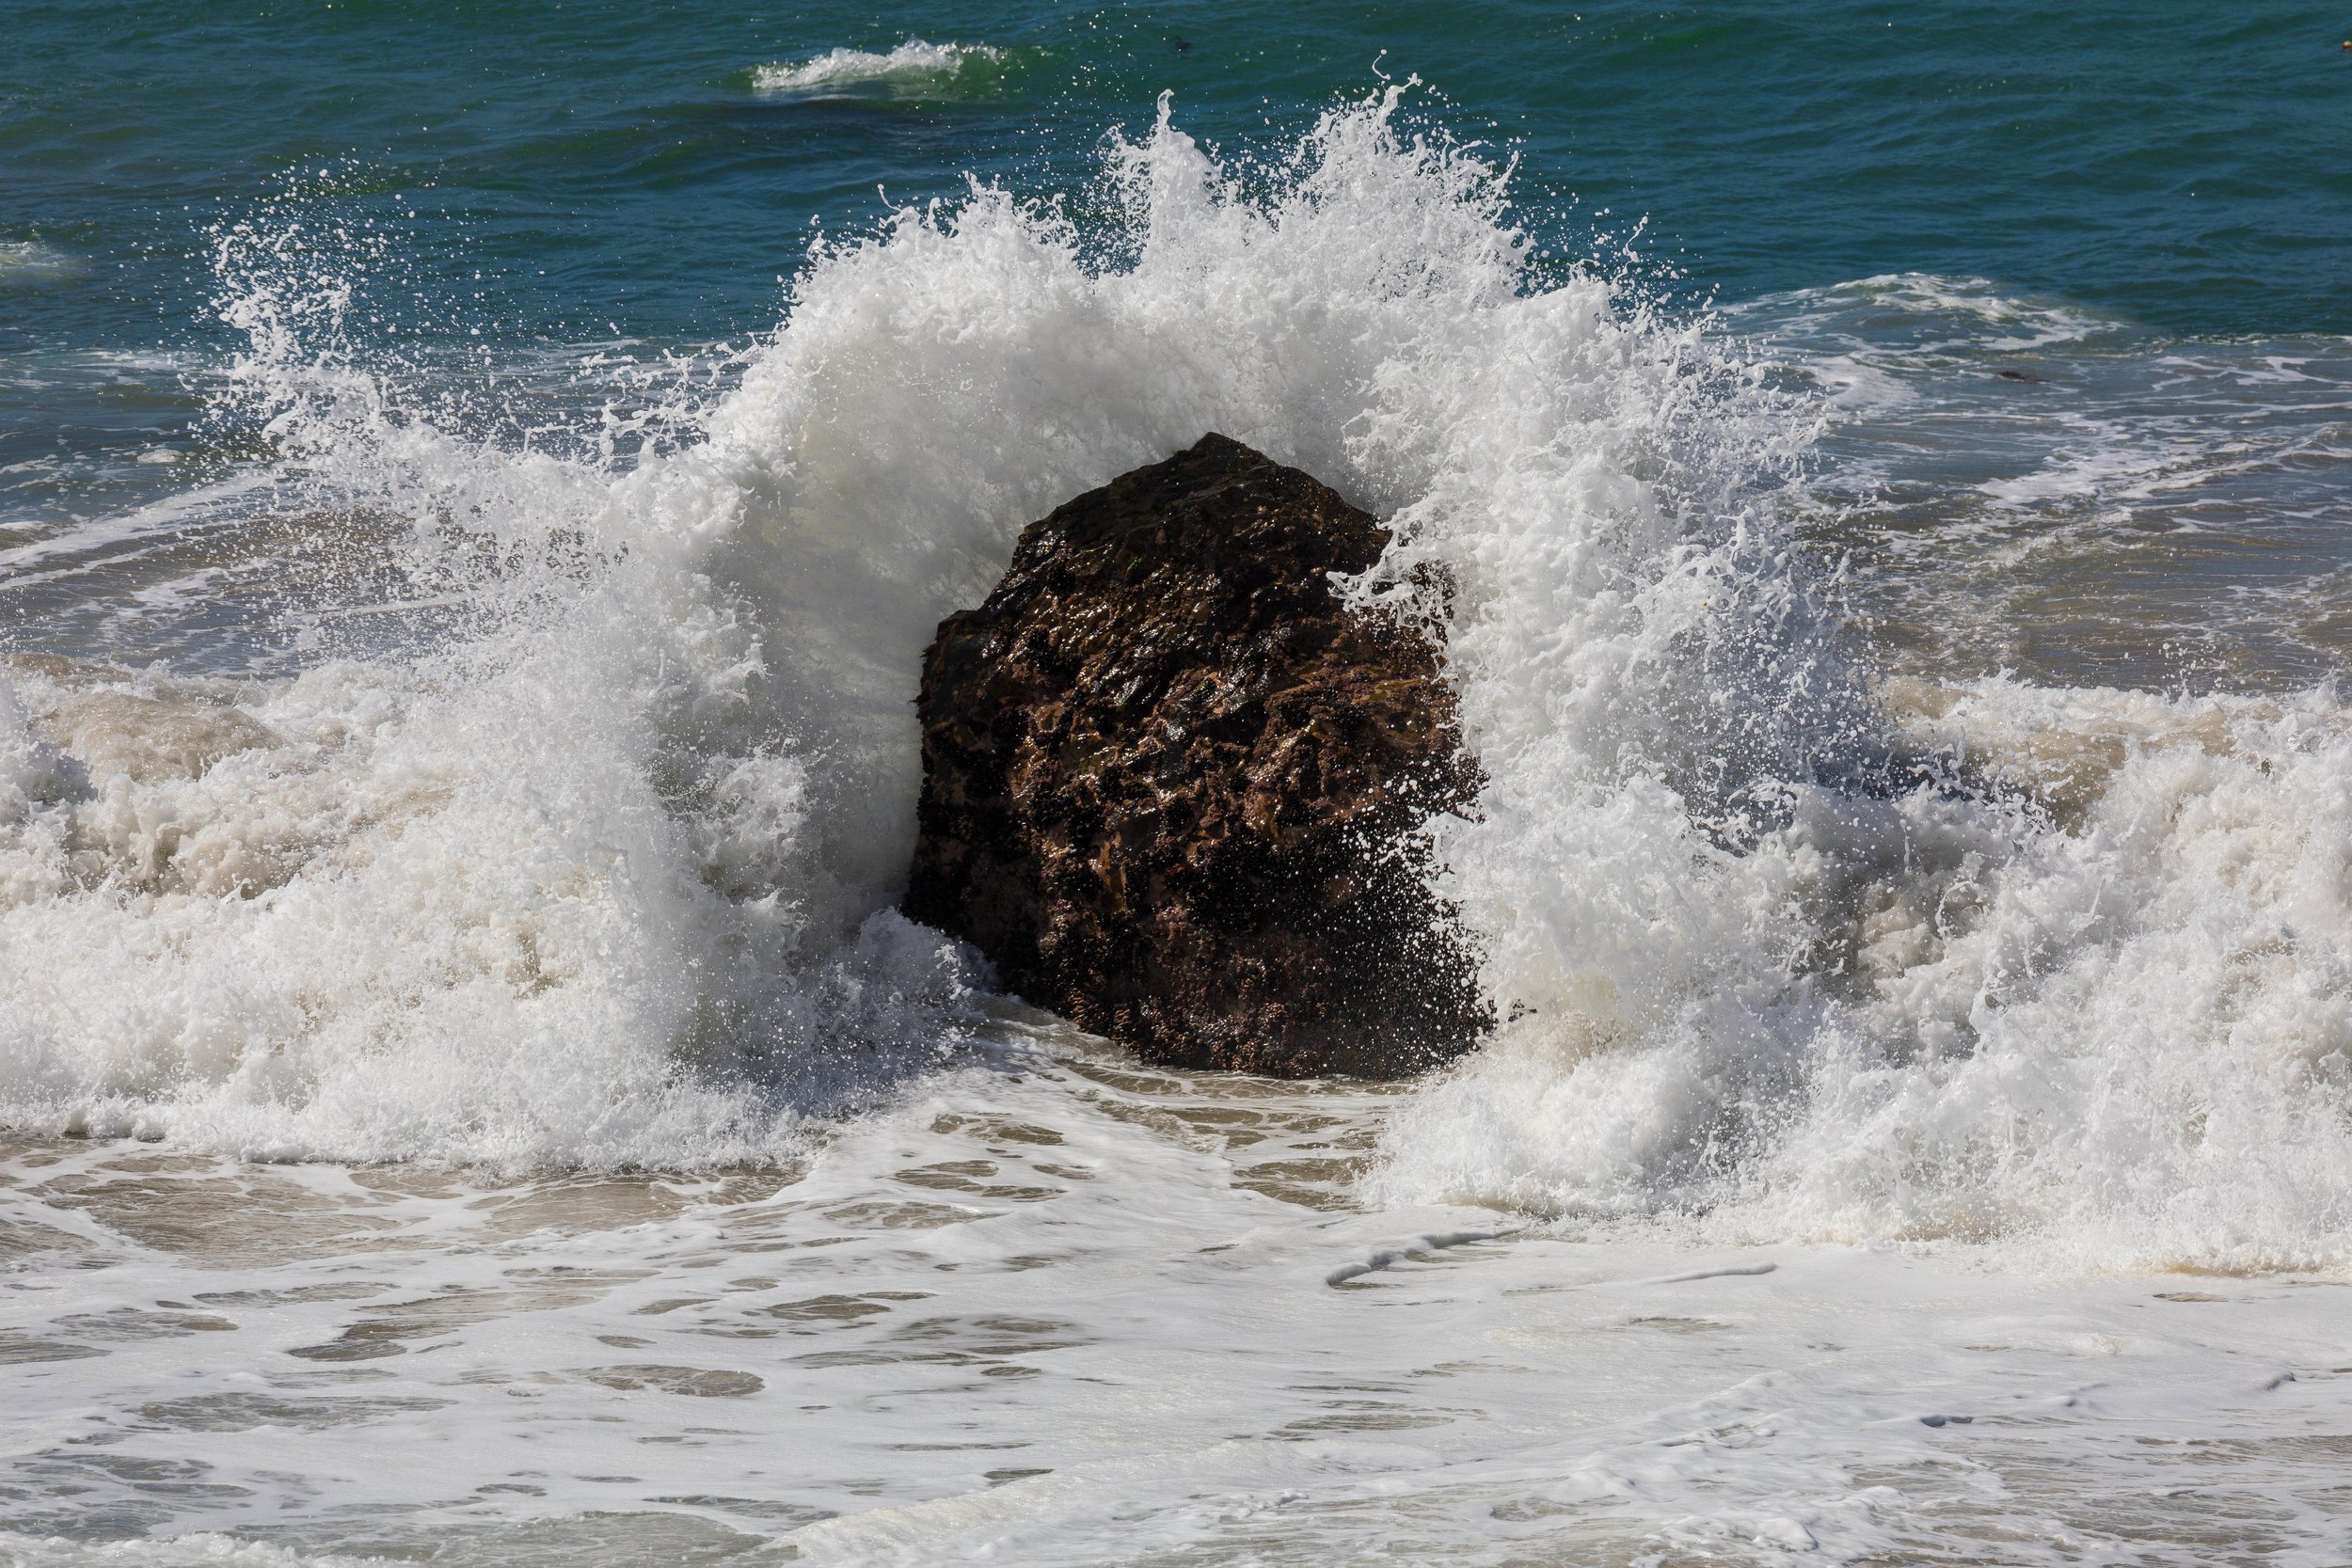
📷 Pro Tip: The purple sand is most vivid in the wet zone right at the wave's edge and in the tidal pools near the south end of the beach. Shoot at low tide for the best access to the rock formations and the most saturated sand color. The Keyhole Arch is at the south end of the beach; during December and January, the sun sets almost perfectly through the opening. For that specific shot, you need a 70 to 200mm lens and a clear day. In fall and early spring, the arch frames the sky and cliffs effectively even without the direct sun alignment. For waves against the rocks, a shutter speed around 1/500 freezes the spray cleanly; dropping to 1 to 2 seconds smooths the foam into soft streaks. Bring a 10-stop ND filter if long exposures are your plan.
Best time: Sunset in winter for the arch alignment; low tide year-round for the purple sand. Access: Day-use fee required. Turn onto Sycamore Canyon Road from Highway 1, approximately 2 miles south of Big Sur Station.

Festivals & Events
Wildflower Season, March through May Not a formal event, but one of the best reasons to visit Big Sur in spring. The coastal bluffs and hillsides along Highway 1 fill with California poppies, lupine, and coyote brush in bloom. Garrapata State Park and the Andrew Molera bluffs are particularly strong. The green hills, the orange and purple wildflowers, and the Pacific behind them make for some of the most color-rich landscape photography in California.
Whale Migration, December through May Gray whales migrate south along the Big Sur coast from December through February, then return north with calves from March through May. The northbound migration, when mothers travel closer to shore with their young, offers the best photography opportunities. Point Lobos and the Garrapata headlands are the most reliable viewing and shooting spots. Bring your longest lens.
Big Sur International Marathon, Late April Held along a closed section of Highway 1 each spring, the marathon brings thousands of runners and spectators to the coast for one day. For photographers, a closed Highway 1 with no car traffic and dramatic coastal scenery in the background is a genuinely unusual opportunity. Arrive early and position yourself at the Bixby Bridge section for the most dramatic runner-and-bridge compositions.
Big Sur River Run, Late October A smaller local running event that uses a stretch of Highway 1 near the river. Less crowded than the marathon and a good excuse to be in Big Sur during the fall shoulder season, which is one of the best photography windows of the year.
Final Thoughts
Big Sur is one of those places that photographs the way it looks in your imagination before you ever get there. The coastline is dramatic, the light is extraordinary, and the scale of the landscape has a way of making you slow down and pay attention. That is exactly what good photography requires.
We arrived by helicopter during an unusual stretch of road closures, and had the entire coast almost to ourselves for days. I know that kind of solitude is not something most visitors will experience. But what Big Sur gives you, even in normal conditions, is scale, open viewpoints, and a coastline that changes mood faster than almost anywhere I have photographed. The fog rolls in, the light shifts, and within an hour you have three completely different photographs from the same pullout.
Whether you are driving the coast for the first time or returning to shoot a specific location at a specific light, this is a destination that rewards patience and rewards early mornings. Give it more time than you think you need. You will use every bit of it.
If you would like to join a future photography workshop, visit my Workshops page for current offerings and upcoming dates. You can also connect with me on Instagram (@chasinghippoz) and Facebook, or subscribe to the newsletter for travel photography tips, destination guides, and behind-the-scenes stories from more than 75 countries. I look forward to sharing the journey with you.
Other Photography Guides You Might Enjoy
My Photography & Travel Guide to Washington, DC If you are based on the East Coast and looking for a landscape-to-city contrast, Washington DC is the natural companion trip. Monuments at blue hour, cherry blossoms at the Tidal Basin, Georgetown and the Eastern Shore within easy reach. I have been shooting this city for decades and the guide covers 54 locations.
My Photography & Travel Guide to Charleston, South Carolina Another coastal destination, completely different in character. Where Big Sur is raw, wide, and wild, Charleston is intimate, historic, and layered. Antebellum architecture, harbor light, and a food scene that rivals anywhere in the American South. A strong pairing for photographers who want range.
My Photography & Travel Guide to Nova Scotia, Canada Peggy's Cove lighthouse at dawn, the Cabot Trail in fall color, fishing villages in morning fog. Nova Scotia is one of the most underrated photography destinations in North America and draws photographers who love coastlines and quiet places. If Big Sur is your kind of trip, Nova Scotia belongs on the list.
Are you carrying too much camera gear… but still coming home with disappointing travel photos?
You’re not alone. Most travel photographers fall into “The Packing Trap” — overpacking, under-planning, and constantly scrambling to capture the shot… while missing the moment.
This powerful, step-by-step eBook is your shortcut to a better way.
The 5-Step Photographer’s Guide to Planning the Perfect Travel Adventure is a field-tested blueprint that helps you:
Travel light without sacrificing image quality
Plan smarter trips that lead to better, more intentional photos
Find breathtaking destinations at the perfect time
Create a shoot-ready itinerary that works with your creative style
Avoid the stress, fatigue, and overwhelm that kills your best work
Written by travel photographer Vito L Tanzi, it’s the system I personally use to craft stress-free photo trips that result in his best images.
Whether you're heading off on your first international shoot or leveling up your local weekend getaways, this guide will help you make the most of every trip.
📸 Format: PDF download